Table of Contents
Advertisement
Quick Links
Weight: 1lb 14oz
Length: 17.25" [435mm]
Width: 8" [205mm]
Height: 4.5" [115mm]
Wheelbase: 10.5" [265mm]
Motor: 20 Turn Photon Speed
Radio: 2 channel surface frequency
• DuraTrax
®
will warranty this kit for 90 days after the purchase date from defects in materials or workmanship. DuraTrax
will either repair or replace, at no charge, the incorrectly made part.
• Make sure you save the receipt or invoice you were given when you bought your model! It is your proof of purchase
and we must see it before we can honor the warranty. Further, DuraTrax reserves the right to change or modify this
warranty without notice.
• To return your Delphi Indy car for repairs covered under warranty you should send your vehicle to:
If the buyer is not prepared to accept the liability associated with the use of this product, the buyer is advised to
return this kit immediately in new and unused condition to the place of purchase.
READ THROUGH THIS MANUAL BEFORE STARTING CONSTRUCTION. IT CONTAINS IMPORTANT INSTRUCTIONS
AND WARNINGS CONCERNING THE ASSEMBLY AND USE OF THIS MODEL.
v1.0 © Copyright 2002
ASSEMBLY AND OPERATION MANUAL
1610 Interstate Drive
Champaign, Illinois 61822
Attn: Service Department
Phone: (217) 398-0007 9:00 am - 5:00 pm Central Time M-F
E-mail: hobbyservices@hobbico.com
®
Warranty
Hobby Services
Technical Support Information
For technical assistance, contact:
Duratrax Product Support
1610 Interstate Drive
Champaign, IL 61822
(217) 398-8970, Ext. 2
carsupport@duratrax.com
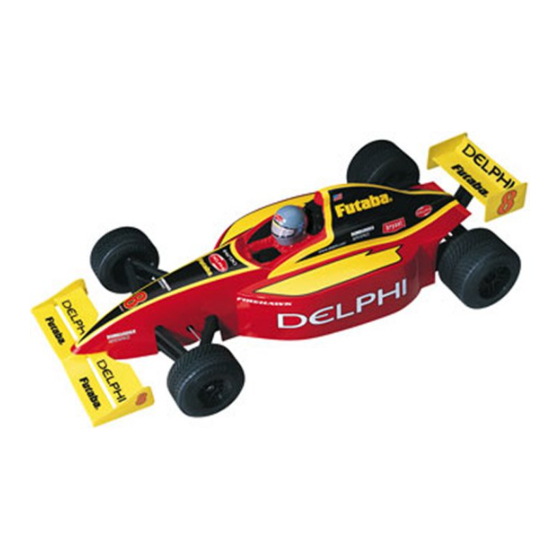
DTXZ1100 For Kit DTXC0012/DTXD12**
Advertisement
Table of Contents

Related Manuals for Duratrax Delphi Indy Car


Summary of Contents for Duratrax Delphi Indy Car
- Page 1 • Make sure you save the receipt or invoice you were given when you bought your model! It is your proof of purchase and we must see it before we can honor the warranty. Further, DuraTrax reserves the right to change or modify this warranty without notice.
-
Page 2: Table Of Contents
REQUIRED ITEMS FOR COMPLETION......3 TOOLS NEEDED FOR COMPLETION ......3 • Do not operate the Delphi Indy car near people. Spectators TOOLS INCLUDED FOR MAINTENANCE .......3 should be behind the driver or at a safe distance away from FINISHING THE RTR VERSION ........4... -
Page 3: Stress Tech Parts Guarantee
STRESS-TECH PARTS GUARANTEE SPECIFICATION & DESCRIPTION CHANGES We have engineered the Delphi Indy car to take the rough All pictures, descriptions and specifications found in this and tumble abuse that makes R/C vehicles fun. We are so instruction manual are subject to change without notice. -
Page 4: Finishing The Rtr Version
FINISHING THE DELPHI INDY CAR RTR VERSION (DTXD12**) 1. Remove the Delphi Indy car and Radio system from the box. 2. Charge the 6-cell battery (not included) using the charger (not included). Follow the charger's instruction manual and safety precautions. -
Page 5: Electronic Speed Control Set-Up
During normal this setting until it is reset. running, the speed control should be switched “on” and FINISHING THE DELPHI INDY CAR PRE-BUILT VERSION (DTXC0020) PREPARING THE RADIO SYSTEM CHECKING THE RADIO SYSTEM Carefully read the radio manufacturer’s instructions before... -
Page 6: Steering Servo Installation
STEERING SERVO INSTALLATION 3. Install a piece of included double-sided tape to the inside of the servo mount and a piece to the chassis as shown. 1. Remove the upper plate by removing the two body clips in the front and lifting the front of the upper plate up out of the way. -
Page 7: Receiver Installation
assembly onto the servo. Note: Do not install the servo horn screw at this time. The transmitter and servo will need to be centered later. RECEIVER INSTALLATION 2. Secure the ESC's on/off switch to the chassis using a small piece of double-sided tape. Make sure that you place the switch in a position where it will not get turned “off”... -
Page 8: Electronic Speed Control Set-Up
ELECTRONIC SPEED CONTROL SET-UP NOTE: The Sprint electronic speed control is pre-set at the factory.The following instructions should be followed if the pre-set needs to be changed. During normal running, the speed control should be switched “on” and not given input from the transmitter for 3 seconds. This bypasses the set-up stage of the ESC. -
Page 9: Assembly Guide
ASSEMBLY GUIDE The following information has been provided to help maintain and tune the Delphi Indy Car. FRONT WING Secure the front wing (1) to the main chassis (38) using (3) 3x10mm flat head self- tapping screws (B). FRONT END 1. -
Page 10: Main Chassis
MAIN CHASSIS 1. Secure the center battery clip (10) to the main chassis (38) and motor plate (39) using (4) 3x8mm flat head self-tapping screws (A). 2. Secure the battery end holders (21) to the sides of the main chassis (38) using (4) 3x10mm flat head self-tapping screws (B). -
Page 11: Motor Plate Assembly
MOTOR PLATE ASSEMBLY 1. Install the two side shock mounts (9) onto the rear plate using (2) 3x10mm flat head self-tapping screws (B). 2. Attach the bottoms of the side shocks to the side shock mounts (9) using (2) 3x8mm pan head self-tapping screws (C). 3. -
Page 12: Upper Plate
UPPER PLATE 1. Attach the antenna mount (18) to the upper plate (40) using a 3x8mm pan head self-tapping screw (C). 2. Install a 4.7mm pivot ball (56) into the upper plate (40) and secure it in place with a 3mm nut (P) on the bottom side of the upper plate (40). -
Page 13: Gear Differential
INLINE BATTERY PLACEMENT CONVERSION To convert the Delphi Indy car so that the battery runs inline with the chassis use the following steps. 1. Remove the battery end holders (21) from the main chassis (38). -
Page 14: Maintenance Tips
4. Check for broken or damaged parts. Replace any broken or damaged parts before running the Delphi Indy car. Running of the Delphi Indy car with broken or damaged parts could result in damage to other parts. 5. Check to make sure that the receiver and speed control are still properly secured to the chassis. -
Page 15: Tuning Guide
RIDE HEIGHT tuning adjustment will allow more aggressive weight transfer The ride height of the Delphi Indy car will effect how weight is to the right wheel giving this wheel a little more initial traction. transferred from side to side and from front to back. Generally Note: Tires can effect how the car will track as well. -
Page 16: Optional Shock Springs
TIRE TIPS speed corners. Try using softer rear tires. Typical with pavement style cars like the Delphi Indy car, tire selection is the most important tuning component you can There are many different settings for the Delphi Indy car. An make.
Need help?
Do you have a question about the Delphi Indy Car and is the answer not in the manual?
Questions and answers