Daikin 2MXS18GVJU Installation Manual
Cool mini split system
Hide thumbs
Also See for 2MXS18GVJU:
- Service manual (32 pages) ,
- Engineering data (464 pages) ,
- Service manual (285 pages)
Table of Contents
Advertisement
DAIKIN AIR CONDITIONER
• Read these Safety Precautions carefully to ensure correct installation.
• This manual classifies the precautions into DANGER, WARNING and CAUTION. Be sure to follow all
the precautions below: they are all important for ensuring safety.
Indicates an imminently hazardous situation which, if not avoided, will result in death or
DANGER
serious injury.
Failure to follow any of WARNING is likely to result in such grave consequences as death or
WARNING
serious injury.
Failure to follow any of CAUTION may in some cases result in grave consequences.
CAUTION
• The following safety symbols are used throughout this manual:
Be sure to observe this instruction.
• After completing installation, test the unit to check for installation errors. Give the user adequate
instructions concerning the use and cleaning of the unit according to the Operation Manual.
DANGER
• Refrigerant gas is heavier than air and replaces oxygen. A massive leak could lead to oxygen depletion,
especially in basements, and an asphyxiation hazard could occur leading to serious injury or death.
• If the refrigerant gas leaks during installation, ventilate the area immediately.
Refrigerant gas may produce a toxic gas if it comes in contact with fire such as from a fan heater, stove or cooking device.
Exposure to this gas could cause severe injury or death.
• After completing the installation work, check that the refrigerant gas does not leak.
Refrigerant gas may produce a toxic gas if it comes in contact with fire such as from a fan heater, stove or cooking device.
Exposure to this gas could cause severe injury or death.
• Do not ground units to water pipes, telephone wires or lightning rods because incomplete grounding could
cause a severe shock hazard resulting in severe injury or death, and to gas pipes because a gas leak could
result in an explosion which could lead to severe injury or death.
• Safely dispose of the packing materials.
Packing materials, such as nails and other metal or wooden parts, may cause stabs or other injuries.
Tear apart and throw away plastic packaging bags so that children will not play with them.
Children playing with plastic bags face the danger of death by suffocation.
• Do not install unit in an area where flammable materials are present due to risk of explosion resulting in serious
injury or death.
• Do not ground units to telephone wires or lightning rods because lightning strikes could cause a severe shock
hazard resulting in severe injury or death, and to gas pipes because a gas leak could result in an explosion
which could lead to severe injury or death.
Safety Precautions
Be sure to establish a ground
connection.
3P207257-2 M07B019
Two-dimensional bar code
is a code for manufacturing.
Never attempt.
Advertisement
Table of Contents

Related Manuals for Daikin 2MXS18GVJU


Summary of Contents for Daikin 2MXS18GVJU
-
Page 1: Safety Precautions
3P207257-2 M07B019 DAIKIN AIR CONDITIONER Two-dimensional bar code is a code for manufacturing. Safety Precautions • Read these Safety Precautions carefully to ensure correct installation. • This manual classifies the precautions into DANGER, WARNING and CAUTION. Be sure to follow all the precautions below: they are all important for ensuring safety. - Page 2 Safety Precautions WARNING • Installation should be left to the authorized dealer or another trained professional. Improper installation may cause water leakage, electrical shock, fire, or equipment damage. • Install the air conditioner according to the instructions given in this manual. Incomplete installation may cause water leakage, electrical shock, fire or equipment damage.
-
Page 3: Precautions For Selecting The Location
Accessories Accessories supplied with the outdoor unit: B Drain plug C Tube A Installation Manual There is on the bottom packing case. D Binding band Precautions for Selecting the Location OUTDOOR UNIT 1) Choose a place solid enough to bear the weight and vibration of the unit, where the operation noise will not be amplified. -
Page 4: Indoor/Outdoor Unit Installation Drawings
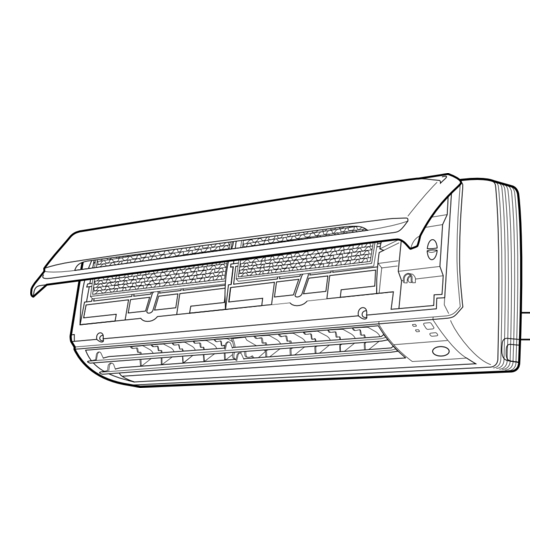
Indoor/Outdoor Unit Installation Drawings For installation of the indoor units, refer to the installation manual which was provided with the units. (The diagram shows a wall-mounted indoor unit.) CAUTION ● Do not connect the embedded branch piping and the outdoor unit when only carrying out piping work without connecting the indoor unit in order to add another indoor unit later. -
Page 5: Precautions On Installation
Precautions on Installation ● Check the strength and level of the installation ground so that the unit will not cause any operating vibration or noise after installed. ● In accordance with the foundation drawing in fix the unit securely by means of the foundation bolts. Prepare four sets of M3/8”... -
Page 6: Selecting A Location For Installation Of The Indoor Units
Selecting a Location for Installation of the Indoor Units ● The maximum allowable length of refrigerant piping, and the maximum allowable height difference between the outdoor and indoor units, are listed below.The shorter the refrigerant piping, the better the performance. Connect so that the piping is as short as possible. -
Page 7: Charging With Refrigerant
Outdoor Unit Purging Air and Checking Gas Leakage ● When piping work is completed, it is necessary to purge the air and check for gas leakage. Refer to “Purging Air and Checking Gas Leakage." Charging with Refrigerant ● If the total length of piping for all rooms exceeds the figure listed below, additionally charge with 0.22 oz/ft of refrigerant (R410A) for each additional feet of piping. -
Page 8: Purging Air And Checking Gas Leakage
Purging Air and Checking Gas Leakage ● When the piping work is completed, it is necessary to purge the air and check for gas leakage. WARNING 1) Do not place any substance other than the specified refrigerant (R410A) into the refrigeration cycle. 2) When a refrigerant gas leak occurs, ventilate the room as soon and as much as possible. -
Page 9: Pump Down Operation
Pump Down Operation In order to protect the environment, be sure to pump down when relocating or disposing of the unit. Close Gas stop valve 1) Remove the valve cap from liquid stop valve and gas Hexagonal stop valve. wrench 2) Carry out forced cooling operation. - Page 10 Wiring WARNING 1) Do not use spliced wires, stranded wires, extension cords, or starburst connections, as they may cause overheating, electrical shock, or fire. Follow all Local, and State electrical codes. 2) Do not use locally purchased electrical parts inside the product. Do not overload the circuit by adding drain pump or other electrical equipment to unit terminals.
-
Page 11: Priority Room Setting
Priority Room Setting ● To use Priority Room Setting, initial settings must be made when the unit is installed. Explain the Priority Room Setting, as described below, to the customer, and confirm whether or not the customer wants to use Priority Room Setting. -
Page 12: Night Quiet Mode Setting
Night Quiet Mode Setting ● If Night Quiet Mode is to be used, initial settings must be made when the unit is installed. Explain Night Quiet Mode, as described below, to the customer, and confirm whether or not the customer wants to use Night Quiet Mode. About Night Quiet Mode Service PC-board The Night Quiet Mode function reduces operating noise of the outdoor... -
Page 13: Test Run And Final Check
Test Run and Final Check ● Before starting the test run, measure the voltage at the primary side of the safety breaker. ● Check that all liquid and gas stop valves are fully open. ● Check that piping and wiring all match. The wiring error check can be conveniently used for underground wiring and other wiring that cannot be directly checked. - Page 14 Test Run and Final Check ● To test cooling, set for the lowest temperature. To test heating, set for the highest temperature. Depending on the room temperature, only heating or cooling (but not both) may be possible. ● After the unit is stopped, it will not start again (heating or cooling) for approximately 3 minutes. ●...
- Page 16 3P207257-2 (M07B019)
Need help?
Do you have a question about the 2MXS18GVJU and is the answer not in the manual?
Questions and answers