Table of Contents
Advertisement
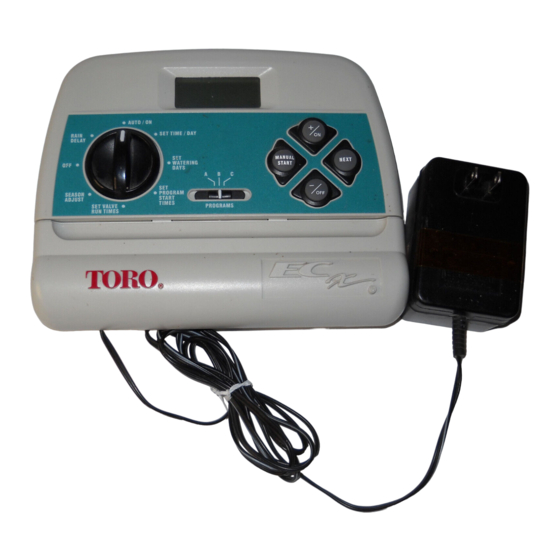
Automatic Outdoor Sprinkler Timer
R
R
User's Guide
ECx Outdoor Timer Features:
• Weather-Resistant Cabinet
• Easily Expandable Up To 12 Zones
With 2-Zone Plug-In Modules
• 3 Watering Programs With:
- Calendar, Interval and Odd/Even Days
- 1 Min. to 4 Hrs. Valve Run Time
- 4 Start Times Per Program
• Battery Back-Up
• Automatic Pump Start
• Seasonal Run Time Adjust
• Rain Delay
• Rain Sensor Ready
• Snap-In Wire Connectors
Advertisement
Table of Contents

Related Manuals for Toro ECx


Summary of Contents for Toro ECx
- Page 1 User’s Guide Automatic Outdoor Sprinkler Timer ECx Outdoor Timer Features: • Weather-Resistant Cabinet • Easily Expandable Up To 12 Zones With 2-Zone Plug-In Modules • 3 Watering Programs With: - Calendar, Interval and Odd/Even Days - 1 Min. to 4 Hrs. Valve Run Time - 4 Start Times Per Program •...
-
Page 3: Table Of Contents
Installation Table of Contents Preparing the Cabinet for Installation ....22 ECx Introduction and Set Up Installing the Cabinet ........23 Connecting the Valves........24 Timer Components .........2-5 Connecting a Pump Start Relay ......25 Sprinkler System Basics ........6 Connecting a Toro Rain Switch .......25 Watering Program Basics ........7... -
Page 4: Ecx Introduction And Set Up
ECx Introduction and Set Up Timer Components PROGRAMS... - Page 5 Timer Components 2 - Control Buttons The following are brief descriptions of the ECx compo- nents and display elements. Each of these items will be button – Increases the time display, scrolls for- explained in further detail within the appropriate pro-...
- Page 6 8 - Fuse – 0.75 Amp, 250V Fast Blow fuse. 9 - Terminal Block – Input power wire connection terminals. 10 - Sensor Connection Terminals – Snap-in connec- tors for optional Toro Rain Switch control wires. 11 - Valve Common Terminal – Snap-in connector for the valve common wire.
-
Page 7: Timer Components
Timer Components MANUAL NEXT START PROGRAMS BATTERY... -
Page 8: Sprinkler System Basics
Valve 1 - Zone 1 - Parkway Lawn - Fixed Spray The next section of this guide is very important. It explains what a program is and how the ECx controls Valve 2 - Zone 2 - Front Lawn - Fixed Spray the operation of the sprinkler system. -
Page 9: Watering Program Basics
Because of variations in plant watering needs, the ECx meets your needs. The other programs can remain provides three separate programs. The programs, called turned off until you need to use them. -
Page 10: Watering Program Details
Interval schedule would Selecting Watering Days be displayed. In this exam- ple, program B has a 3-day The ECx provides four options for scheduling watering SU MO TU WE TH FR SA Interval schedule which will days: Calendar, Interval Odd/Even and Off. - Page 11 Sometimes it is necessary to run a watering program cycle. This is how the ECx enables you to assign water- more than one time per day. For example, when growing ing zones to different programs.
-
Page 12: Planning Your Watering Schedule
ECx after it is installed. A watering ing information: schedule form is provided on page 12 for you to fill out. - Page 13 (Example)
-
Page 15: Remote" Programming
2. Insert the battery into the timer housing as shown in before installation. Installing its 9-volt battery brings the Figure 1. ECx to life, so you can program your new timer while in the comfort of your home. 3. Slide the battery switch (14) to the left (ALK) for Alka-... -
Page 16: Selecting Optional Control Features
12/24 Hour Selector operate your sprinklers. Just set the current time Jumper (4). To store the and day and your ECx will be ready to operate auto- jumper, install it on one pin matically. as shown. See Figure 3. -
Page 17: Resetting The Timer Memory
Resetting the Timer Memory The ECx program memory can be reset to the perma- Figure 4 nent program values or cleared completely at any time without removing power. Resetting the permanent program erases all user input and replaces it with the permanent program values. -
Page 18: Programming The Timer
Example 1 Programming the Timer Setting the Current Time and Day or Date AUTO / ON RAIN SET TIME / DAY DELAY Note: To select the 24-hour clock mode, see page 14. Turn the control dial to the MANUAL NEXT SET TIME START WATERING... -
Page 19: Setting The Watering Day Schedule
Setting the Watering Day Schedule For each program, you can select Calendar, Interval Odd/Even or Off. To set a Calendar schedule, continue PGM A here. To set an Interval schedule see page 18. To set a SU MO TU WE TH FR SA Odd or Even day schedule or to turn Off a program, see page 19. -
Page 20: Setting An Interval Schedule
Setting an Interval Schedule Turn the control dial to the SET WATERING DAYS position. PGM A Check the switch setting. If necessary, PROGRAMS reposition the switch to select the desired program. The current watering schedule will be displayed. If AUTO / ON RAIN SET TIME / DAY Int (Interval) is not displayed, press the +/... -
Page 21: Setting An Odd/Even Schedule
Setting an Odd or Even Schedule Turning Off a Program AUTO / ON AUTO / ON RAIN SET TIME / DAY RAIN SET TIME / DAY DELAY DELAY MANUAL MANUAL NEXT NEXT START START WATERING WATERING DAYS DAYS SEASON PROGRAM PROGRAM SEASON ADJUST... -
Page 22: Setting Program Start Times
Setting Program Start Times Turn the control dial to SET PROGRAM START TIMES PGM A position. Check the switch setting. If necessary, PROGRAMS reposition the switch to select the desired program. 3 5 7 AUTO / ON Program start time number 1 will begin flashing. The RAIN SET TIME / DAY DELAY... -
Page 23: Setting Valve Run Times
Setting Valve Run Times Turn the control dial to the SET VALVE RUN TIMES position. PGM A Check the switch setting. If necessary, PROGRAMS 2 3 4 5 6 reposition the switch to select the desired program. AUTO / ON Zone number 1 will be flashing and its current run RAIN SET TIME / DAY... -
Page 24: Installation
Three wiring access holes are provided in the cabinet base as follows: (D) - 1/2" (13mm) for power and equipment ground wires. (E) - 1/2" (13mm) (plugged) for optional Toro Rain Switch wires. 1. Remove the lower housing cover (A) by pulling (F) - 3/4"... -
Page 25: Installing The Cabinet
Installing the Cabinet 1. For safe, reliable operation, select an installation site which will provide the following conditions: • Protection from irrigation spray, exposure to direct sun during the hottest hours, wind and snow. • Access to a grounded power source which is not 6"... -
Page 26: Connecting The Valves
Note: Connecting a master valve (or pump relay) is back 1/2" (13mm) from all cable wires. optional and may not be required in your sprinkler Note: The ECx has snap-in wire terminals. To attach system. wires, simply raise the lever, insert the stripped wire,... -
Page 27: Connecting A Pump Start Relay
Connecting a Toro Rain Switch (Optional) (Optional) The Toro Rain Switch (model # 53221) is a remote rain Caution: To prevent timer damage, ensure the sensing device which can be connected directly to your relay current draw does not exceed 0.30 Amps. -
Page 28: Connecting The Power Source
Connecting the Power Source WARNING: AC power wiring must be installed and connected by qualified personnel only. All electrical compo- nents and installation procedures must comply with all applicable local and national electrical codes. Some codes may require a means of discon- nection from the AC power source installed in the fixed wiring and having a contact separation of at least 0.120"... -
Page 29: Timer Operation
In other words, if a program has an assigned watering day schedule, start time and a zone In the Automatic mode, the ECx keeps track of the cur- with run time, it will operate automatically regardless of rent time, day of the week and the automatic watering the position of the switch. -
Page 30: Manual Operation
Manual Operation Flashing Manual operation enables the automatic watering pro- grams or selected zones assigned to the program to be Flashing started manually. During operation, temporary changes can be made to increase or decrease the valve run time, step through the valve sequence and pause or stop watering using the “Watering Control Features”... -
Page 31: Watering Control Features
To Cancel Watering Watering Control Features Press the +/ and –/ buttons at the same time - The following watering control features enable you to fur- two times. ther control the watering program during operation. • All watering operations will be canceled and the timer All watering control features apply to watering programs will return to the automatic mode. -
Page 32: Turning Off The Ecx
Turning Off the ECx Flashing When the control dial is turned to the position, the timer immediately shuts off any watering operation cur- rently in progress. Leaving the control dial in the PGM A position will prevent all automatic and manual watering operations. -
Page 33: Using The Season Adjust Feature
With any adjustment above 100%, the Turn the control dial to the position. ECx will first increase the run time by the adjustment SEASON ADJUST The season adjust display will be shown and 100% percentage, then split the time in half and run the water- will be flashing. -
Page 34: Service And Specifications
Adding a Zone Module Service and Specifications 1. Turn the control dial to the position. 2. Remove the lower front cover from the timer housing Replacing the Fuse by sliding it downward. A 0.75 Amp fuse protects the controller from damage due to power surges and excessive current draw through the Zone Modules. -
Page 35: Troubleshooting
If you are having a problem with the timer, check the following symptoms, possible causes and remedies. If the problem cannot be resolved or you would like assistance with any Toro irrigation product, call our toll-free Toro Help Line, 1-800-367-8676 Monday through Friday, 7:30 –... -
Page 36: Specifications
• Input: 120 V a.c. 60 Hz, 0.5A Neither The Toro Company nor Toro Warranty Company is liable for failure of • Output: 24 V a.c. 60 Hz, 20 VA products not manufactured by it even though such products may be sold or Maximum Load Per Zone: 0.35 Amps @ 24 V a.c.
Need help?
Do you have a question about the ECx and is the answer not in the manual?
Questions and answers