Table of Contents
Advertisement
Available languages
Available languages
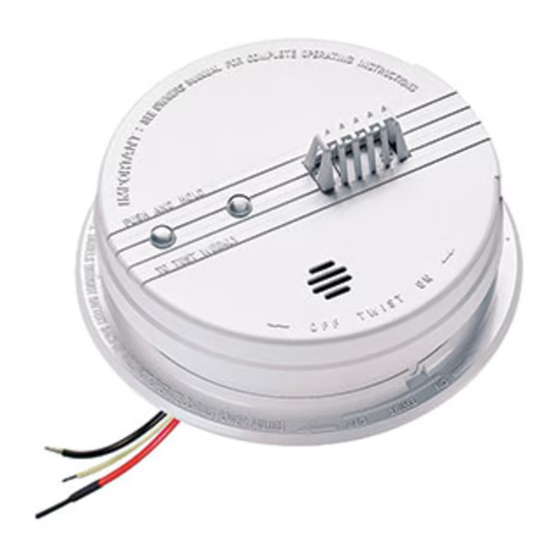
HD135F
Heat Alarm User's Guide
AC Wire-in Single and/or Multiple Station (up to 24 Devices) Heat Alarm
with 9 Volt Battery Back Up, 135ºF fixed temperature.
Thank you for purchasing this heat alarm. It is an important part of your family's
home safety plan. You can trust this product to provide the highest quality safe-
ty protection. We know you expect nothing less when the lives of your family
are at stake. Kidde alarms and accessories CAN ONLY BE interconnected with
other Kidde alarms and accessories as well as specified brands and models of
interconnect compatible alarms. Connection of Kidde products to a non-speci-
fied manufacturer's interconnect system, or connection with non-specified
equipment from another manufacturer into an existing Kidde system could result
in nuisance alarming, failure to alarm, or damage to one or all of the devices in
the interconnect system. Refer to the User's Guide supplied with each Kidde
product for interconnect compatible models, brands, and devices. Refer to the
wiring instructions in section 3 for NFPA initiating device limits
For your convenience, write down the following information. If you call
our Consumer Hotline, these are the first questions you will be asked.
Heat Alarm Model Number
(located on back of alarm):
Date Code (located on back of alarm): The
National Fire Protection Association (NFPA)
and the manufacturer recommend replacing
this alarm ten years from the date code.
Date of Purchase:
Where Purchased:
For model: HD135F
820-0917 Rev. B
11/2006
Advertisement
Table of Contents

Related Manuals for Kidde HD135F


Summary of Contents for Kidde HD135F
- Page 1 We know you expect nothing less when the lives of your family are at stake. Kidde alarms and accessories CAN ONLY BE interconnected with other Kidde alarms and accessories as well as specified brands and models of interconnect compatible alarms. Connection of Kidde products to a non-speci- fied manufacturer’s interconnect system, or connection with non-specified...
-
Page 2: Specifications
Model Number ......HD135˚F AC 120 VAC, 60HZ, 80 mA max, 9 V battery backup, Multiple station (up to 24), compatible with Kidde/Lifesaver smoke alarms (see section 3 for a complete list of compatible devices). -
Page 3: Recommended Location Of Alarms
Note A: Maximum coverage established by U.L. is based on providing equal response time as sprinkler devices spaced at 10-Ft intervals (100 Sq/Ft) on a smooth ceiling approximately 15 feet high. Higher ceilings may adversely affect response time and earlier response time may be obtained by reducing the spac- ing between alarms. -
Page 4: Locations To Avoid
of alarms shall be spaced and located within 3 ft (0.9m) of the peak of the ceiling measured horizontally” (see figure 3). • In rooms with open joists or beams, all ceiling mounted alarms shall be located on the bottom of such beams (see figure 2). -
Page 5: Installation Instructions
• When alarms are interconnected, all interconnected units must be powered from a single circuit. • A maximum of 24 Kidde/Lifesaver devices may be interconnected in a multiple station arrangement. The interconnect system should not exceed the NFPA interconnect limit of 12 smoke alarms and/or 18 alarms total (smoke, heat, carbon monoxide, etc.). -
Page 6: Battery Installation
• When mixing models which have battery backup (1275, 1276, 1285, 1296, i12040, i12060, i12080, PE120, PI2000, KN-COSM-IB, HD135F, KN-COB-IC, KN-COP-IC) with models without battery backup, (1235, i12020, KN-COSM-I, 120X, SM120X, CO120X, SL177i) be advised that the models without battery backup will not respond during an AC power failure. -
Page 7: Mounting Instructions
MOUNTING INSTRUCTIONS CAUTION: THIS UNIT IS SEALED. THE COVER IS NOT REMOVABLE! 1. Remove the trim ring from the back of the alarm by holding the trim ring and twisting the alarm in the direction indicated by the “OFF” arrow on the alarm cover. - Page 8 7. Install the alarm on the trim ring with the indicating marks aligned and rotate the alarm in the direction of the “ON” arrow on the cover until the alarm snaps in place (see figure 7). 8. Turn on the AC power. The green AC Power On Indicator should be lit when the alarm is operating from AC power.
-
Page 9: Operation And Testing
5. OPERATION AND TESTING OPERATION: The heat alarm is operating once AC power is applied, fresh batter- ies are installed and testing is complete. When the heat alarm senses tempera- tures above 135ºF (plus or minus a few degrees), the horn will sound a loud (85 db) pulsating alarm until the temperature drops below 135ºF. -
Page 10: False Alarms
6. FALSE ALARMS To avoid false alarms,DO NOT USE WHERE ROOM TEMPERATURES WILL EXCEED 100º F. Heat alarms respond only to heat. They do not detect smoke. If the unit does alarm, check for fires first. If a fire is discovered, get out of the house and call the fire department. - Page 11 This smoke alarm uses a 9V carbon backup battery (alkaline and lithium batteries may also be used). A fresh battery should last for one year under normal operat- ing conditions. This alarm has a low/missing battery monitor circuit which will cause the alarm to “chirp”...
-
Page 12: Limitations Of Heat Alarms
8. LIMITATIONS OF HEAT ALARMS WARNING: PLEASE READ CAREFULLY AND THOROUGHLY • HEAT ALARMS ARE NOT DESIGNED TO PROTECT LIFE SAFETY AGAINST FIRE AND SMOKE. IN MOST FIRES, HAZARDOUS LEVELS OF TOXIC GASES, SMOKE AND HEAT CAN BUILD UP BEFORE A HEAT ALARM WILL OPERATE. -
Page 13: Good Safety Habits
9. GOOD SAFETY HABITS DEVELOP AND PRACTICE A PLAN OF ESCAPE • Install and maintain Fire extinguishers on every level of the home and in the kitchen, basement and garage. Know how to use a fire extinguisher prior to an emergency. •... -
Page 14: Nfpa Required Protection
• Call the fire department from your neighbor’s home - not from yours! • Don’t return to your home until the fire officials say that it is all right to do so. There are situations where a smoke alarm may not be effective to protect against fire as stated in the NFPA Standard 72. -
Page 15: Service And Warranty
12. SERVICE AND WARRANTY If after reviewing this manual you feel that your smoke alarm is defective in any way, do not tamper with the unit. Return it for servicing to: KIDDE Safety, 1016 Corporate Park Dr., Mebane, NC 27302. -
Page 16: Five Year Limited Warranty
The obligation of KIDDE Safety under this warranty is limited to repairing or replacing the heat alarm or any part which we find to be defective in material, workmanship or design, free of... - Page 17 Sabemos que usted no espera menos cuando la vida de su familia está en juego. Las alarmas y los accesorios Kidde SÓLO SE PUEDEN interconectar con otras alarmas y otros accesorios Kidde, así como con marcas y modelos especificados de alarmas de interconexión compatibles.
-
Page 18: Especificaciones
Número de modelo-----------------------------------------------------HD135F CA 120 VCA, 60 HZ, 80 mA máx., batería de emergencia de 9 V, Múltiples estaciones (hasta 24), compatible con alarmas contra humo Kidde/Lifesaver (consulte la Sección 3 para obtener una lista completa de los dispositivos compatibles). - Page 19 2. UBICACIÓN RECOMENDADA PARA LAS ALARMAS • El lugar de instalación que favorece más a una alarma de calor es en el cielo raso del centro de la habitación, ya que, en este lugar, la MÍNIMO 4 pulg. alarma se encuentra más cerca de todas las CIELO RASO (10 cm) áreas de la habitación (consulte la Figura 3).
- Page 20 EN CUALQUIER LUGAR DENTRO DE ESTA ÁREA 3 pies 3 pies (0,9 m) (0 9 (0,9 m) (0 9 S - Espacio entre alarmas FIGURA 3 INSTALACIÓN EN CASAS RODANTES Las casas rodantes modernas han sido diseñadas y construidas para lograr un uso eficiente de la energía.
- Page 21 • Cuando las alarmas están interconectadas, todas las unidades interconectadas deben activarse desde un circuito único. • En una configuración de múltiples estaciones, se pueden interconectar 24 dispositivos Kidde/Lifesaver como máximo. El sistema de interconexión no debe exceder el límite de interconexión de la NFPA de 12 alarmas contra humo y/o 18 alarmas en total (contra humo, calor, monóxido de carbono, etc.).
-
Page 22: Instalación De Baterías
FIGURA 4. DIAGRAMA DE CABLEADO DE INTERCONEXIÓN FUSIBLE O INTERRUPTOR AUTOMÁTICO NEGRO NEGRO ROJO ROJO BLANCO BLANCO CONECTOR CONECTOR Modelo SM120X del módulo de ALARMA relés de Kidde ALARMA ALARMA DE CALOR Alarma Primera Alarma CONTRA CONTRA Accesorio opcional HD135F adicional alarma... - Page 23 4. Introduzca el CONECTOR RÁPIDO DE CA por el orificio central del anillo de ajuste e instale el anillo, asegurándose de que los tornillos de montaje estén ubicados en los extremos pequeños de los orificios de agarre antes de apretar los tornillos (consulte la Figura 5). 5.
- Page 24 Condición de alarma Cuando la unidad detecte calor y suene, el LED rojo comenzará a destellar rápidamente (un destello por segundo). El LED de destello rápido y la alarma pulsante continuarán hasta que la temperatura baje a menos de 135 º F. CUANDO LAS UNIDADES ESTÉN INTERCONECTADAS, sólo destellará...
- Page 25 FIGURA 9 ¡PRECAUCIÓN! SI LA BATERÍA NO MANTIENE PRESIONADO EL ENGANCHE DE RETENCIÓN INDICADOR DE BATERÍA EN EL COMPARTIMIENTO CORRESPONDIENTE, LA PUERTA DEL COMPARTIMIENTO NO SE CERRARÁ, EL CONECTOR RÁPIDO DE CA NO SE CONECTARÁ A LA ALARMA Y, A SU VEZ, ÉSTA NO SE CONECTARÁ AL ANILLO DE AJUSTE. Esta alarma contra humo usa una batería de emergencia de carbón de 9 V (también se pueden usar baterías de litio y alcalinas).
- Page 26 DETECTAN INCENDIOS, YA QUE ES POSIBLE QUE SE PRODUZCA UN INCENDIO DE EXPANSIÓN LENTA (QUE PRODUZCA HUMO) DEL TIPO QUE PRODUCE POCO CALOR, QUE EL INCENDIO SEA EN UNA HABITACIÓN DISTINTA A LA DE LA ALARMA O QUE EL CALOR DEL INCENDIO NO PASE CERCA DE LA ALARMA.
- Page 27 QUÉ HACER CUANDO SUENA LA ALARMA • Salga inmediatamente de la casa de acuerdo con su plan de escape. Cada segundo cuenta, no se detenga para vestirse o tomar objetos de valor. • Al salir de la casa, no abra ninguna puerta interior sin primero tocar su superficie. Si está caliente o si ve humo filtrándose por los bordes, ¡no abra esa puerta! En lugar de eso, use la salida de emergencia alternativa.
-
Page 28: Servicio Y Garantía
La obligación de KIDDE Safety de acuerdo con esta garantía está limitada a la reparación o reemplazo, sin costos para el cliente, de la alarma de calor o de cualquier pieza que esté...
Need help?
Do you have a question about the HD135F and is the answer not in the manual?
Questions and answers
red light flashes every minute but no alarm. is there a problem
No, there is no problem. The red light on the Kidde HD135F flashing every 30–40 seconds indicates proper operation.
This answer is automatically generated