Table of Contents
Advertisement
Quick Links
Advertisement
Table of Contents

Related Manuals for Pandigital UG-SA-W_A


Summary of Contents for Pandigital UG-SA-W_A
- Page 1 ?aNLlIGI1raL Digital Photo Frame User's Guide...
-
Page 2: Table Of Contents
Table of Contents Table of Contents Important Safety Precautions Cleaning the LCD Screen Cleaning the Digital Photo Frame Introduction What's In the Box Setting up the Digital Photo Frame Using the Control Buttons and Remote Control Use the Control Buttons Use the Remote Control Install and Replace the Remote Control Battery Setting Up the Slideshow... -
Page 3: Important Safety Precautions
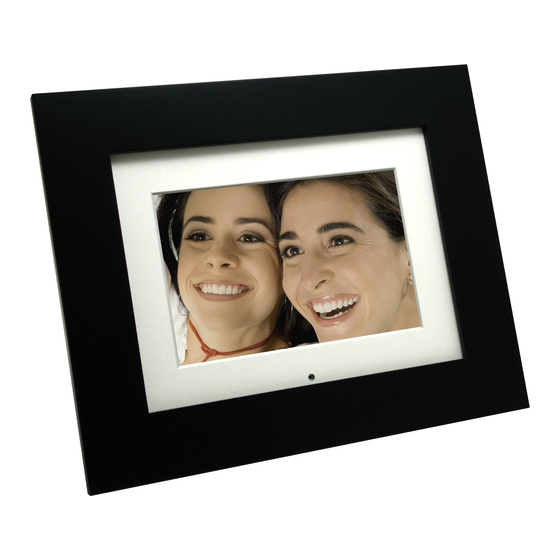
Clean the outer surface of the Digital Photo Frame (excluding the screen) with a soft cloth dampened with water. Introduction Welcome to the Pandigital Multimedia Photo Frame! Now you can display your digital photos directly from your memory card, no computer is necessary. Simply insert a memory card into the Digital Photo Frame, and turn on the power. -
Page 4: What's In The Box
To learn more about your Digital Photo Frame's features, and take full advantage of them, please take a few minutes to read this User's Guide. What's In the Box • Digital Photo Frame • AC Power Adapter (9V, 2A) • This User's Guide and Quick Start Guide •... -
Page 5: Using The Control Buttons And Remote Control
Using the Control Buttons and Remote Control You can use all of the Digital Photo Frame's features with either buttons on top and left side of the frame or using the remote control. Use the Control Buttons The control buttons are located on the left and top of the Digital Photo Frame. The following table describes their actions. -
Page 6: Setting Up The Slideshow
Setting Up the Slideshow You can control all of the Digital Photo Frame functions with the buttons on the top of the frame or with the remote control. To display the setup screen, press the SETUP button on the Digital Photo Frame, or press the Setup button on the remote control. -
Page 7: Display A Single Photo On The Full Screen
From the Select Mode screen, choose PHOTO and press ENTER. The Thumbnails Screen opens. Press the Arrow Buttons on the Remote Control or the Digital Photo Frame until the desired photo is highlighted. The memory source, photo's filename and size, are displayed at the top of the screen. The other number indicates how many screens of photos are in the memory, and which one is currently displayed. -
Page 8: Watch A Video
Watch a Video You can watch video files on your Digital Photo Frame as well. It supports the Motion JPEG (AVI) video format used by most digital cameras. Insert a memory card with video files on it. The Card Selection Screen opens. Choose the desired card. -
Page 9: Copy Photos From A Memory Card To Built-In Memory
Copy Phoios from a Memory card to Built-in Memory The Digital Picture Frame can store photos in its built-in memory. You can copy photos one at a time, or in batches. Copy A Single Photo Use the Remote control to copy a photo from a memory card to the built-in memory. 1. -
Page 10: Delete Several Or All Photos In The Built-In Memory
Press the Up or Down arrow to choose Delete File and press ENTER. The highlighted photo will be deleted. Caution: You will not be asked to confirm or have a chance to change your mind. It is a good idea to keep copies of the photos you copy onto your Digital Photo Frame. - Page 11 The following table lists the Setup Menu and submenu options and describes their actions. Menu Option Second menu options Description Fade Stutter Cross Comb Mask Special effects shown to transition from one photo to Brick Slideshow Transition the next in a Slideshow. Dissolve Expansion Silk...
-
Page 12: Displaying A Clock, Calendar, And Slideshow
Displaying A Clock, Calendar, and Slideshow You can use your Digital Picture frame as a desk calendar with a real-time clock and continuous slideshow. You can also use the Digital Picture Frame as an Alarm Clock, after setting internal clock. To Display the Calendar/Clock screen: Open the Select Mode Screen. -
Page 13: Turn Scheduled Slideshows On Or Off
Use the Arrow buttons to select Set On/Off Schedule and press Enter. The Set Schedule page opens with the Hours field for the Weekdays Turn on at highlighted. Use the Up or Down arrow to set the hour you want scheduled slideshows to start, then use the right arrow to move to the minutes field, set the minutes in the same manner as the hours, and then move the highlight to the AM/PM field. - Page 14 Open My Computer on your Desktop. A window showing all drives connected to your computer opens. (It will look similar to the screen shown below.) _" x :". _ClI ~:lkIenc _ HP FAVlUON Ie RE MR" lD thl IJ ,C(P E :y$I_ rlOimabon .[lVlID.-...
-
Page 15: Disconnect The Digital Photo Frame From The Computer
Note: If your PC is connected to Local Area Network drives, or if you have multiple drive letters already assigned to peripheral devices, you will need to manage your drive settings in Windows to free up the four drive letters immediately following your CD-ROM drive so the Digital Photo Frame can assign them to memory card slots properly. -
Page 16: Frequently Asked Questions
LABOR: For a period of ninety (90) days from the date of purchase, if this product is found to be defective, Pandigital will repair or replace the product, at its option, at no charge. After this ninety (90) day period, labor charges will be charged on a case by case basis. -
Page 17: Fcc Statement
(5) damage due to improper operation, improper maintenance, or connection to an improper power supply; (6) damage due to an attempted repair of the product by anyone other than a facility authorized by Pandigital to service the product; (7) consumables (such as fuses and batteries). This warranty is valid only in the United States. - Page 19 "SELECT CARD" on it and depress to display (i.e. Photo, to begin. screen. "ENTER" on the remote. Music, Video, Clock). ?aNLJIGI,raL www.pandigital.net...
- Page 20 Digital Photo Frame and on the first try. If after a few the one with "Pandigital" label minutes, the external driver's is for the internal memory. Connect the small end of...
- Page 21 Place First Class Stamp Here r-aNLJIGI1raL P.O. Box 2969 Dublin, CA 94568-2969...
- Page 22 Serial Number: - - - - - - - - - - - - - - Date Purchased: Purchased At: - - - - - - - - - I would like to receive email information from Pandigital in the future.
Need help?
Do you have a question about the UG-SA-W_A and is the answer not in the manual?
Questions and answers