
Related Manuals for Meade LX90GPS


Summary of Contents for Meade LX90GPS
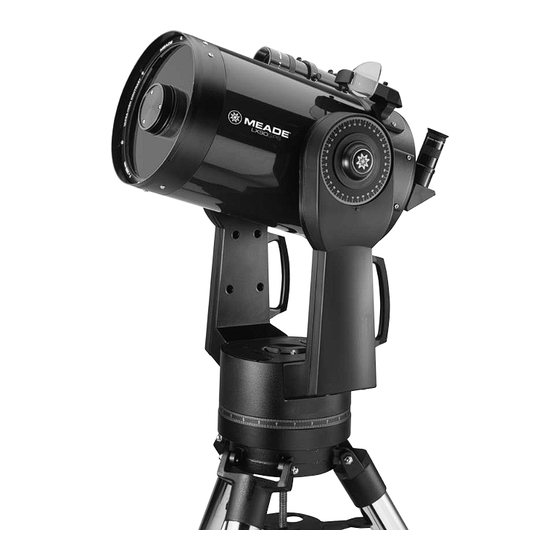
- Page 1 Instruction Manual 8", 10", 12" LX90 Schmidt-Cassegrain Telescopes AutoStar ® — GPS— SmartFinder ™ ™...
- Page 2 WARNING! Never Meade ® LX90 ™ Telescope to look at the Sun! Looking at or near the Sun will cause instant and irreversible damage to your eye. Eye damage is often painless, so there is no warning to the observer that damage has occurred until it is too late.
-
Page 3: Table Of Contents
CONTENTS Quick-Start Guide ............4 Telescope Features ............6 To Attach the Handbox Holder ........8 AutoStar Features ............9 ® Getting Started ..............12 Parts Listing ..............12 How to Attach the Tripod to the Telescope ....12 How to Assemble Your Telescope ......13 Choosing an Eyepiece ..........14 Using SmartFinder ..........14 Aligning SmartFinder and the Viewfinder....15... -
Page 4: Quick-Start Guide
QUICK-START GUIDE It is recommended that you attach the supplied tripod to the LX90 for observing. Perform the telescope and AutoStar setup indoors in the light so that you become familiar with the parts and operation before moving the telescope outside into the dark for observing. - Page 5 Battery Compartment (c) 00 Meade [2.0] A U T O S T A R Flip the Power Switch on the computer control panel to the ON position. The copyright message lights on AutoStar’s LCD display. Battery Holder Remove covers from both battery compartments located on top of the drive base and...
-
Page 6: Telescope Features
TELESCOPE FEATURES Side View A. Handbox Port B. LED C. ON/OFF Switch D. Auxiliary Ports (2) E. 12v Power Connector Computer Control Panel Some models of the LX90 have the computer control panel on the left fork arm, others on the right fork arm. - Page 7 LX90: Your Personal Window to the Universe The Meade LX90 is an extremely versatile, high-resolution telescopes with features similar to those available only with larger and more specialized imaging systems. With pushbutton controls, automatic tracking of celestial objects and software downloading capability, the LX90 telescope may be all the telescope ever required by many terrestrial and astronomical observers.
-
Page 8: To Attach The Handbox Holder
D. Auxiliary (AUX) Port (2): Provides connection for the SmartFinder LNT module, and also current and future Meade accessories, such as the Meade Accessory Port Module. See , page 43. OPTIONAL ACCESSORIES E. 12v Power Connector: Provides connection so that the telescope assembly may be powered from either a 12v DC auto cigarette light plug or from a stan- dard 115v AC home outlet using optionally available 25' power cords. -
Page 9: Autostar Features
AUTOSTAR FEATURES Fig. 2: The LX90 AutoStar Handbox. Tour the Cosmos with Just the Push of a Button Control of the LX90 is through the operation of the standard-equipment AutoStar. Nearly all functions of the telescope are accomplished with just a few pushes of AutoStar’s buttons. Some of the major features of AutoStar are: •... - Page 10 The AutoStar Computer Controller provides control of virtually every telescope function within NOTE: a compact handbox. AutoStar has soft-touch keys designed to have a positive feel. The LCD AutoStar does not require batteries; the (Liquid Crystal Display) is backlit with a red LED (Light Emitting Diode) for easy viewing in the telescope’s batteries dark.
- Page 11 The SmartFinder’s red dot will now blink on for 10.2 seconds and turn off for 0.7 seconds, and then repeat the cycle until you change the values again. Press and hold MODE exit this function. Similarly, you can set the Intensity value by scrolling through the intensity values with the Scroll keys .
-
Page 12: Getting Started
GETTING STARTED Getting the telescope ready for first observations requires only a few minutes. When first opening the packing box, note carefully the following parts: • LX90 Telescope with fork mount system and attached SmartFinder • AutoStar handbox and interface coil cord •... -
Page 13: How To Assemble Your Telescope
Place the entire telescope onto the top of the tripod head, and insert the threaded rod into the central hole in the bottom of the drive base of the telescope. Tighten the tension knob (3, Fig. 3); firm tightening of the tension knob is sufficient to result in rigid positioning of the tripod legs. -
Page 14: Choosing An Eyepiece
Choosing an Eyepiece A telescope’s eyepiece magnifies the image formed by the telescope’s main optics. Each eyepiece has a focal length, expressed in millimeters, or “mm.” The smaller the focal length, the higher the magnification. For example, an eyepiece with a focal length of 9mm has a high- er magnification than an eyepiece with a focal length of 26mm. -
Page 15: Aligning Smartfinder And The Viewfinder
Aligning SmartFinder In order for the SmartFinder to be useful, it must first be aligned with the main telescope, so that both the SmartFinder and the main telescope are pointing at precisely the same location. To align the SmartFinder: 1. Point the main telescope at some well-defined distant (perhaps a mile away) land object, such as a telephone pole or sign. -
Page 16: Observing
OBSERVING IMPORTANT NOTE: Observing By Moving the Telescope Manually Objects appear If you wish to observe a distant land object, such as a mountain top or a bird, you can observe upside-down and by merely pointing the telescope and looking through the eyepiece. reversed left-for-right when observed in the Loosen the telescope’s R.A. -
Page 17: Slew Speeds
Verify that AutoStar is properly connected to your telescope. See HOW TO ASSEMBLE YOUR , page 13. TELESCOPE Flip the telescope power switch to the ON position. The AutoStar screen is activated and a copyright message displays briefly, followed by a short beep. -
Page 18: Astronomical Observing
Astronomical Observing Used as an astronomical instrument, your telescope has many optical and electromechanical capabilities. It is in astronomical applications where the high level of optical performance is readily visible. The range of observable astronomical objects is, with minor qualification, limit- ed only by the observer’s motivation. -
Page 19: Observe A Star Using Automatic Tracking
AutoStar also determines the positioning ( i.e., tilt and tip) of the optical tube. Important Tip: Finds North. Locates magnetic North, then calculates true North. See FINDING TRUE It is recommended page 21. NORTH, that you train your telescope’s drive the Attempts a "GPS Fix."... -
Page 20: Go To Saturn
Go To Saturn After performing the Automatic Alignment procedure, the motor drive begins operating and the telescope is aligned for a night of viewing. Objects in the eyepiece should maintain their position even though the Earth is rotating beneath the stars. IMPORTANT NOTE Once aligned, only use the GO TO or Arrow keys to move the telescope. -
Page 21: Finding True North
LX90 Tips Global Positioning System Receiver The Global Positioning System (GPS) is comprised of 24 satellites orbiting the Earth that are constantly transmitting their precise position and time. The system provides highly accurate, worldwide positioning and navigation information for any number of applications. GPS receivers on the Earth acquire signals from three to twelve satellites to determine the precise latitude, longitude, and time of the receiver. -
Page 22: Basic Autostar Operation
BASIC AUTOSTAR OPERATION OBJECT Select from over 30, 220 database objects and press GO TO to move the telescope automatically to the object and place it in the telescopic field of view. SETUP Select Item: Quick, easy alignment Object permits all telescope operations with only a 2-minute setup. -
Page 23: Entering Data Into Autostar
To Calculate Sunset time: Press the MODE key several times, until “Select Item: Object” is displayed. Press the Scroll Down key once to display the “Event” option in the “Select Item” menu. Press the ENTER key to choose the "Event" option and move down a level. "Event: Sunrise"... -
Page 24: Menus And Menu Options
MENUS AND MENU OPTIONS Looking at or near the Sun will cause irreversable damage to your eye. Do not point this telescope at or near the Sun. Do not look through the telescope as it is moving. -
Page 25: Objects Menu
Object Menu Use the OBJECT menu to select an Almost all observing with AutoStar is performed using the Object menu category. ( NOTE: object from the data- Exceptions include Guided Tour and Landmark Survey. ) See , page 20, for an GO TO SATURN base. -
Page 26: Event Menu
Event Menu Use the Event menu to look up dates of The Event menu provides access to dates and times of astronomical events. The Event various astronomical database includes: events, such as Sunrise and Sunset calculates the time that the Sun rises or sets on the current date. Find sunrises and sunsets, rise and set times for other dates by entering a new date into the “Setup: Date”... - Page 27 Set: Enter the time of day for the alarm to sound, in hours, minutes, and seconds, then press ENTER. Start/Stop: Activates the alarm set previously. Use the Scroll keys to toggle between ON and OFF. When ON is displayed, press ENTER to activate the alarm. When the alarm time arrives, AutoStar beeps.
-
Page 28: Setup Menu
Park Scope is designed for a telescope that is not moved between observing sessions. Align the telescope one time, then use this function to park the telescope. Next time it is powered up, enter the correct date and time – no alignment is required. Pressing ENTER causes the telescope to move to its pre-determined Park position. - Page 29 Custom: Allows entry of user-defined tracking rates. Reverse L/R: Reverses the functions of the Left and Right Arrow keys ( i.e. , the Right key moves the telescope to the left ). Reverse UP/DOWN: Reverses the functions of the Up and Down Arrow keys ( i.e. , the Up key moves the telescope down ).
- Page 30 Delete: Deletes a stored site from the database. Edit: Edits a selected site, including: the name, latitude, longitude, and time zone. Time Time Zone Shift Zone refers to the Greenwich Mean Time (GMT) time zone shift. Users West of Greenwich, Atlantic -4 Hours England use “-”...
-
Page 31: Advanced Autostar Features
ADVANCED AUTOSTAR FEATURES Adding Observing Sites If you plan to observe using AutoStar at different geographic locations, you can store up to six observation sites in AutoStar's memory to help simplify your telescope setup. Perform these procedures using the Site options (Add, Select, Delete, Edit) of the Setup menu. To Add a Site to the user-defined site list: In this example, you will choose a city and add it to the database list. -
Page 32: Finding Objects Not In The Database
Using the Arrow keys, change the name of the site so that it now reads the name of your Time Zone Shift observing location. Press ENTER. "Edit: Name" displays again. Atlantic -4 Hours Eastern -5 Hours Press the Scroll Down key and "Edit: Latitude" displays. Press ENTER. Central -6 Hours Using the Number Keys, enter the latitude of your observing site and then press ENTER. -
Page 33: Observing Satellites
AutoStar then prompts you to enter the magnitude of the object. This step is also optional. Use the Number keys to enter this information, if so desired, and press ENTER to go to the next display. "User Object: Add" displays again. To GO TO a user-entered object: In this procedure, you will choose an object from the User Object list and GO TO the object. -
Page 34: How To Create Your Own Guided Tour
How to Create Your Own Guided Tour When a Guided Tour is selected, AutoStar slews your telescope to a predetermined list of objects and displays information about each object, such as type of object, constellation location, R.A. and Dec coordinates, and so forth. AutoStar contains a few Guided Tours which are programmed at the factory. - Page 35 Writing a Tour Using the list of commands listed above, a custom tour can be created. Placing the word AUTO SELECT before any of the command lines activates Automatic Mode and, when selected, AutoStar automatically searches and finds the designated object. The following is a list of command lines, complete with keywords and necessary strings: TITLE Title must be the first keyword in your tour after any comment lines and must be 15 characters...
- Page 36 ASTEROID "name" Enter ASTEROID and then the name of the desired asteroid in quotes. AutoStar displays information about the asteroid from its database. For example: ASTEROID: "Ceres" COMET "name" Enter COMET and then the name of the desired comet in quotes. AutoStar displays informa- tion about the comet from its database.
-
Page 37: Landmarks
AUTO SLEW ON / AUTO SLEW OFF With AUTO SLEW ON enabled in the tour, AutoStar automatically slews the telescope to objects first before displaying the text description. This feature is useful when designing tours in which observing certain objects is required. For example, an astronomy professor may require his students to observe six objects, four of which AutoStar automatically slews to in a tour. -
Page 38: Identify
Display the "Landmark: Select" menu option. Press ENTER. Use the Scroll keys to scroll through the list of objects you have previously entered. When the desired object displays, press ENTER to select the object. Use the Scroll keys to scroll through location information about the object, if desired. - Page 39 Two-Star alt/az alignment procedures, you will (unlike the Automatic and Easy alignment pro- cedures) manually place the telescope in the home position. The procedures for equatorial (polar) alignment are discussed in , page 50; the APPENDIX A three alternative alt/az alignment methods are discussed below. Easy (Two-Star) Alignment In this method, AutoStar automatically sets the home position, and also automatically picks two stars from its libraries for alignment.
-
Page 40: Browse
One-Star Alt/Az Alignment One-Star Alignment requires some knowledge of the night sky. AutoStar provides a library of bright stars. One-Star Alignment is identical to Two-Star Alt/Az: Alignment (see , page 38), except only one star from the database is TWO-STAR ALT/AZ ALIGNMENT chosen by the observer for alignment. -
Page 41: Photography With The Lx90
PHOTOGRAPHY WITH THE LX90 Photography through the LX90 requires the addition of the optional #62 T–Adapter. See page 43. With the #62 T-Adapter and a T-mount attached to the OPTIONAL ACCESSORIES, telescope (Fig. 15), through-the-telescope photography is possible with any 35mm camera body with a removable lens. - Page 42 Shorter exposure times is one of the biggest drawback. Long exposures with digital cameras introduce undesirable noise and artifacts into a digital image. This limits the range of astro images to the Moon, planets and bright stars. Some tips for better digital photos: •...
-
Page 43: Optional Accessories
OPTIONAL ACCESSORIES A wide assortment of professional Meade accessories is available for the LX90 telescope. The premium quality of these accessories is well-suited to the quality of the instrument itself. Consult the Meade General Catalog for complete details on these and other accessories. Some of the Meade Series 4000 and 5000 Eyepieces are as follows. - Page 44 #62 T-Adapter: The T-Adapter (Fig. 22) is the basic means of prime-focus photography through all Meade Schmidt-Cassegrain models. Thread the T-Adapter on to the rear cell of your telescope, followed by a T-Mount for your 35mm camera, and the camera body is rigidly coupled to the telescope.
-
Page 45: Maintenance
MAINTENANCE The LX90 is a precision optical instrument designed to yield a lifetime of rewarding applica- tions. Given the care and respect due any precision instrument, the LX90 will rarely, if ever, require factory servicing. Maintenance guidelines include: Avoid cleaning the telescope’s optics: a little dust on the front surface of the telescope’s correcting lens causes virtually no degradation of image quality and should not be considered reason to clean the lens. - Page 46 ring of light fills about 10% of the eyepiece field-diameter. If the dark central spot is offset in (i.e., not concentric with) the ring of light, your telescope’s optical system is misaligned and requires collimation. Follow these steps for collimation of the optical system: The only adjustments possible, or necessary, on the LX90 are from the three screws (Fig.
-
Page 47: Inspecting The Optics
Inspecting the Optics A Note About the “Flashlight Test:" If a flashlight or other high-intensity light source is pointed down the main telescope tube, the view (depending upon the observer’s line of sight and the angle of the light) may reveal what appears to be scratches, dark or bright spots, or just generally uneven coatings, giving the appearance of poor quality optics. -
Page 48: Specifications
SPECIFICATIONS 8” LX90 Specifications Optical design ............Schmidt-Cassegrain Clear aperture ............8" Focal length ..............2000mm Focal ratio (photographic speed) ......f/10 Viewfinder..............8 x 50 finder SmartFinder ..............Red dot projected onto finder’s lens Coatings ..............Meade EMC Super Multi-Coatings Mounting ..............Cast-aluminum, double-tine forks Gears ................4.9"-dia worm gears, both axes Alignment ..............Altazimuth or equatorial w/optional wedge 5 arc-minutes in GO TO mode 1x sidereal to 6.5°/sec in 9 increments... -
Page 49: Star Charts
12” LX90 Specifications Optical design ............Schmidt-Cassegrain Clear aperture ............12" Focal length ..............3048mm Focal ratio (photographic speed) ......f/10 Viewfinder..............8 x 50 finder SmartFinder ..............Red dot projected onto finder’s lens Coatings ..............Meade EMC Super Multi-Coatings Mounting ..............Cast-aluminum, double-tine forks Gears ................4.9"-dia worm gears, both axes Alignment ..............Altazimuth or equatorial w/optional wedge ..................5 arc-minutes in GO TO mode ..................1x sidereal to 6.5°/sec in 9 increments... -
Page 50: Appendix A: Equatorial (Polar) Alignment
APPENDIX A: EQUATORIAL (POLAR) ALIGNMENT Polar Alignment In Polar Alignment, the telescope is oriented so that the horizontal and vertical axes of the telescope are lined up with the celestial coordinate system. In order to Polar align your telescope, it is essential to have an understanding of how and where to locate celestial objects as they move across the sky. -
Page 51: Locating The Celestial Pole
Locating the Celestial Pole To get basic bearings at an observing location, Little Dipper take note of where the Sun rises (East) and sets Polaris (West) each day. After the site is dark, face North by pointing your left shoulder toward where the Sun sets. -
Page 52: Equatorial Wedge
Note that the R.A. circle is double-indexed (i.e., there are two series of numbers running in opposite directions around the circumference of the R.A. circle). The upper series of numbers (increasing counterclockwise) applies to observers located in the Earth’s Northern Hemisphere; the lower series of numbers (increasing clockwise) applies to observers located in the Earth’s Southern Hemisphere. -
Page 53: Precise Polar Alignment
Begin polar aligning the telescope by locating Polaris. Finding Polaris is simple. Most people recognize the “Big Dipper.” The Big Dipper has two stars that point the way to Polaris (Fig. 29 ) . Once Polaris is found, it is a straightforward procedure to obtain a rough polar alignment. To line up with Polaris, follow the procedure described below. - Page 54 known as the “Drift” method: 1. Obtain a rough polar alignment as described earlier. Place the illuminated reticle eyepiece (or eyepiece/Barlow combination) into the eyepiece holder of the telescope. 2. Point the telescope, with the motor drive running, at a moderately bright star near where the meridian (the North-South line passing through your local zenith) and the celestial equator intersect.
-
Page 55: Appendix B: Helpful Charts
APPENDIX B: HELPFUL CHARTS Latitude Chart for Major Cities of the World To aid in the Polar Alignment procedure (see page 50), latitudes of major cities around the world are listed below. To determine the latitude of an observing site not listed on the chart, locate the city closest to your site. Then follow the procedure below: Northern Hemisphere observers (N): If the site is over 70 miles (110 km) North of the listed city, add one degree for every 70 miles. -
Page 56: Appendix C: Training The Drive
APPENDIX C: TRAINING THE DRIVE Train the telescope motors using AutoStar. Perform this procedure if you are experiencing any pointing accuracy problems. Fig. 33 depicts the complete Drive Training procedure. Use a terrestrial object, such as a telephone pole or lamp post, to train the drive. NOTE: LX90 TIPS Complete this exercise once every 3 to 6 months to... -
Page 57: Appendix D: Basic Astronomy
BASIC ASTRONOMY APPENDIX D: In the early 17th century Italian Scientist Galileo, using a crude telescope considerably smaller than the LX90, turned it to look towards the sky instead of distant trees and mountains. What he saw, and what he realized about what he saw, forever changed the way mankind thought of the universe. - Page 58 Planets Planets change positions in the sky as they orbit around the Sun. To locate the planets on a given day or month, consult a monthly astronomy magazine, such as Sky and Telescope or Astronomy . You can also consult AutoStar for information about planets. Scroll to the "Object: Solar System"...
- Page 59 The Meade Schmidt-Cassegrain Optical System Ray (2) Ray (1) Secondary Mirror Focal Plane Secondary Primary Baffle Tube Baffle Field Stops Correcting Plate Primary Mirror In the Schmidt-Cassegrain design of the Meade LX90, light enters from the right, passes through a thin lens with 2-sided aspheric correction (“correcting plate”), proceeds to a spherical primary mirror, and then to a convex secondary mirror.
- Page 60 MEADE LIMITED WARRANTY Every Meade telescope, spotting scope, and telescope accessory is warranted by Meade Instruments Corporation (“Meade”) to be free of defects in materials and workmanship for a period of ONE YEAR from the date of original purchase in the U.S.A. and Canada.
Need help?
Do you have a question about the LX90GPS and is the answer not in the manual?
Questions and answers