Table of Contents
Advertisement
Available languages
Available languages
Advertisement
Table of Contents

Related Manuals for Hisense DH-35K1SJE5


Summary of Contents for Hisense DH-35K1SJE5
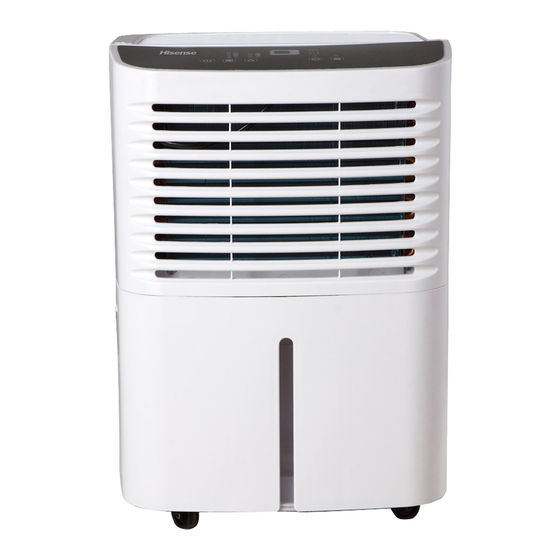
- Page 1 Dehumidifier Use & Care Guide Deshumidificador Guí a de instrucciones Model/Modelo: DH-35K1SJE5 For questions about features, operation/performance, parts or service, call: 1-877-465-3566 Para preguntas sobre caracterí sticas, funcionamiento, rendimiento, piezas o servicio, llame al: 1-877-465-3566...
-
Page 2: Table Of Contents
TABLE OF CONTENTS Normal Sounds................8 DEHUMIDIFIER SAFETY............3 INSTALLATION REQUIREMENTS........4 DEHUMIDIFIER CARE..............9 Electrical Requirements..........4 Cleaning the Air Filter..............9 Location Requirements...........4 Cleaning the Dehumidifier.............9 TROUBLESHOOTING..............10 DEHUMIDIFIER USE............5 ASSISTANCE OR SERVICE............11 Setting the Controls............5 Draining the Dehumidifier..........7 PRODUCT REGISTRATION.............11 ÍNDICE SEGURIDAD DEL DESHUMIDIFICADOR......12 Sonidos normales................17 REQUERIMIENTOS DE INSTALACION......13 MANTENIMIENTO DEL DESHUMIDIFICADOR......18... -
Page 3: Dehumidifier Safety
DEHUMIDIFIER SAFETY Your safety and safety of other s are very important We have provided many important safety messages in this manual and on your appliance. Always read and obey all safety messages. This is the safety alert symbol. This symbol alerts you to potential hazards that can kill or hurt you and others. All safety messages will follow the safety alert symbol with the word “DANGER”... -
Page 4: Installation Requirements
INSTALLATION REQUIREMENTS Electrical Requirements Recommended Grounding Method This dehumidifier must be grounded. This dehumidifier is equipped with a power supply cord with a three-prong grounding plug. The cord must be plugged into a mating, grounded three -prong outlet, grounded in accordance with all local codes and Electrical Shock Hazard WARNING ordinances. -
Page 5: Dehumidifier Use
DEHUMIDIFIER USE Setting the Controls Control Panel 1. Plug into a grounded three-prong outlet. 2. Press POWER to turn on the dehumidifier. 3. Press FAN to choose the fan speed. 4. Press MODE to choose the mode. 5. Press the plus or minus arrow button to choose the level WATER FULL of humidity. -
Page 6: Desired Humidity
Desired Humidity Press MODE to select the desired humidity setting. NOTE: The humidity displayed is only for reference. For accurate humidity, please check a hygrometer. 2. Choose Auto Dry, Continuous or Normal Auto Dry: Will operate the dehumidifier only in the dry mode. ■... -
Page 7: Filter Monitor
Power Filter Monitor Press POWER to turn on or turn off the dehumitifier. Filter Monitor indicator light is lit, remove, clean and When replace air filter. See “Cleaning the Air Filter”. 2. Press FILTER MONITOR after cleaning and replacing the air filter. -
Page 8: Connect Drain Hose
Option 2 Connect Drain Hose 4.Place the other end of garden hose into a floor drain. Check to see that the hose lies flat and is in the drain. If you plan to run your dehumidifier continuously, you may want 5. -
Page 9: Dehumidifier Care
DEHUMIDIFIER CARE Your new dehumidifier is designed to give you many years of dependable service. This section tells you how to clean and care for your dehumidifier. Call your local authorized dealer for an annual cleaning of the dehumidifier. Remember...the cost of this service call is your responsibility. -
Page 10: Troubleshooting
TROUBLESHOOTING Before calling for service, try the suggestions below to see whether you can solve your problem without outside help. Dehumidifier runs but does not dehumidify Dehumidifier will not run ■ All models have an automatic de-icer that will shut off ■... -
Page 11: Assistance Or Service
Designated service technicians are trained to fulfill the product warranty and provide after-warranty service, anywhere in the United States. PRODUCT REGISTRATION For better safeguard your product,please log on http://www.hisense-usa.com/support/productReg.asp to registrate your product. By registration, you will receive: Recall Notifications Quality Assurance... -
Page 12: Seguridad Del Deshumidificador
Hemos incluido muchos mensajes importantes de seguridad en este manual y en el mismo equipo. Por favor lea y obedezca siempre todos los mensajes de seguridad. Este es el símbolo de aviso de seguridad. Este símbolo le advierte de los riesgos potenciales que pueden matar o lastimar a Usted o a otros. Todos los mensajes de seguridad se indican después del símbolo de advertencia con la palabra DANGER o WARNING (PELIGRO o PRECAUCION) -
Page 13: Requerimientos De Instalacion
ADVERTENCIA Método recomendado de conexión a tierra Método recomendado de conexión a tierra Método recomendado de conexión a tierra Este deshumidificador debe estar conectado a tierra. Este deshumidificador tiene un cable de alimentación con un enchufe de tres terminales. El cable debe conectarse con el correspondiente tomacorriente puesto a tierra, conforme a los códigos y ordenamientos locales. -
Page 14: Uso Del Deshumidificador
Ajuste de Controles Panel de Control Panel de Control Panel de Control 1. Conéctelo a una salida a tierra de tres postes. 2. Oprima POWER para encender al deshumidificador. 3. Oprima FAN para seleccionar la velocidad del ventilador 4. Oprima MODE para seleccionar el modo. 5. - Page 15 Humedad Deseada Humedad Deseada Humedad Deseada 1. Oprima MODE para seleccionar la humedad deseada. NOTA: La humedad mostrada es únicamente un ejemplo.. Para una 2. Seleccione Auto Dry, Continuous o Normal. medición de humedad exacta, use un higrómetro. ■ Auto Dry: El deshumidificador funciona solamente en Reloj Reloj Reloj...
-
Page 16: Drenaje Del Deshumidificador
Monitor del Filtro Monitor del Filtro Monitor del Filtro Encendido Encendido Encendido Oprima POWER para arrancar o apagar el deshumidificador 1. Cuando se enciende la luz del Monitor del Filtro, remuévalo, límpielo y colóquelo nuevamente. Ver “Limpiando el Filtro de Aire“. 2. -
Page 17: Sonidos Normales
Opción 2 Conecte la manguera de drenaje Opción 2 Conecte la manguera de drenaje Opción 2 Conecte la manguera de drenaje 4 . Ponga el otro extremo de la manguera de jardín en un drenaje en el piso. Revise que la manguera este extendida y dentro del drenaje. -
Page 18: Mantenimiento Del Deshumidificador
Su nuevo deshumidificador fue construido para proporcionarle un servicio confiable durante muchos años. En ésta sección se indica como limpiar y mantener su deshumidificador. Llame a su distribuidor autorizado l para obtener un servicio de limpieza anual. Recuerde que el costo de la llamada de servicio es bajo su resposabilidad. -
Page 19: Solucion De Problemas
Antes de llamar al servicio, revise estas sugerencias para ver si Usted puede resolver el problema sin ayuda externa. El deshumidificador funciona pero no El deshumidificador funciona pero no El deshumidificador funciona pero no No funciona el deshumidificador No funciona el deshumidificador No funciona el deshumidificador deshumidifica deshumidifica... -
Page 20: Asistencia O Servicio
EE.UU. Para una mejor proteger su producto, por favor visite http://www.hisense-usa.com/support/productReg.asp para registrate tu producto. - Page 21 1557089-01...
Need help?
Do you have a question about the DH-35K1SJE5 and is the answer not in the manual?
Questions and answers