Table of Contents
Advertisement
Quick Links
Advertisement
Table of Contents

Related Manuals for Grundig GDP 1400


Summary of Contents for Grundig GDP 1400
- Page 1 DVD-PLAYER GDP 1400 ENGLISH...
-
Page 2: Table Of Contents
CONTENTS ________________________________________________________________________ DVD Player GDP 1400 Special features of your DVD player Scope of delivery Disc formats Set-up and safety Overview The front of the DVD player The back of the DVD player The remote control 10-13 Connection and preparation... - Page 3 CONTENTS __________________________________________________________________________________ 27-28 Picture CD playback JPEG CD features Features of the KODAK picture CD 27-28 Displaying JPEG pictures Selecting pictures Adjusting the picture display Enlarging the picture (zoom) 29-30 Audio CD playback Audio CD features 29-30 Audio CD playback Repeat functions Creating a program Audio settings...
-
Page 4: Dvd Player Gdp 1400
DVD PLAYER GDP 1400 _____________________________________ Special features of your DVD player Your DVD player provides you with perfect digital video playback of studio quality. It also provides superb cinema-quality audio playback – in stereo or with digital multi-channel sound – depending on the type of DVD and the audio system or stereo television. -
Page 5: Set-Up And Safety
SET-UP AND SAFETY Please note the following information when setting up your DVD player: °C °C This DVD player set is designed to play video and audio signals from compact discs (DVDs and CDs). Any other use is expressly prohibited. ON/OFF If the DVD player is subjected to a sudden change in temperature, for example if it is brought in from the cold to a warm room, do not connect it to the mains... -
Page 6: Overview
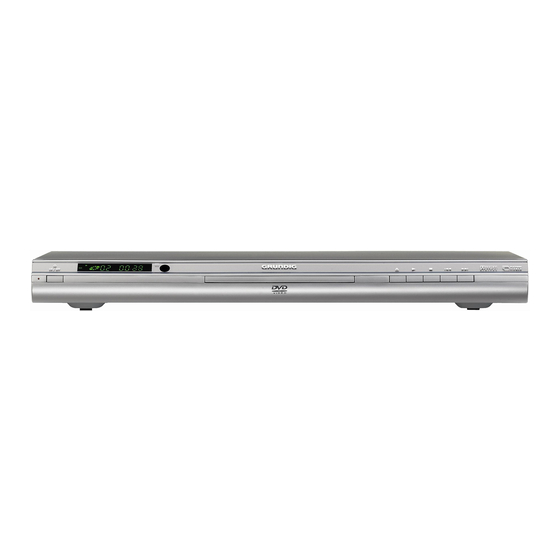
OVERVIEW _______________________________________________________________________ The front of the DVD player ON/OFF Switches the DVD player to stand-by and off again. ON/OFF The device is only completely disconnected from the mains if the plug is pulled out. Display. Compartment for CD media. Opens and closes the disc compartment. Starts playback. -
Page 7: The Back Of The Dvd Player
OVERVIEW __________________________________________________________________________________ The back of the DVD player S VIDEO OUT VIDEO OUT R AUDIO OUT L DIGITAL AUDIO OUT 220-240 V EURO AV 50/60 Hz 15 W Video output socket for connecting a television or AV S VIDEO OUT receiver with an S video socket. -
Page 8: The Remote Control
VOLUME (not used for MP3 CDs). PAUSE/STEP STOP Displays GRUNDIG software information when the disc compartment PLAY is open. Tele Pilot 86 D Calls up the main menu of the DVD player. - Page 9 OVERVIEW __________________________________________________________________________________ Opens up the disc menu of the DVD during playback; MENU switches playback control (PBC) on/off (available for S-VCD/VCD). AUDIO Switches between the original and dubbed language during DVD playback. Selects various audio channels. OPEN STANDBY REPEAT Enlarges scenes during playback (not used for MP3 and audio ZOOM ANGLE CDs).
-
Page 10: Connection And Preparation
CONNECTION AND PREPARATION _______ Connecting a television or flat screen You have three options, depending on the sockets you have on your television or flat screen: – You get the best picture quality by making the connection at the EURO-AV socket using a fully assigned EURO-AV cable. - Page 11 CONNECTION AND PREPARATION _______________________________________ Connection using a Y/C (S-VIDEO) cable and a cinch cable S VIDEO OUT VIDEO OUT R AUDIO OUT L DIGITAL AUDIO OUT 220-240 V EURO AV 50/60 Hz 15 W AUDIO S–VHS INPUT Plug a standard Y/C cable into the »S VIDEO OUT«...
-
Page 12: Connecting A Multi-Channel Amplifier Or Digital Two-Channel Audio System
CONNECTION AND PREPARATION _______________________________________ Connecting a multi-channel amplifier or digital two-channel audio system The digital multi-channel sound of a DVD can best be decoded and played back with a multi-channel audio/video amplifier (Dolby* digital decoder or DTS*). OPTICAL DIGITAL S VIDEO OUT VIDEO OUT R AUDIO OUT L DIGITAL AUDIO OUT... -
Page 13: Connecting An Audio System With Analogue Two-Channel Stereo Sound
CONNECTION AND PREPARATION _______________________________________ Connecting an audio system with analogue two-channel stereo sound As an alternative to using the television's speakers, the sound can also be played back through an audio system. This can improve audio playback. AUDIO INPUT S VIDEO OUT VIDEO OUT R AUDIO OUT L DIGITAL AUDIO OUT... -
Page 14: Getting Started
GETTING STARTED ____________________________________________________ Switching on the DVD player Switch the DVD-Player to stand-by with »ON/OFF « on the device. Switch on the DVD player by pressing » « on the remote control. Note: The DVD player must be in stop mode for the following settings. All settings which are made via the main menu are then only activated if they have been ended beforehand using »SETUP«. - Page 15 GETTING STARTED Selecting the video output socket (EURO AV/RGB or S-Video) The video output of your DVD player has been set at the factory to »RGB«. If you connect your DVD player using a Y/C cable (»S-VIDEO OUT« socket on the DVD player) to the television, you will need to set »S-Video« as the video output for the video signal to be relayed to the television.
-
Page 16: Before Playback
BEFORE PLAYBACK __________________________________________________ Preparation Switch on the television and select the preset channel for the DVD player. If an audio system or an AV receiver is connected to the DVD player, switch it on and select the audio input for the DVD player. Switch the DVD-Player to stand-by with »ON/OFF «... -
Page 17: Dvd Playback
DVD PLAYBACK ___________________________________________________________ DVD features You can recognise a DVD by the logo on the label. Depending on the content of the DVD, the discs contain one or more titles. Each title may contain one or more chapters. Titles and chapters can be selected easily and conveniently. -
Page 18: Selecting Titles Or Chapters
DVD PLAYBACK _________________________________________ DVD playback After the disc compartment closes and the DVD is scanned, playback starts Play automatically. Pause To pause playback (freeze-frame), press »PAUSE «. Press »PLAY « to resume playback. Play End playback with »STOP « (press twice). Stop Selecting titles or chapters ... -
Page 19: Calling Up Information
DVD PLAYBACK _________________________________________ Selecting a chapter directly To select the next chapter, press » « during playback. Next To select the previous chapter, press » « during playback. Back – The DVD player locates the chapter and starts playback. Calling up information You can view information on the screen. -
Page 20: Interrupting/Resuming Playback (Resume)
DVD PLAYBACK _________________________________________ Interrupting/resuming playback (resume) The playback of a DVD can be interrupted at any point and then resumed from the same place. Interrupt playback by pressing »STOP « once. Stop Resume playback at the point where you stopped it with »PLAY «. - Page 21 DVD PLAYBACK _________________________________________ Selecting the camera angle for particular scenes or passages Many DVDs contain scenes or passages which were filmed from several differ- ent camera angles. You can choose from among these different angles. During playback, select the camera angle function by pressing »ANGLE«. –...
-
Page 22: Repeat Functions
DVD PLAYBACK _________________________________________ Selecting and displaying subtitles If the DVD provides subtitles, they can be displayed on your TV screen. When subtitles are available in several languages, you can select your preferred language. During playback, press »SUB TITLE«. – Display: for example, »o 1/21 Eng« is briefly displayed, and the 1/21 Eng current subtitle is displayed. -
Page 23: Vcd/Vcd Features
S-VCD/VCD PLAYBACK _______________________________________ S-VCD/VCD features You can recognise S-VCD/VCDs (video CDs) by the logo on the label. Depending on the contents of the S-VCD/VCD (films, music videos etc.), the discs may carry one or more tracks. Film film Film film Like audio CDs, S-VCDs/VCDs have a track structure. -
Page 24: Playing Back A Track
S-VCD/VCD PLAYBACK _________________________________ Playing back a track After the disc compartment closes and the S-VCD/VCD is scanned, playback Play starts automatically. Pause To pause playback (freeze-frame), press »PAUSE «. Step Press »PAUSE « repeatedly to switch through individual frames. Press »PLAY «... -
Page 25: Mp3 Cd Playback
MP3 CD PLAYBACK _________________________________________________ MP3 CD features MP3 stands for MPEG-1 Audio Layer 3 and arises from the Motion Picture Expert Group (MPEG) Standard which was developed for compressing film data. The MP3 format enables audio files to be saved on a computer with a sound quality similar to that of a CD. -
Page 26: Selecting Files
MP3 CD PLAYBACK ____________________________________ Selecting files ..using the numerical buttons During playback, select the desired file using »1 … 0«. For tracks with two digit numbers, enter the first digit by pressing »10+« as many times as necessary, and then enter the next digit using »1 …... -
Page 27: Picture Cd Playback
PICTURE CD PLAYBACK _______________________________________ JPEG CD features JPEG stands for Joint Picture Experts Group. This process was designed to com- press picture files. JPEG files can be burned onto a CD along with other file types. Such CDs are known as file CDs or mixed mode CDs. For example, the CD could contain MP3 files (audio) and JPEG files (for example to display album covers). -
Page 28: Selecting Pictures
PICTURE CD PLAYBACK _________________________________ Selecting pictures ... using the numerical buttons During playback, select the desired picture using »1 … 0«. For pictures with two digit numbers, enter the first digit by pressing »10+« as many times as necessary, and then enter the next digit using »1 …... -
Page 29: Audio Cd Playback
AUDIO CD PLAYBACK __________________________________________ Audio CD features An audio CD is identified by this logo. Audio CDs contain only sound recordings. They can be played in the normal manner on an audio system. The individual tracks are stored in a sequence. There are no folders. Track 1 Track 2 Track 3... -
Page 30: Repeat Functions
AUDIO CD PLAYBACK ___________________________________ Fast search Four different speeds are available. To select the desired playback speed press » « or » « repeatedly during playback. To return to playback press »PLAY «. Play Ending playback Playback stops automatically at the end of the CD. You can stop playback at Stop any time by pressing »STOP... -
Page 31: Creating A Program
CREATING A PROGRAM ____________________________________ This function enables you to program a playback list for all types of discs. Up to 12 titles, chapters or tracks can be stored. Note: Opening the disc compartment deletes the programme. Creating a program Insert the DVD, audio CD or picture CD in the disc tray. Program Input Stop the DVD player by pressing »STOP... -
Page 32: Audio Settings
AUDIO SETTINGS _______________________________________________________ Selecting the digital output Here you select whether the audio signal is emitted from the »DIGITAL AUDIO OUT« sockets in the original data format or in PCM format. The factory setting is »PCM«. Call up the main menu using »SETUP«. Installation Picture Sound... -
Page 33: Child Lock
CHILD LOCK ____________________________________________________________________ The child lock enables you to block scenes on DVDs which are not suitable for children or to select alternative scenes. This is done by selecting a certain access level. Authorising the contents of a DVD Films on DVD may be wholly or partially unsuitable for children. These DVDs contain information which marks the corresponding content or scenes. -
Page 34: Personal Settings
PERSONAL SETTINGS Setting the language Call up the main menu using »SETUP«. Select the »Installation« menu item with »a « or »s« and activate it with »ENTER«. – The »Installation« menu is displayed. Note: For further operation, see the following sections, each one starting from Step 1. -
Page 35: Resetting The Dvd Player To Its Original Condition
PERSONAL SETTINGS __________________________________ Switching function displays on and off The various displays which inform you about the current operating mode of the DVD player on the screen have been preset to on. You can switch them on and off as required. Installation Picture Sound... -
Page 36: Information
INFORMATION Technical data This product fulfils the European directives 89/336/EEC, 73/23/EEC and 93/68/EEC. This device conforms to the safety regulation DIN EN 60065 and therefore the international safety regulation IEC 60065. You may not open the DVD player. The manufacturer will not accept any liability for damage result- ing from improper handling. -
Page 37: Troubleshooting
INFORMATION __________________________________________ Troubleshooting Not every picture or sound problem is caused by a defect in your DVD player. Impairment can also be caused by leads having been accidentally pulled out, damaged DVDs/CDs and worn-out batteries in the remote control. If the following measures do not do not rectify the problem, consult an authorised dealer. -
Page 38: Software Information
GRUNDIG will refuse to refund any costs resulting in such cases. Any repair costs in such cases, even those occurring within the guarantee period, are to be paid by the customer. - Page 39 Grundig Multimedia B.V. • De Boelelaan 7 • NL-1083 HJ Amsterdam • http://www.grundig.com 30/04 72011 603 7100...
Need help?
Do you have a question about the GDP 1400 and is the answer not in the manual?
Questions and answers