
Related Manuals for Grundig GDP1620HD


Summary of Contents for Grundig GDP1620HD
- Page 1 SLIM HDMI DVD PLAYER GDP1620HD The Gold Technical Support Line: 1902 215 259 (Charges will apply at $2.95 per minute)
-
Page 2: Introduction
INTRODUCTION Thank you for buying this Grundig product, which is designed to give you many years of trouble-free service. You may already be familiar with using a similar unit, but please take time to read these instructions. They are designed to familiarise you with the unit’s many features and to ensure you get the very best from your purchase. -
Page 3: Table Of Contents
TABLE OF CONTENTS 1. INTRODUCTION-------------------------------------------------------------------------------------------1 2. TABLE OF CONTENTS-----------------------------------------------------------------------------------2 3. FEATURES---------------------------------------------------------------------------------------------------3 4. SAFETY PRECAUTIONS------------------------------------------------------------------------------4-5 5. FRONT PANEL AND REAR PANEL -------------------------------------------------------------------6 6. REMOTE CONTROL---------------------------------------------------------------------------------------7 7. CONNECTING YOUR DVD PLAYER --------------------------------------------------------------8-9 8. OPERATION--------------------------------------------------------------------------------------------10-11 9. PLAYING WMA, MP3 AND JPEG DISCS ----------------------------------------------------------12 11. -
Page 4: Features
Your DVD player is suitable for playing: DVDs, SVCDs, CDs, VCDs VCD, DVD±RWs, DVD±RWs, CDs, CD-Rs and CD-RWs with MP3 data and picture data (JPEG and Picture CDs) CD-Rs and CD-RWs with video data Component (YPbPr) and Composite Video Output Coaxial Digital Audio Output Video Output Supported to 1080P HDMI Output... -
Page 5: Safety Precautions
SAFETY PRECAUTIONS WARNING: TO REDUCE THE RISK OF FIRE OR ELECTRIC SHOCK, DO NOT EXPOSE THIS APPLIANCE TO RAIN, MOISTURE OR EXTREME TEMPERATURES. CAUTION: TO REDUCE THE RISK OF ELECTRIC SHOCK, DO NOT REMOVE COVER. REFER SERVICING TO A QUALIFIED SERVICE PROFESSIONAL ONLY. This symbol alerts the user to the presence of uninsulated dangerous voltage within this device, which may be a risk of electric shock. - Page 6 Macrovision: This product incorporates copyright protection technology that is protected by method claims of certain U.S patents and other intellectual property rights owned by Macrovision Corporation and is intended for home and other limited viewing uses only unless otherwise authorized by Macrovision Corporation. Reverse engineering or disassembly is prohibited. Manufactured under license from Dolby Laboratories.
-
Page 7: Front Panel And Rear Panel
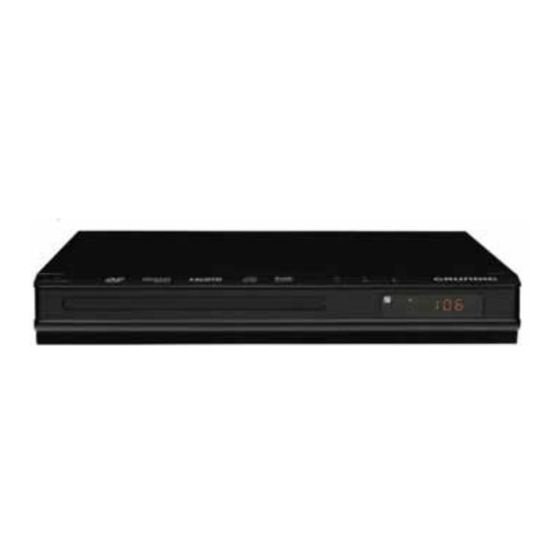
FRONT PANEL AND REAR PANEL Front Panel 1. Standby 4. Stop 2. Eject 5. Disc Tray 3. Play/Pause 6. Sensor 7. LED Display Screen Rear panel 1. Downmix Left 4. Downmix Right 2. Component Video Output 5. HDMI 3. Video 6. -
Page 8: Remote Control
REMOTE CONTROL 1. STANDBY 19. OPEN/CLOSE 2. AUDIO 20. SEARCH 3. SUBTITLE 21. NUMERIC BUTTON 4. CLEAR 22. MENU 5. SETUP 23. TITLE 6. UP BUTTON 24. DISPLAY 7. LEFT BUTTON 25. RIGHT BUTTON 8. DOWN BUTTON 26. ENTER 9. REV 27. -
Page 9: Connecting Your Dvd Player
CONNECTING YOUR DVD PLAYER Before connecting your DVD player, make sure to turn off the power and remember to turn it back on to play install. Basic Connections You should connect your AV cables by colour. Yellow plug ------------ Video Terminal (yellow) White plug------------- Left Audio Terminal (white) Red plug--------------- Right Audio Terminal (red) Connecting your DVD player to your TV... - Page 10 Connecting your DVD player to your Amplifier There are the following ways of connecting your DVD player with an AV amplifier: Connect the left/right Audio Output Connect the Coaxial Digital Audio Output Warning: Do not connect any amplifier with coaxial connector that does not contain Dolby digital AC 3 or DTS decoder.
-
Page 11: Operation
OPERATION Function Buttons on the Remote Control Menu Play Press the MENU button to display the DVD Root Menu. When the menu is displayed, you can press the ARROW buttons to highlight the menu item you want to choose. Press the ENTER button to confirm selection and enter next menu. Playback Control Press the MENU button to display the SVCD or VCD 2.0 menu. - Page 12 Press the PLAY/PAUSE button to resume normal playback. Multispeed Slow Motion Playback Press the SLOW button to enter Slow Motion Playback mode. Slow Motion Playback has six speeds: 1/2, 1/3, 1/4, 1/5, 1/6, 1/7. Press the PLAY/PAUSE button to resume normal playback. Using the Repeat Feature While a disc is playing, Press the REPEAT button to switch repeat modes.
-
Page 13: Playing Wma, Mp3 And Jpeg Discs
Playing WMA, MP3 and JPEG discs Place an MP3 / JPEG disc into the tray and the player will auto search the saved MP3 / JPEG files. After searching, will automatically go to the first file saved and play the first song in the file. The screen will display as the picture on the left shows. -
Page 14: Setup Menu System
Setup Menu System Setup Items Introduction Press the SETUP button, the main setup menu appears. When the main menu is displayed, the DVD system will auto pause. Press the Left and Right ARROW buttons to highlight the icon of the desired page, then press the Down or Right ARROW button to activate that page. - Page 15 5. TV TYPE 16:9 (Wide Screen): Choose this setting if your DVD player is connected to a wide screen TV. If you choose this setting and you don’t have a wide screen TV, the images on the screen may appear distorted due to vertical compression. 4:3 LB (Letter Box): Choose this setting if your DVD player is connected to a normal ratio TV.
- Page 16 9. LANGUAGE SETUP The language setup options are illustrated on the right. Highlight the OSD LANGUAGE option and press the ARROW buttons to choose the OSD language you prefer. Press the ENTER button to confirm and it will display the OSD language.
- Page 17 11. VIDEO SETUP The video setup options are illustrated on the right. BRIGHTNESS Use the UP and DOWN ARROW buttons to move the scroll and adjust the brightness. CONTRAST Use the UP and DOWN ARROW buttons to move the scroll and adjust the contrast. Use the UP and DOWN ARROW buttons to move the scroll and adjust the hue.
-
Page 18: Specifications
Specification Signal system PAL/AUTO/NTSC Frequency Response 20HZ-20KHZ( at 1KHz 0 dB) ≥90 dB( at 1KHz 0 dB) Signal-to-Noisy Ratio ≤-60dB ( at 1KHz0dB) Audio Distortion +Noise Audio Output(Analog audio) Vrms -1..0 Video Output Composite:1.0±0.2Vp-p Load impedance: 75Ω, imbalance, negative polarity MAX Resolution >500 lines Power Supply... -
Page 19: Troubleshooting
Troubleshooting No picture: Ensure that the equipment is connected properly. Connect the video cable securely into the appropriate jacks. Select the appropriate video input mode on the TV. Picture Distorted The disc may be dirty or scratched. You should ensure it is cleaned. Ensure that the picture cables are connected correctly. -
Page 20: Warranty
In the unlikely event that your product fails to work normally, please contact Grundig Warranty on 1800 509 394 (Australia) or 0800 450 259 (New Zealand) and have your receipt of purchase on hand. - Page 21 PO BOX 6287 Silverwater NSW 1811 www.grundig.net.au...
Need help?
Do you have a question about the GDP1620HD and is the answer not in the manual?
Questions and answers