Table of Contents
Advertisement
Advertisement
Table of Contents
Troubleshooting

Related Manuals for GoVideo VR2940


Summary of Contents for GoVideo VR2940
- Page 1 ������ ��� �������� � ��� ������ ����� ���������������...
-
Page 2: Table Of Contents
Macrovision Corporation. Reverse engineering or disassembly is prohibited. GoVideo shall not be liable for any errors contained herein or for any damages arising out of or related to this document or the information contained herein, even if GoVideo has been advised of the possibility of such damages. This document is intended for informational and instructional purposes only. -
Page 3: Important Safeguards
Important Safeguards CAUTION TO PREVENT ELECTRIC SHOCK, MATCH WIDE BLADE OF PLUG TO WIDE SLOT, FULLY INSERT. ATTENTION POUR ÉVITER LES CHOC ÉLECTRIQUES, INTRODUIRE LA LAME LA PLUS LARGE DE LA FICHE DANS LA BORNE CORRESPONDANTE DE LA PRISE ET POUSSER JUSQU’AU FOND. -
Page 4: Important Safety Instructions
• Consult the dealer or an experienced radio/ TV technician for help. FCC COMPLIANCE: The responsible party for this product’s compliance is: GoVideo, 7835 East McClain Drive, Scottsdale, AZ 85260, USA. Important Safety Instructions Read Instructions - All the safety and operating instructions should be read before the product is operated. - Page 5 Important Safety Instructions (cont.) Alternate Warnings - This product is equipped with a three-wire grounding-type plug, a plug having a third (grounding) pin. This plug will only fit into the outlet, contact your electrician to replace your obsolete outlet. Do not defeat the safety purpose of the grounding-type plug.
-
Page 6: Welcome
1 - Welcome Unpacking The following items are included with your DVD Recorder+VCR: RF Coaxial Cable AAA Batteries Blank DVD+RW Disc Audio/Video Cable Remote Control User’s Guide Registration Card Compatible Discs The following disc types are compatible with your DVD Recorder+VCR: Playable Discs •... -
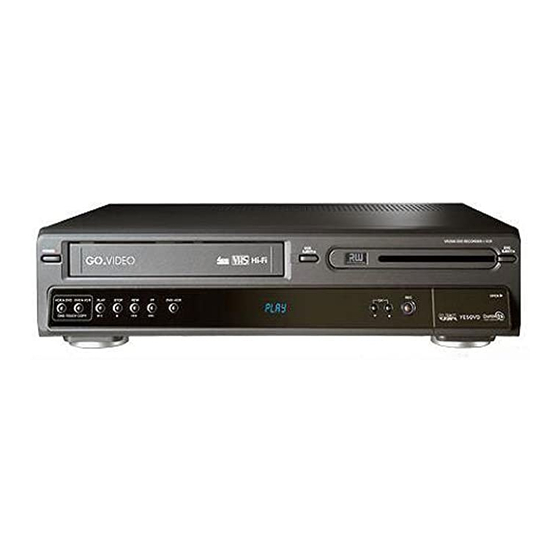
Page 7: Front Panel Overview
1 - Welcome (cont.) Front Panel Overview 7 8 9 10 11 POWER Turns the DVD Recorder+VCR on and off. Press and hold for five seconds to lock/un- lock front panel keys. VCR Deck Insert your videotape here. VCR EJECT Ejects the tape in the VCR deck. -
Page 8: Front Panel Display Overview
1 - Welcome (cont.) Front Panel Display Overview 13 14 When lit, indicates that: A videotape is loaded in the VCR deck. Circle: The VCR is recording. Clock: A VCR Timer Recording is set. A stereo broadcast is being received. A Second Audio Program (SAP) is being received. -
Page 9: Remote Control Overview
1 - Welcome (cont.) Remote Control Overview EJECT POWER TV/VCR TV VIEW TRACKING CLEAR 100+ MENU SETUP CH + ENTER EDIT DISPLAY CH – PREV NEXT PLAY/PAUSE SLOW – STOP SLOW + REC SPEED INPUT P.SCAN SUBTITLE ANGLE ZOOM REPEAT SEARCH AUDIO TITLE... - Page 10 1 - Welcome (cont.) Remote Control Overview (cont.) EJECT POWER TV/VCR TV VIEW TRACKING CLEAR 100+ MENU SETUP CH + ENTER EDIT DISPLAY CH – PREV NEXT PLAY/PAUSE SLOW – STOP SLOW + REC SPEED INPUT P.SCAN SUBTITLE ANGLE ZOOM REPEAT SEARCH AUDIO...
-
Page 11: Rear Panel Overview
1 - Welcome (cont.) Rear Panel Overview AC Power Cord Connects to a power outlet. Audio Output Connects to a TV or stereo receiver with left/right audio inputs. Component / Progressive Scan Video Output Connects to a TV with Progressive Scan or Component Video inputs. -
Page 12: Connections/Setup
2 - Connections/Setup Antenna/Cable Connections Connecting an Antenna/Basic Cable Connect the RF coaxial cable from your antenna or cable wall outlet to the ANT. IN jack as shown. DVD & VCR OUT AUDIO OUT S-VIDEO COAXIAL DIGITAL AUDIO OUT DVD Recorder+VCR Connecting a Cable Box/Satellite Receiver Connect the RF coaxial cable from your cable box/satellite receiver to the ANT. -
Page 13: Basic Tv Connections
2 - Connections/Setup (cont.) Basic TV Connections You can choose one of four ways to connect the DVD Recorder+VCR to your TV (in order of increasing picture quality): 1) RF, 2) Audio/Video, 3) S-Video, 4) Component Video/Progressive Scan. Choose only one of these connection methods. RF Coaxial Connections Connect the supplied RF coaxial cable from the RF OUT jack to the ANT. -
Page 14: Enhanced Video Connections
2 - Connections/Setup (cont.) Cable/Satellite Wall Outlet Enhanced Video Connections S-Video Connections Connect an S-Video cable (not included) from the S-Video Out jack to the S-Video input on your TV as shown. Set your TV to its S-Video input. Satellite Receiver Choose one of the enhanced audio connections on page 15. -
Page 15: Enhanced Audio Connections
DVD Recorder+VCR 2 - Connections/Setup (cont.) ANT. IN LINE IN 2 AUDIO Enhanced Audio Connections VIDEO RF OUT For enhanced audio quality, you can connect the DVD Recorder+VCR to a stereo system or digital Yellow amplifier/receiver. Stereo/Receiver Connections Connect the supplied audio cable (red and white) from the Audio Out jacks to the Audio inputs on your stereo or 2-channel analog receiver as shown. -
Page 16: Optional Equipment Connections
2 - Connections/Setup (cont.) DVD Recorder+VCR Optional Equipment Connections LINE IN 2 COMPONENT AUDIO You can connect optional devices, such as a VCR, camcorder, or video game, to the Line 1 (front panel) or Line 2 (rear panel) audio/video jacks. You can also connect a MiniDV camcorder to the VIDEO front DV IN jack. -
Page 17: Initial Setup
2 - Connections/Setup (cont.) Initial Setup After successfully connecting your DVD Recorder+VCR to your TV and other devices, you are ready to complete the Initial Setup. The Welcome screen is displayed. Press ENTER to continue. to select the desired language ... -
Page 18: Playback
Press DVD EJECT to open the disc tray. Load your disc in the tray with the playback side down (label side up). VR2940 DVD RECORDER + VCR EJECT Press DVD EJECT to close the tray. Playback starts automatically. If playback... -
Page 19: Title Menus
3 - Playback (cont.) Disc Menus Many DVDs have Disc Menus that allow you to access chapters and/or special features. • Press MENU to open a Disc Menu. • Use the 0-9 buttons to directly select the desired options, or use ... -
Page 20: Playing Vhs Tapes
3 - Playback (cont.) Playing VHS Tapes Before you begin: • Press the VCR button to set the remote control to operate the VCR deck. • Turn the TV on and select the video input source connected to the DVD Recorder+VCR. -
Page 21: Playing Audio/Mp3 Cds
3 - Playback (cont.) Playing Audio/MP3 CDs You can play audio CDs and MP3 files on CD- R/RW. Insert your CD and close the disc tray. The disc loads and the Audio CD or MP3 CD menu appears. to select a track or a file, then ... -
Page 22: Recording
4 - Recording About YesDVD™ YesDVD allows you to transfer your videotapes or other video content to a DVD+R/RW with the professional quality features found in Hollywood movies. Whenever you record or copy to DVD, you can enable YesDVD to automatically: •... -
Page 23: Basic Recording
4 - Recording (cont.) Basic Recording Recording from TV Follow the instructions below to record a TV program. Turn on the DVD Recorder+VCR and load a recordable disc or tape. • Make sure your TV input is set to view the DVD Recorder+VCR. -
Page 24: One Touch Copy
4 - Recording (cont.) One Touch Copy Copying from DVD to VHS You can copy the contents of a DVD to a VHS tape using the front panel DVD Insert the disc you wish to copy in the DVD deck and close the disc tray. Insert a blank VHS videotape into the VCR deck. -
Page 25: Timer Recording
4 - Recording (cont.) Timer Recording Setting a Timer Recording You can set up to 8 programs to record within any one-month period. Insert recordable media such as a DVD+R/ RW disc or a blank VHS tape. Press TIMER. • The Timer Recording menu appears. Timer Recording ��... -
Page 26: Timer Recording Troubleshooting
4 - Recording (cont.) Timer Recording Troubleshooting Even if a Timer Recording is set, the DVD Recorder+VCR will not record if: • No disc is loaded. • A non-recordable disc is loaded. • The disc is locked; see page 27. •... -
Page 27: Editing
5 - Editing Disc Menu Options Once you’ve made some recordings, you can use the Disc Menu to make your DVD+R or DVD+RW disc compatible with other players. You can also access these special disc level features: • DVD+R - Allows you to rename your disc or finalize it so it will be compatible with most other DVD players. -
Page 28: Title Menu Options
5 - Editing (cont.) Title Menu Options The Title Menu provides options to play, erase, name, and overwrite your recorded titles (erase and overwrite features are for DVD+RW discs only). Playing a Title To play a title: Press MENU to dis- play the Disc Menu. -
Page 29: Dvd Edit Menu Options
5 - Editing (cont.) DVD Edit Menu Options The DVD Edit Menu provides options to add, delete, hide and unhide chapters on your recorded discs. You can also change the thumbnail image that represents the title in the Disc Menu. You can even split a title on a DVD-RW disc. -
Page 30: Auto Channel Search
6 - Advanced Settings Setup Menu Overview The Setup menu allows you to customize your DVD Recorder+VCR. Choose from six categories: • Installation • Recording Options • Languages • Preferences • System Info • Restore Defaults About Menu Navigation • Press SETUP to display and exit the Setup menu. -
Page 31: Add/Remove Channels
6 - Advanced Settings (cont.) Add/Remove Channels Allows you to manually add or remove channels. Press SETUP. to select “Installation.” to select “Add/Remove Channels,” then press ENTER. to select the desired channel. Press ENTER to switch the channel’s status - Adds the selected channel. -
Page 32: Menu Language
6 - Advanced Settings (cont.) Auto Chapter Enables automatic chapter marking at regular intervals during DVD recording. Also provides an opportunity to enable the YesDVD feature. Press SETUP. to select “Recording Options.” to select “Auto Chapter,” then ... -
Page 33: Audio Language
6 - Advanced Settings (cont.) Subtitle Language Sets your preferred language for DVD subtitles (if available). Press SETUP. to select “Languages.” to select “Subtitle Language,” then press ENTER. to select your preferred subtitle language, then press ENTER. •... -
Page 34: Digital Output
6 - Advanced Settings (cont.) Scan Mode Enables or disables Progressive Scan. • Do NOT enable Progressive Scan unless you have connected the DVD Recorder+VCR to a TV equipped with Progressive Scan inputs. • If you do accidentally select Progressive Scan and your screen goes black, press and hold the P.SCAN button on the remote control for 3 seconds to resume normal... -
Page 35: Vcr Reception
6 - Advanced Settings (cont.) VCR Reception Sets your desired audio signal when recording a TV show to the VCR deck. Press SETUP. to select “Preferences.” to select “Audio,” then press ENTER. to select “VCR Reception,” then ... -
Page 36: Auto Clock
6 - Advanced Settings (cont.) AutoPlay Enables you to skip the ads and trailers and play your DVDs automatically when they are inserted in the tray. Press SETUP. to select “Preferences.” to select “AutoPlay,” then press ENTER. -
Page 37: System Information
6 - Advanced Settings (cont.) System Information The Systems Info menu allows you to view the version number of your DVD Recorder+VCR in case service is required. System Info ������� �� ��� ��� ���� ����� ��������� ����� �������� ����� ��� ���������� �����... -
Page 38: Help
7 - Help Troubleshooting SYMPTOM CAUSE No power. • Power cord disconnected. No picture. • TV not set to receive DVD Recorder+VCR signal output. • Video cable not connected securely. • TV power turned off. No sound. • Equipment connected with audio cable not set to receive DVD Recorder+VCR signal output. - Page 39 7 - Help (cont.) Troubleshooting (cont.) SYMPTOM CAUSE Can’t play disc • Disc was not finalized (or not made recorded compatible if using a DVD+RW). on this DVD • Some players will not play even a Recorder+VCR on finalized disc. another DVD player.
-
Page 40: Technical Specifications
7 - Help (cont.) Technical Specifications General Power requirements Power consumption Dimensions (approx.) Mass (approx.) Operating temperature Operating humidity Signal system Recording Recording formats Recordable discs Recordable time Video sampling frequency Video compression format Audio sampling frequency Audio compression format VCR Specifications Head system Timer... -
Page 41: Disc Handling & Maintenance
7 - Help (cont.) Disc Handling & Maintenance Handling Precautions • Hold the disc by the edges so the surface will not be soiled with fingerprints. • Fingerprints, dirt and scratches can cause skipping and distortion. • Do not write on the label side with a ball-point pen or other writing utensil. -
Page 42: Yesdvd Terms & Conditions
7 - Help (cont.) YesDVD™ Terms & Conditions IMPORTANT NOTICE • READ BEFORE OPERATING THE UNIT AND USE OF THE TECHNOLOGY • PLEASE CAREFULLY READ THE TERMS AND CONDITIONS OF THIS LICENSE AGREEMENT BEFORE OPERATING THE UNIT AND USING THE TECHNOLOGY. •... - Page 43 7 - Help (cont.) unmodified Software will substantially conform to the Documentation and be free of physical defects, when properly used on the appropriate equipment. YesVideo does not warrant that the Software will meet Customer’s requirements or that operation of the Software will be uninterrupted or error-free.
-
Page 44: Govideo Limited Warranty
This warranty covers internal operating parts and service/labor to repair or replace covered parts in this GoVideo product for 90 days labor, 1 year parts, from the date of purchase, defined as follows: (1) Original Consumer Retail Purchase; (2) First Rental Purchase Agreement; or (3) First Lease Purchase Agreement (the “Warranty Period”). -
Page 45: Index
Index Add/Remove Channels 31 Adding/Deleting Chapters 29 Audio CD Playback 21 Audio Language 33 Audio Settings 34 AutoPlay 36 Auto Channel Search 30 Auto Chapter 32 Auto Clock 36 Clock, Set 31 Compatible Discs 6 Connections Antenna/Cable 12 Audio/Video 13 Cable Box/Satellite Receiver 12 Component Video 14 Digital Camcorder 16... - Page 46 Index (cont.) OSD Language 32 Overwriting 28 Parental Controls 35 Parental Level 35 Password 35 Picture CD Playback 21 Preferences 33 Rear Panel 11 Recording Basic 23 External Input 26 One Touch 23 Timer Recording 25 Recording Settings 31 Record Quality DVD 31 VCR 31 Remote Control 9...
Need help?
Do you have a question about the VR2940 and is the answer not in the manual?
Questions and answers