Table of Contents
Advertisement
Advertisement
Table of Contents

Related Manuals for GoVideo DVR4000


Summary of Contents for GoVideo DVR4000
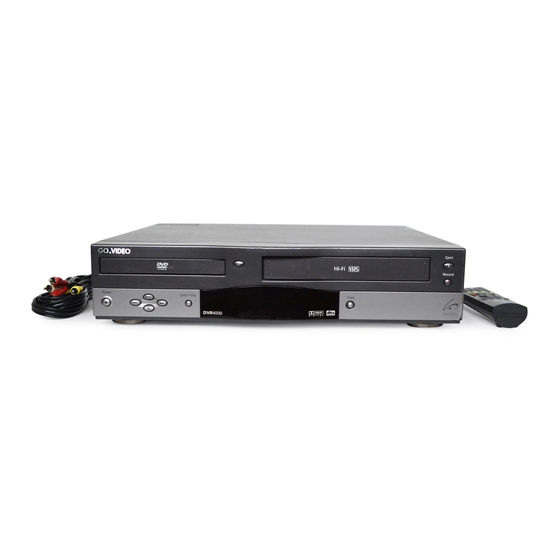
- Page 1 D V D + V C R C O M B O DV R 4 0 0 0 U S E R ’ S G U I D E...
- Page 2 C o n g r a t u l a t i o n s ..on your purchase of this Go-Video DVD+VCR! We know you will enjoy this product for many years to come. In case warranty service is required, please take a moment to attach your receipt to this manual and write down your Serial Number (located on the back panel of the DVD+VCR): __________________________________ .
-
Page 3: Table Of Contents
Important Safety Instructions ... iii 1 - GETTING STARTED 1 Unpacking ... 1 Basic Connections ... 2 Auto Setup ... 3 Feature Summary ... 4 2 - QUICK TOUR 5 Remote Control ... 5 Front Panel ... 8 Flap Door ... 9 Front Panel Display ... - Page 4 APPENDIX B - SYSTEM SETTINGS 37 APPENDIX C - ADVANCED DVD SETUP 45 APPENDIX D - HELP 51 INDEX 55 DVD+VCR User’s Guide Dolby/DTS Decoder Setting ... 33 Other A/V Hookup ... 34 Cable Box Hookup ... 35 Alternative Cable Box Hookup ... 36 Language Settings ...
-
Page 5: Important Safety Instructions
IMPORTANT SAFETY INSTRUCTIONS R E A D I N S T R U C T I O N S All the safety and operating instructions should be read before the unit is operated. R E T A I N I N S T R U C T I O N S The safety and operating instructions should be retained for future reference. - Page 6 Electrical Code, ANSI/NFPA No. 70-1984, provides information with respect to proper grounding of the mast and supporting struc- ture, grounding of the lead-in wire to an an- tenna discharge unit, size of grounding con- ductors, location of antenna-discharge unit, connection to grounding electrodes, and re- quirements for the grounding electrode.
-
Page 7: Getting Started
G E T T I N G This Chapter will guide you through initial setup of your DVD+VCR, Before you begin, please check that all items are included in your DVD+VCR box, then insert the enclosed batteries in the remote control. S T A R T E D including basic connections and Auto Setup. - Page 8 Follow these steps to connect the DVD+VCR to your television and antenna/cable TV. From Antenna or Cable TV To Television C O N N E C T A N T E N N A / C A B L E T V Connect the RF antenna cable from your indoor/outdoor antenna or cable wall outlet to the IN (FROM ANT.) jack...
- Page 9 Follow these steps to run Auto Setup, which will set the clock and save local channels automatically. N O T E S • If no channels were found in your area, the DVD+VCR will alert you and then display the “Channel Setup” menu;...
- Page 10 • Hi-Fi Stereo VCR • 4 heads for superior slow motion and stop action • VISS Index Search/Scan, Zero Return, Direct Time Search, Blank Search • 16-event/1 year timer recording • Time remaining counter, real time counter DVD+VCR User’s Guide DVR4000 ®...
- Page 11 This Chapter provides an overview of the DVD+VCR remote control, The following is an overview of the DVD+VCR remote control. The keys are described in four sections: System/Deck Select Keys, TV Control Keys, DVD Control Keys, and VCR Control Keys. POWER OPEN/CLOSE TRK—...
- Page 12 POWER TRK— AUTO ZOOM SHUTTLE MODE REPEAT SKIP 3D SOUND F.ADV 100+ TV VIEW MUTE SETUP /ENTER TITLE SUBTITLE AUDIO SP/SLP SET TIMER RETURN SEARCH/INDEX The DVD Control keys are active when the DVD deck is selected (by pressing the DVD key on the remote control or the DVD+VCR key on the front panel).
-
Page 13: Front Panel
POWER OPEN/CLOSE TRK— AUTO TRK+ ZOOM DISPLAY SHUTTLE CLOCK/ COUNTER MODE REPEAT SKIP CLEAR 3D SOUND TV/VCR F.ADV 100+ TV VIEW MUTE ANGLE DISC MENU SETUP /ENTER TITLE SUBTITLE AUDIO MARK SP/SLP SET TIMER RETURN SEARCH/INDEX The VCR Control keys are active when the VCR deck is selected (by pressing the VCR key on the remote control or... - Page 14 The following is an overview of the DVD+VCR front panel. 7 8 9 10 11 D V D D E C K Deck used for DVD/CD playback and other DVD functions. D V D O P E N / C L O S E Press to open and close the DVD deck.
-
Page 15: Flap Door
The following is an overview of the keys and inputs located behind the front panel flap door. C O P Y Press to copy a DVD in the DVD deck to a VHS tape in the VCR deck. Note: The DVD+VCR will not copy Macrovision encoded DVDs. -
Page 16: Front Panel Display
The following is an overview of the DVD+VCR front panel display. 3 4 5 D V D D E C K I N D I C A T O R The DVD deck is active. D I S C T Y P E I N D I C A T O R A DVD, CD, VCD or SVCD is loaded. -
Page 17: Rear Panel
The following is an overview of the DVD+VCR rear panel. R F A N T E N N A I N P U T Connect to your antenna, cable TV, or cable box with an RF coaxial cable. R F O U T T O T V Connect to your television with an RF coaxial cable. -
Page 18: Skip Forward
B A S I C This Chapter shows you how to play DVDs and videotapes with your DVD+VCR. You will also learn how to navigate in the DVD+VCR menu system. Follow these steps to play a DVD. POWER TRK— AUTO ZOOM SHUTTLE MODE... -
Page 19: Basic Operations
Follow these steps to play a VHS tape. POWER OPEN/CLOSE TRK— AUTO TRK+ ZOOM DISPLAY SHUTTLE CLOCK/ MODE COUNTER REPEAT SKIP CLEAR 3D SOUND TV/VCR F.ADV 100+ TV VIEW MUTE ANGLE DISC MENU SETUP /ENTER TITLE SUBTITLE AUDIO MARK SP/SLP SET TIMER RETURN SEARCH/INDEX N O T E... - Page 20 The following keys are used to open and navigate through the DVD+VCR on-screen menu system. POWER TRK— AUTO ZOOM SHUTTLE MODE REPEAT SKIP 3D SOUND TV/VCR F.ADV 100+ TV VIEW MUTE SETUP /ENTER TITLE SUBTITLE AUDIO SP/SLP SET TIMER RETURN SEARCH/INDEX DVD+VCR User’s Guide S E T U P / E N T E R K E Y SETUP...
-
Page 21: Special Dvd Features
S P E C I A L D V D F E A T U R E S This Chapter explains some of the special features of DVD/CD/VCD playback. The DISPLAY key is a shortcut to view and select the desired title, chapter/track or time (counter position) DISPLAY press... -
Page 22: Angle/Zoom
Follow these instructions to view a DVD movie from multiple angles, or to zoom in during playback. press ANGLE ZOOM press N O T E • The Angle and Zoom features are not available during VCD playback. DVD+VCR User’s Guide A N G L E Some DVDs allow you to view the same scene from different perspectives, or angles,... - Page 23 Follow these steps to select among all available subtitle languages and audio tracks on your DVD, or to activate 3D Sound. SUBTITLE SET TIMER AUDIO press RETURN 3D SOUND 100+ press S U B T I T L E S Many DVDs provide subtitles in one or more languages.
- Page 24 Follow these steps to repeat a chapter, title, or segment (A-B) or a DVD disc. MODE press REPEAT MODE press REPEAT N O T E • The minimum AB Repeat time is 5 seconds. DVD+VCR User’s Guide R E P E AT C H A P T E R / T I T L E You can repeat a single chapter over and over, or you can repeat a complete title.
-
Page 25: Bookmarks
You can insert up to three Bookmarks on your DVDs, so you can jump quickly to your favorite scene or song. MARK press SEARCH/INDEX S E T B O O K M A R K S 1 While a DVD is playing, press MARK. The “Mark”... - Page 26 Follow these steps to program playback of a DVD or CD in a random or preset order. MODE press REPEAT Select Programmed Play DVD+VCR User’s Guide R A N D O M P L AY B A C K with TV View set to DVD Random Playback sets a random order for playback of chapters/tracks on a DVD or...
- Page 27 V C R This Chapter will show you how to record television programs in the VCR deck Follow these steps to record a television show in the VCR deck. POWER OPEN/CLOSE TRK— AUTO TRK+ ZOOM DISPLAY SHUTTLE CLOCK/ MODE COUNTER REPEAT SKIP CLEAR...
-
Page 28: Record Settings
Follow these steps to set the default VCR record settings for your DVD+VCR. SETUP press /ENTER SETUP MENU Set Timer Recording Child Lock Set Clock DVD Setup VCR & Channel Setup Language/Langue/Idioma To Move RETURN to Quit Select VCR & Channel Setup VCR &... - Page 29 The DVD+VCR allows you to copy the contents of a DVD to a VHS tape with a press of the COPY button. I N S E R T D I S C Insert the disc you wish to copy in the DVD deck and close the drawer. I N S E R T V H S T A P E Insert a VHS tape with a record safety tab into the VCR deck.
-
Page 30: Timer Recording
T I M E R Follow these steps to program your DVD+VCR to record up to 16 television shows. SETUP press /ENTER SETUP MENU Set Timer Recording Child Lock Set Clock DVD Setup VCR & Channel Setup Language/Langue/Idioma To Move RETURN to Quit Select Set Timer Recording SELECT EVENT [1-16] :01... - Page 31 ...continued SET LENGTH (H) [0-9] :00 2001 10:30PM 1H00M Su Mo Tu We 1-Time Ch10 Auto to set hours press and minutes SET TYPE [1-4] : 1 2001 10:30PM 1H00M Su Mo Tu We 1-Time Ch10 Auto press to set type SET SOURCE [1-4] : 1 2001 10:30PM...
-
Page 32: Timer Recording Errors
...continued AUDIO press RETURN SELECT EVENT [1-16] :01 1 10:30 PM Ch10 - - : - - - - Ch - - - - : - - - - Ch - - - - : - - - - Ch - - To Move T I M E R R E C O R D I N G E R R O R S Ta p e M i s s i n g... -
Page 33: Search/Index
This Chapter will show you how to locate recordings on your VHS tapes using Follow these steps to place Index Marks on your recordings. POWER OPEN/CLOSE TRK— AUTO TRK+ ZOOM SHUTTLE MODE REPEAT SKIP 3D SOUND TV/VCR F.ADV 100+ TV VIEW MUTE DISC MENU SETUP... -
Page 34: Index Search/Scan
Follow these steps to locate recordings by scanning or searching for Index Marks. press SEARCH MENU Index Search/Scan Blank Search Direct Time Search Return to 0:00:00 To Move RETURN to Quit Select Index Search/Scan S c a n : P r e s s F F o r R E W S e a r c h : 1 - 9 9 T h e n F F / R E W R E T U R N t o Q u i t TO SCAN... - Page 35 Follow these steps to find the nearest blank segment of tape, find a specific tape counter position, or return to 0:00:00. MARK press SEARCH/INDEX SEARCH MENU Index Search/Scan Blank Search Direct Time Search Return to 0:00:00 To Move To Select RETURN to Quit Select Blank Search, Direct Time Search, &...
-
Page 36: Appendix A - Advanced Connections
A P P E N D I X A D V A N C E D C O N N E C T I O N S This Chapter will show you how to use the S-Video and Component outputs, as well as how to connect additional audio/video devices to your DVD+VCR. - Page 37 If you have connected the DVD+VCR to your TV using the S-Video or Component Video Out jacks, you MUST set the “Alt Video Out” selection in the On-Screen menu system. SETUP press /ENTER Select DVD Setup N O T E •...
-
Page 38: Stereo Connection
Follow these steps to connect your DVD+VCR to an A/V receiver or stereo system using the Line Out or Digital Audio Out jacks. Connect to Stereo Line Inputs, OR STEREO CONNECTION C O N N E C T D V D + V C R T O S T E R E O Connect RCA cables from the ”Line Out”... - Page 39 If you connected the DVD+VCR to your A/V receiver with the Digital Audio Out AND your A/V receiver is equipped with a Dolby Digital or DTS Decoder, you must enable the correct digital output in the menu system. SETUP press /ENTER Select DVD Setup Select Language/Audio Setup...
- Page 40 Follow these steps to connect your DVD+VCR to an external audio/video component, such as a camcorder, video game, etc. From Audio/Video External Device C O N N E C T D E V I C E T O V C R Connect RCA cables from the audio/video outputs of your external device to the audio/video inputs on the front (Line 1) or rear (Line 2) of the DVD+VCR.
- Page 41 Follow these instructions to connect a Cable Box to your DVD+VCR. Cable Box From Cable Wall Outlet Input Output C O N N E C T C A B L E T O C A B L E B O X Connect an RF antenna cable from your cable wall outlet to the “In from Cable”...
- Page 42 Follow these steps if you have a cable box and want to be able to watch a second channel while recording a TV program. From Cable Wall Outlet To Cable Box Input C O N N E C T C A B L E T O T V Connect a coaxial cable from the wall outlet to the “IN (From Ant)”...
-
Page 43: Appendix B - System Settings
A P P E N D I X S Y S T E M This Chapter will show you how to customize your DVD+VCR experience, with settings that affect language, clock, channels, displays and more. Follow these steps to set the On-Screen menu language to English, French or Spanish. - Page 44 Follow these steps to turn Auto Clock Set on or off. You can also specify the time zone and the channel that Auto Clock Set uses to determine your local time. SETUP press /ENTER SETUP MENU Set Timer Recording Child Lock Set Clock DVD Setup VCR &...
- Page 45 If Auto Clock Set is not available in your area, follow these steps to set the clock manually. If Auto Clock Set is available but has set the time incorrectly, try adjusting Daylight Savings Time (page 40) and Time Zone (page 38) before setting the clock manually. SETUP press /ENTER...
-
Page 46: Daylight Savings Time
Follow these steps to set Daylight Savings Time manually. You should only set “Daylight Savings” if Auto Clock Set has set the time incorrectly. SETUP press /ENTER Select Set Clock SET CLOCK Auto Clock Set Daylight Savings Time Zone Clock Set Channel To Move RETURN to Go Back N O T E S... -
Page 47: Channel Settings
Follow these steps to set all Channel Settings for your DVD+VCR, including Tuner Band, Auto Channel Search, Add/Remove Channel and Show Weak Channels. SETUP press /ENTER Select VCR & Channel Setup VCR & CHANNEL SETUP Channel Setup Date/Time Stamp Timer Auto Play/Rewind Both Record Source... - Page 48 Follow these steps to prevent children from tampering with the DVD+VCR. Child Lock disables all front panel keys so the DVD+VCR can only be operated with the remote control. SETUP press /ENTER N O T E S • You must use the remote control to disable Child Lock and resume normal front panel operation. •...
- Page 49 Follow these steps to turn on Auto Play which will play tapes auto- matically when inserted and Auto Rewind which rewinds tapes automatically when they are done playing. SETUP press /ENTER Select VCR & Channel Setup VCR & CHANNEL SETUP Channel Setup Date/Time Stamp Timer...
- Page 50 Follow these steps to set the dimmer on the Front Panel Display. SETUP press /ENTER Select VCR & Channel Setup DVD+VCR User’s Guide O P E N “ S E T U P M E N U ” Press SETUP/ENTER. S E L E C T “...
-
Page 51: Appendix C - Advanced Dvd Setup
A P P E N D I X A D V A N C E D D V D S E T U P This Chapter explains advanced DVD setup options, including Aspect Ratio, Language Preferences, Dynamic Compression, Rating Control, Still Mode and Black Level. Follow these steps to set the TV Aspect Ratio so the DVD player will display movies at the appropriate size for your television. -
Page 52: Select Audio
Follow these steps to choose the default language for DVD audio soundtracks, subtitles and disc menus. SETUP press /ENTER Select DVD Setup Select Language/Audio Setup Select Audio, N O T E S • If you select “Original” on the “Audio Language” menu, the disc’s default language will be selected. •... - Page 53 Dynamic Compression constrains the dynamic range of a DVD soundtrack; i.e., the difference between the quietest and loudest passages. SETUP press /ENTER Select DVD Setup Select Language/Audio Setup O P E N “ S E T U P M E N U ” Press SETUP/ENTER.
-
Page 54: Rating Control Settings
Follow these directions to set up a rating control system for your DVD movies. SETUP press /ENTER Set Timer Recording Child Lock Set Clock DVD Setup VCR & Channel Setup Language/Langue/Idioma To Move Select DVD Setup TV Aspect Ratio Language/Audio Setup Rating Control Still Mode Black Level... -
Page 55: Changing Password
Follow these instructions to change the rating control password. CHANGE PASSWORD Enter New Password - - - - Use 0-9 Keys RETURN to Go Back CHANGE PASSWORD Re-Enter Password - - - - Use 0-9 Keys RETURN to Go Back CHANGE PASSWORD P A S S W O R D H A S B E E N C H A N G E D... -
Page 56: Still Mode/Black Level
Follow these steps to set Still Mode (the method used to freeze a single image) and Black Level (the reference level for black in the video signal). SETUP press /ENTER Select "DVD Setup" Select "Still Mode" "Black Level" DVD+VCR User’s Guide O P E N “... -
Page 57: Appendix D - Help
No picture. H E L P 1-800-SENSORY Monday-Friday, 7:30 a.m. to 9:00 p.m. MST “dvdhelp@sensoryscience.com” “www.govideo.com” or “www.sensoryscience.com” SOLUTION(S) • Stop the DVD player. You cannot access the Setup menu while a disc is playing. • Connect the DVD+VCR to a Dolby Digital-ready amplifier. - Page 58 Poor picture quality on VCR. Remote not working. On-screen display shows “Error.” VCR doesn’t work. Cannot record from cable box. Cannot Timer Record. Tape ejects during copy or record. VCR automatically plays and rewinds. Tape counters not moving on VCR deck. No menu or On-Screen Displays.
- Page 59 The following are the technical specifications for your DVD+VCR. INPUTS AUDIO VIDEO OUTPUTS AUDIO VIDEO VCR SPECIFICATIONS VIDEO SYSTEM AUDIO TRACK PLAY/RECORD TIME FF/REW TIME HEADS Video: Audio: Control: Erase: WOW & FLUTTER FREQ. RESPONSE DVD SPECIFICATIONS DISC COMPATIBILITY FREQ. RESPONSE S/N RATIO DYNAMIC RANGE SYSTEM SPECIFICATIONS...
- Page 60 W h o P r o v i d e s t h e L i m i t e d W a r r a n t y During the warranty period, the Go-Video Warranty Administra- tor will honor DVD+VCR service for 90 days labor, 1 year parts from the original date of consumer purchase.
-
Page 61: Index
Symbols 0-9 keys 5, 6 1-Time recording 25 100+ key 5 16:9 Widescreen 45 3D Sound 6, 10, 17 4:3 Letterbox 45 4:3 Pan and Scan 45 A-B Repeat 18 A/V Receiver 32 Add/Remove Channel Alt Video Out 30, 31 Always recording 25 AM/PM 10, 39 Angle 6, 10, 16... - Page 62 Macrovision 4 Manual Clock Set 39 Mark key 6, 19 Menu Navigation 14 Minute 39 Mode/Repeat key 6, 7, 18, 20 Monday-Friday record- ing 25 Mono 7 Month 39 Mute key 5 One-Touch Recording Open/Close key 6, 7, 8, 12 Optical 11 OTR 21 OTR Loop Record 21...
- Page 64 We take pride in our ability to deliver unparalleled customer support, and are honored to have received the prestigious Inside Track award for Supplier Loyalty two years running. Should you have any questions, feel free www.govideo.com E-MAIL dvdhelp@sensoryscience.com PHONE...
Need help?
Do you have a question about the DVR4000 and is the answer not in the manual?
Questions and answers