
Related Manuals for Blaupunkt WOODSTOCK DAB52


Summary of Contents for Blaupunkt WOODSTOCK DAB52
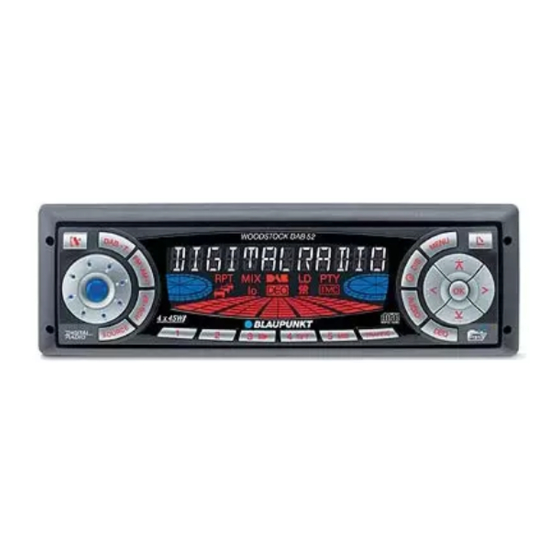
- Page 1 DAB-Radio / CD / MP3 / MMC Woodstock DAB52 Operating instructions http://www.blaupunkt.com...
- Page 2 Bitte aufklappen Open here Ouvrir s.v.p. Aprite la pagina Hier openslaan a.u.b. Öppna Por favor, abrir Favor abrir Åbn her...
- Page 4 CONTROLS Button, to unlock the remova- button, to open the flip-re- ble control panel (release panel) lease control panel Volume control Arrow buttons Button, to switch the unit on/off OK button, to confirm menu en- and operate the volume mute tries and start the scan function feature <...
-
Page 5: Table Of Contents
CONTENTS Storing stations ......57 Notes and accessories ..46 Storing stations automatically Road and traffic safety ....46 (Travelstore) ........58 Installation ........46 Listening to stored stations .... 58 Accessories ........46 Scanning receivable stations Removable control panel ..48 (SCAN) ......... - Page 6 CONTENTS MP3 mode ......66 Clock - Time ......74 Preparing the MP3 CD ....66 Briefly displaying the time ....74 Switching to MP3 mode ....67 Setting the clock ......74 Selecting 12/24-hour clock mode .. 74 Selecting a directory ...... 67 Selecting tracks ......
-
Page 7: Notes And Accessories
Eu- connection instructions that follow these ropean Union. You can view the guar- operating instructions. antee conditions at Accessories www.blaupunkt.de or ask for them di- rectly at: Only use accessories approved by Blau- punkt. Blaupunkt GmbH Remote control... - Page 8 NOTES AND ACCESSORIES CD changer You can connect the following Blaupunkt CD changers: CDC A 06, CDC A 08, CDC A 072 and IDC A 09. You can also connect the CDC A 05 and CDC A 071 CD changers by using an adapter cable (Blaupunkt no.:...
-
Page 9: Removable Control Panel
REMOVABLE CONTROL PANEL button 1. Removable control panel Press the The control panel locking mechanism Theft protection opens. As a way of protecting your car radio First, pull the control panel straight against theft, the unit is equipped with off the unit and then out towards a removable control panel (flip-release the left. -
Page 10: Switching On/Off
SWITCHING ON/OFF ADJUSTING THE VOLUME Switching on/off Adjusting the volume There are various ways of switching the The volume can be adjusted in steps unit on/off: from 0 (off) to 50 (maximum). To increase the volume, turn the Switching on/off using the vehicle volume control 2 to the right. -
Page 11: Telephone Audio / Navigation Audio
You can find out from your Blaupunkt dealer which navigation systems can be used with your car radio. If a traffic information message is re-... -
Page 12: Dab Mode
DAB MODE DAB mode Switching NEWS on/off Press the MENU button 8. You can enjoy radio in digital audio qual- ity thanks to DAB (Digital Audio Broad- Keep pressing the button cast). : until “DAB_NEWS_OFF” or “DAB_NEWS_ON” appears in the Switching to DAB mode display. -
Page 13: Selecting The Memory Bank
DAB MODE Note: Selecting the memory bank You can interrupt a news or weather With this device, you can store DAB sta- report whilst it is being played by press- tions in four memory banks (D1, D2, D3 ing the TRAFFIC button >. The gen- and DT). -
Page 14: Selecting Stations
DAB MODE Tuning into stations manually The station storing procedure begins. “TRAVEL STORE” appears in the dis- You can also tune into ensembles man- play. After the process is completed, the ually. station that is stored in location 1 in the button : during Press the “DT”... -
Page 15: Setting The Dab Waveband
DAB MODE Setting the DAB waveband Switching between DAB and FM With the Woodstock DAB52 you can You can select various settings for receive DAB stations and ensembles on switching between the DAB and FM the following wavebands: “Band III”... -
Page 16: Dab Service Following
DAB MODE DAB service following The name of the sub-programme is dis- played. To switch between the sub-pro- If the reception quality of the station grammes, being received decreases, the Wood- button :. briefly press the stock DAB52 can automatically tune to the station in another ensemble (if avail- If you want to leave the sub-programme able). -
Page 17: Radio Mode
RADIO MODE Radio mode Switching REG on/off Press the MENU button 8. This unit is equipped with an RDS radio receiver. Many of the receivable FM sta- Keep pressing the button tions transmit a signal that not only car- : until “REG” appears in the dis- ries the programme but also additional play. -
Page 18: Tuning Into A Station
RADIO MODE Tuning into a station Setting the sensitivity of station seek tuning There are various ways of tuning into a station. You can choose whether to only tune into stations with a strong reception or Automatic seek tuning to also tune into those with a weak re- button :. -
Page 19: Storing Stations Automatically (Travelstore)
RADIO MODE Storing stations automatically Stopping SCAN and continuing listening to a station (Travelstore) Press the OK button ;. You can automatically store the five sta- tions with the strongest reception in the Scanning is stopped and the station that region (only FM). - Page 20 RADIO MODE PTY-EON Selecting a programme type and starting seek tuning If you specify the programme type and button :. start seek tuning, the unit will switch from Press the the current station to a station of the The current programme type appears selected programme type.
-
Page 21: Optimising Radio Reception
RADIO MODE Keep the RDS button ? pressed Optimising radio reception until “NAME FIX” appears in the Treble reduction feature during display. interference (HICUT) To allow scrolling texts to appear in The HICUT function improves reception the display again, keep the RDS during poor radio reception (only FM). -
Page 22: Traffic Information
TRAFFIC INFORMATION Traffic information If you hear the warning sound, you can either switch off traffic information pri- Your unit is equipped with an RDS-EON ority or tune into a station that broad- receiver. EON stands for Enhanced casts traffic information. Other Network. -
Page 23: Dab-Fm Traffic Information Source
FM (in radio mode). In AUX, Micro- punkt navigation systems. You can find drive™, MMC, CD and CD changer out from your Blaupunkt dealer which mode, traffic announcements from the navigation systems can be used with source that was active last (either DAB your car radio. -
Page 24: Cd Mode
CD MODE CD mode Selecting tracks Press one of the arrow buttons : You can use this unit to play standard CDs with a diameter of 12 cm. to select the next or previous track. button : once, If you press the Risk of severe damage to the the current track will be played again CD drive! -
Page 25: Repeating Tracks (Repeat)
CD MODE Note: Changing the display You can set the scanning time To switch between the track (scantime). For further details, number and clock display / track please read the section entitled number and playing time display, “Setting the scantime” in the “Radio / DIS button 7 once press the mode”... -
Page 26: Removing A Cd
CD MODE button :. Removing a CD Press the button 9. You will now enter editing mode. Press the The first input position flashes. The flip-release panel opens and the CD is ejected. button : to Press the Remove the CD and close the con- select the character you want. -
Page 27: Mp3 Mode
MP3 mode Each directory can contain up to 254 tracks and subdirectories, which can On the Woodstock DAB52 you can also also be selected. A maximum of 8 lev- play CD-Rs containing MP3 music files. els of directories are allowed. -
Page 28: Switching To Mp3 Mode
Do not use mix-mode CDs contain- The directory name can be displayed ing audio tracks and MP3 tracks. in the Woodstock DAB52 display. Name Switching to MP3 mode the directories and tracks using your CD MP3 mode is activated in the same way burner software. -
Page 29: Selecting Tracks
MP3 MODE Selecting tracks Cancelling MIX Keep pressing the 5 MIX button > To move up or down to another track in the current directory, until “MIX OFF” appears in the dis- play. button : keep pressing the The device plays track 1 in the current until the number of the required directory. -
Page 30: Pausing Playback (Pause)
MP3 MODE Deactivating REPEAT Repeatedly press the / DIS but- ton 7 for longer than two seconds To stop the current track or current di- until the required display appears. rectory from being repeated, keep pressing the 4 RPT button > Briefly displaying the time until “REPEAT OFF”... -
Page 31: Mmc Mode
MP3 MODE MMC MODE MMC mode Switching favourite track playback on/off You can play MP3 files on an MMC (Mul- To start or stop playing the programmed ti-Media Card) using the Woodstock favourite tracks for the currently insert- DAB52. You can write data to the MMCs ed CD, that you want to use with the Woodstock briefly press button 1 >. -
Page 32: Switching To Mmc Mode
MMC MODE Switching to MMC mode Random track play (MIX) Keep pressing the SOURCE but- Mix directory ton @ until “MMC” appears in the You can play all the tracks in the cur- display. rent directory at random: Playback begins with the first track that Press button 5 MIX >. -
Page 33: Pausing Playback (Pause)
MMC MODE CD CHANGER MODE CD changer mode Deactivating REPEAT To stop the current track or current di- Note: rectory from being repeated, Information on handling CDs, in- keep pressing the 4 RPT button > serting CDs and operating the CD until “REPEAT OFF”... -
Page 34: Repeating Individual Tracks Or Whole Cds (Repeat)
CD CHANGER MODE than two seconds until the required the tracks on one CD are played display appears. randomly first before the next CD in the changer is played. Repeating individual tracks or Cancelling MIX whole CDs (REPEAT) Press button 5 MIX > until “MIX If you wish to repeat the current OFF”... -
Page 35: Clock - Time
CLOCK - TIME Clock - Time Selecting 12/24-hour clock mode Briefly displaying the time Press the MENU button 8. To display the time, briefly press “MENU” appears in the display. / DIS button 7. Keep pressing the button Setting the clock : until “24 H MODE”... -
Page 36: Sound And Volume Distribution Settings
SOUND AND VOLUME DISTRIBUTION SETTINGS Sound and volume Setting the left/right volume distribution (balance) distribution settings To set the left/right volume distribu- You can adjust the sound and volume tion (balance), press the AUDIO distribution settings separately for each button =. source (radio, CD, CD changer/Micro- drive™, AUX, MMC and traffic an- “BASS”... -
Page 37: Equalizer
EQUALIZER Equalizer Switching the equalizer on/off This unit is equipped with a parametric To switch the equalizer on, keep the DEQ button < pressed until digital equalizer. In this case, paramet- ric means that one frequency can be EQ lights up and “EQ ON” briefly increased or decreased (GAIN +8 to - appears in the display. -
Page 38: Selecting Sound Presets
EQUALIZER Selecting sound presets Switching level display on/off You can also select sound presets for The spectrometer (level display) briefly the following styles of music. provides a symbolic display of the vol- ume, the sound control settings and the CLASSIC equalizer settings whilst you are mak- ing your changes. -
Page 39: Help Adjusting The Equalizer
EQUALIZER Help adjusting the equalizer Start by adjusting the treble and mid levels and finish by setting the bass levels. Sound impression / problem Measures Bass sound is too weak Boost bass with Frequency: 50 to 100 Hz Level: +4 to +6 Dirty bass Reduce the lower mid level with Booming sound... -
Page 40: External Audio Sources
87.5 - 108 MHz cable. You can obtain this cable from 531 - 1,602 kHz your Blaupunkt dealer. 153 - 279 kHz Switching the AUX input on/off FM frequency response: Press the MENU button 8. - Page 41 01-333 9575 01-324 8756 Poland (PL) 0800-118922 022-8771260 Turkey (TR) 0212-3350677 0212-3460040 (USA) 800-2662528 708-6817188 Brasil (Mercosur) (BR) +55-19 3745 2769 +55-19 3745 2773 Malaysia (Asia Pacific) (MAL) +604-6382 474 +604-6413 640 Blaupunkt GmbH 01/02 K7/VKD 8 622 403 160...
-
Page 42: Important Information
IMPORTANT INFORMATION Important information MP3 and MMC mode Important changes were made to this Preparing the MP3-CD or MMC device after the accompanying operat- (P. 66) ing instructions went to press. These A maximum of 127 directories in 8 di- changes were introduced to make the rectory levels can be stored on MP3- unit even easier to operate. - Page 43 IMPORTANT INFORMATION button :. Deleting all the lists for all CDs Press the You can delete all stored tracks for all The name of the CD is displayed. the CDs. Keep the MENU button 8 pressed Press and hold button 2 > for for longer than four seconds until longer than eight seconds until you “DELETE NAME”...
Need help?
Do you have a question about the WOODSTOCK DAB52 and is the answer not in the manual?
Questions and answers