
Related Manuals for Blaupunkt Woodstock DAB54


Summary of Contents for Blaupunkt Woodstock DAB54
- Page 1 Radio / DAB / CD / MMC / MP3 Woodstock DAB54 7 644 708 310 Operating instructions PocketDAB 2004 http://www.blaupunkt.com...
- Page 2 Bitte aufklappen Open here Ouvrir s.v.p. Aprite la pagina Hier openslaan a.u.b. Öppna här Por favor, abrir Favor abrir Åbn her...
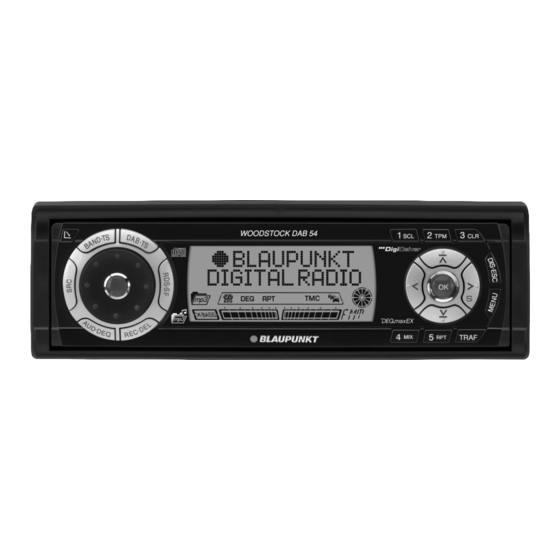
- Page 4 CONTROLS Button to switch the device on/ TRAF button to switch traffic in- off and operate the volume mute formation standby on/off. feature < Keys 4 - 5 button to open the flip-release Display control panel > RDS•SF button to switch the BND button (band) to select ra- RDS (Radio Data System) func- dio mode as the source, to se-...
-
Page 5: Table Of Contents
CONTENTS Notes and accessories ..71 Radio mode ......88 Road safety ........71 Switching to radio mode ....88 Installation ........71 Convenient RDS functions Accessories ........71 (AF, REG) ........88 Activating / Selecting the waveband / deactivating demo mode ....72 memory bank ......... - Page 6 CONTENTS MP3 mode ......100 Configuring the display ....113 Programming your favourite Preparing an MP3-CD ....100 tracks for an MMC/SD ....113 Switching to MP3 mode ....101 Switching pre-record on/off ..113 Configuring the display ....101 Selecting a directory ....
-
Page 7: Notes And Accessories
NOTES AND ACCESSORIES Notes and accessories Road safety Thank you for choosing a Blaupunkt Road safety has absolute prior- product. We hope you enjoy using this ity. Only operate your car sound sys- new piece of equipment. tem if the road and traffic conditions allow you to do so. -
Page 8: Activating / Deactivating Demo Mode
CONTROL PANEL/ ACCESSORIES KEYCARD Detachable control panel Amplifiers and KeyCard You can use all Blaupunkt and Velocity amplifiers. Theft protection CD changers The device is equipped with a detacha- You can connect the following Blaupunkt ble control panel (flip-release panel) as... -
Page 9: Detaching The Control Panel
CONTROL PANEL/KEYCARD Detaching the control panel Press button The control panel opens out towards you. Hold the control panel by its right side and then pull the control panel straight out of the bracket. Note: When attaching the control panel, make sure you do not press the display. -
Page 10: Preparing A Second Keycard
KeyCard. This means you tled “Detaching the control panel”. can create a “spare key”. You can ob- The slot for the KeyCard C is located tain KeyCards from your Blaupunkt behind the control panel. dealer. Carefully insert the KeyCard (with... -
Page 11: Looking After The Keycard
CONTROL PANEL/KEYCARD Card, please read the section entitled Then proceed in the same way for “Preparing a new KeyCard”. all the digits of the master code. If the master code is displayed cor- Keep the car radio passport and rectly, press the OK button :. the KeyCard in a safe place but nev- er in the vehicle. -
Page 12: Switching On/Off
SWITCHING ON/OFF ADJUSTING THE VOLUME Switching on/off Adjusting the volume There are various ways of switching the You can adjust the volume in steps from device on/off: 0 (off) to 50 (maximum). To increase the volume, Switching on/off using the vehicle turn the volume control 5 clock- ignition wise. - Page 13 503. “LAST VOLUME”, the volume level can be very high when the device is You can find out from your Blaupunkt switched on again. dealer which navigation systems can be Severe damage to your hearing can used with your car sound system.
- Page 14 ADJUSTING THE VOLUME Note: Automatic sound You can use the volume control 5 This feature automatically adjusts the to adjust the volume of telephone volume of the car sound system to suit calls and navigation announce- the speed at which the vehicle is travel- ments whilst you are listening to ling.
-
Page 15: Dab Mode
At the end of the news report, antenna. You can obtain further infor- the radio returns to the programme that mation from your Blaupunkt dealer. you were listening to before. Switching to DAB mode Press the MENU button 9. - Page 16 DAB MODE WEATHER SPORT Weather reports (WEATHER) are pro- Sports reports are provided in addition vided in addition to the traffic announce- to the traffic announcements, news re- ments. If you wish, you can allow the ports and weather reports. If you wish, weather reports to be played.
-
Page 17: Switching Dab Ta-Reg On/Off
DAB MODE Note: Note: You can interrupt a news, weather Since this function is not supported or sports report whilst it is being by all broadcasters, it is possible played by pressing the TRAF but- that you will not receive any traffic ton ;. -
Page 18: Tuning Into Ensembles
DAB MODE Tuning into ensembles Manually tuning an ensemble You can also tune into ensembles man- With DAB, several programmes broad- ually. casted over the same frequency are always combined into an “ensemble”. button 7 during Press the seek tuning. Note: Since various programmes from You can now tune the radio manu-... -
Page 19: Storing Programmes
DAB MODE Note: Stopping DAB-SCAN and Any programmes that were previ- continuing listening to a programme ously stored in this memory bank Press the OK button :. are deleted in the process. Scanning stops and the radio continues You cannot use the DAB Travel- playing the programme that it tuned into store feature if the PTY function is last. -
Page 20: Setting The Dab Waveband
When you have finished making your changes, Setting the DAB waveband press the MENU button 9. With the Woodstock DAB54, you can Selecting a programme type and receive DAB programmes and ensem- starting seek tuning bles on the following wavebands: “Band 3”... -
Page 21: Switching Between Dab And Fm
DAB MODE Press the MENU button 9. button 7 to Press the button 7 repeatedly switch between the settings. Press the until “DAB MENU” appears in the If “DAB-BAND L” or “DAB-BAND 3” is display. set, only the selected waveband will be used. -
Page 22: Dab Sub-Programmes
DAB MODE DAB sub-programmes DAB radio text Some DAB programmes contain sub- In addition to their programmes, some programmes. Programmes that contain stations broadcast additional informa- sub-programmes are marked with a “ ” tion (e.g. news) as scrolling text in the in front of the programme name. -
Page 23: Setting The Length Of The Programme Names
DAB MODE Setting the length of the Changing the display programme names You can choose from various display options in DAB mode: Most programmes use programme names that are 8 characters long (as “NORMAL MODE”: you are already familiar with from RDS). First line: Programme name and, if Some programmes use names that are applicable, memory location. -
Page 24: Radio Mode
RADIO MODE Note: Radio mode REGIONAL must be activated/de- This device is equipped with an RDS activated separately in the menu. radio receiver. Many of the receivable FM stations broadcast a signal that not Switching REGIONAL on/off only carries the programme but also Press the MENU button 9. -
Page 25: Tuning Into A Station
RADIO MODE To switch between the FM memory Note: banks (FM1, FM2 and FMT) and the When using this feature, you will MW and LW wavebands, only be able to switch to stations that you have received once before briefly press the BND•TS button already. -
Page 26: Storing Stations
RADIO MODE Storing stations Scanning receivable stations (SCAN) Storing stations manually You can use the scan function to play Select the memory bank that you all the receivable stations briefly. You want (FM1, FM2, FMT) or one of can set the scanning time in the menu the wavebands (MW or LW). -
Page 27: Programme Type (Pty)
RADIO MODE Note: switch from the currently tuned sta- The scanning time that you set is tion or from CD/MP3 mode or CD- also applied by the system to scan- changer mode to the station whose ning carried out in CD/MP3, MMC, programme type matches the one DAB and CD-changer mode. -
Page 28: Optimising Radio Reception
RADIO MODE The radio will then tune into the next “HICUT 0” means that no automatic re- station that it finds that corresponds to duction of the interference level will be your selected programme type. made; “HICUT 2” means that a maxi- mum reduction will be made. -
Page 29: Configuring The Display
RADIO MODE button 7 to move Configuring the display Use the from one text input position to an- You have the option in radio mode of other. displaying the frequency / radio text or Press the MENU button 9. the frequency / radio text and the time in the lower display area. -
Page 30: Traffic Information
TRAFFIC INFORMATION Traffic information Switching traffic information priority on/off Your device is equipped with an RDS- Press the TRAF button ;. EON receiver. EON stands for En- hanced Other Network. Traffic announcement priority is active Whenever a traffic announcement (TA) when the traffic-jam symbol lights up in is broadcast, the system switches au- the display. -
Page 31: Cd Mode
TRAFFIC INFORMATION CD MODE Setting the volume for traffic CD mode announcements You can use this device to play stand- Press the MENU button 9. ard audio CDs, CD-Rs and CD-RWs with a diameter of 12 cm. To avoid prob- button 7 repeat- Press the lems when playing CDs, you should not... -
Page 32: Selecting Tracks
CD MODE Gently close the control panel Random track play (MIX) whilst exerting a little pressure until Press the 4 MIX button <. you feel it click into place. “MIX CD ON” appears briefly in the dis- The CD starts playing. play and the MIX symbol lights up. -
Page 33: Repeating Tracks (Repeat)
CD MODE Note: Repeating tracks (REPEAT) In the menu you can configure If you want to repeat a track, whether you want to display the press the 5 RPT button <. CD text or the CD name. For fur- ther information, please read the “RPT TRK ON”... -
Page 34: Naming Cds
CD MODE Switching CD text on/off Entering/editing CD names Press the MENU button 9. Listen to the CD that you want. button 7 repeat- Press the MENU button 9. Press the edly until “VARIOUS MENU” ap- button 7 repeat- Press the pears in the display. -
Page 35: Traffic Announcements In Cd Mode
CD MODE button 7 repeat- Traffic announcements in CD Press the edly until “CD NAME EDIT” ap- mode pears in the display. If you wish to receive traffic announce- Press the OK button :. ments in CD mode, press the TRAF button ;. Press and hold down the MENU button 9. -
Page 36: Mp3 Mode
MP3 MODE This device supports as many subdirec- MP3 mode tories as your burner software can cre- You can also use this car sound sys- ate despite the fact that the maximum tem to play CD-Rs and CD-RWs that directory depth defined by the ISO 9660 contain MP3 music files. -
Page 37: Switching To Mp3 Mode
MP3 MODE Note: Do not use mix-mode CDs contain- When naming directories and ing both CD-audio tracks and MP3 tracks/files you should avoid using tracks. If you try playing a mix- accents and special characters. mode CD, the device will only play You can use a maximum of 32 the CD-audio tracks. -
Page 38: Selecting A Directory
MP3 MODE Note: Selecting the directory in browse You can use MP3 browse mode to mode find MP3 files on your CD quickly You can display the current and subse- and conveniently. You cannot use quent directory in both lines of the dis- the fast search, MIX, SCAN or play. -
Page 39: Fast Searching (Not In Mp3 Browse Mode)
MP3 MODE Selecting tracks in browse mode Cancelling MIX Browse mode conveniently allows you To cancel MIX, to view the tracks contained in a direc- briefly and repeatedly press the 4 tory and then select a particular track. MIX button < until “MIX OFF” ap- During MP3 playback, repeatedly pears in the display. -
Page 40: Repeating Individual Tracks Or Whole Directories - Repeat (Not In Mp3 Browse Mode)
MP3 MODE buttons 7 to switch Repeating individual tracks or Use the between the “ON” and “OFF” op- whole directories – REPEAT tions. (not in MP3 browse mode) When you have finished making your To play the current track repeatedly, changes, briefly press the 5 RPT button <. -
Page 41: Mmc/Sd Mode
Switching TPM on/off write data onto the MMCs/SDs that you To switch the TPM function on/off, want to use with the Woodstock DAB54 press the 2 TPM button 6 repeat- with the help of a standard MMC/SD edly until “TPM ON” or “TPM OFF”... -
Page 42: Switching To Mmc/Sd Mode
MMC/SD MODE Removing an MMC/SD 3. “MP3 BROWSE MODE”: First line: Directory name Detach the flip-release panel. Second line: Track name. Carefully push the MMC/SD into Note: the device until you feel a slight re- You can use MP3 browse mode to sistance. -
Page 43: Selecting Tracks
MMC/SD MODE Note: Selecting tracks The device will automatically skip Selecting tracks/files using the any directories that do not contain arrow buttons (Normal, info, track MP3 files. The device will automati- and dir and clock mode) cally correct the number of directo- ries for the display. -
Page 44: Random Track Play - Mix (Not In Mp3 Browse Mode)
MMC/SD MODE section entitled “Setting the scan- Random track play – MIX ning time” in the “Radio mode” (not in MP3 browse mode) chapter. To play the tracks in the current directo- ry in random order, Cancelling SCAN and continuing listening to a track briefly press the 4 MIX button <. -
Page 45: Recording Dab Programmes Onto Mmcs/Sds
Before using MMCs/SDs in the Wood- stock DAB54, you should definitely for- Displaying scrolling text mat them in the Woodstock DAB54. For The selected information (track, album further details, please read the section or file name and directory name) is dis- entitled “Formatting MMCs/SDs”... - Page 46 MMC/SD MODE please read the “DAB mode” chap- stands for the hour recording was start- ter. ed, “mm” stands for minutes and “ss” for seconds. Press the REC•DEL button ? The device creates the “DAB_DIR” di- when you want to start recording. rectory on the MMC/SD to store the re- Notes: corded files.
-
Page 47: Making A Timer-Controlled Recording Of A Dab Programme
MMC/SD MODE button 7. Making a timer-controlled Press the recording of a DAB programme The currently set recording “DURA- TION” is displayed. The set recording You can use this device to record a DAB duration is the same for both timers. programme at a preset time. -
Page 48: Playing Recordings Using The Device
MMC/SD MODE The settings are saved. The Woodstock DAB54 uses spe- cial algorithms for playing DAB pro- To close the MMC-RECORD menu, grammes in order to ensure an op- Press and hold down the timum listening experience even if REC•DEL button ? for longer you are playing material that was than two seconds. -
Page 49: Configuring The Display
MMC/SD MODE Switching pre-record on/off Switch to FM radio mode. For fur- ther details on this, please read the If you activate the DAB pre-record func- “Radio mode” chapter. tion, the device will continuously buffer Press the MENU button 9. 480 Kbytes of the current programme. -
Page 50: Cd-Changer Mode
CD CHANGER MODE CD-changer mode Changing the display You can choose from various display Note: options in CD-changer mode: Information on handling CDs, in- “NORMAL MODE”: serting CDs and operating the CD First line: Track number changer can be found in the oper- Second line: CD number / CD ating instructions supplied with name and playing time... -
Page 51: Repeating Individual Tracks Or
CD CHANGER MODE Repeating individual tracks or Scanning all tracks on all CDs whole CDs (REPEAT) (SCAN) To repeat the current track, To scan (briefly play) all the tracks on all the inserted CDs in ascending order, briefly press the 5 RPT button <. press and hold down the OK but- “REPEAT TRACK”... -
Page 52: Cd Changer Mode
CD CHANGER MODE Press the OK button :. Press and hold down the MENU button 9. After four seconds you button 7 repeat- Press the will hear a beep and “DELETE edly until “CD NAME EDIT” ap- NAME” appears in the display. pears in the display. -
Page 53: Clock Time
CLOCK TIME button 7 repeat- CLOCK time Press the edly until “CLOCK SET” appears in Displaying the time the display. You can make the clock time appear Press the OK button :. continuously in the bottom part of the The time appears in the display. display while any audio source is acti- The hours flash and can be adjusted. -
Page 54: Sound
CLOCK TIME SOUND Displaying the time continuously Sound when the device is off and the You can adjust the sound settings (bass ignition is on and treble) separately for each source (radio, CD/MP3, CD changer, AUX, traf- To display the time when the device is fic announcement, telephone/naviga- off and the vehicle ignition is on, tion). -
Page 55: X-Bass
X-BASS SOUND Setting the left/right volume X-BASS distribution (balance) The X-BASS feature can be used to boost the bass at low volume levels. To adjust the left/right volume distribu- tion (balance), Adjusting the X-BASS boost press the AUD•DEQ @ button. The X-BASS boost (LVL) can be set in button 7 repeat- Press the... -
Page 56: Equalizer
EQUALIZER Equalizer To deactivate the equalizer, button 7 repeat- press the The device is equipped with a DEQ+. edly until “EQ OFF” appears in the This means you have three 5-band display. equalizers, six sound presets and sev- Press the OK button : and then en vehicle presets at your disposal. - Page 57 EQUALIZER Hold the calibration microphone in the Selecting vehicle presets appropriate position whilst calibration is You can select optimised equalizer set- taking place. tings for the following vehicle types. The position of the microphone for Sit- COMPACT uation 1 (e.g. for the driver alone) is at 4DOOR the height of the driver’s head, approx.
- Page 58 EQUALIZER button 7 repeat- Press the Now read the “Sound impression” edly until “MANUAL EQ” appears in column in the table entitled “Help the display. adjusting the equalizer”. Press the OK button :. Set the equalizer values as de- scribed in the “Measures” column. button 7 repeat- Press the edly until the equalizer that you...
- Page 59 EQUALIZER To adjust the gain, Note: Please note that you can boost or button 7. press the reduce one frequency in each To adjust the quality factor, equalizer band. Proceed in the way button 7. described above with all the equal- Press the izer bands that you want to adjust.
-
Page 60: Adjusting The Display Settings
ADJUSTING THE DISPLAY SETTINGS Press the OK button :. Adjusting the display settings button 7 repeat- Press the edly until “PWR METER” appears Switching the bar graph on/off in the display alongside the current You also have the option of switching setting (“ON”... -
Page 61: Adjusting The Viewing Angle
ADJUSTING THE DISPLAY SETTINGS Press the OK button :. Adjusting the viewing angle button 7 repeat- You can adjust the display’s viewing Press the angle to suit the installation position of edly until “DISPLAY COLOR” ap- the device in your vehicle. pears in the display. - Page 62 ADJUSTING THE DISPLAY SETTINGS button 7 repeat- Mixing the button illumination Press the colour edly until the setting that you want is displayed. You can mix your own button/key illu- button 7 to mination colour using the two primary Press the colours red and green.
-
Page 63: External Audio Sources
If you want to connect an external au- dio source, you will need an adapter cable. You can obtain this cable (Blaupunkt no.: 7 607 897 093) from your author- ised Blaupunkt dealer. Switching the AUX input on/off Press the MENU button 9. -
Page 64: Amplifier
TMC, which means they can be We recommend you use well-matched used by compatible navigation systems products from the Blaupunkt or Veloci- during route planning. Your car sound ty product ranges. system has a TMC output, which you... -
Page 65: Specifications
SPECIFICATIONS Specifications Frequency response: Amplifier 20 - 20,000 Hz Output power: 4 x 18 watts sine at 14.4 V and 1% dis- Pre-amp out tortion factor at 4 channels: 4 ohms. 4 x 26 watts sine in accordance with DIN Input sensitivity 45324 at 14.4 V at AUX input:... -
Page 66: Installation Instructions
PocketDAB 2004 Operating and installation instructions http://www.blaupunkt.com... - Page 67 CONTENT Introduction ....20 Abbreviations ....20 Important ...... 21 Installation and Setup ... 21 PocketPC Installation ..21 PocketDAB Installation ..21 Bluetooth Setup ....21 PocketDAB Application . 23 Main Screen ....24 Status bar ......24 Audio service list ....25 Data service list ....
-
Page 68: Introduction
Program Associated Data service provider to the receiver. The (channel) PocketDAB 2004 software combined Personal Digital Assistance with the Woodstock DAB54 allows the Slideshow Service user to access these data services. This TMC Traffic Message Service software was developed in the Re-... -
Page 69: Important
IMPORTANT INSTALLATION AND SETUP 3. Important 4. Installation and Setup Warning: 4.1 PocketPC Installation The PDA should not be used by the Refer to the manual provided with the driver while driving! Using a PDA PDA before using the device. For the while driving is even more danger- PDA to communicate with the PC you ous than using a mobile phone. - Page 70 INSTALLATION AND SETUP The following steps are for the HP H2210 PDA with the PocketPC 2003 operating system. Switch on the BT on your PDA. To do this tap on the BT-symbol in the lower right corner and then on the menu en- try “Bluetooth ON”...
-
Page 71: Pocketdab Application
INSTALLATION POCKETDAB AND SETUP APPLICATION number please see the manual provid- 5. PocketDAB Application ed with the BT adapter. The parame- The PocketDAB program gives you ters will be saved for all future connec- more access to the DAB part of the tions. -
Page 72: Main Screen
POCKETDAB MAIN SCREEN APPLICATION The TopNews is comparable to the tele- 6. Main Screen text from the televison. But instead of The main screen of the PocketDAB soft- text pages audio objects are transmit- ware is divided in five parts. The status ted. -
Page 73: 6.2 Audio Service List
MAIN SCREEN the PocketPC start menu appears and 6.2 Audio service list you can start other applications on the PDA. The PocketDAB software will con- tinue to decode in the background. In the centre of the status bar, the cur- rently tuned ensemble name is dis- played. -
Page 74: 6.3 Data Service List
MAIN SCREEN you can use the up/down scroll buttons Icon Data Service on the right to scroll to the remaining services. No service available On the left side of every data service label, icons indicating the type of the data service are displayed. SLS available BWS available, but not the Icon... -
Page 75: 6.4 Dls Box
The energy saving a skin and apply it, tap on the skin and was switched off while using the Pocket then tap on the “Apply” button. Tapping DAB application. on the “Restore” button will restore the original Blaupunkt skin. - Page 76 MAIN SCREEN To exit this screen, tap on OK in the top ports are only for special cases. To iden- right corner. tify the correct BT COM port for your PDA you have to open the “Bluetooth Settings / Serial Port” menu of your 6.5.2.2 Options Screen PDA.
-
Page 77: 6.5.3 View Menu
MAIN SCREEN 6.5.3 View Menu 6.5.3.1 TopNews Screen View -> Radio Text On tapping this menu item, you can start or stop the automatic DLS decoding of the current audio service. If marked, the DLS is being decoded and if unmarked, the DLS is in a stopped state. - Page 78 MAIN SCREEN service provider transmits a specific pause button to pause every playing. “TopNews.ini” file along with the audio The moving bar is for the volume control. objects so that this TopNews player can The four buttons on the lower right part interpret the service.
-
Page 79: 6.5.4 Help Menu
MAIN SCREEN In the Websites screen, you can select of already decoded objects according one of the listed BWS services to view to the total number of objects. The sec- the web pages. At a time, 9 services are ond percentage indicates the data vol- displayed and the up/down scroll but- ume which is already decoded accord- tons can be used to scroll to the remain-... -
Page 80: Known Issues
KNOWN ISSUES 7. Known Issues • According to the DAB specification, the BWS UserApplicationType data Bluetooth: field in FIG 0/13 should carry the • If the connection between the PDA MinimumProfileId. The application and the Bluetooth adapter is dis- decodes the service even if this is connected you have to close and not present using the selected pro- restart the PocketDAB application... - Page 81 KNOWN ISSUES • If you select the SD/MMC-Card as SLS: cache path the software may dis- • According to the DAB specification, connect and the system may hang the SLS images should be dis- on some PDA models. Perform a played in 1/4 VGA landscape.
- Page 82 01-333 9575 01-324 8756 Poland (PL) 0800-118922 022-8771260 Turkey (TR) 0212-3350677 0212-3460040 (USA) 800-2662528 708-6817188 Brasil (Mercosur) (BR) +55-19 3745 2769 +55-19 3745 2773 Malaysia (Asia Pacific) (MAL) +604-6382 474 +604-6413 640 Blaupunkt GmbH, Robert-Bosch-Str. 200, D-31139 Hildesheim 10/04 - CM/ASA2...
Need help?
Do you have a question about the Woodstock DAB54 and is the answer not in the manual?
Questions and answers