Table of Contents
Advertisement
Quick Links
Advertisement
Chapters
Table of Contents

Related Manuals for BenQ DC E1050t


Summary of Contents for BenQ DC E1050t
- Page 1 DC E1050t Digital Camera User Manual Welcome...
- Page 2 Copyright Copyright 2008 by BenQ Corporation. All rights reserved. No part of this publication may be reproduced, transmitted, transcribed, stored in a retrieval system or translated into any language or computer language, in any form or by any means, electronic, mechanical, magnetic, optical, chemical, manual or otherwise, without the prior written permission of this company.
- Page 3 FCC Caution: Any changes or modifications not expressly approved by the party responsible for compliance could void the user's authority to operate this equipment. Taking care of your camera • The camera operating temperature is between 0 and 40 degrees Celsius. It is normal for the operating time to be shortened when the temperature is low.
-
Page 4: Table Of Contents
Table of Contents Table of Contents Touring the camera ......1 Playback mode ......20 Checking the package contents ..1 Options for playback and editing 21 Camera components ..... 2 Using My Drawings and Add Memo .......... 22 Front view ........2 Rotating an image ....... -
Page 5: Touring The Camera
Touring the camera 1 Touring the camera Checking the package contents Carefully unpack your kit box and ensure that you have the following items. 1. User manual/Quick start guide 2. Digital camera 3. USB cable 4. Battery 5. Leather case 6. -
Page 6: Camera Components
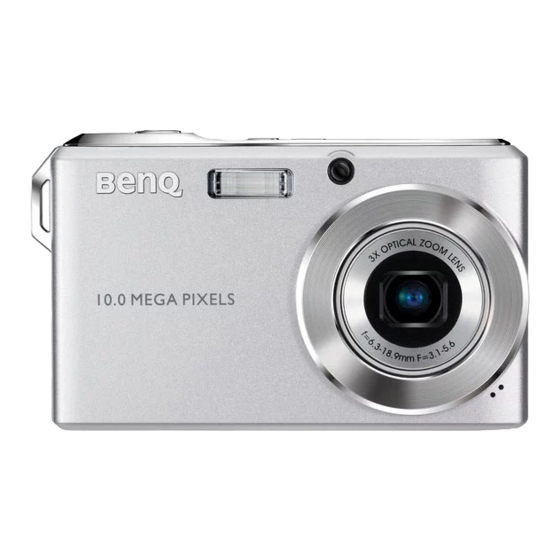
2 Touring the camera Camera components Front view 1. Shutter button 2. Flash 3. S.S.F. (Super Shake-Free) button 4. Power button / Status LED indicator 5. AF Assist Lamp / Self-timer LED indicator 6. Lens and lens cover 7. Microphone 8. -
Page 7: Preparing The Camera For Use
Preparing the camera for use 3 Preparing the camera for use Use only the specified battery for the camera, and always turn off the camera before removing the battery. To install the battery: 1. Open the battery/SD card cover (A). 2. -
Page 8: Using Touch Screen And Buttons
4 Preparing the camera for use • Damage caused by the use of an incorrect charger set is not covered under the warranty. • The battery may be warm after being charged or used. This is normal and not a malfunction. -
Page 9: Setting Date And Time
Operating the camera 5 Setting date and time You need to set the date and time the first time you use the camera, or when the camera battery has been removed for a long time. To set date and time: 1. -
Page 10: Viewing Captured Images And Videos
6 Viewing captured images and videos Viewing captured images and videos To enter the playback mode, press to view the image or video just captured. • To view the previous image/video, swipe and slide the screen (at least 1/3 of the width; see the illustrations below from A to C) to the right, or tap on the Control Panel. -
Page 11: Capture Mode
Capture mode 7 Capture mode Item Description Page reference Scene mode Flash mode Focus mode Drive mode S.S.F. (Super Shake-Free) Number of shots available Image size Image quality AF area Battery status Histogram AE metering White balance EV compensation ISO sensitivity More options... -
Page 12: Scene Mode
8 Capture mode Scene mode Select one of the following scene modes to fit your shooting condition. Icon Mode Description Auto The camera automatically decides most settings, so you can capture images with ease. Program You can set the shooting parameters manually. Movie Record Captures videos with sound. - Page 13 Capture mode 9 High ISO Portrait Makes people stand out with the background out-of- focus even in a dark environment. In this mode, a higher ISO value is used. Food Captures food by enhancing color brightness and giving more vivid colors. Museum Captures photos with flash function disabled.
-
Page 14: Flash Mode
10 Capture mode Using Smile Catch: Smile Catch automatically captures smiling moments. 1. Tap and select from the scene mode icons. 2. The camera is tracking the face of your subject (each subject is tracked by an auto focus frame; maximum 8 subjects can be tracked). 3. -
Page 15: Focus Mode
Capture mode 11 Slow Sync Fires the flash for proper exposure of the subject, and uses a slow shutter speed to capture ambient light for proper exposure of the background. Useful for capturing night scenes with still subjects (such as portraits). Use of tripod is recommended. -
Page 16: Drive Mode
12 Capture mode Drive mode Icon Mode Description Standard Self-timer and Continuous Shooting are disabled. 10 sec Self-timer Automatically takes a picture after a 10 second delay. This mode is useful when you want to be part of the picture. 2 sec Self-timer Automatically takes a picture after a 2 second delay. -
Page 17: Iso Sensitivity
Capture mode 13 ISO sensitivity The higher the ISO value, the more noise you may see in the image. Icon Description Automatically sets the ISO value. Equivalent to color ISO 100/200/400 film. Used for outdoor photography in bright sunlight. Equivalent to color ISO 800/1600/3200 film (ISO 3200 for images at 3 megapixels or lower). -
Page 18: White Balance
14 Capture mode White balance White balance compensates for color temperatures in different lighting conditions, so white and other colors can display properly when you capture images. Icon Mode Description Auto Adjusts white balance automatically. Daylight Adjusts white balance for bright daylight conditions. Cloudy Adjusts white balance for cloudy, twilight, or shady conditions. -
Page 19: Effect
Capture mode 15 Effect You can add special effects to your images in capture mode. Icon Mode Description Normal No effect is added to the image. Vivid Recorded image will be stored in a bright and lively tone. Sepia Recorded image will be stored in a sepia tone. B/W (Black/White) Convert image to black &... -
Page 20: Af Area
16 Capture mode AF Area Icon Mode Description Center Focuses on the center of the touch screen. Wide Focuses on subjects in a wider focusing area. Manual You can manually decide the auto focusing area by dragging the frame within the boundary shown on the touch screen. -
Page 21: Ev Compensation
Capture mode 17 EV compensation EV (exposure value) lightens or darkens the entire image. Adjust EV compensation when the brightness between the subject and the background is not balanced, or when the subject occupies only a small part of the picture. To set EV compensation: 1. -
Page 22: Other Capture Options
18 Capture mode Other capture options More options are available for image settings in > > Icon Option Description Flash Intensity Sets the intensity of the flash. Photo Frame Adds a photo frame to the image. • If the original image size is larger than 3M, the image size will be automatically changed to 3M. -
Page 23: System Settings
System settings 19 System settings To change the system settings, tap > and then . Tap to find more options. Icon Mode Description Manage Memory Formats the internal memory or the SD card. Instant Review Sets the display time of each captured photo. Digital Zoom Sets a zoom setting for the camera to remember (useful when you turn it on next time). -
Page 24: Playback Mode
20 Playback mode Playback mode Press to enter the playback mode. You can press to show different information on the screen. • When the camera is off, pressing will enter the playback mode. • In the capture mode, press to enter the playback mode. •... -
Page 25: Options For Playback And Editing
Playback mode 21 Options for playback and editing By default, ten options show when you tap on the screen. Icon Mode Description Page reference My Drawings Adds your own drawing to a captured image. Rotation Rotates images by certain degrees. Z-Lighting Adjusts lighting (mainly enhances the brightness and contrast in the darker areas of... -
Page 26: Using My Drawings And Add Memo
22 Playback mode To select a playback/edit option: 1. Press and select an image. Then tap 2. The available icons of playback/edit options show. Tap the one you need. Options available may vary depending on the image size. 3. Follow the on-screen instructions. Using My Drawings and Add Memo Add preset or customized drawings (including handwriting), stamps, and callouts to an image. - Page 27 Playback mode 23 Icon Tool Description Line Creates lines such as handwriting. To create lines: 1. Tap , and then tap for a type and for a color. 2. Tap 3. Start tapping on the touch screen, and then drag your finger or stylus to create lines.
-
Page 28: Rotating An Image
24 Playback mode Discard Discards the modified file. Rotating an image Changes the orientation of an image. To rotate an image: 1. Tap and select an image. 2. Tap > , and then tap a thumbnail in the orientation you want. The newly rotated image overwrites the original one and shows on the screen. -
Page 29: Dpof
Playback mode 25 DPOF Enters the Digital Print Order Format (DPOF) data for selected images or all images. A DPOF-compatible printer can read this data for printing. To enter DPOF data: 1. Tap and select an image. 2. Tap > 3. -
Page 30: Red-Eye Removal
26 Playback mode Red-eye Removal Removes appearance of red eyes in an image. To remove appearance of red eyes: 1. Tap and select an image. 2. Tap > > > Red-eye Removal. Then tap 3. Tap Overwrite to replace the current image file, or Save as to save to another file. Effect Changes the color tone of an image. -
Page 31: Bundled Software
Bundled software 27 Bundled software The camera provides the following programs on a CD. ArcSoft Combines photo editing with creative enhancement and sharing tools PhotoImpression 5 that maximize your digital media experience. ArcSoft Creates multimedia presentations by combining photos and video VideoImpression 2 clips with audio, text and scene transitions. -
Page 32: Printing Images
28 Printing images Printing images In addition to printing images by connecting the camera to a printer via a computer or bringing the SD card (if available) to a photo-processing center, you can choose to print using PictBridge or DPOF. Printing with Printer mode You can directly print images by connecting your camera to a PictBridge-compatible printer without using a computer. -
Page 33: Troubleshooting And Service Information
Troubleshooting and service information 29 Troubleshooting and service information If your camera cannot operate normally, see the frequently encountered problems and solutions listed below. If the problem persists, contact your nearest service center or technical support. Problem Cause Solution I cannot play back The MPEG-4 video compression Make sure you are using Windows video clips by... -
Page 34: Technical Support
These pictures are taken by Enlarging these pictures could pictures look another camera. solve the problem. unclear or be read improperly during playback? Technical support For technical assistance, firmware updates, product information, user manual, and news releases, visit the following web site: http://www.BenQ.com... -
Page 35: Specifications
Specifications 31 Specifications Image sensor 10M CCD; size: 1/2.3-inch LCD display 3-inch LTPS LCD; 230 K dots Zoom Optical: 3X Digital: 5X (preview) / 12 (playback) Wise Zoom: 30X (Optical Zoom + Digital Zoom) when the image size is VGA (640 x 480); a different image size comes with a different maximum wise zoom ratio. - Page 36 32 Specifications Storage • Internal: Built-in Approx. 9 MB (usable) • External: SD card in the following sizes: 64 MB, 128 MB, 256 MB, 512 MB, 1 GB, 2 GB, 4 GB, and up to 16 GB for SDHC. This camera is compatible with SD cards manufactured by Panasonic, Toshiba, and Sandisk.
Need help?
Do you have a question about the DC E1050t and is the answer not in the manual?
Questions and answers