
Related Manuals for Gigabyte Gigabyte AirCruiser G GN-WB01GS


Summary of Contents for Gigabyte Gigabyte AirCruiser G GN-WB01GS
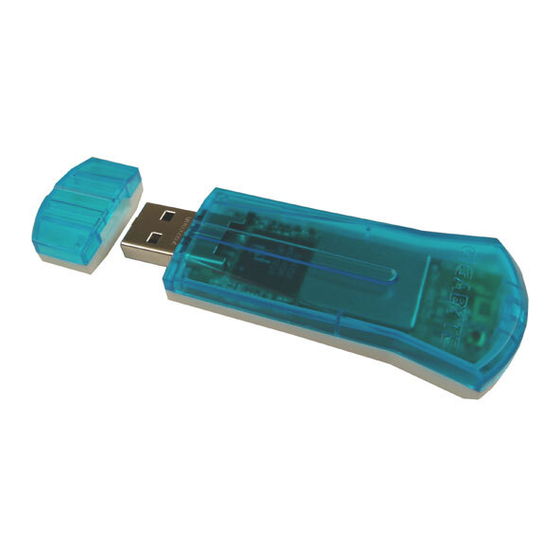
- Page 1 54Mbps Wireless USB Adapter GN-WB01GS User’s Manual http://www.gigabyte.com.tw Rev. 1.0...
- Page 2 Federal Communication Commission Interference Statement: This equipment has been tested and found to comply with the limits for a Class B digital device, pursuant to Part 15 of the FCC Rules. These limits are designed to provide reasonable protection against harmful interference in a residential installation. This equipment generates, uses and can radiate radio frequency energy and, if not installed and used in accordance with the instructions, may cause harmful interference to radio communications.
-
Page 3: Table Of Contents
CHAPTER 1 PRODUCT OVERVIEW...1 NTRODUCTION TO THE ...1 EATURES HYSICAL IMENSIONS LED I ...2 NDICATORS YSTEM EQUIREMENTS CHAPTER 2 INSTALLATION...3 2-1. I WB01GS ...3 NSTALLING THE CHAPTER 3 USING THE WIRELESS UTILITY ...8 3.1. P ...8 ROFILE 3.2. L ...16 TATUS 3.3. -
Page 4: Chapter 1 Product Overview
USB Plug-and-Play devices, it’s a breeze to setup. Power in a small package Don’t be fooled by its small and convenient size, the GIGABYTE’s WB01GS Wireless USB Adapter is powerful. Enabling 54 Mbps wireless Internet sharing – 5 times faster than most Wireless USB adapters. -
Page 5: Physical Dimensions & Packaging
1.3 Physical Dimensions & Packaging Dimensions: 77.6 x 31.0 x 9.1mm +/- 0.5mm Before beginning the installation procedures, please inspect the components to assure that they have not been damaged during shipping. The components include: Package Contents • GN-WB01GS Adapter with pocket clip cap •... -
Page 6: Chapter 2 Installation
This chapter covers the installation of the WB01GS Adapter for your Notebook or Desktop PC. The following sections will assist you with proper installation of the Adapter. 2-1. Installing the WB01GS Note: If your system has other third party wireless drivers installed, we suggest you disable them before beginning. - Page 7 Figure 2-2. Welcome screen Step 4: Click Install Wireless LAN Utility to begin installation. Step 6: When the Install Shield welcome screen appears, click Next Figure 2-3. Install Shield Step 7: InstallShield will check your operating system and select the appropriate driver. Click Next to proceed.
- Page 8 Figure 2-4. Check setup information Step 8: If you receive the message regarding “Windows Logo Testing”, click Continue Anyway. Figure 2-5. Finished installing Step 9: Click Finish to complete installation.
- Page 9 Note: The following section applies to users of GIGABYTE Wireless Routers. GIGABYTE SmartSetup 3 is a powerful, yet user-friendly wireless network configuration wizard specially designed for GIGABYTE wireless networks. If you are connecting to a GIGABYTE wireless router, SmartSetup 3 will detect this and activate.
- Page 10 Step 3: Your GIGABYTE router’s web configuration utility will automatically open, and detect your ISP type. Just key in the Username and Password. Done. Figure 2-8. Auto detecting your ISP type Note: If Figure 12 does not appear, please type 192.168.1.254 in the address bar of your web browser, and click “Smart Setup”...
-
Page 11: Chapter 3 Using The Wireless Utility
Chapter 3 Using the Wireless Utility The WB01GS Wireless Utility is a powerful application that helps you to configure the Adapter and monitor the statistics of the communication link. It also permits the configuration for parameters while the Adapter is operating – no restarting is required. It also offers more configuration options than does Windows native Zero Wireless Configuration. - Page 12 Figure 3-2. Current profile Description of items in Figure 3-2 is as follows: Profile Name: A profile can be saved for various wireless settings in different environments, i.e. home, office, and the corner coffee shop. SSID: The Network Name of the wireless router or Access Point. Channel: Shows the current wireless channel.
- Page 13 Figure 3-3. Configuration Description of items in Figure 3-3 is as follows: Profile Name: Users can save different profiles names for different configurations. SSID: Select the AP detected by the system from the drop-down menu or input a SSID. (Default: ANY) Power Saving mode: Select “Power Saving Mode”...
- Page 14 3c29f2536bef3276d32e364a2c) Note: Using a Hex key is more secure than using an ASCII key, and if you are connecting to a GIGABYTE Router or Access Point, ASCII keys are not allowed and you must use a Hex key. WPA-PSK/WPA2-PSK encryption: WPA-PSK/ WPA2-PSK (Preshared Key) uses TKIP or AES based on your choice.
- Page 15 and the system will use the Passphrase to create a cipher code in which it will encrypt the data. To use WPA-PSK/ WPA2-PSK: 1. Create a Passphrase, and key it in. Use 8~63 ASCII digits. 2. Remember this Passphrase. If you forget the Passphrase, you will have to do a hard reset of the Access Point in order to restore default settings and connect again.
- Page 16 Use Client Certificate: This certificate is necessary for TLS and an option for PEPA and TTLS. Check “Use Client Certificate” to verify the authenticity of a Client Certificate during the authentication process. Clicking More will open the Client Certificate Selection Window (shown in Figure 3-7). Users can select one suitable certificate as Client Certificate.
- Page 17 To verify the CA server: 1. Confirm if the Server Certificate is issued by assigned certificate issuer. If “Allow Intermediate Authentication” is checked, the server certificate can be issued by one intermediate certificate issuer. 2. Check the server name of server certificate is the same as the name entered by the user or belongs to the same domain.
- Page 18 It includes the 802.11b/g wireless transmission mode settings. Once you have finished here, just click OK to apply all changes to the Edit Profile and you will return to the Profile Tab (Figure 3-2). A reboot is not needed for changes to take effect. Figure 3-8 Advanced Description of items in Figure 3-8 is as follows: Wireless Mode: Sets infrastructure Protocols, including 802.11 B/G mix and 802.11 B...
-
Page 19: Link Status Tab
3.2. Link Status Tab The Link Status tab displays the current association information about the Adapters connection with a wireless network. (see Figure 3-9) Figure 3-9. Link Status Description of items in Figure 3-9 is as follows: Status: Shows current link status. “No Link” will appear on the screen when no connection is available. -
Page 20: Site Survey Tab
3.3. Site Survey Tab The Site Survey tab shows you the list of reachable access points and/or peer-to-peer Stations. Just double click on the SSID that you want to connect or click the Connect button. (see Figure 3-10) Figure 3-10. Site Survey Description of items in Figure 3-10 is as follows: SSID: The name of the wireless network (also known as Network Name). -
Page 21: Statistics Tab
Statistics Tab 3.4. The Statistics tab shows you the number of packets sent and received by the Adapter (see Figure 3-11) Figure 3-11. Statistics Description of items in Figure 3-11 is as follows: Frames Transmitted Successfully: Number of frames transmitted successfully. Frames Transmitted Successfully Without Retry: Number of frames transmitted successfully, excluding packets transmitted successfully with more than one retry. -
Page 22: About Tab
About Tab 3.5. The About tab displays information about current drivers and physical MAC address (see Figure 3-12). Figure 3-12. About Tab GbConfig Version (Date) – The version number (and date) of the Adapter Utility Driver Version (Date) – The version number (and date) of the Adapter Driver. EEPROM Version - Hardware version number of the Adapter’s EPROM. -
Page 23: Appendix A Troubleshooting
Appendix A Troubleshooting This troubleshooting guide provides answers to some common problems which you may encounter while installing or using GIGABYTE Wireless Adapters. Contact the GIGABYTE Wireless Technical Support Team at mentioned in this section. Problem: Cannot connect to an AP Advice: Make sure the SSID for the USB Adapter is the same as the Access Point. -
Page 24: Appendix B Specifications
Operating: 0 ~ 40 degree C, Storage: -20 ~ 65 degree C 10% ~ 85% Non-condensing Windows 98SE/Me/2000/XP 64/128 bit WEP, TKIP, AES, 802.1x, WPA, WPA2 Seamless roaming among 802.11b/g access points. Monitors the network situation. 77.6 x 31.0 x 9.1mm +/- 0.5mm 15.0 ± 1.0g Generic, Gigabyte, private labeling optional... -
Page 25: Appendix C Regulatory Information
When operating in France, this device may be operated under the following conditions: Indoors only, using any channel in the 2.4465-2.4835 GHz band. Trademarks: GIGABYTE is a registered trademark of GIGA-BYTE Technology, Inc. Other trademarks or registered trademarks are the property of their respective manufacturers or owners. -
Page 26: Appendix D Warranty
Thank you for purchasing the GIGABYTE Product. This limited warranty statement will provide you one year warranty starting from the purchase date. Of which if any defect is occurred due to accidents or any man-made factors, or any unauthorized torn-off or damage to GIGABYTE’s sticker on the product, GIGABYTE Technology will not provide after-sale services, such as: •...
Need help?
Do you have a question about the Gigabyte AirCruiser G GN-WB01GS and is the answer not in the manual?
Questions and answers