
Related Manuals for Gigabyte GN-WM01GT


Summary of Contents for Gigabyte GN-WM01GT
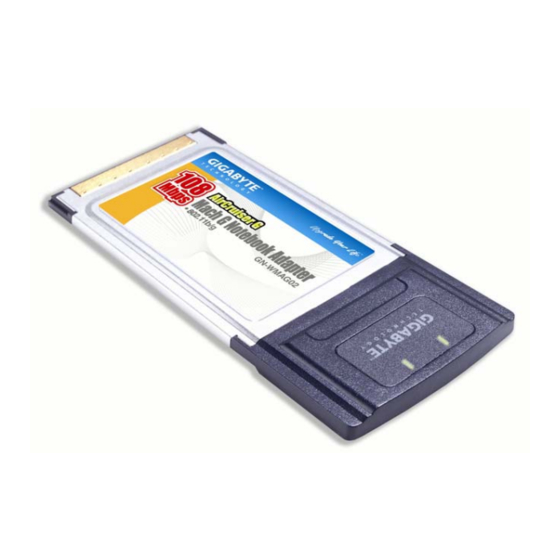
- Page 1 108Mbps Mach G Notebook Adapter GN-WM01GT User’s Manual www.gigabyte.com.tw Version 1.0...
- Page 2 Federal Communication Commission Interference Statement: This equipment has been tested and found to comply with the limits for a Class B digital device, pursuant to Part 15 of the FCC Rules. These limits are designed to provide reasonable protection against harmful interference in a residential installation. This equipment generates, uses and can radiate radio frequency energy and, if not installed and used in accordance with the instructions, may cause harmful interference to radio communications.
-
Page 3: Table Of Contents
CHAPTER 1 PRODUCT OVERVIEW...1 1.1. T WM01GT W IRELESS 1.2. F ...1 EATURES 1.3. O PERATING ODES 1.4. P ACKAGE ONTENTS 1.5. LED I ...2 NDICATOR 1.6. S YSTEM EQUIREMENTS CHAPTER 2 INSTALLATION...4 2-1. I NSTALLING THE IRELESS 2-2. S 3...6 MART ETUP... -
Page 4: Chapter 1 Product Overview
SmartSetup 3 is a GIGABYTE exclusive technology which takes all the guesswork and fuss away from your new network. With SmartSetup 3, users can go from ‘out-of-the-box’... -
Page 5: Operating Modes
Ad-Hoc Mode is used when two computers are configured with file and print sharing enabled and you want to exchange files directly between them. These modes are selectable from the in the Gigabyte Client Utility. This and other advanced configuration options are explained further in Configuring the 1.4.Package Contents... -
Page 6: System Requirements
1.6.System Requirements For trouble free installation and operation, please ensure your Notebook meets the following minimum system requirements: • Notebook with a Pentium® 300 MHz or higher compatible processor with an available PCMCIA slot • CD-ROM drive • 20 Mbytes of free hard disk space... -
Page 7: Chapter 2 Installation
This chapter covers the installation of the WM01GT Adapter for your Notebook. The following sections will assist you with proper installation of the Notebook Adapter and with using the Client Utility. You should use the setup procedure as described below. 2-1. - Page 8 Figure 2-2. WM01GT InstallShield Wizard C. If you receive the message; “This Hardware has not Passed Windows Logo Testing” (Figure 2-3) click Continue Anyway. Figure 2-3. Windows Logo Testing D. When InstallShield has finished, click Finished to complete the installation (Figure 2-4).
-
Page 9: Smart Setup 3
GIGABYTE SmartSetup 3 is a powerful, yet user-friendly wireless network configuration wizard specially designed for Gigabyte wireless networks. If you are connecting to a GIGABYTE Wireless Router, SmartSetup 3 will detect this and activate itself, and help you establish a WPA secure network and Internet connection in three easy steps. - Page 10 Step 1: To begin, select the GIGABYTE Wireless Router from the available networks (figure 2-6). Figure 2-6. SmartSetup 3 Selection Tool Step 2: In the Define Security Key window (Figure 2-7), create a WPA Passphrase using any keyboard character. Make it no less than 8 but no more than 63 characters in length.
- Page 11 Figure 2-8. ISP Type auto detected Note: If Figure 2-8 does not appear, please type 192.168.1.254 in the address bar of your web browser, and click “Smart Setup” from the main menu which displays. For more information about SmartSetup 3, please see the enclosed Quick Start Guide. Congratulations.
-
Page 12: Chapter 3 Using The Wireless Utility
Chapter 3 Using the Wireless Utility This chapter explains how to use GIGABYTE Wireless Utility to view the client adapter’s status, and transmit and receive configuration settings. The following topics are covered in this chapter: Current Status - Displays the complete operation state of the WM01GT Site Survey - Displays all visible AP’s in the immediate wireless network. - Page 13 Profile Name – Network configuration (Profile) your Adapter is currently using. Creating and modifying a profile is done from the Profile Management Tab. Link Status – Displays the association status of the Adapter to a network. (Not Associated, Associated, Authenticating, Authenticated, Authentication Failed, Authentication Failed Retrying) Wireless Mode –...
- Page 14 Data Encryption - The data encryption type that was negotiated with the access point (in infrastructure mode) or another client (in ad hoc mode) upon association. Authentication Type - Specifies whether the client adapter must share the same WEP keys as the access point in order to authenticate or can authenticate to the access point regardless of its WEP settings.
-
Page 15: Site Survey Tab
or short and long radio headers. Current Link Speed - The rate at which your client adapter is currently transmitting data packets. Channel - The channel that your client adapter is currently using for communications. This field displays Scanning while the client adapter searches for a channel. Frequency - The radio frequency that your client adapter is currently using for communications. -
Page 16: Profile Management Tab
Channel – The channel upon which the network broadcasts. Wireless Mode – The radio frequency which the network broadcasts. 3.3. Profile Management Tab Every session runs under a Profile – even if it is the ‘default’ Profile. The Profile Management Tab displays your current wireless connection profile, and its details. -
Page 17: General Tab
Order Profiles – Arranges the profiles in a list according to an order which is convenient to you. Radio - Toggle on or off the WP01GT wireless radio receiver. Clicking Modify from the Profile Management Tab will present the Profile Management Dialogs. -
Page 18: Security Tab
3.3.2 Security Tab The wireless security sub tab offers you the method of security (if any) you may select. Select WPA/WPA2, WPA/WPA2-Passphrase, 802.1x, Pre Shared WEP, or None. WPA/WPA2 is a security standard stronger than WEP encryption, and 802.1x is the RADIUS authentication service. - Page 19 To use WEP, select if you want Hex or ASCII method, enter a pre-shared key, select 64-bits, 128-bits, or 152-bits from the drop down box and click OK. Note: ASCII text WEP keys are not supported on GIGABYTE Routers, you must choose the Hexadecimal (0-9,A-F) option if you are connecting with these Access Points.
- Page 20 Using LEAP Before you can enable LEAP authentication, your network access point must be configured for LEAP authentication. Perform one of the following from the Security Tab: If you want to enable LEAP without WPA/WPA2, choose 802.1x under Set Security Options and LEAP in the 802.1x EAP Type drop-down box. If you want to enable LEAP with WPA/WPA2, choose WPA/WPA2 under Set Security Options and LEAP in the WPA/WPA2 EAP Type drop-down box.
- Page 21 the network. Use Saved User Name and Password - Does not require you to enter a LEAP username and password each time the computer reboots. Authentication occurs automatically as needed using a saved username and password (which are registered with the RADIUS server).
- Page 22 Use Temporary User Name and Password - Requires you to enter the EAP-FAST username and password each time the computer reboots in order to authenticate and gain access to the network. Use Saved User Name and Password - Does not require you to enter an EAP-FAST username and password each time the computer reboots.
- Page 23 Select the protected access credential (PAC) authority provisioning Check the Allow Automatic PAC Provisioning for this Profile checkbox to have the system automatically provide the PAC for this profile. OR. To set a PAC authority, choose a PAC Authority from the drop-down list to use.
- Page 24 accept a certificate from any server that supplies a certificate signed by the certificate authority listed in the Server Properties drop-down list. Login Name - If the Login Name field is not filled in automatically, enter your username in this format: username@domain.com. Enabling EAP-TTLS If you want to enable EAP-TTLS without WPA/WPA2, choose 802.1x under Set Security Options and EAP-TTLS in the 802.1x EAP Type drop-down box.
- Page 25 Figure 3-11. Define PEAP(EAP-GTC) Configuration Trusted Root Certification Authorities – Choose the certificate authority from which the server certificate was downloaded in the drop-down list. Set Password – Select Token or Static Password, depending on your users database. User information for PEAP (GTC) Authentication - Enter your PEAP username and password in the corresponding fields.
-
Page 26: Advanced Tab
Figure 3-12. Define PEAP(EAP-MSCHAP V2) Configuration Trusted Root Certification Authorities – Choose the certificate authority from which the server certificate was downloaded in the drop-down list. User information for PEAP (EAP-MSCHAP V2) Authentication - Enter your PEAP username and password in the corresponding fields. 3.3.3 Advanced Tab The Profile Management (Advanced) window (see Figure 3-13) enables you to set parameters that control how the client adapter operates within an infrastructure or ad hoc... - Page 27 Figure 3-13. Profile Management > Advanced Tab Transmit Power Level - Specifies the preferred power level at which your client adapter transmits. Although the adapter supports up to 100 mW, the transmit power level that is actually used is limited to the maximum value allowed by your country's regulatory agency (FCC in the U.S., DOC in Canada, ETSI in Europe, TELEC in Japan, etc.).
- Page 28 to an access point. Open and shared authentication do not rely on a RADIUS server on your network. Preferred Access Points If this profile is configured for use in an infrastructure network and you want to specify up to four access points to which the client adapter should attempt to associate, click Preferred APs.
-
Page 29: Diagnostics Tab
3.4. Diagnostics Tab Basic transmit and receive statistics are available here (see Figure 3-15), with more advanced statistics available from the Advanced Statistics button. Transmit: Multicast Packets – Number of packets sent to a multicast address Broadcast Packets – Number of packets sent to a broadcast address Unicast Packets –... - Page 30 Figure 3-16. Advanced Statistics Window Transmit Frames Transmitted OK – The number of total frames transmitted or received without errors. Frames received – The number of frames receive by the client. Frames Dropped – The number of frames dropped by the client. No ACK Frames –...
- Page 31 Authentication Time-Out - The number of times the client adapter tried to authenticate to an access point but was unable to because the access point did not respond fast enough (timed out). Authentication Rejects - The number of times the client adapter tried to authenticate to an access point but was rejected.
-
Page 32: Adapter Information Tab
3.5. Adapter Information Tab The Driver Info Tab displays the information of the card’s driver, MAC address and version date. Figure 3-17. Adapter Info Tab Utility Version -- The version number of the WM01GT utility. Utility Date -- The date of manufacture of the WM01GT utility file. Driver Version –... -
Page 33: Appendix A Faq
This section provides solutions to common problems that may occur during installation, configuration or use of the Adapter. Q: What is Ad-hoc mode? A: When a wireless network is set to Ad-hoc mode, the wireless-equipped computers are configured to communicate directly with each other. The Ad-hoc wireless network will not communicate with any wired network.. -
Page 34: Appendix B Glossary
Appendix B Glossary ADSL Asymmetric digital subscriber line (ADSL) is a new modem technology that converts existing twisted-pair telephone lines into access paths for high-speed communication of various sorts. Auto-MDI/MDIX On a network hub or switch, an auto-MDI/MDIX port automatically senses if it needs to act as a MDI or MDIX port. - Page 35 Ping (Packet Internet Groper) A utility to determine whether a specific IP address is accessible. It works by sending a packet to the specified address and waiting for a reply. PING is used primarily to troubleshoot Internet connections. SSID SSID is the name representing the Router in WLAN. PPPoE Point-to-Point over Ethernet is a protocol for connecting remote hosts to the Internet over an always-on connection by simulating a dial-up connection.
-
Page 36: Appendix C Specifications
1. System Host Interface Operating Voltage 2. RF Performance 802.11b Frequency Band Modulation Technology Modulation Techniques Date Rates Typical Power Consumption Peak Output Power Minimum Receive Sensitivity Antenna 802.11g(backward compatible to 802.11b) Frequency Bands Modulation Technology Modulation Techniques Date Rates Typical Power Consumption Peak Output Power Receive sensitivity... - Page 37 Dimensions Weight Packaging LED indicators Subject to Change without Notices 120 x 54 x 6 mm 40± 1 g Packaging specially used by Gigabyte. Two LEDs indicating Activity/Link...
-
Page 38: Appendix D Regulatory Information
When operating in France, this device may be operated under the following conditions: Indoors only, using any channel in the 2.4465-2.4835 GHz band. Trademarks: GIGABYTE is a registered trademark of GIGA-BYTE Technology, Inc. Other trademarks or registered trademarks are the property of their respective manufacturers or owners. -
Page 39: Appendix E Wireless Security
Appendix E Wireless Security The WM01GT, and all of GIGABYTE’s wireless offerings are all built to deliver the easiest and most secure wireless networking experience as possible. Please understand the following key points in order to enjoy a safe and secure wireless network. -
Page 40: Appendix F Warranty
Thank you for purchasing the GIGABYTE Product. This limited warranty statement will provide you one year warranty starting from the purchase date. Of which if any defect is occurred due to accidents or any man-made factors, or any unauthorized torn-off or damage to GIGABYTE’s sticker on the product, GIGABYTE Technology will not provide after-sale services, such as: •...
Need help?
Do you have a question about the GN-WM01GT and is the answer not in the manual?
Questions and answers