
Related Manuals for Gigabyte GN-WS30N-RH


Summary of Contents for Gigabyte GN-WS30N-RH
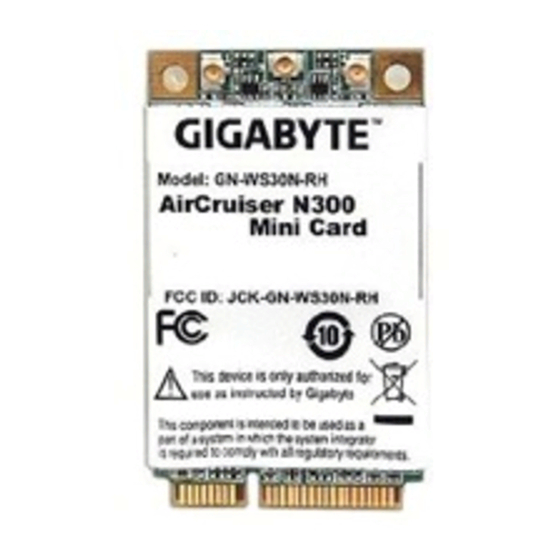
- Page 1 GN-WS30N-RH AriCruiser N300 Mini Card User’s Manual http://www.gigabyte.com.tw Revised 1.0-1 Version...
- Page 2 Administrative Regulations on Low Power Radio Waves Radiated Devices Article 14 Without permission granted, the frequency change, transmitting power enhance or alter of original design characteristic as well as function by companies, enterprises, or users for approved Low-power radio frequency devices is not allowed.
- Page 3 CCXXxxYYyyyZzW...
-
Page 4: Table Of Contents
Content CHAPTER 1 PRODUCT OVERVIEW ......1 1-1. I ......................1 NTRODUCTION 1-2. F ........................1 EATURES 1-3. P ................1 HYSICAL IMENSIONS ACKAGING 1-4. S ....................2 YSTEM EQUIREMENTS CHAPTER 2 INSTALLING THE WLAN CARD ....3 2-1. I WLAN C )..........3 NSTALLING THE ARDWARE NSTALLATION 2-2. -
Page 5: Chapter 1 Product Overview
1-3.Physical Dimensions/Packaging Dimensions: 50.8mm ×29.8mm ×3.65mm Before the installation procedures, please ensure the components are not damaged during the shipping. The components include: GN-WS30N-RH WLAN card×1 External antenna×1 Installation CD (including User’s Manual and driver)×1 User’s Manual×1 In case of any missing or damaged accessories, please contact your local distributor or authorized reseller immediately. -
Page 6: 1-4. System Requirements
1-4. System Requirements 1-4-1. Supported Platform: IBM PC/AT compatible computer 1-4-2. Supported Operation System: Windows 98SE/Me/2000/XP... -
Page 7: Chapter 2 Installing The Wlan Card
Chapter 2 Installing the WLAN Card The following sections will assist you to install this WLAN card. 2-1: Hardware Installation, 2-2~2-5: Software Installation, which provides users more convenient installation methods and automatically installs drivers and utilities. Please refer to different section (2-2: Windows 98SE, 2-3: Windows ME, 2-4: Windows 2000, and 2-5: Windows XP) for software installation in accordance with your operation system. -
Page 8: Installing The Driver & Utility (Win 98Se)
2-2. Installing The Driver & Utility (Win 98SE) Step 1: Click “Cancel” for automatic installation. Step 2: Insert the installation CD into the CD-ROM drive. The following window will pop Step 3: Click “Install Wireless LAN Utility”. - Page 9 Step 4: Click “Next”. Step 5: Click “Next”.
- Page 10 Step 6: Click “OK”. Step 7: Click “Finish”. Step 8: To install 802.1X function, click “Browse the CD”. authentication...
- Page 11 Step 9: Run “CD-ROM:\\Utility \AegisI2.exe” of the installation CD. Step 10: Click “Install”. Step 11: Click “Cancel”. Windows may reboot after the installation.
-
Page 12: Installing The Driver & Utility (Win Me)
2-3. Installing The Driver & Utility (Win ME) Step 1: Click “Cancel” for automatic installation. Step 2: Insert the installation CD into the CD-ROM drive. The following window will pop Step 3: Click “Install Wireless LAN Utility”. - Page 13 Step 4: Click “Next”. Step 5: Click “Next”.
- Page 14 Step 6: Click “OK”. Step 7: Click “Finish”. Step 8: To install 802.1X function, click “Browse the CD”. authentication...
- Page 15 Step 9: Run “CD-ROM:\\Utility \AegisI2.exe” of the installation CD. Step 10: Click “Install”. Step 11: Click “Cancel”. Windows may reboot after the installation.
-
Page 16: Installing The Driver & Utility (Win2000)
2-4. Installing The Driver & Utility (Win2000) Step 1: Click “Cancel” for automatic installation. Step 2: Insert the installation CD into the CD-ROM drive. The following window will pop Step 3: Click “Install Wireless LAN Utility”. - Page 17 Step 4: Click “Next”. Step 5: Click “Next”.
- Page 18 Step 6: Click “OK”. Step 7: Click “Finish”.
- Page 19 Step 8: Click “Yes”. Step 9: To install 802.1X function, click “Browse the CD”. authentication...
- Page 20 Step 10: Run “CD-ROM:\\Utility \AegisI2.exe” of the installation CD. Step 11: Click “Install”. Step 12: Click “Close”. Windows may reboot after the installation.
-
Page 21: Installing The Driver & Utility (Win Xp)
2-5. Installing The Driver & Utility (Win XP) Step 1: Click “Cancel” for automatic installation. Step 2: Insert the installation CD into the CD-ROM drive. The following window will pop Step 3: Click “Install Wireless LAN Utility”. - Page 22 Step 4: Click “Next”. Step 5: Click “Next”.
- Page 23 Step 6: Click “Finish”. Step 7: To install 802.1X function, click “Browse the CD”. authentication...
- Page 24 Step 8: Run “CD-ROM:\\Utility \AegisI5.exe” of the installation CD. Step 9: Click “Install”. Step 10: Click “Close”. Windows may reboot after the installation.
-
Page 25: Chapter 3 Using The Utility
Chapter 3 Using the Utility The Configuration & Monitor Utility is a powerful application that helps you to configure the network card and monitor the statistics of the communication link. This application permits the configuration for parameters while the card is operating. It also offers more configuration options and supports Windows 98SE/Me/2000/XP. - Page 26 Description of items in Figure 3-2 is as follows: Profile Name: You can save various wireless settings for different environments. : In use. SSID: Displays the SSID of the WLAN card or Access Point. Channel: Shows which channel is current in use. Authentication: Authentication types currently in use include “OPEN”, “WPA”, “WPA-PSK”...
- Page 27 Description of items in Figure 3-3 is as follows: Profile Name: Users can save different profiles names for different configurations. SSID: Select the AP detected by the system from the drop-down list or input a SSID. Power Saving mode: Transceivers consume a lot of power in WLAN. Select “Power Saving Mode”...
- Page 28 Figure 3-5. Authentication and Security Table 3-1 Authentication Security Secure Key Use 802.1X Setting None None None Key Setting Shared None None TKIP None None WPA-PSK TKIP WPA-PSK Key WPA-PSK Key 3-1-2-1. 802.11 Authentication and Security Authentication: Before a station connects to a SSID, the authentication type used by the SSID must be known.
- Page 29 WPA-PSK encryption: Use WPA-PSK (Preshared Key) for WPA-PSK encryption (TKIP and AES). The system will read the Key with different types of encryption according to the length of Preshared Key. 1. Enter Preshared Key. Please enter 64 or 8~63 ASCII digits. hexadecimal digits 2.
- Page 30 authentication type in the Tunnel. Data needed for authentication includes Tunnel ID, Tunnel Password, Client Certificate or Server Authentication. Protocol: Use assigned authentication type in the safe tunnel. Tunnel ID: Users’ accounts. Password: Passwords for users’ accounts. Figure 3-7. Client Certificate List Figure 3-8.
- Page 31 Description of items in Figure 3-8 is as follows: CA Server is used when TLS, TTLS or PEAP is in use. The Client can verify if such server is reliable and then transmit Client Certificate after the verification is confirmed. (if “Use Client Certificate”...
-
Page 32: 3-2."Link Status" Setting
3-2.“Link Status” Setting “Link Status” tab shows you the current association information about the card’s connection with a wireless network. (see Figure 3-9) Figure 3-9. Link Status Description of items in Figure 3-9 is as follows: Status: Shows current link status. “No Link” will appear on the screen when no connection is available. -
Page 33: 3-3."Site Survey
3-3.“Site Survey” Setting “Site Survey” tab shows you the list of reachable access points and/or peer-to-peer Stations. You can double click SSID that you want to connect or click “Connect”. (see Figure 3-9) Figure 3-10. Site Survey Description of items in Figure 3-10 is as follows: AP Account: Access Points’... -
Page 34: 3-4."Statistics" Setting
3-4.“Statistics” Setting “Statistics” tab shows you the number of packets sent and received by the card (see Figure 3-11) Figure 3-11. Statistics Description of items in Figure 3-11 is as follows: Frames Transmitted Successfully: Number of frames transmitted successfully. Frames Transmitted Successfully Without Retry: Number of frames transmitted successfully, excluding packets transmitted successfully with more than one retry. -
Page 35: 3-5."Advance" Setting
3-5.“Advance” Setting “Advance” tab includes fields of various parameters to review or change drivers. Just click “Apply” button to apply any parameter change to the driver in the tab. A reboot is not needed for the WLAN card (see Figure 3-12) Figure 3-12. -
Page 36: 3-6."About" Setting
3-6.“About” Setting “About” tab displays information about current drivers and physical MAC address (see Figure 3-13). Figure 3-13. About... -
Page 37: Chapter 4 Troubleshooting
Chapter 4 Troubleshooting This troubleshooting guide provides answers to some common problems which you may encounter while installing or using GIGABYTE WLAN card products. Contact the WLAN Technical Support if you encounter problems not mentioned in this section. “802.1x”, “WPA” and “WPA-PSK” can not work Windows XP / 2000: 1. -
Page 38: Chapter 5 Specification
64/128 bit WEP, WPA and WPA2 Quality of Service (QoS) Roaming Seamless roaming among 11b/g/n access points. Management Utility Monitors the network situation. Mechanical 7.5g 1.0g Weight 50.8mm*29.8mm*3.65mm 0.15mm Dimension Packaging Generic, Gigabyte, private labeling optional Subject to change without notices. - Page 39 5. This compliance to FCC radiation exposure limits for an uncontrolled environment, and minimum of 20 cm separation between antenna and body. 6. Only the type of antenna tested may be used. 7. The end product must carry a label stating "Contains TX FCC ID:JCK-GN-WS30N-RH".
Need help?
Do you have a question about the GN-WS30N-RH and is the answer not in the manual?
Questions and answers