
Related Manuals for Gigabyte GN-WB31N-RH


Summary of Contents for Gigabyte GN-WB31N-RH
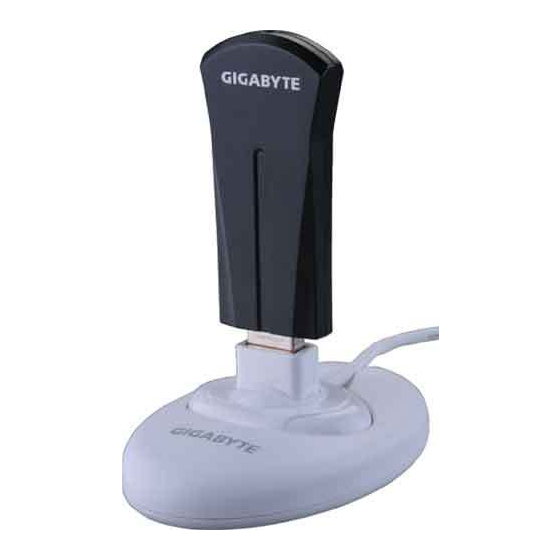
- Page 1 GN-WB31N-RH AIRCRUISER N300 USB Adapter Quick Start Guide http://www.gigabyte.com.tw Rev. 1.0...
- Page 2 Federal Communication Commission Interference Statement: This equipment has been tested and found to comply with the limits for a Class B digital device, pursuant to Part 15 of the FCC Rules. These limits are designed to provide reasonable protection against harmful interference in a residential installation. This equipment generates, uses and can radiate radio frequency energy and, if not installed and used in accordance with the instructions, may cause harmful interference to radio communications.
-
Page 3: Table Of Contents
YSTEM PECIFICATIONS ....................1 ONTENTS ACKAGE LED I .......................1 NDICATORS ....................1 YSTEM EQUIREMENTS CHAPTER 2 INSTALLATION............2 2-1. I GN-WB31N-RH................2 NSTALLING THE 2-2. S 3......................4 MART ETUP CHAPTER 3 USING THE WIRELESS UTILITY ......2 3.1. P ......................2 ROFILE 3.2. L .......................1 TATUS 3.3. -
Page 4: Chapter 1 Product Overview
Power in a small package With the design of small and convenient size, the GIGABYTE’s GN-WB31N-RH is powerful. Enabling 54 Mbps wireless Internet sharing – 5 times faster than most Wireless USB adapters on the 802.11b network. High-level WEP encryption protects your network from would be hackers without a hit on performance. -
Page 5: System Specifications
64/128 bit WEP, 802.1x, WPA and WPA2 Quality of Service (QoS) Roaming Seamless roaming among 11b/g/n access points. Management Utility Monitors the network situation. Mechanical 15 g ± 1.0g Weight Dimension 77.6mm*31.0mm*9.1mm ± 0.5mm Packaging Generic, Gigabyte, private labeling optional... -
Page 6: Contents Package
Before beginning the installation procedures, please inspect the components to assure that they have not been damaged during shipping. The components include: Package Contents • GN-WB31N-RH with pocket clip cap • GN-WB31N-RH Setup CD-ROM • Quick Start Guide In case of any missing or damaged accessories, please contact your local distributor or authorized reseller immediately. -
Page 7: Chapter 2 Installation
Chapter 2 Installation This chapter covers the installation of the GN-WB31N-RH for your Notebook or Desktop PC. The following sections will assist you with proper installation of the Adapter. 2-1. Installing the GN-WB31N-RH Note: If your system has other third party wireless drivers installed, we suggest you disable them before starting installation. - Page 8 Figure 2-2. Found New Hardware Wizard Step 4: Select the driver locations. Click Next. Figure 2-3. Found New Hardware Wizard Step 5: Copying files, when complete, click on Next...
-
Page 9: Smart Setup 3
Note: The following section applies to users of GIGABYTE Wireless Routers. GIGABYTE SmartSetup 3 is a powerful, yet user-friendly wireless network configuration wizard specially designed for GIGABYTE wireless networks. If you are connecting to a GIGABYTE wireless router, SmartSetup 3 will detect this and activate. - Page 10 Figure 2-5. SmartSetup 3 Network Selection Step 2: Create a WPA(WPA-PSK) Passphrase using any keyboard character. Make it no less than 8 but no more than 63 characters in length. Anyone wishing to gain access to your network, will first need to key-in this Passphrase. In the example below, we used ‘I love green eggs and ham’.
- Page 11 Step 3: Your GIGABYTE router’s web configuration utility will automatically open, and detect your ISP type. Just input the Username and Password. Click Continue. Figure 2-7. Auto detecting your ISP type Note: If Figure2-7 Setup” from the main menu which displays. For more information...
-
Page 12: Chapter 3 Using The Wireless Utility
Figure 3-1. GN-WB31N-RH Wireless Utility quick start icon To open the GN-WB31N-RH Utility, double click the quick start icon located in your system tray. Or, go to Windows Start menu, select Programs, Gigabyte Wireless Network Adapters, GN-WB31N-RH and then GN-WB31N-RH Utility. - Page 13 Figure 3-2. Current profile Description of items in Figure 3-2 is as follows: Profile Name: A profile can be saved for various wireless settings in different environments, i.e. home, office, and the corner coffee shop. SSID: The Network Name of the wireless router or Access Point. Channel: Shows the current wireless channel.
- Page 14 3-1-1. Configuration Screen If you want to ADD new profiles, or EDIT existing ones, the Configuration screen will open. Here you will Name your profile, and if you like, select an alternate network type (Ad hoc), restrict on SSID connections and more. All three tabs shown (see Figure 3-3) are related, so when you’re done with all three (Configuration, Authentication, Advanced) tabs, click Figure 3-3.
- Page 15 Preamble will function but not PSM. Also, the Channel option will appear and 802.1X Authentication will be disabled. (Default: Infrastructure) TX Power: Select percentage of transmitted power. (Default: Auto) RTS Threshold: This is a mechanism implemented to prevent the “Hidden Node” problem, “Hidden Node”...
- Page 16 3c29f2536bef3276d32e364a2c) Note: Using a Hex key is more secure than using an ASCII key, and if you are connecting to a GIGABYTE Router or Access Point, ASCII keys are not allowed and you must use a Hex key. WPA-PSK/WPA2-PSK encryption: WPA-PSK/ WPA2-PSK (Preshared Key) uses TKIP or AES based on your choice.
- Page 17 Figure 3-5. 802.1X Authentication Description of items in Figure 3-5 is as follows: Authentication type: PEAP, TLS/Smart Card, TTLS and MD5-Challenge. (Default: PEAP) Session Resumption: This feature can create a new connection without the overhead of a full handshake. Identity: The Account’s User ID. Password: Passwords for users accounts can be used when LEAP and MD5-Challenge are selected as authentication types.
- Page 18 Protocol: Use assigned authentication type in the safe tunnel. Tunnel ID: Users’ accounts. Password: Passwords for users’ accounts. Figure 3-6. Client Certificate Selection List...
- Page 19 3-1-2-2. 802.1x Settings - CA Server Tab CA Server is used when TLS, TTLS or PEAP is in use. When Use certificate chain is checked, the Client can verify if such server is reliable and then transmit Client Certificate after the verification is confirmed. Figure 3-7.
- Page 20 Server name must match exactly: If this option is selected, the server name of server certificate must be the same as “Server Name” or as the name of domain where the server is located. Domain name must end in specified name: If this option is selected, the certificate issuer must be the domain or secondary domain entered in “Server Name”.
- Page 21 Ad Hoc Wireless Mode: Sets Ad Hoc Wireless Protocols, including 802.11 B/G mix, 802.11 B Only and 802.11 G Only. (Default: 802.11 B/G mix) TX Burst: The longest interval between frames is normally one DIFS while frames are transmitted. When this setting is open, the longest interval between frames is one SIFS that means the system is allowed to transmit higher capacity of data in one interval.(Default: OFF) B/G Protection: 802.11b uses CCK modulation.
-
Page 22: Link Status Tab
3.2. Link Status Tab The Link Status tab displays the current association information about the Adapters connection with a wireless network. (see Figure 3-9) Figure 3-9. Link Status Description of items in Figure 3-9 is as follows: Status: Shows current link status. “No Link” will appear on the screen when no connection is available. -
Page 23: Site Survey Tab
the signal strength in dBm. Noise Level: Noise level during connection. 3.3. Site Survey Tab The Site Survey tab shows you the list of reachable access points and/or peer-to-peer Stations. Just double click on the SSID that you want to connect or click the Connect button. -
Page 24: Statistics Tab
Encryption: The security method used by the Access Point. Authentication: The authentication type used by the Access Point. Network Type: Informs you if an Access Point (infrastructure) or other stations (802.11 Ad Hoc) is connected. When it is 802.11 Ad Hoc, we can select a channel for all members in 802.11 Ad Hoc. - Page 25 Frames Transmitted Successfully: Number of frames transmitted successfully. Frames Transmitted Successfully Without Retry: Number of frames transmitted successfully, excluding packets transmitted successfully with more than one retry. Frames Transmitted Successfully After Retry[s]: Number of frames transmitted successfully with more than one retry. Frames Fail To Receive ACK After All Retries: Number of frames failing to receive ACK after many retries.
-
Page 26: Qos
3.5. QoS The Qos tab allows you to configure the Quality of services settings. Qos configuration contains WMM Enable function, Enable WMM Power Save setting, and Enable Direct Link Setup. (see Figure 3-12) Figure 3-12. QoS Tab WMM (Wi-Fi Multimedia) is a subset of the IEEE RFC known as 802.11e. WMM is designed to support user applications and works with all three 802.11 wireless physical layer standards - 802.11a, 802.11b and 802.11g. - Page 27 Direct Link Setup Enable– Enable Direct Link Setup Enable functions. Select Direct Link Setup Enable option and click Apply. Direct Link Setup MAC Address– Specify the MAC Address of client adapter you want to direct link and click Apply to add DLS status table. Timeout Value–...
-
Page 28: About Tab
3.6. About Tab The About tab displays information about current drivers and physical MAC address (see Figure 3-13). Figure 3-13. About Tab GNConfig Version (Date) – The version number (and date) of the Adapter Utility Driver Version (Date) – The version number (and date) of the Adapter Driver. EEPROM Version –... -
Page 29: Appendix A Troubleshooting
Appendix A Troubleshooting This troubleshooting guide provides answers to some common problems which you may encounter while installing or using GIGABYTE Wireless Adapters. Contact the GIGABYTE Wireless Technical Support Team at www.giga-byte.com if you encounter problems not mentioned in this section. -
Page 30: Appendix B Regulatory Information
Please contact local spectrum management authorities for further details before putting this device into operation. GIGA-BYTE Technology, Inc. declares that the product: Wireless USB Adapter Model Number: GN-WB31N-RH is in conformity with and in accordance with the European Directive of EMC, 89/336 EEC for the following sections: EN 61000-3-2, EN 61000-3-3, EN 55024, and EN 55022 Disturbances and Immunities GIGA-BYTE Technology, Inc. -
Page 31: Appendix C Warranty
Thank you for purchasing the GIGABYTE Product. This limited warranty statement will provide you one year warranty starting from the purchase date. Of which if any defect is occurred due to accidents or any man-made factors, or any unauthorized torn-off or damage to GIGABYTE’s sticker on the product, GIGABYTE Technology will not provide after-sale services, such as: •... - Page 32 第十二條 型式認證合格之低功率射頻電機,非經許可,公司、商號或使用者均 不得擅自變更頻率、加大功率或變更原設計之特性及功能。 第十四條 低功率射頻電機之使用不得影響飛航安全及干擾合法通信;經發現有 干擾現象時,應立即停用,並改善至無干擾時方得繼續使用。 前項合法通信,指依電信法規定作業之無線電通信。 低功率射頻電機須忍受合法通信或工業、科學及醫療用電波輻射性電 機設備之干擾。...
Need help?
Do you have a question about the GN-WB31N-RH and is the answer not in the manual?
Questions and answers