Table of Contents
Advertisement
Quick Links
G
G
ENESIS
ENESIS
Owners Guide
DANGER
If you smell gas:
1. Shut off gas to the appliance.
2. Extinguish any open flames.
3. Open lid
4. If odor continues, keep away from the
appliance and immediately call your
gas supplier or your fire department.
Leaking gas may cause a fire or explosion
which can cause serious bodily injury or
death, or damage to property.
WARNING
1. Do not store spare liquid propane
cylinder within 10 feet (3m) of this
appliance.
2. Do not store or use gasoline or other
flammable liquids or vapors within 25
feet (8m) of this appliance.
WARNING: Follow all leak-check proce-
dures carefully in this manual prior to
barbecue operation. Do this even if the
barbecue was dealer-assembled.
NOTICE TO INSTALLER: These instruc-
tions must be left with the owner and the
owner should keep them for future use.
THIS GAS APPLIANCE IS DESIGNED FOR
OUTDOOR USE ONLY.
WARNING: Do not try to light this appli-
ance without reading the "Lighting" In-
structions section of this manual
S
S
®
®
ILVER–A
ILVER–A
Gas Grill
Y
OU MUST READ THIS
BEFORE OPERATING YOUR GAS GRILL
A030.b
B002.b
C001.b
D113.a
Natural Gas
O
G
WNERS
UIDE
®
55142 02/28/00
Advertisement
Table of Contents

Related Manuals for Genesis Gas Grill


Summary of Contents for Genesis Gas Grill
- Page 1 WARNING: Do not try to light this appli- ance without reading the “Lighting” In- structions section of this manual ILVER–A ILVER–A Gas Grill OU MUST READ THIS BEFORE OPERATING YOUR GAS GRILL Natural Gas WNERS A030.b B002.b C001.b D113.a 55142 02/28/00 UIDE ®...
- Page 2 Failure to follow the Dangers, Warnings and Cautions contained in this Owner’s Manual may result in serious bodily injury or death, or in a fire or an explosion causing damage to property. Do not store a spare or disconnected liquid propane cylinder under or near this barbecue. Improper assembly may be dangerous.
-
Page 3: Warranty
Weber-Stephen Products Co. (Weber) hereby warrants to the ORIGINAL PURCHASER of this Weber Gas Grill that it will be free of defects in material and workman- ship from the date of purchase as follows: Aluminum Castings, lifetime 1 year paint... -
Page 4: Table Of Contents
Contents Danger & Warnings ... A-2 Warranty ... A-3 General Instructions ... A-5 Exploded View ... A-6 Parts List ... A-9 Assembly Instructions ... B-1 Installing Features ... C-1 Operating ... D-1 Lighting ... D-1 Manual Lighting ... D-2 Cooking ... D-3 Storage and/or Nouse ... -
Page 5: General Instructions
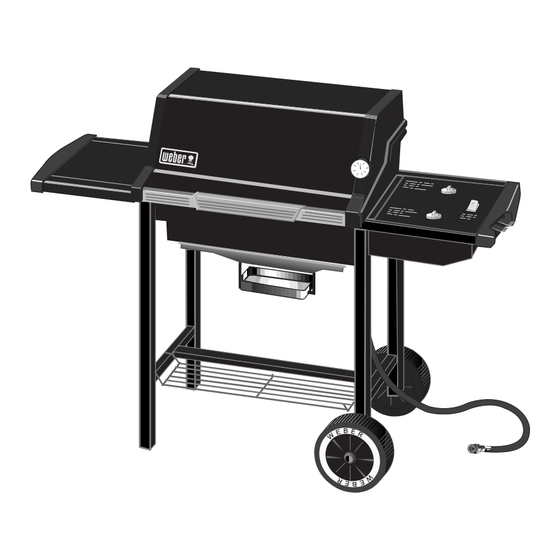
General Instructions Your Weber Gas Barbecue is a portable outdoor cooking appliance. With the Weber Gas Barbecue you can grill, barbecue, roast and bake with results that are difficult to duplicate with indoor kitchen appliances. The closed lid and Flavorizer® Bars produce that “outdoor”... - Page 6 Genesis Silver-A NG...
- Page 7 Hinge Pin Left Endcap Shroud Handle Warming Rack Cooking Grates Flavorizer Bars Cooking Box 1/4-20 keps nut Slide Out Bottom Tray Catch pan holder Left Trim Piece Work Surface 1/4-20 x 1 3/4 inch bolts Left Frame 1/4-20 x 1/2 inch bolts Nylon Washers Leg Frame 1/4-20 x 2 inch bolts...
- Page 8 © 1999 Weber-Stephen Products Co., Weber, the silhouette, and the kettle configuration are registered trademarks ® of Weber-Stephen Products Co., 200 East Daniels Road, Palatine, IL, 60067-6266, U.S.A. This product is covered by one or more United States patents and patents in other nations globally. Printed in the U.S.A.
- Page 9 Screwdriver Phillips screwdriver Hammer 7/16 open-end or an adjustable wrench Pliers Block of wood Lid - 1 Cooking Box - 1 Cooking grates - 2 Control panel - 1 Left Frame - 1 Right Frame -1 Wheel Frame - 1 Leg Frame - 1 Frame Connectors - 1 Left Trim Piece - 1...
- Page 10 Warming Rack - 1 Flavorizer Bars - 5 Wrap-Around Trim Piece - 1 Bottom tray - 1 Catch Pan Holder - 1 Catch-Pan - 1 Disposable Drip Pans - 2 Thermometer - 1 Wheels - 2 Manifold Support Bracket - 1 Burner Control Knobs - 2 Hinge Pins (1/4 x 1 1/2 inch clevis pin) - 2 2 inch bolts (1/4 x 20 x 2 inch bolts) - 1...
-
Page 11: Assembly Instructions
Assembly Instructions Assemble wheel frame You will need: axle rod, two wheel hubcaps, two wheels, wheel frame, hammer and a block of wood. Place one end of the axle rod on the block of wood (or other protected surface). Tap one hubcap onto the end of the axle rod. - Page 12 Continue frame assembly You will need: leg frame, wheel frame, four 1/2 inch bolts, four nylon washers and a 7/16 inch or adjustable wrench. Place the leg frame onto the tabs of the left frame. Place the wheel frame onto the tabs of the right frame. The leg tabs must be on the inside of the frames.
- Page 13 Tighten by holding the bolt with pliers while you tighten the nut with a wrench. Your Weber Gas Grill Manifold assembly consisting of gas manifold, valves and gas burners has been factory assembled, pressure- and flame- tested. As a safety...
- Page 14 Install manifold bracket You will need: manifold bracket. Hook the bracket(2) onto the manifold in the center. Place your hand underneath the bracket. Lift the manifold, bracket and cooking box slightly, then hook the tab of the bracket onto the frame brace(1). Install frame connector You will need: frame connector, two 1 3/4 inch bolts, two nylon washers and a 7/16 inch or adjustable...
- Page 15 Gas Line Piping If the length of the line required does not exceed 50 feet, use a 5/8" O.D. tube. One size larger should be used for lengths greater than 50 feet. Gas piping may be copper tubing, type K or L; polyethylene plastic tube, with a minimum wall thickness of .062 inch;...
- Page 16 Check that all burner valves are off You will need: burner control knobs. Valves are shipped in the OFF position, but you should check to be sure that they are turned OFF. Put the knob on each valve. Check by pushing down and turning clockwise.
- Page 17 Check for gas leaks DANGER Do not use an open flame to check for gas leaks. Be sure there are no sparks or open flames in the area while you check for leaks. Sparks or open flames will result in a fire or explosion which can cause serious bodily injury or death and damage to property.
- Page 18 Install the slide out bottom tray You will need: the slide out bottom tray(1), catch pan holder(2), catch pan and one disposable drip pan. Hook the ends of the catch pan holder into the hole in the slide out bottom tray. The front of the catch pan holder must be on the same side as the finger grip(1) of the bottom tray.
- Page 19 Install Lid You will need: lid, two hair pin cotters(1) and two hinge pins(2). Place lid on top of the cooking box. Align the hinges at the rear of the barbecue. Insert hinge pins through the hinges from the outside. Insert hair pin cotters into the small holes in the hinge pins.
-
Page 20: Installing Features
Installing Features Install the right trim piece with tool holders You will need: Right trim piece with tool holders Push the Right trim piece into the frame as shown(1), making sure that the tabs on the underside of the trim piece are snapped into the slots in the frame.(2) Install the left end trim piece You will need: End trim piece, two 1/2 inch bolts, two... - Page 21 Install Flavorizer® Bars and Cooking Grates You will need: five Flavorizer Bars and two cooking grates. Place the Flavorizer Bars side by side in the cooking box. Set the cooking grates onto the ledges in the cooking box with the rounded sides up. Installing the warming rack You will need: warming rack.
-
Page 22: Operating
Lighting Summary lighting instructions are on the control panel. DANGER Failure to open the lid while igniting the barbecue’s burners, or not waiting 5 min- utes to allow the gas to clear if the barbe- cue does not light, may result in an explo- sive flame-up which can cause serious bodily injury or death. -
Page 23: Manual Lighting
Manual Lighting DANGER Failure to open lid while igniting the barbecue’s burners, or not waiting 5 min- utes to allow the gas to clear if the barbe- cue does not light, may result in an explo- sive flame-up which can cause serious bodily injury or death. -
Page 24: Cooking
Weber Gas Barbecue is stored indoors, the gas supply MUST BE DISCONNECTED. After a period of storage and/or nonuse, the Weber Gas Grill should be checked for gas leaks and any obstructions in the burner tubes before using. (See “Maintenance” Section.) -
Page 25: Cast Iron Cooking Grates Care
Cast Iron Cooking Grates Care Instructions WARNING: Follow all safety instructions provided with your barbecue. Do not drop cast iron grates, they will break. First Time Use - Wash thoroughly with a mild dishwashing liquid to remove the wax coating used for protection in shipping. -
Page 26: Annual Maintenance
Annual Maintenance After a period of nonuse, we recommend that you perform the following maintenance procedures for your safety. WARNING: Check the hose before each use of the barbecue for nicks, cracking, abrasions or cuts. If the hose is found to be damaged in any way, do not use the barbecue. -
Page 27: General Maintenance
General Maintenance Weber Spider Stopper™ Guards Your Weber Gas Barbecue, as well as any outdoor gas appliance, is a target for spiders and other insects. They can nest in the venturi section (Venturi(1), air shutter(2), venturi fin(3) ) of the burner tubes. This blocks the normal gas flow, and can cause the gas to flow back out of the air shutter. -
Page 28: Replacing Main Burners
Replacing Main Burners 1) Your Weber Gas Barbecue must be OFF and cool. 2) Turn gas OFF at source. 3) To remove control panel: take off the burner control knobs. Remove the screws holding the control panel in place. Lift off the control panel. 4) Unlatch the Spider Stopper™... -
Page 29: Crossover Ignition System Operations
9) Reinstall the Spider Stopper Guards. Slightly rotate the Spider Stopper Guards so that the seams are in line with the Venturi fins(1). There should be no gaps in the seams or in the fit around the burners(2) and valves(3). CAUTION: If the Spider Stopper Guards do not fit tightly, contact the Customer Service Represen- tative in your region using the contact information... -
Page 30: Troubleshooting
Problem Burners burn with a yellow or orange flame, in conjunction with the smell of gas. Burner does not light, or flame is low in HIGH position. Experiencing flare-ups: CAUTION: Do not line the bottom tray with aluminum foil. Burner flame pattern is erratic. Flame is low when burner is on HIGH.
Need help?
Do you have a question about the Gas Grill and is the answer not in the manual?
Questions and answers