Table of Contents
Advertisement
Advertisement
Table of Contents

Related Manuals for Polaroid PhotoKeeper


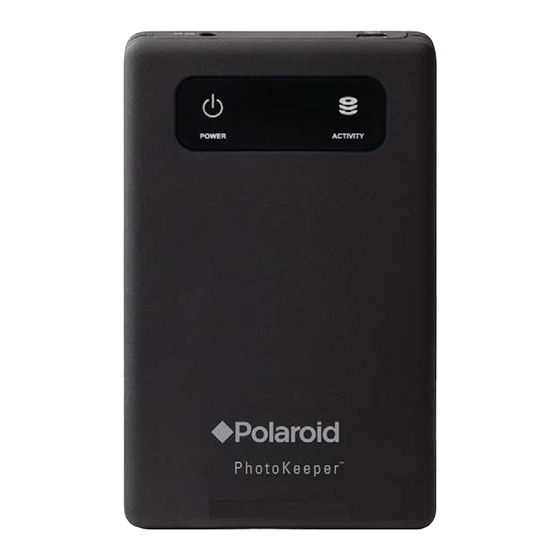
Summary of Contents for Polaroid PhotoKeeper
- Page 1 PhotoKeeper User’s Manual 20071226 20080404...
-
Page 2: Table Of Contents
ONGRATULATIONS on your purchase of a Polaroid PhotoKeeper™. Please read carefully and follow all instructions in the manual and those marked on the product before fi rst use. Failing to follow these warnings could result in personal injury or damage to the device. Also remember to keep this User’s Manual in a convenient location for future reference. -
Page 3: Getting Started
Conveniently view all your photos in thumbnail and expanded size. • Stores a lifetime of memories: Storage capacity for up to 80,000 photos Package contents Check to ensure the following components are included: • PhotoKeeper™ • USB cable (Type A to mini-B) • AC power adapter • Slipcase •... -
Page 4: How To Make A Backup Of Your Photos
The PhotoKeeper™ will not automatically start up if it is connected to your computer before it has completely started up. 2. Plug in power adapter. Connect the included 5V power adapter to both PhotoKeeper™ and the wall outlet. Continue to Step 3. The power indicator on your PhotoKeeper™ will glow. - Page 5 The Countdown screen will automatically appear on your computer. Once the Countdown screen appears on your computer, the backup countdown timer will begin. When the countdown timer reaches zero, the backup will automatically start. There may be a slight delay between connecting PhotoKeeper™ and when the Countdown screen appears.
- Page 6 Troubleshooting section of this manual. 5. Back up will begin on its own. PhotoKeeper™ will automatically search for and backup all your digital photos. The amount of time required to complete this process will depend on your computer’s confi guration and number of photos on your computer.
- Page 7 How To Make a Backup of Your Photos...
-
Page 8: Restoring (Copying) Photos
1. You are restoring to the same computer PhotoKeeper™ currently holds a backup for. 2. You are restoring to a computer other than the one PhotoKeeper™ holds a backup for OR you are restoring to the same computer with a reinstalled operating system. - Page 9 Note: The drive you select must have enough space to hold your selected photos. 6. Click the Start Restore button to restore your photos. PhotoKeeper™ will begin to restore your photos. Depending on the number of photos being restored and speed of your computer, the restore process may take several minutes.
-
Page 10: Moving Images From Photokeeper™ To Another Computer Or Restoring (Copying) To The Same Computer With A Reinstalled Operating System
Restoring (Copying) Photos When moving images from PhotoKeeper™ to another computer OR restoring (copying) to the same computer with a reinstalled operating system... - Page 11 Note: The drive you select must have enough space to hold all of your photos. 4. Click the Start Restore button to restore all of your photos. PhotoKeeper™ will begin to restore your photos. Depending on the number of photos being restored and speed of your computer, the restore process may take several minutes.
-
Page 12: Confi Guration Options
PhotoKeeper™ backs up fi les and is recommended for advanced users only. Note: PhotoKeeper™ will only back up photos that meet all criteria as specifi ed in the backup options. For example, if both fi le size and fi le extension criteria have been set, a photo must meet both criteria in order to be backed up. -
Page 13: To Have Photokeeper™ Automatically Search Your Entire Computer
5. Check the boxes next to the fi le types that you want to back up. Use + and – to expand or collapse the tree. You must select at least one fi le type to back up. 6. Click the Save button. When PhotoKeeper™ starts its next backup, it will only back up the fi le types that you have specifi ed. -
Page 14: Change The Way Photokeeper™ Handles Fi Les Found In E-Mails And Zip Fi Les
3. Click on the Embedded Photos button. 4. Check the Search for photos in compressed fi les box if you want PhotoKeeper™ to back up fi les found within Zip fi les. Leaving this box unchecked will cause PhotoKeeper™ to skip Zip fi les, including those attached to e-mails. The default setting is to search for photos in compressed fi... -
Page 15: Advanced Confi Guration Options
The Reset tool allows you to reset PhotoKeeper™ for use with another computer (see Working with more than one computer). PhotoKeeper™ is designed to backup a single computer at a time. If PhotoKeeper™ already holds a backup for a computer but you would like to use it to backup a different computer, you must fi... -
Page 16: Statistics
Ensure that you have a copy of your photos on before resetting PhotoKeeper™. 5. Click the Reset button. PhotoKeeper™ will begin to reset itself. This procedure may take several minutes. 6. When the reset completes, click on the OK button. PhotoKeeper™ will automatically restart and prepare to back up your computer. -
Page 17: Working With Your Photos
Note: This feature is only supported under Windows XP and Vista. 1. Connect PhotoKeeper™ to your computer and let the backup complete. If you have already backed up photos onto PhotoKeeper™, you should click on the View Images button on the Countdown page. -
Page 18: To Attach Your Photos To An E-Mail (Microsoft Outlook And Outlook Express Only)
Deleting will allow you to remove backed up photos or directories (including their contents) from PhotoKeeper™. Deleting a photo or directory will remove it from PhotoKeeper™ but will not remove it from your computer. If you delete a photo or directory from PhotoKeeper™... - Page 19 Working with Your Photos To delete a directory: 1. Connect PhotoKeeper™ to your computer. If you have already backed up photos onto PhotoKeeper™, you should click on the View Images button on the Countdown page. 2. If you have just completed a backup of your computer and new photos were found, click on the View All Photos button.
-
Page 20: Troubleshooting
Some photos were missed during backup. Check Backup options from the Setup Options link. For more information, see Backup Confi guration Options in PhotoKeeper™ User’s Manual. PhotoKeeper™ beeps after it has been connected to Connect power adapter computer. PhotoKeeper™ doesn’t automatically start when... -
Page 21: Frequently Asked Questions
Yes, this is normal. Each time PhotoKeeper™ backs up your computer, it only backs up photos that it does not already have a copy of. As a result, the fi rst backup usually takes the longest and subsequent backups are usually much quicker. -
Page 22: Recycling And Copyright Information
As a consumer, you are responsible for ensuring that this product is disposed of properly. To fi nd out how to properly dispose of this product, go to www.polaroid.com and click on “Company“ or call the customer service number for your country listed in the instruction manual.
Need help?
Do you have a question about the PhotoKeeper and is the answer not in the manual?
Questions and answers