Vermont Castings 1920 Homeowner's Installation And Operating Manual
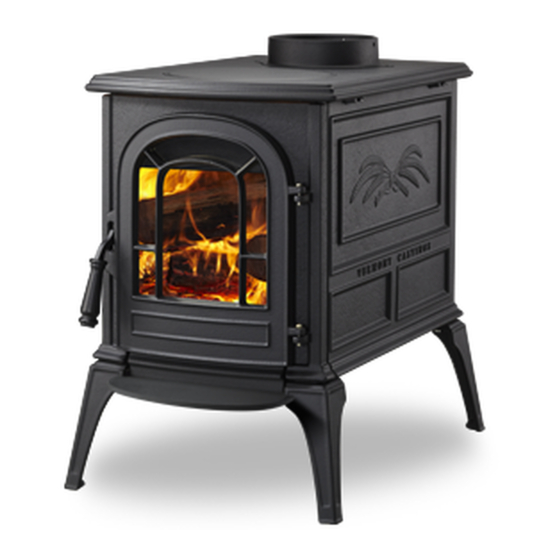
The aspen woodburning stove
Hide thumbs
Also See for 1920:
- Installation & operating manual (38 pages) ,
- Homeowner's installation and operating manual (32 pages) ,
- Homeowner's installation and operating manual (28 pages)
Table of Contents
Advertisement
Safety Notice: if thiS appliaNce iS Not properly iNStalled, operated aNd maiN-
taiNed, a houSe fire may reSult.
to reduce the riSk of fire, follow the iNStallatioN iNStructioNS. failure to
follow iNStructioNS may reSult iN property damage, bodily iNjury or eveN
death. coNtact local buildiNg officialS about reStrictioNS aNd iNStallatioN
iNSpectioN requiremeNtS iN your area.
do Not discard this manual: retain for future use
3069
aspen cover
2/10/00
the aspen
woodburning Stove
model 1920
Homeowner's
Installation
and Operating
Manual
For use in the
United States and Canada
®
30000369 7/11 Rev. 22
Advertisement
Table of Contents

Related Manuals for Vermont Castings 1920


Summary of Contents for Vermont Castings 1920
- Page 1 ® woodburning Stove model 1920 Homeowner’s Installation and Operating Manual For use in the United States and Canada Safety Notice: if thiS appliaNce iS Not properly iNStalled, operated aNd maiN- taiNed, a houSe fire may reSult. 3069 to reduce the riSk of fire, follow the iNStallatioN iNStructioNS. failure to...
-
Page 2: Table Of Contents
® introduction Thank you for choosing a Vermont Castings Aspen to meet your heating needs. We’re confident you will find the Aspen to be an effective wood-burning heater incorporating modern, non-catalytic combustion technology with the classic aesthetic appeal of its Vermont Castings lineage. -
Page 3: Specifications
Since so many variables affect performance, Width (Left leg - Right leg) ....... 16” (406 mm) consult your Vermont Castings authorized dealer to determine realistic expectations for your home. Depth (Front leg - Rear leg)..... 23” (584 mm) Height to top of top exit flue collar ... - Page 4 Aspen Woodburning Stove ® installation Safety Notice: if your Stove iS Not prop- chimneys erly iNStalled, operated aNd maiNtaiNed, a Your stove must be connected either to a sound houSe fire may reSult. for Safety, follow masonry chimney that meets local codes, to a relined all iNStallatioN, operatioN aNd maiNte- masonry chimney that meets local codes, or to an NaNce directioNS.
- Page 5 Aspen Woodburning Stove ® masonry chimneys, cont’d. Ask your dealer about components available for con- • Unused openings in an existing masonry chimney necting the stove to a steel chimney liner. must be sealed with masonry to the thickness of chimney connector guidelines the chimney wall, and the chimney liner should be repaired.
- Page 6 Aspen Woodburning Stove ® double-wall chimney connectors Thimble Sleeve The Aspen is approved for installation in the U.S. and Flue Canada with double-wall chimney connectors that have Chimney been tested and listed for use with solid-fuel burning Connector appliances by a recognized testing laboratory. Keep sleeve Follow the instructions for assembling and installing end flush with...
- Page 7 Aspen Woodburning Stove ® connection above the fireplace In this installation, the chimney connector enters the fireplace flue though a thimble located above the fire- place. The liner of the fireplace chimney should extend Chimney Connector Heat Shield at least to the point at which the chimney connector enters the chimney.
- Page 8 Aspen Woodburning Stove ® u.S. requirements: The National Fire Protection Association (NFPA) has Solid insulated, Min. 2” listed factory- established guidelines for use in the United States for (51mm) built chimney length set flush passing chimney connectors through combustible walls. with flue Min.
-
Page 9: Floor Protection Requirements
Aspen Woodburning Stove ® floor protection floor protection requirements A tremendous amount of heat radiates from the bottom plate of your Aspen. The floor area directly under and around the stove will require protection from radiant heat as well as from stray sparks or embers that may escape the firebox. -
Page 10: Installation Requirements
Aspen Woodburning Stove ® clearance to Surrounding mobile home installation combustible materials The Aspen is approved for use in manufactured (mo- bile) homes when installed with the optional Mobile When the stove is operating, both the stoveplate and Home Kit #1898 in accordance with the instructions the chimney connector radiate heat in all directions. - Page 11 Aspen Woodburning Stove ® wall Shields Wall shields should be constructed of 24 gauge or heavier sheet metal, or another noncombustible mate- rial such as 1/2” (13mm) insulation board or common brick “laid on flat,” with the 3¹⁄₂" (90mm) side down. 36”...
-
Page 12: Clearances
Aspen Woodburning Stove ® when: a = 9” (229 mm) Max. b = 22¹⁄₂" (572 mm) Min. a = 7¹⁄₂" (191 mm) Max. Max. 9” b = 21” (533 mm) Min. (229mm) a = 6” (152 mm) Max. b = 19¹⁄₂" (495 mm) Min. a = 4¹⁄₂"... - Page 13 Aspen Woodburning Stove ® aspen clearance chart Use the chart below together with the diagrams on the next page to determine the required clearance for your particu- lar installation. Stove clearances are measured from the top plate to the combustible surface. Chimney connector clearances are measured from the connector surface and take into account flue collar offset.
- Page 14 Aspen Woodburning Stove ® uNprotected SurfaceS protected SurfaceS Stove installed Stove installed Stove in corner Stove in corner parallel to wall parallel to wall top exit, No heat Shields top exit, rear heat Shield only rear exit, rear heat Shield only top exit, rear heat Shield and single-wall connector w/ shields, or double-wall connector ST255 exit diagram...
-
Page 15: Assembly
Aspen Woodburning Stove ® assembly You will need the following tools to assemble the Aspen: • 9/16” open end wrench • safety glasses & gloves Carefully tilt the stove • flat head screwdriver • power drill w/ 1/8” (3mm) bit on the pallet to install •... - Page 16 Aspen Woodburning Stove ® 3. If you are not installing a Rear Heat Shield, use the phillips head screw to secure the upper flange of the Adapter to the stove at the hole from which the screw was removed in Step 1. (Fig. 24) Otherwise, a heat shield spacer will be used here.
-
Page 17: Operation
Aspen Woodburning Stove ® operation Another separate supply of oxygen is delivered to the how the aspen works upper area of the firebox to support combustion of Combustion control is achieved in the Aspen through gases released from the main fuel bed. This Second- two separate air delivery systems. - Page 18 Aspen Woodburning Stove ® In newer homes that are well-insulated and weather- tight, poor draft may result from insufficient air in the house. In such cases, a slightly opened window or High door, near the stove on the windward side of the house will provide the fresh air needed.
- Page 19 Aspen Woodburning Stove ® Once the draft is established, open the front door and light the rest of the fuel bed at the bottom. Do not light the main bed of fuel until the chimney be- gins drawing. Step 4. after the stove has been broken-in using Steps 1-3, continue to build the fire gradually.
- Page 20 Aspen Woodburning Stove ® ash disposal cautioN: avoid SlammiNg the Stove Remove ash before it reaches the top of the ash pan. door or StrikiNg the glaSS paNel. do Check the level at least once a day, and before each re- Not operate the Stove with the glaSS paNel miSSiNg, damaged, or brokeN.
-
Page 21: Maintenance
Aspen Woodburning Stove ® maintenance Let the fire in the stove go out and allow the stove to glass replacement cool completely before beginning any maintenance procedure. Replace glass only with MHSC part no. 30000362. The glass panel rests on a cushion provided by three flat care of the cast iron Surface gaskets, and is held in place by two clips. - Page 22 Aspen Woodburning Stove ® gasket replacement adjust the door Your Aspen uses rope-type fiberglass gaskets to make The door latch may need adjustment as the gasket a tight seal between some parts. With use, particularly material compresses over time. The latch engagement on those parts that move, gaskets can become brittle may be tightened by removing the shim washers that and compressed and can begin to lose their effective-...
- Page 23 Reinstall the con- nector sections after cleaning, being sure to secure the individual sections with sheet metal screws. If you cannot inspect or clean the chimney yourself, contact your local Vermont Castings’ Authorized Dealer Phillips or hire a professional chimney sweep. Head...
-
Page 24: Appendix - Draft Management
Aspen Woodburning Stove ® draft management Steel chimney Your stove is only one part of a system that includes the chimney, the operator, the fuel and the home. The other Most factory-made ‘Class A’ steel chimneys have a parts of the system will affect how well the stove works. layer of insulation around the inner flue. - Page 25 Aspen Woodburning Stove ® You can judge the moisture content of wood by its ap- pipe & chimney layout pearance and weight or use a commercially available Every bend in the flue will act as a brake on the exhaust moisture meter for an exact measurement.
- Page 26 Consult your Vermont Castings’ dealer regarding an adapter to attach to the stove to connect an air duct for outdoor combustion air.
-
Page 27: Replacement Parts
48 49 56 48 48 29 55 32 MHSC reserves the right to make changes in design, materials, specifications, prices and discontinue colors and products at any tme, without notice. aspen woodburning Stove 0369 model 1920 Aspen 1920 parts 8/02 30000369... - Page 28 Aspen Woodburning Stove ® aspen woodburning Stove model 1920 (continued) item description part Number item description part Number 29. Glass Gasket, horizontal (8¹⁄₄") 30000382 1. Top See Chart Pg. 28 2. Right Side See Chart Pg. 28 30. Glass Gasket, vertical (2) 30000383 3.
- Page 29 Aspen Woodburning Stove ® 30000369...
- Page 30 Aspen Woodburning Stove ® 30000369...
-
Page 31: Warranty
Aspen Woodburning Stove ® warranty limited 3 year warranty MHSC warrants that this woodburning stove will be free of defects 4. This warranty does not cover a stove repaired by someone in material and workmanship for a period of three years from the MHSC other than a Authorized Dealer. - Page 32 mhSc 149 Cleveland Drive • Paris, Kentucky 40361 www.mhsc.com...
Need help?
Do you have a question about the 1920 and is the answer not in the manual?
Questions and answers