Table of Contents
Advertisement
Advertisement
Table of Contents

Related Manuals for Electrolux EDC67550W


Summary of Contents for Electrolux EDC67550W
- Page 1 用户手册 Tumble Dryer 滚筒干衣机 EDC67550W...
-
Page 2: Table Of Contents
2 electrolux Electrolux. Thinking of you. Share more of our thinking at www.electrolux.com Contents Important safety information Cleaning and maintenance Environment What to do if ... Product description Technical data Control panel Machine settings Before first use Hints for test institutes Programme chart Installation Sorting and preparing laundry... - Page 3 electrolux 3 • Please make sure that no gas lighters or • Only dry fabrics which are designed to be matches have accidentally been left in machine dried. Follow the instructions on pockets of garments to be loaded into ap- each garment label.
-
Page 4: Environment
4 electrolux Environment components are identified by markings, e.g. The symbol on the product or on its >PE<, >PS<, etc. Please dispose of the packaging indicates that this product may packaging materials in the appropriate con- not be treated as household waste. Instead tainer at the community waste disposal fa- it should be taken to the appropriate cilities. -
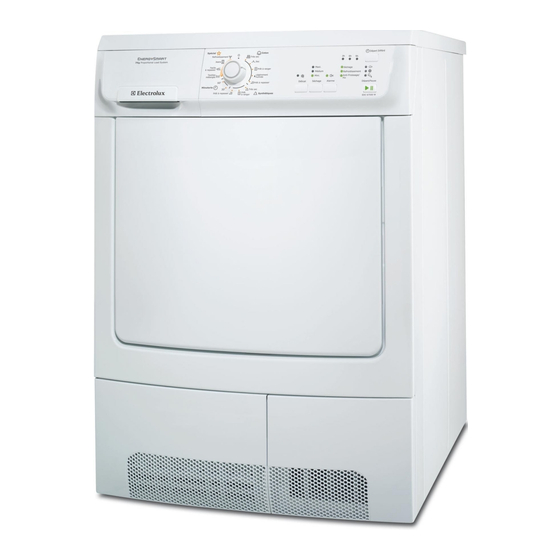
Page 5: Product Description
electrolux 5 Product description Control panel Drawer with condensed water container Fluff filters Push button for base door opening Loading door (reversible) Rating Plate Ventilation grille Heat exchanger Adjustable feet Heat exchanger door... -
Page 6: Control Panel
6 electrolux Control panel Programme knob and On/Off switch Indicator lights DELAY TIMER button Function buttons START/PAUSE button Before first use In order to remove any residues which may 1. Turn the programme knob to TIME have been produced during production, wipe (TIME) . -
Page 7: Sorting And Preparing Laundry
electrolux 7 Programme Application/properties For thin fabrics which are not ironed, e.g. easy care shirts, Cupboard 3 kg table linen, baby clothes, socks, lingerie with bones or wires. (Cupboard) For thin fabrics which are also to be ironed, e.g. knitwear, 3 kg Iron (Iron) cotton shirts. -
Page 8: Daily Use
8 electrolux • Turn items with double-layered fabrics in- Type of laun- Weight side out (e.g. with cotton-lined anoraks, the cotton layer should be outermost). Towelling tow- 200 g These fabrics will then dry better. Important! Do not overload the appliance. Tea cloth 100 g Observe max. - Page 9 electrolux 9 Press the button until the light relevant to the desired delay lights up. This option must be selected after having selected the pro- gramme and before 3 6 9 pressing START/ PAUSE (START/PAUSE) to start the pro- gramme. The machine begins the countdown, which is shown by the pilot lights.
-
Page 10: Cleaning And Maintenance
10 electrolux Putting in extra items or taking items out phase which lasts around 30 minutes. The drum rotates at intervals during this before end of programme phase. This keeps the laundry loose and 1. Open loading door. free of creases. The laundry can be re- Warning! Laundry and drum can moved at any time during the anti- become hot. - Page 11 electrolux 11 3. Refit water reservoir. If the programme has been interrupted as a result of the water reservoir being full: Press the START/PAUSE button to con- Clean the door seal tinue the drying cycle. Wipe the door seal with a damp cloth imme- diately after the drying cycle has finished.
-
Page 12: What To Do If
12 electrolux 6. To empty the heat exchanger, hold verti- cally over a washing-up bowl. Caution! Do not use sharp objects to clean. The heat exchanger could develop leaks. 7. Clean heat exchanger. It is best to use a brush or to rinse thor- oughly with a hand-held shower. -
Page 13: Fluff Filters
electrolux 13 Have you pressed the START/ Press the START/PAUSE (START/ PAUSE (START/PAUSE) button? PAUSE) button again. Select a different programme the Drying results unsatisfac- Wrong programme selected. next time you dry (see “Programme tory. overview” chapter). Lint filters clogged. Clean lint filters. -
Page 14: Technical Data
14 electrolux Technical data This appliance conforms with the following EU Directives: – 2006/95/EC dated 12.12.2006 Low Voltage Directive – 89/336/EEC dated 03.05.1989 EMC Directive inclusive of Amending Directive 92/31/EEC – 93/68/EEC dated 22.07.1993 CE Marking Directive Height x width x depth 85 x 60 x 58 cm Drum volume 108 l... -
Page 15: Hints For Test Institutes
electrolux 15 Water hardness 1. Turn the programme selector to any programme. Water contains, a variable 2. Press simultaneously the DRYNESS and START/PAUSE but- quantity of limestone and min- tons and hold down for approx. 5 seconds: eral salts of which quantities –... - Page 16 16 electrolux Important! The appliance must not be Should the appliance power supply installed behind the lockable door, a sliding cable need to be replaced, this must door a door with a hinge on the opposite side be carried out by an authorised serv- to that of the appliance.
-
Page 17: Service
electrolux 17 Permanent connection Intermediate installation kits for stacked washer and iron aid appliance: In the case of permanent connection it is These intermediate installation kits can be necessary that you install a double pole used to arrange the iron aid appliance and an switch between the appliance and the elec- automatic Electrolux washing machine tricity supply (mains), with a minimum gap of... - Page 18 18 electrolux Electrolux. Thinking of you. 在 www.electrolux.com 上分享更多我们的思维 目录 重要安全信息 清洁和保养 环境 如果发生下列情况应如何 ... 产品说明 技术数据 控制面板 干衣机设置 首次使用之前 测试学会的提示 程序表 安装 分类和准备衣物 服务 日常使用 如有更改恕不另行通知 重要安全信息 重要事项! 为了您的安全起见和确保正确使 导致受伤或严重故障。 请联系您当地的服 用,安装和初次使用干衣机之前,请仔细通 务中心。 始终坚持使用原装备件。 读本用户手册,包括其中的提示以及警 • 被烹饪油丙酮、汽油、煤油、污迹去除 告。 为了避免不必要的错误和意外,必须确 剂、松节油、蜡和蜡去除剂等物质污染的...
- Page 19 electrolux 19 • 安装本干衣机所需的任何电气工作都应该 • 切勿从电源线拉出插座上的插头; 请务必 由合格电工或有能力的人员进行。 握住插头。 • 必须小心确保干衣机没有阻碍电源线。 • 如果电源线、控制面板、工作台面或底座 • 如果将干衣机放置在有地毯的地面上,请 损坏而可以接触滚筒干衣机的内部,切勿 调整机脚,使干衣机底下的空气可以自由 使用滚筒干衣机。 流通。 • 使用衣物柔顺剂或类似产品时,必须按照 • 安装干衣机后,检查并确保干衣机没有压 衣物柔顺剂说明书的指示进行。 住或阻碍电源线。 • 小心 - 热烫表面 : 打开照明时,请勿碰 • 如果将干衣机放置在洗衣机的上面,就必 触机门灯罩表面(仅限于配备内部烘干槽 需使用堆叠套件(可选附件)。 照明的干衣机)。 使用 儿童安全 • 此干衣机设计于在家庭中使用。 切勿将本 •...
- Page 20 20 electrolux 产品说明 控制面板 带冷凝水容器的隔间 绒毛滤网 用于打开底座门的按钮 装载门(可反转) 铭牌 通风栅 热交换器 可调机脚 热交换器门 控制面板 程序旋钮和开关 "延迟计时器"按钮...
- Page 21 electrolux 21 "开始/暂停"按钮 功能按钮 指示灯 首次使用之前 为了去除生产时可能产生的任何残余物,可 1. 将程序旋钮转到 TIME(时间)。 使用湿布擦拭干衣机的烘干槽,或将湿布放 2. 按 START/PAUSE(开始/暂停)按钮。 在干衣机内然后执行简短的烘干程序(30分 钟)。 程序表 程序 应用/性质 棉质 7公 Extra (额 彻底烘干厚或多层织品,例如,厚绒布毛巾物品、浴衣。 斤 外) 7公 Strong (强 彻底厚的织物,例如,厚绒布毛巾物品、毛巾。 斤 力) 7公 彻底烘干更厚的织品,例如,厚绒布毛巾物品、针织品、毛 Cupboard 斤 巾。 (衣橱) 7公 用于仍需烫熨的薄织物,例如,编织衣物、棉质衬衫。 Damp (湿)...
- Page 22 22 electrolux 程序 应用/性质 长约10分钟的特殊程序,用于使用市面上销售的清洁套件来 1公 清新和温柔清洗织物。 (仅使用制造商标明适合干衣机的 Cooling (冷 斤 产品; 请遵循制造商的使用说明。)(提供 Buzzer[蜂鸣 却) 器]功能) 分类和准备衣物 分类衣物 • 反转带双层织物的衣物(例如,带棉衬里 的兜帽,棉层应该在最外面)。 这样即可 • 按织品类型分类: 更好的烘干这类织物。 – 棉/亚麻布使用 COTTONS (棉质)程 序组内的程序。 重要事项! 请勿超载干衣机。 遵循 7 公斤的 – 混合织品及合成纤维使用 最大装载量 SYNTHETICS(合成纤维)程序组内的 衣物重量 程序。...
- Page 23 electrolux 23 DELICATE(纤细衣物) 用于特别温和烘干带有护理标签的敏感织 品,和用于对温度敏感的纺织品(例如,丙 烯酸纤维、纤维胶)。 程序将会在低热下执 行。 Delicate(纤细衣物)仅适用于最多3 公斤的装载量。 1. 按 Delicate(纤细衣物)按钮。 相应的 2. 装载您的衣物(请勿强行挤入衣物)。 指示灯将会亮起。 小心! 小心不要让衣物夹在装载门和橡 Dryness(干燥度) 胶密封垫之间。 重复按 Dryness (干燥度)按钮可选择所需 3. 稳固关闭装载门。 必须听到锁定的声 的选项。 相应的指示灯将会亮起。 衣物的 音。 干燥度将会从MIN(最小)到MAX(最 大), 根据需要,多次按Dryness (干燥 选择程序 度)按钮,直到所需的剩余潮湿度的小指示 灯亮起。 当程序完成时,End(结束)指示灯将会亮 起。 Buzzer(蜂鸣器)...
- Page 24 24 electrolux 将会亮起),在3个小时之后,9h将会熄灭 2. 装载或取出衣物。 而6h指示灯将会亮起; 在3个小时之后,6h 3. 稳固关闭装载门。 必须听到锁定的声 将会熄灭而3h将会亮起。 经过9个小时之后 音。 (3h指示灯熄灭),烘干程序将会开始。在 4. 按 START/PAUSE(开始/暂停)按钮继 延迟开始期间,不可以更改程序或选定的延 续烘干程序。 迟。 如果您要进行更改,您必须先将程序选 烘干程序完成/取出衣物 择器转盘转到位置"O"取消所有选项。 选择 烘干程序一旦完成, ANTICREASE/END 新程序、选项和延迟开始,然后按 START/ 过滤器 满槽 (抗皱摺/结束)、 和 指 PAUSE(开始/暂停)。 如果您只要更改选 示灯将会亮起。 如果按下 Buzzer(蜂鸣 项,则只有在新选项和程序兼容的情况下可 器)按钮,将会间歇性的发出声音信号约一 执行此操作。...
- Page 25 electrolux 25 层。 出现上述情况时,请使用刷子和温 水清洗过滤器。 拉出机门,取出机门内 的过滤器。 您可以将它定位,使齿轮的 齿朝向左边或右边。) 清洗之后,务必记 得将它放回原位。 2. 将冷凝水倒入水盆或类似容器中。 4. 从纤维屑滤网取出绒毛,最好是弄湿双 手再执行此操作。 5. 装回过滤器。 3. 装回储水器。 如果程序因为储水器已满而中断: 按 START/PAUSE(开始/暂停)按钮继续 烘干程序。 储水器的容量约为 4升。 这将足够用于 先前在1000转/分钟转速下脱水的大约7 公斤衣物。 冷凝水可作为蒸馏水使用,例如,用于 蒸汽烫斗。 但是,必须先过滤冷凝水 (例如,使用咖啡过滤器)以去除任何 残余物和小绒毛。 清洁机门密封垫 清洁热交换器 烘干程序完成后,立即使用湿布擦拭机门密 如果显示 热交换器,则表示需要清洁热 封垫。 交换器。...
- Page 26 26 electrolux 6. 若要清空热交换器,可垂直握住洗涤 碗。 小心! 请勿使用尖锐物件进行清洁工 作。 这样会使热交换器逐渐泄漏。 7. 清洁热交换器。 最好使用刷子或使用手持淋浴器彻底冲 洗。 8. 装回热交换器并锁定到位(将两个锁垫 圈向外转动直到它们卡入定位)。 9. 关闭底座的机门。 如果 热交换器仍然亮起,干衣机将 无法操作。 小心! 切勿操作不具备热交换器的干衣 3. 从机门内部和热交换器前室清洁绒毛。 机。 用湿布擦拭机门密封垫。 清洁烘干槽 4. 将两个锁垫圈向内转动。 小心! 请勿使用研磨剂或钢丝绒来清洁 烘干槽。 水或清洁剂中的石灰可能会在烘干槽内 部形成几乎不能看见的内层。 衣物的烘 干程度将无法再可靠检测。 衣物从干衣 机取出时比预期更潮湿。 使用标准的家用清洁剂(例如,含醋的清洁 剂)向下擦拭烘干槽的内部和烘干槽骨架。...
- Page 27 electrolux 27 在下次烘干时选择不同的程序(请 烘干效果不理想。 选择了错误程序。 参阅"程序概观"章节)。 纤维屑滤网阻塞。 清洁纤维屑滤网。 绒毛过滤器阻塞。 清洁绒毛过滤器。 热交换器门被纤维屑阻塞。 清洁热交换器。 衣物超载。 遵循建议的装载量。 底部区域的通风槽被遮蔽。 解除底部区域通风槽的遮蔽。 烘干槽的内部表面或烘干槽骨架上 清洁烘干槽的内部表面和烘干槽骨 出现残余物。 架。 安装场地的水导率和机器的标准设 重新编程烘干程度的标准设置(请 置不同。 参阅"编程选项"章节)。 按下按钮时 - 干衣机没有 烘干防护。 启动程序后,不可再设 将程序旋钮转到 O (关闭)。 反应。 置选项。 再次设置程序。 显示的程序时间不规律变 根据衣物的类型和数量,程序时间 自动处理; 这不是干衣机故障。 化,或长时间保持一样。 将会自动更正。...
- Page 28 28 electrolux 电压 230 V - 240 V 需要的保险丝 10 A 总功率 2350瓦 能源效率等级 能源消耗(7公斤棉质,在1000 rpm转速下 3.92 千瓦/小时 预先排水) 平均每年能源消耗 284,1千瓦/小时 使用 家庭 允许的环境温度 +5°C 至 + 35°C 水电消耗值 水电消耗值在标准情况下制定。 该值在家庭环境下操作干衣机时可能会偏差。 以kWh表示的能源消耗/以分钟表示的平均烘 程序 干时间。 (7公斤装载量,在1000 rpm转 3.92 / 125 COTTON(棉质)CUPBOARD(棉质衣 速下预先排水)...
- Page 29 electrolux 29 • 正常和一半装载量下的衣橱干棉质程序期 所有程序必须根据EN 61121(家用滚筒干 间的凝结效率(使用最终湿度更正)。 衣机, - 测量性能的方法)进行检查。 安装 重要事项! 运输此干衣机时,必须直向移 动。 放置干衣机 • 为了您的方便,建议将干衣机放置在靠近 洗衣机的地方。 • 必须将滚筒干衣机安装在一个干净、不会 累积尘埃的地方。 • 干衣机周围的空气必须能够自由流通。 请 勿阻挡前端的通风栅,或干衣机背面的通 风口栅。 • 若要保持使用干衣机时最低的震动和噪 音,应该将它放置在一个平稳的表面上。 3. 从机器拆除箔软管和聚苯乙烯垫。 • 设置其永久操作位置后,检查并确定在使 用水平仪帮助下干衣机绝对水平。 若不 是,可升高或降低机脚直到其水平为止。 • 切勿卸下机脚。 请勿使用deeppile地毯、 木条或类似物体来限制地面间隔。 这样可 能会导致热积聚而影响干衣机的操作。...
- Page 30 30 electrolux 警告! 将切断的插头插入13 amp插座是 一个严重危及安全(触电)的动作。 请确定安全处置切断的插头。 警告! 安装干衣机后,必须能够插拔插 头。 永久连接 如果要永久连接,您必须在干衣机和电源供 应之间安装一个双极开关,且开关接点之间 必须具有至少3毫米的间隙,以及在现行电 气规范下适合所需负载的类型。 开关的黄色和绿色地线在任何接点都必须不 能断开。 特殊附件 您可以从您的伊莱克斯服务团队中心或您的 电源线内的电线颜色按照下列规范分配: 专业零售商获取特殊附件。 蓝色 - 中性线 堆叠洗衣机和iron aid干衣机的中间安装套 电线夹 件: 褐色 - 电线 这些中间安装套件可用来排列iron aid干衣机 绿色和黄色 - 地线 和伊莱克斯自动洗衣机(60厘米宽,前载 绿色和黄色电线必须连接到标有"E"或接地符 式)作为节省空间的洗衣机/iron aid堆叠。 自动洗衣机在下面而iron aid干衣机在上...
- Page 31 electrolux 31...
- Page 32 www.electrolux.com www.electrolux.com.sg 136908650-02-20012008...