Electrolux EDC2086PDW User Manual
Hide thumbs
Also See for EDC2086PDW:
- User manual (20 pages) ,
- User manual (20 pages) ,
- User manual (64 pages)
Table of Contents
Advertisement
Available languages
Available languages
Quick Links
Advertisement
Chapters
Table of Contents

Related Manuals for Electrolux EDC2086PDW


Summary of Contents for Electrolux EDC2086PDW
- Page 1 ..................... EDC2086PDW EN TUMBLE DRYER USER MANUAL ID TUMBLE DRYER BUKU PETUNJUK (PENGERING GILING) TH เครื ่ อ งอบผ า คู ม ื อ การใช ง าน VI MÁY SẤY LỘN HƯỚNG DẪN SỬ DỤNG...
-
Page 2: Table Of Contents
11. TECHNICAL DATA ............14 WE’RE THINKING OF YOU Thank you for purchasing an Electrolux appliance. You’ve chosen a product that brings with it decades of professional experience and innovation. Ingenious and stylish, it has been designed with you in mind. -
Page 3: Safety Instructions
ENGLISH SAFETY INSTRUCTIONS Before the installation and use of the ap- • Always be careful when you move the pliance, carefully read the supplied in- appliance because it is heavy. Always structions. The manufacturer is not re- wear safety gloves. sponsible if an incorrect installation and •... -
Page 4: Care And Cleaning
Should the appliance power supply ca- • Do not dry items in the appliance if in- ble need to be replaced, this must be dustrial chemicals have been used for carried out by our Service Centre. cleaning. • Connect the mains plug to the mains •... -
Page 5: Product Description
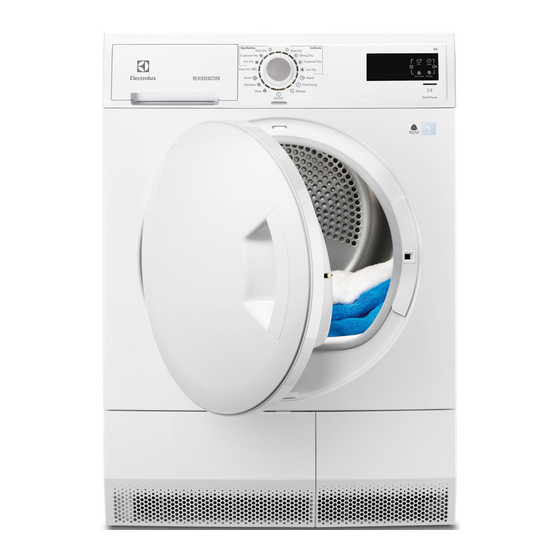
ENGLISH 2. PRODUCT DESCRIPTION Appliance door Filter Button for condenser door Airflow slots Adjustable feet Condenser door Condenser cover Locks for condenser lid Rating plate The load door can be installed by the user in the opposite side. It can help to easily put and remove the laundry or if there is a limit to Water container install the appliance (see separate... -
Page 6: Programme Table
Indicators Description Acoustic signals. Child lock. Water container. Filter. Condenser. Drying phase. Cooling phase. Crease guard phase. Delay start. Programme duration. Time Drying duration. Delay start duration. 4. PROGRAMME TABLE Programmes Type of load / Load (max.) / Fabric mark... -
Page 7: Options
ENGLISH Programmes Type of load / Load (max.) / Fabric mark Silk fabrics and lingerie. Delicate programme with warm Delicates air. / 3kg Wool fabrics. Remove Immediately the items when the programme is completed. / 1kg Gentle drying washable woollens and sport shoes (Only Wool with the Drying Rack —... -
Page 8: Settings
Programmes ● Extra Dry ● Strong Dry ● Cupboard Dry ● Iron Dry Synthetic fabrics ● Extra Dry ● Cupboard Dry ● Iron Dry ● Easy Iron ● Duvet ● Delicates ● ● ● Wool Refresh ● ● Time Drying Rapid 1) Together with the programme you can set 1 or more options. -
Page 9: Daily Use
ENGLISH 2. Press and hold touchpads (A) and (B) 6.2 Buzzer on/off at the same time until one of the these To deactivate or activate the acoustic sig- indicators comes on: nals, press and hold for approximately 2 • (low <300 μS/cm) seconds touchpads (B) and (C) at the •... -
Page 10: Hints And Tips
10 www.electrolux.com • An intermittent acoustic signal oper- 1. Press the on/off button to deactivate ates. the appliance. • The indicator 2. Open the appliance door. flashes. 3. Remove the laundry. • The indicator comes on. 4. Close the appliance door. -
Page 11: Care And Cleaning
ENGLISH 9. CARE AND CLEANING 9.1 Cleaning the filter 9.2 Draining the water container... -
Page 12: Cleaning The Condenser
12 www.electrolux.com You can use the water from the water container as an alternative to distilled water (e.g. for steam ironing). Before you use the water, remove dirt residues with a filter. 9.3 Cleaning the condenser abrasive products, abrasive cleaning pads 9.4 Cleaning the drum... -
Page 13: Troubleshooting
ENGLISH 10. TROUBLESHOOTING 10.1 Problem Possible solution You cannot activate the appliance. Make sure that the mains plug is connec- ted to the mains socket. Make sure that there is not a damaged fuse in the fuse box. The programme does not start. Press Start/Pause . -
Page 14: Technical Data
14 www.electrolux.com 11. TECHNICAL DATA Dimensions (mm) Width / Height / Depth 600 / 850 – 865 / 600 Max. depth 1090 mm (with the appliance door open) Max. width 950 mm (with the appliance door open) Electrical connection Voltage... - Page 15 11. DATA TEKNIS ............27 KAMI MEMIKIRKAN ANDA Terima kasih Anda telah membeli peralatan Electrolux. Anda telah memilih produk yang menghadirkan pengalaman profesional dan inovasi selama beberapa dekade. Cerdas dan bergaya, didesain dengan memperhatikan Anda.
-
Page 16: Petunjuk Keselamatan
16 www.electrolux.com PETUNJUK KESELAMATAN Sebelum pemasangan dan penggunaan • Jangan memasang peralatan di bela- peralatan, bacalah dengan seksama pe- kang pintu berkunci, pintu geser, atau tunjuk yang disertakan. Produsen tidak pintu dengan engsel di sisi sebaliknya, bertanggung jawab jika pemasangan dan... - Page 17 • Peralatan ini harus dihubungkan ke ta- • Jangan keringkan barang-barang se- nah. perti karet busa (busa lateks), tudung mandi, tekstil anti-air, barang-barang • Pastikan informasi kelistrikan pada pelat dengan menyokong karet, serta pakai- pemeringkatan sesuai dengan catu da- an atau bantal yang diisi dengan poto- ya.
-
Page 18: Deskripsi Produk
18 www.electrolux.com • Bersihkan peralatan dengan kain lem- • Lepas peralatan dari steker jaringan lis- but yang lembab. Gunakan hanya de- trik. terjen netral. Jangan gunakan produk • Putus arus kabel jaringan listrik dan abrasif, bantalan pembersih abrasif, ba- singkirkan. -
Page 19: Diagram Program
Kenop program Start/Pause (Mulai/Jeda) papan sentuh Layar Tombol Tombol On/Off (Hidup/ Time (Waktu) papan sentuh Mati) Delay (Tunda) papan sentuh Delicate (Halus) papan sentuh Wool Load (Beban Wol) papan sentuh Sentuh papan sentuh dengan jari di bidang dengan simbol atau na- ma opsi. - Page 20 20 www.electrolux.com Program Jenis beban / Beban (maks.) / Tanda kain Iron Dry (Setrika Tingkat kekeringan: berlaku untuk seterika. / 8kg / Kering) Synthetic (Sintetis) kain Extra Dry (Sangat Tingkat kekeringan: sangat kering. / 3,5kg / Kering) Cupboard Dry (Le- Tingkat kekeringan: lemari.
-
Page 21: Opsi
5. OPSI Apabila Anda menekan opsi Time (Waktu) 5.1 Time (Waktu) untuk program Wol, maka opsi Wool Opsi ini berlaku untuk program Time Load (Beban Wol) akan otomatis diblok. Drying (Waktu Pengeringan) dan program Wool (Wol) (hanya dengan Rak Pengeri- 5.2 Wool Load (Beban Wol) ngan). -
Page 22: Pengaturan
22 www.electrolux.com Program Time Drying (Waktu ● ● Pengeringan) Rapid (Cepat) 1) Bersama program, Anda dapat menetapkan 1 atau beberapa opsi. Untuk mengaktifkan atau menonaktifkannya, tekan papan sentuh yang sesuai. 2) Hanya dengan Rak Pengeringan 6. PENGATURAN 6.2 Buzzer on/off... -
Page 23: Penggunaan Sehari-Hari
7. PENGGUNAAN SEHARI-HARI Sebelum menggunakan peralatan 3. Tetapkan program. untuk pertama kali 1. Bersihkan drum peralatan dengan kain 7.4 Di akhir program lembut yang lembab. Ketika program selesai, 2. Jalankan program singkat (misal, 30 • Akan terdengar sinyak suara terputus- menit) dengan cucian yang lembab. -
Page 24: Petunjuk Dan Tips
24 www.electrolux.com 8. PETUNJUK DAN TIPS • Jangan menempatkan kain dengan 8.1 Menyiapkan cucian warna kuat bersama-sama dengan • Tutup ritsleting. warna lembut. Warna kuat dapat luntur. • Tutup pengencang dari penutup duvet. • Gunakan program yang sesuai untuk kaus katun dan bahan rajutan untuk •... - Page 25 9.2 Pembuangan isi wadah air Anda dapat menggunakan air dari wadah air sebagai pengganti air suling (misalnya, untuk seterika uap). Sebelum menggunakan air, singkirkan dahulu sisa-sisa koto- ran dengan penyaring. 9.3 Membersihkan kondensor...
-
Page 26: Pemecahan Masalah
26 www.electrolux.com 9.4 Membersihkan drum netral. Jangan gunakan produk abrasif, bantalan pembersih abrasif atau bahan Bersihkan drum dengan kain lembut yang pelarut. lembab. Gunakan hanya deterjen netral. Keringkan peralatan dengan kain lembut Jangan gunakan produk abrasif, bantalan yang lembut. pembersih abrasif atau bahan pelarut. -
Page 27: Data Teknis
Masalah Solusi yang mungkin Program tidak mau memulai. Tekan Start/Pause (Mulai/Jeda) . Pastikan pintu peralatan sudah ditutup. Pintu peralatan tidak mau menutup. Pastikan pemasangan filter sudah benar. Pastikan bahwa cucian tidak tersangkut di antara pintu peralatan dan perapat karet. Peralatan berhenti di tengah-tengah Lihatlah apakah wadah air tidak terisi air. - Page 28 28 www.electrolux.com Panjang maks. 950 mm (pintu peralatan dalam keada- an terbuka) Sambungan listrik Voltase 220-240 V Frekuensi 50 Hz Sekering 10 A Total daya 2250 W Volume drum 118 l Berat peralatan 40 kg Cucian: berat maks. 8 kg...
- Page 29 ขอบพระคุ ณ ที ่ ซ ื ้ อ เครื ่ อ งใช ไ ฟฟ า จาก Electrolux คุ ณ ได เ ลื อ กผลิ ต ภั ณ ฑ จ ากผู ผ ลิ ต ที ่ ไ ด ส ั ่...
-
Page 30: คำแนะนำเพื ่ อ ความปลอดภั ย
30 www.electrolux.com คำแนะนำเพื ่ อ ความปลอดภั ย ก อ นติ ด ตั ้ ง และใช ง านเครื ่ อ ง กรุ ณ าอ า นคำแนะนำที ่ จ ั ด ‐ • หากเครื ่ อ งอบแห ง วางอยู ด า นบนของเครื ่ อ งซั ก ผ า... -
Page 31: รายละเอี ย ดของผลิ ต ภั ณ ฑ
หากคุ ณ หยุ ด เครื ่ อ งก อ นสิ ้ น รอบการอบแห ง ให น ำ‐ • อย า นั ่ ง หรื อ ยื น บนฝาเครื ่ อ งที ่ เ ป ด อยู ผ า ออกและกระจายผ า ทั น ที เ พื ่ อ ให ค วามร อ นถ า ยเท‐ •... -
Page 32: แผงควบคุ ม
32 www.electrolux.com ฝาใส ผ า สามารถติ ด ตั ้ ง ได โ ดยผู ใ ช ใ นด า น‐ ตรงกั น ข า ม ซึ ่ ง จะช ว ยให ใ ส ห รื อ นำผ า ออก‐... -
Page 33: โปรแกรมการทำงาน
ไฟสั ญ ลั ก ษณ รายละเอี ย ด ระยะเวลาเริ ่ ม การทำงานแบบหน ว งเวลา 4. โปรแกรมการทำงาน โปรแกรม ประเภทผ า / น้ ำ หนั ก (สู ง สุ ด ) / เครื ่ อ งหมายกำกั บ ผ า Cotton (ผ า ฝ า ย) EXTRA DRY (แห... -
Page 34: ตั ว เลื อ ก
34 www.electrolux.com 2) สำหรั บ การทดสอบเท า นั ้ น : โปรแกรมมาตรฐานสำหรั บ ทดสอบมี ร ะบุ ไ ว ใ นเอกสาร EN 61121 3) โปรแกรมนี ้ ไ ด ร ั บ การรั บ รองโดย Woolmark Company โปรแกรมนี ้ เ หมาะสำหรั บ อบแห ง ผ า ขนสั ต ว ท ี ่ ม ี ฉ ลากสำหรั บ... -
Page 35: ค า ปรั บ ตั ้ ง
1) นอกเหนื อ จากการตั ้ ง โปรแกรม คุ ณ ยั ง สามารถตั ้ ง ค า ตั ว เลื อ กได เ พิ ่ ม อี ก 1 รายการขึ ้ น ไป เป ด หรื อ ป ด ใช ง านฟ ง ก ช ั ่ น โดย กดแป... -
Page 36: คำแนะนำและเคล็ ด ลั บ
36 www.electrolux.com 7.2 การเริ ่ ม โปรแกรมโดยหน ว งการเริ ่ ม เครื ่ อ งจะทำงานต อ ไปในรอบป อ งกั น รอยยั บ เป น เวลา‐ เพิ ่ ม อี ก 30 นาที การทำงาน รอบป อ งกั น รอยยั บ ใช เ พื ่ อ ลดรอยยั บ ของผ า... -
Page 37: การดู แ ลรั ก ษาและทำความสะอาด
ฉลาก‐ รายละเอี ย ด สำหรั ‐ บผ า ผ า ที ่ เ หมาะสำหรั บ อบแห ง ตั ้ ง โปรแกรมโดยใช อ ุ ณ หภู ม ิ ม าตรฐาน ผ า ที ่ เ หมาะสำหรั บ อบแห ง ตั ้ ง โปรแกรมโดยใช อ ุ ณ หภู ม ิ ต ่ ำ ผ... - Page 38 38 www.electrolux.com 9.2 ระบายน้ ำ ในที ่ เ ก็ บ น้ ำ ออก คุ ณ สามารถใช น ้ ำ จากที ่ เ ก็ บ น้ ำ แทนน้ ำ กลั ่ น (เช น สำหรั บ รี ด ไอน้ ำ ) ก อ นใช น ้ ำ ดั ง กล า ว...
-
Page 39: การแก ไ ขป ญ หา
9.4 การทำความสะอาดถั ง อบ ผลิ ต ภั ณ ฑ ท ี ่ ม ี ฤ ทธิ ์ ก ั ด กร อ น แผ น ขั ด ที ่ ห ยาบหรื อ น้ ำ ยา‐ ที ่ เ ป น สารละลาย ทำความสะอาดถั... -
Page 40: ข อ มู ล ทางเทคนิ ค
40 www.electrolux.com ป ญ หา วิ ธ ี แ ก ไ ขที ่ อ าจช ว ยแก ป ญ หาได จอแสดงผลแสดงข อ ความ E51) ป ด และเป ด เครื ่ อ งใหม เริ ่ ม โปรแกรมใหม หากยั ง เกิ ด ‐... - Page 41 12. ข อ มู ล เพื ่ อ การรั ก ษาสิ ่ ง แวดล อ ม รี ไ ซเคิ ล วั ส ดุ ท ี ่ ม ี ส ั ญ ลั ก ษณ ใส บ รรจุ ภ ั ณ ฑ ล งใน อุ...
- Page 42 CHÚNG TÔI NGHĨ ĐẾN BẠN Cảm ơn bạn đã mua thiết bị Electrolux. Bạn đã chọn một sản phẩm trong đó có chứa đựng cả hàng thập niên kinh nghiệm chuyên gia và sự đổi mới. Tinh tế và sành điệu, thiết bị này được thiết kế dành cho bạn. Vì vậy bất cứ...
-
Page 43: Hướng Dẫn Về Sự An Toàn
HƯỚNG DẪN VỀ SỰ AN TOÀN Trướ c khi lắ p đặ t và sử dụ n g thiế t bị , hã y đọ c kỹ • Đả m bả o có sự lưu thông khí giữ a thiế t bị và hướ... - Page 44 44 www.electrolux.com • Thiế t bị nà y tuân thủ Chỉ Thị củ a Cộ n g Đồ n g • Chỉ sấ y khô cá c loạ i vả i có thể đượ c sấ y khô Kinh Tế Châu Âu (E.E.C.).
-
Page 45: Mô Tả Sản Phẩm
2. MÔ TẢ SẢN PHẨM Cử a thiế t bị Bộ lọ c Nú t đó n g mở cử a bộ ngưng Lỗ thông khí Các chân điều chỉnh được Cử a bộ ngưng Nắ p đậ y bộ ngưng Khó... -
Page 46: Bảng Chương Trình
46 www.electrolux.com Chạ m ngó n tay và o cá c phí m điề u khiể n tạ i khu vự c có biể u tượ n g hoặ c tên tù y chọ n . Không đeo găng tay khi vậ n hà n h bả n g điề... -
Page 47: Tùy Chọn
Chương trì n h Loạ i quầ n á o / Khố i lượ n g (tố i đa) / Nhã n vả i Cá c loạ i vả i dễ xử lý chỉ cầ n là ở mứ c tố i thiể u . Kế t quả sấ y khô có thể... -
Page 48: Cà I Đặ T
48 www.electrolux.com hợ p có biể u tượ n g trên nhã n vả i (ví dụ như acrylic, vitco). Chương trì n h Vả i Cotton (Cotton) ● EXTRA DRY (Thật Khô) ● Strong Dry (Siêu Khô) ● Cupboard Dry (Tủ Khô) ●... -
Page 49: Sử Dụng Hàng Ngày
2. Bấ m giữ đồ n g thờ i cá c phí m điề u khiể n (A) điệ n củ a thiế t bị . Nế u biế t giá trị dẫ n điệ n củ a và (D) cho đế n khi đè n chỉ bá o khó a trẻ em nướ... -
Page 50: Các Mẹo Và Lời Khuyên
50 www.electrolux.com Quý vị có thể lấ y đồ giặ t ra trướ c khi hoà n tấ t giai 4. Đóng cửa thiế t bị . đoạ n chố n g nhà u . Để có kế t quả tố t hơn, chú n g Luôn là... -
Page 51: Chăm Sóc Và Làm Sạch
9. CHĂM SÓC VÀ LÀM SẠCH 9.1 Là m sạ c h bộ lọ c 9.2 Xả vậ t đự n g nướ c... - Page 52 52 www.electrolux.com Quý vị có thể sử dụ n g nướ c từ vậ t đự n g thay cho nướ c cấ t (ví dụ như để là hơi nướ c ). Trướ c khi sử dụ n g nướ c nà y , hã y loạ...
-
Page 53: Xử Lý Sự Cố
10. XỬ LÝ SỰ CỐ 10.1 Vấ n đề Giải pháp có thể thự c hiệ n Quý vị không thể bậ t thiế t bị . Đả m bả o rằ n g đã cắ m phí c h cắ m và o ổ cắ m điệ n . Đả... - Page 54 54 www.electrolux.com Độ sâu tố i đa 1090 mm (khi mở cử a thiế t bị ) Chiề u rộ n g tố i đa 950 mm (khi mở cử a thiế t bị ) Kế t nố i điệ n Điện thế...
- Page 56 www.electrolux.com/shop...
Need help?
Do you have a question about the EDC2086PDW and is the answer not in the manual?
Questions and answers