Advertisement
Table of Contents
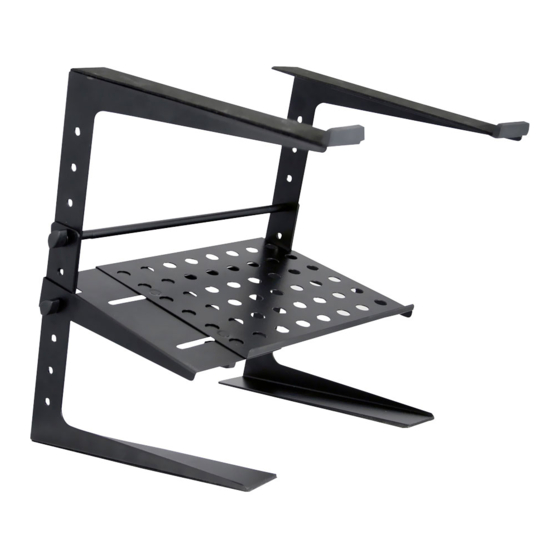
Thanks for purchasing the PLPTS26, an awesome laptop stand from Pyle Pro that's
perfect for DJing. It places your laptop at an angle for easy access while you drop
your beats. Plus, it has a variable height adjustment and a storage shelf to hold
your cell phone, memory cards, and anything else you might need. Holds up to 8
lbs. Also compatible with CD players, controllers, EFX machines, and lighting
controllers.
Your kit includes one (1) set of the following items:
PLPTS26
Laptop Computer Stand for
DJs with Storage Shelf
http://www.pyleaudio.com
Specifications:
Ideal For Holding Your Laptop, CD Player/Controller,
EFX Machine Or Lighting Controller
Includes a Storage Shelf
This Versatile Stand Can Stand Alone On Any Flat
Surface For Quick And Easy Set-Up
Features 4 Easy Line-It-Up Height Adjustments
Platform Dimensions: 9.25''w x 10.8''D
Height Range: 6.3 - 10.9 inches
Weight Capacity: 8 lbs.
2 x L-bar (left, right)
2 x L-bar with rubber stoppers (left,
right)
2 x support bars
2 x bar extenders (unscrews to 4)
1 x storage rack plate
Advertisement
Table of Contents

Subscribe to Our Youtube Channel
Related Manuals for Pyle PLPTS26


Summary of Contents for Pyle PLPTS26
- Page 1 DJs with Storage Shelf http://www.pyleaudio.com Thanks for purchasing the PLPTS26, an awesome laptop stand from Pyle Pro that’s perfect for DJing. It places your laptop at an angle for easy access while you drop your beats. Plus, it has a variable height adjustment and a storage shelf to hold your cell phone, memory cards, and anything else you might need.
- Page 2 1. Start by removing the end screws from the 3. Next, you will be connecting two of the L- two support bars. Additionally, loosen up the bars and the Use one with rubber stoppers screws on the storage rack plate so that the and one without.
- Page 3 3. Repeat the L-bar, storage plate, and support bar steps for the other side. 4. Connect the other support bar between the two L-bar supports. Once everything is connected, you can tighten the screws on the storage plate. 5. Your stand is now complete!
Need help?
Do you have a question about the PLPTS26 and is the answer not in the manual?
Questions and answers