Zanussi ZOP37902XK User Manual
Product manaul
Hide thumbs
Also See for ZOP37902XK:
- User manual (56 pages) ,
- User manual (28 pages) ,
- User manual (28 pages)
Table of Contents
Advertisement
Advertisement
Table of Contents

Related Manuals for Zanussi ZOP37902XK


Summary of Contents for Zanussi ZOP37902XK
- Page 1 User manual Oven ZOP37902...
-
Page 2: Table Of Contents
• Cleaning and user maintenance shall not be made by children without supervision. General Safety • Internally the appliance becomes hot when in operation. Do not touch the heating elements that are in the appliance. Always use oven gloves to remove or put in accessories or ovenware. www.zanussi.com... -
Page 3: Safety Instructions
• Make sure that the electrical information on tion device which lets you disconnect the ap- the rating plate agrees with the power sup- pliance from the mains at all poles. The isola- ply. If not, contact an electrician. www.zanussi.com... -
Page 4: Pyrolytic Cleaning
First Use function please re- the appliance directly on the bottom. move from the oven cavity: – Do not put aluminium foil directly on the – Any excess food residues, oil or grease bottom of the appliance. spills / deposits. www.zanussi.com... -
Page 5: Product Description
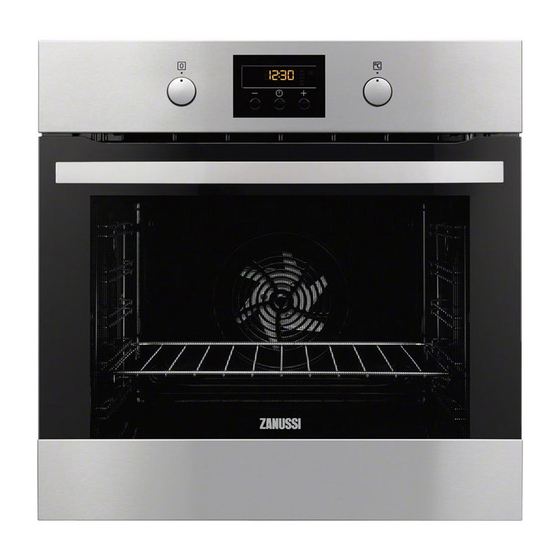
Product description Electronic programmer Knob for the temperature Grill Oven lamp Shelf support, removable Rating plate Shelf positions Oven accessories • Wire shelf For cookware, cake tins, roasts. • Grill- / Roasting pan Knob for the oven functions www.zanussi.com... -
Page 6: Before First Use
3. To deactivate the appliance, turn the knob comes out. for the oven functions to the off position. Activating and deactivating the appliance 1. Turn the knob for the oven functions to an oven function. Oven functions Oven function Application Off position The appliance is off. www.zanussi.com... -
Page 7: Display/Buttons
To set a clock function. Minus, plus To set the time. Heat-up and residual heat indicator show that the oven temperature increases or decreases. When you activate an oven function, the bars in the display come on one by one. The bars www.zanussi.com... -
Page 8: Clock Functions
End function oper- time you can set is 23 hours 59 minutes. This ates. function has no effect on the operation of the oven. You can set the Minute Minder at any time, also if the appliance is off. www.zanussi.com... -
Page 9: Using The Accessories
Incorrect operation of the appliance or defec- • If an oven function operates. tive components can cause dangerous over- • If you do not change the oven temperature. heating. To prevent this, the oven has a safety thermostat which interrupts the power supply. www.zanussi.com... -
Page 10: Helpful Hints And Tips
[°C] Whisked recipes 3 (2 and 4) 45 - 60 In a cake mould Shortbread 3 (2 and 4) 20 - 30 In a cake mould dough Buttermilk 60 - 80 In a 26 cm cake cheesecake mould www.zanussi.com... - Page 11 In a baking tray Eclairs - two lev- 2 and 4 35 - 45 In a baking tray Plate tarts 45 - 70 In a 20 cm cake mould Rich fruit cake 110 - 120 In a 24 cm cake mould www.zanussi.com...
-
Page 12: Bread And Pizza
45 - 60 In a mould Quiches 50 - 60 In a mould Lasagne 180 - 180 - 25 - 40 In a mould Cannelloni 180 - 180 - 25 - 40 In a mould 1) Preheat for 10 minutes. MEAT www.zanussi.com... - Page 13 Preheat the empty oven for 10 minutes, before cooking. Quantity Grilling Cooking time [min] TYPE OF DISH Pieces Shelf posi- Temp [°C] 1st side 2nd side tion Fillet steaks max. 12 - 15 12 - 14 Beef steaks max. 10 - 12 6 - 8 www.zanussi.com...
- Page 14 150 - 170 90 - 120 cooked) Veal TYPE OF DISH Quantity Shelf position Temperature [°C] Time [min] Roast veal 1 kg 160 - 180 90 - 120 Knuckle of veal 1.5 - 2 kg 160 - 180 120 - 150 www.zanussi.com...
- Page 15 10 - 15 Cream can also be whipped Cream 2 x 200 80 - 100 10 - 15 when still slightly frozen in pla- ces. Gateau 1400 Drying - True Fan Cooking Cover the oven shelves with baking parchment. www.zanussi.com...
-
Page 16: Care And Cleaning
Use a soft cloth with warm water and a cleaning agent. • If you have nonstick accessories, do not clean them using aggressive agents, sharp- edged objects or a dishwasher. It can de- stroy nonstick coating. www.zanussi.com... -
Page 17: Removing/Installing Shelf Supports
Always hold the halogen lamp with a cloth to 4. Set the function Pyrolysis. Refer to "Oven prevent grease residue from burning on the functions". lamp. 5. When flashes, press + or - to set the necessary procedure: www.zanussi.com... -
Page 18: Cleaning The Oven Door
Make sure that you install the top panel in the door to the first soft cloth on a stable seats correctly (refer to the illustration). opening position surface. (halfway). Then pull forward and remove the door from its seat. www.zanussi.com... -
Page 19: What To Do If
1. Fully close the door. door lock is defective. 2. Deactivate the appliance with the house fuse or the safety switch in the fuse box and ac- tivate it again. 3. If the display shows F102 again, contact the service centre. www.zanussi.com... -
Page 20: Installation
The rating plate is on the front tre. frame of the appliance cavity. We recommend that you write the data here: Model (MOD.) ......... Product number (PNC) ......... Serial number (S.N.) ......... Installation Warning! Refer to the Safety chapters. www.zanussi.com... - Page 21 This appliance is supplied without a main plug and a main cable. Applicable types of cables for Europe: • Minimum size Cable / flex: 1,5 mm² • Cable / flex type: H07 RN-F, H05 RN-F, H05 RRF, H05 VV-F, H05 V2V2-F (T90), H05 BB-F www.zanussi.com...
-
Page 22: Environment Concerns
Dispose of the packaging material in the otherwise be caused by inappropriate waste containers provided for this purpose at your lo- handling of this product. For more detailed cal waste management facility. www.zanussi.com... - Page 23 www.zanussi.com...
- Page 24 www.zanussi.com/shop...
Need help?
Do you have a question about the ZOP37902XK and is the answer not in the manual?
Questions and answers