Table of Contents
Advertisement
Quick Links
Advertisement
Table of Contents

Related Manuals for PURE DRX-601EX


Summary of Contents for PURE DRX-601EX
-
Page 2: Safety Instructions
Imagination Technologies Limited makes no representation or warranties with respect to the content of this document and specifically disclaims any implied warranties of merchantability or fitness for any particular purpose. Further, Imagination Technologies Limited reserves the right to revise this publication and to make changes in it from time to time without obligation of Imagination Technologies Limited to notify any person or organization of such revisions or changes. -
Page 3: Table Of Contents
Contents Introduction ................1 Unpacking ................2 Controls and Connectors ............3 Setting up ................5 Using your DRX-601EX............. 7 Using the remote control ............10 Guide to Digital Radio............. 12 Troubleshooting ..............14 Technical Specifications ............16 Aerial advice ................ 18 Getting Help................ -
Page 4: Introduction
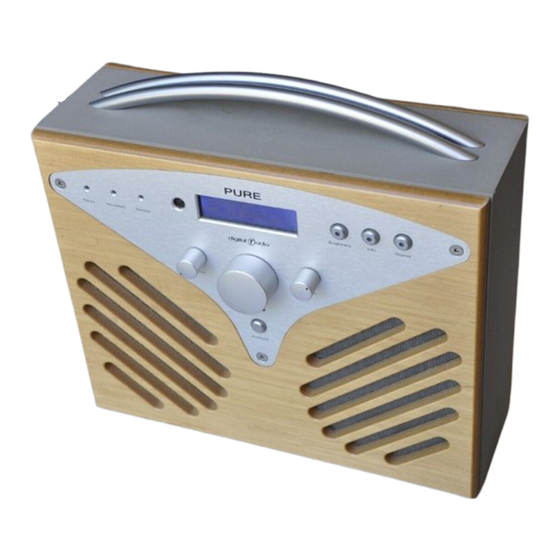
Using real wood veneer and inlaid aluminium, the DRX-601EX is beautifully finished and sounds as good as it looks. An input connector enables you to connect other devices such as a portable CD or MiniDisc player and digital and analogue outputs are also provided enabling you to connect to an external amplifier or record programmes. -
Page 5: Unpacking
Unpacking This section lists the contents of your DRX-601EX package. Contact us if any items are missing or damaged. Package contents 1. DRX-601EX digital radio unit 2. Infrared remote control handset 3. Telescopic DAB indoor aerial 4. Two AAA batteries for the remote control handset 5. -
Page 6: Controls And Connectors
Controls and Connectors This section provides information on the controls and connectors available on the front, side and rear panels of your DRX-601EX. For information on the remote control, see page 10. Front Panel Side Panel Rear Panel... -
Page 7: Front Panel
Front Panel Side Panel Stereo LED indicates when stereo service is being received, see page 8 Aerial socket Secondary LED indicates whether secondary services are available, S/PDIF co-axial digital output, see page 6 see page 11 S/PDIF optical digital output, see page 6 Remote LED indicates remote control activity RADIO/AUX IN switch, switches between DAB radio and any auxiliary Remote sensor picks up the infrared signal from the remote... -
Page 8: Setting Up
This section provides information on connecting your aerial and connecting to any other devices. Connector sockets are provided on the side and rear panels of your DRX-601EX. Before connecting other devices to your DRX-601EX, switch both devices off. For a quick setup you can connect just your aerial and power supply - the other connections listed are optional and will not prevent normal operation of the unit. - Page 9 601EX. When the source selection switch is set to AUX IN, you will hear the auxiliary device through the speakers on your DRX-601EX. Connect the INPUT sockets to the output socket(s) on your auxiliary device using the supplied 3.5mm to stereo phono cable or a stereo phono cable as appropriate.
-
Page 10: Using Your Drx-601Ex
Before switching on for the first time, check all connections and ensure that the volume is turned down. Push the power switch on the side of your DRX-601EX to the I (on) position to switch the unit on or to the 0 (off) position to switch the unit off. - Page 11 The DRX-601EX display feature has four modes which enable you to view different parts of the broadcast data on the bottom line of the display. Press the Display button on the front panel of your DRX-601EX and repeat or hold down to cycle through the four different display modes.
- Page 12 The DRX-601EX has two information modes which enable you to view extra information about the current multiplex. Press the Info button on the front panel of your DRX-601EX and repeat or hold down to cycle through the two different information modes. Press the Display button to return to normal display mode.
-
Page 13: Using The Remote Control
The infrared remote control provides access to the main functions of your DRX-601EX and also advanced facilities such as presets and dynamic range control. Before using your remote, insert the supplied batteries. Aim the remote control at the sensor on the front panel of your DRX-601EX. -
Page 14: Mute Button
Press any button on the remote control or main unit to return to the previous volume. DISPLAY button The DISPLAY button enables you to change the display mode on your DRX-601EX. This button performs the same function as the Display button the main unit. See page 8 for details. -
Page 15: Guide To Digital Radio
Each multiplex is transmitted in a set frequency range and received by your DRX-601EX for decoding. Your DRX-601EX enables you to receive multiplexes broadcast in frequency band III (174-240 MHz) and store the services in each multiplex for you to access. - Page 16 Useful addresses The following addresses provide additional useful information about digital radio including coverage, available services and usage tips: BBC Digital Radio tel: 08700 100 123 Room 5661 e-mail: digitalradio@bbc.co.uk Broadcasting House website: www.bbc.co.uk/digitalradio Portland Place London, W1A 1AA Digital Radio Development Bureau tel: 020 7306 2630 The Radiocentre...
-
Page 17: Troubleshooting
Troubleshooting This section gives some of the most likely solutions to problems you might have with your DRX-601EX. I can’t get any sound Make sure your DRX-601EX is plugged in and switched on as explained on page 7. Check that the source selection switch on the side panel is set to RADIO. - Page 18 I’ve lost my remote control If you lose your remote control you can still use your DRX-601EX but you will not be able to access your preset stations, switch between primary or secondary services or use DRC or mute facilities. Contact VideoLogic Support to obtain a replacement remote control, see page 19 for details.
-
Page 19: Technical Specifications
Technical Specifications This section lists the technical specifications for the DRX-601EX. General Stereo digital radio with full Band III reception capability, for reception of all UK DAB broadcasts. Fully compliant with ETS 300 401 and capable of decoding all DAB transmission modes 1-4. Analogue stereo output and input, optical and coaxial 48 kHz S/PDIF digital output and RDI digital output. - Page 20 LCD Display High visibility STN LCD display with 16 x 2 characters and 4 user-selectable brightness levels Indicators Remote control activity indicator (front panel) Stereo service indicator Secondary service availability indicator Frequency response 20 Hz to 20 kHz for 48 kHz decode 20 Hz to 12 kHz for 24 kHz low sample frequency (LSF) decode THD (nominal output) Less than 0.005% at 1 kHz S/N Ratio: 100 dB...
-
Page 21: Aerial Advice
TV/FM transmitter, reception may be no better. The standard TV or FM RF connector cannot be plugged into your DRX-601EX directly, you will need to use an RF to F-type adapter. You may also find that you need to use a signal booster if you want to use the aerial for both TV or FM and DAB reception. -
Page 22: Getting Help
The Troubleshooting section of this manual, on page 14, lists some of the more likely reasons for problems you might have with your DRX-601EX. If you still have a problem with your DRX-601EX, either visit our website at www.videologic.com/pure or contact us using the details below for the latest support information. -
Page 23: Index
External aerial 18 Remote control 10 Main unit 2 Unpacking 2 Remote lost 15 Memory Reset 14 Changing the display mode 8 Using your DRX-601EX 7 Remote sensor 3 Channels 12 Multiplex 12 Connecting cables Fax 19 Mute 11 Frequency 8... - Page 24 Please return your registration card to the following address to validate your warranty. VideoLogic Systems Imagination Technologies Ltd., Home Park Estate, Kings Langley, Herts., WD4 8LZ, UK 01923 270188 sales@videologic.com 01923 277488 sales support@videologic.com 01923 277477 support & service www.videologic.com/pure...
Need help?
Do you have a question about the DRX-601EX and is the answer not in the manual?
Questions and answers