Advertisement
Product defect? Not working properly?
DO NOT return this product to the
store where you purchased it.
Contact Ideal Air Support directly
at support@ideal-air.com or call
1-877-9-IDEAL-1
For answers to the most common questions and a complete
technical support library please visit www.ideal-air.com
For warranty claims contact
the Customer Care Center
1-866-646-4332
5408 NE 88th St., Bldg. A
Vancouver, WA 98665
www.ideal-air.com
A division of Sunlight Supply
All design and specifications herein are subject to change without
notice for product improvement. Contact Ideal Air for
details, updates and other information.
OWNER'S MANUAL
Portable Air Conditioner
IMPORTANT!
Before operating this product, please read the
instructions carefully and save this manual for future use.
Advertisement
Table of Contents

Related Manuals for Ideal Air Portable Air Conditioner


Summary of Contents for Ideal Air Portable Air Conditioner
- Page 1 Vancouver, WA 98665 instructions carefully and save this manual for future use. www.ideal-air.com A division of Sunlight Supply All design and specifications herein are subject to change without notice for product improvement. Contact Ideal Air for details, updates and other information.
-
Page 2: Table Of Contents
Table of Contents PLEASE BE RESPONSIBLE SAFETY PRECAUTIONS ......... 2 - 3 DO NOT dispose of PARTS IDENTIFICATION ......... 4 - 5 this product in the trash, on the landscape CONTROL PANEL or into any unsorted Overview and Operation........6 - 7 waste stream! It may contain hazardous substances INSTALLATION... -
Page 3: Safety Precautions
Safety Precautions Safety Precautions To prevent injury to the user or other people and property damage, the following instructions must For your safety WARNING On some models, the power NOTE be followed. Incorrect operation due to ignoring of instructions may cause harm or damage. supply cord contains a current Do not store or use gasoline or other flammable liquids or detection device to reduce the risk... -
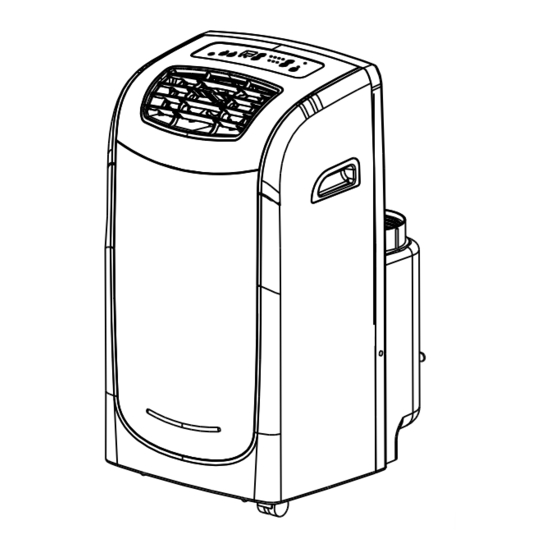
Page 4: Parts Identification
Parts Identification Parts Identification ACCESSORIES INCLUDED: FRONT Control Panel Blades Control Handle Vertical Louver Blade Horizontal Louver Blade Standard intake and exhaust Remote control and batteries hoses with adapter (2) (remote control models only) Carrying Handle (both sides) Check to make sure included accessories are in the package. Caster Refer to installation instructions for correct use. -
Page 5: Control Panel
Control Panel Control Panel Before operating your air conditioner, thoroughly familiarize yourself with the Control Panel, Remote Control and Operating MODES all of their functions (see Remote Control Instructions packaged with the remote). COOL 62˚F to 95˚F (17˚C to 35˚C) HEAT 41˚F to 88˚F (5˚C to 30˚C) 1. -
Page 6: Installation
Installation Installation Air Conditioner Placement Installing the Window Slider Kit in a Vertical, Double-Hung Sash Window Shown with The air conditioner should be placed on a firm optional surface to minimize noise and vibration. For safe Window and secure operation, place the unit on a smooth, Slider Kit 1. -
Page 7: Connecting Intake And Exhaust Hoses
Installation Installation Installing the Window Slider Kit in a Horizontal Sliding Sash Window Connecting Intake and Exhaust Hoses 1. Install flexible intake and exhaust hoses on collars in the back of the unit (Fig. 13). 1. Cut 1 piece of Adhesive Foam Seal to the proper Adhesive 2. -
Page 8: Care & Maintenance
Care and Maintenance Troubleshooting Tips IMPORTANT: Before calling service, review the chart below. You may be able to quickly resolve the problem yourself. 1. Be sure to unplug the unit from the power supply before cleaning or servicing. PROBLEM POSSIBLE CAUSE SOLUTION 2. -
Page 9: Warranty
Warranty Notes...
Need help?
Do you have a question about the Portable Air Conditioner and is the answer not in the manual?
Questions and answers