
Related Manuals for Kawai ES7


Summary of Contents for Kawai ES7
- Page 1 Introduction Playing the Piano Rhythm Section Recorder Owner’s Manual USB Functions Settings Appendix...
- Page 3 About this Owner’s Manual Before attempting to play the ES7 digital piano, please read the Introduction chapter from page 10 of this owner’s manual. This chapter explains the name and function of each part, how to set-up the instrument, and how to perform basic operations.
-
Page 4: Important Safety Instructions
Important Safety Instructions SAVE THESE INSTRUCTIONS INSTRUCTIONS PERTAINING TO A RISK OF FIRE, ELECTRIC SHOCK, OR INJURY TO PERSONS WARNING CAUTION TO REDUCE THE RISK OF FIRE OR ELECTRIC SHOCK, DO NOT RISK OF ELECTRIC SHOCK EXPOSE THIS PRODUCT TO DO NOT OPEN RAIN OR MOISTURE. - Page 5 WARNING - When using electric products, basic precautions should always be followed,including the following: WARNING Indicates a potential hazard that could result in death or serious injury if the product is handled incorrectly. The product should be connected to If you are going to use an AC power cord, 120V 230V 240V...
- Page 6 Indicates a potential hazard that could result in injury or CAUTION damage to the product or other property if the product is handled incorrectly. Do not use the product in the following areas. Using the product in such areas may result in product breakdown.
- Page 7 This device complies with Part 15 of the FCC Rules. Operation is subject to the following two conditions: (1) this device may not cause harmful interference, and (2) this device must accept any interference received, including interference that may cause undesired operation. This applies only to products distributed by Kawai America Corporation.
-
Page 8: Table Of Contents
2. Playing a Song ........Welcome to the Kawai ES7 ......10 3. - Page 9 Settings Appendix (cont.) Virtual Technician ........84 Connecting to Other Devices .
-
Page 10: Welcome To The Kawai Es7
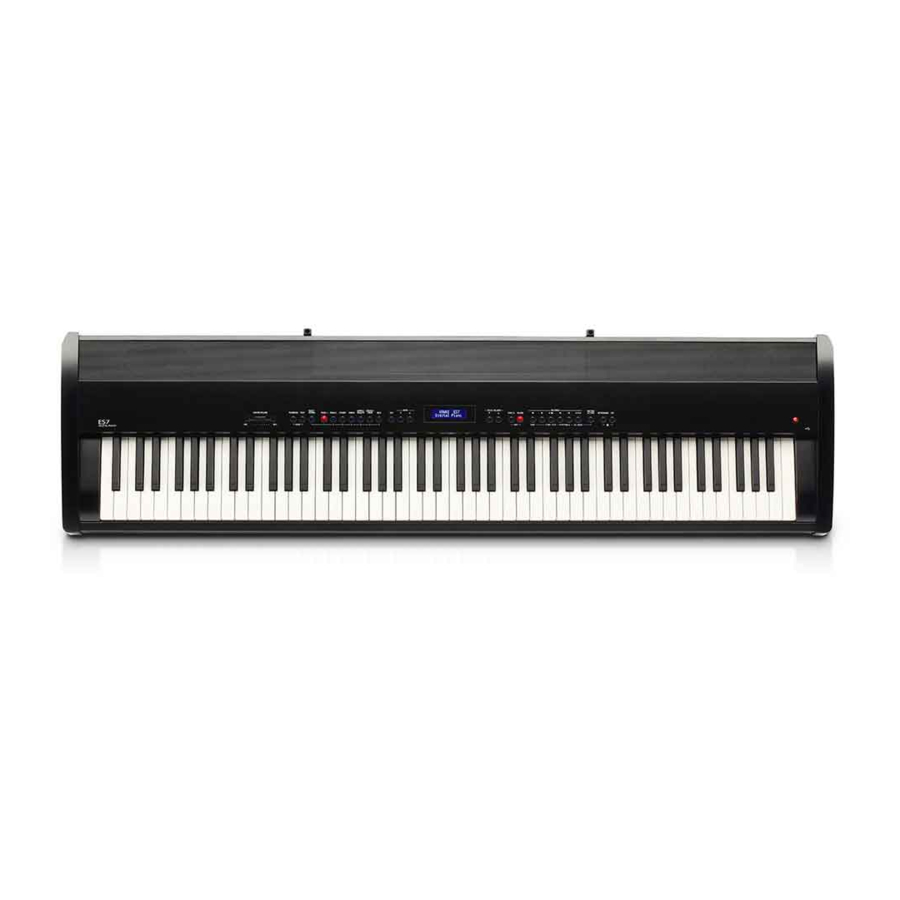
Welcome to the Kawai ES7 Package Contents The Kawai ES7 digital piano package contains the following items: ES7 digital piano AC power adaptor (PS-154) Foot pedal (F-10H) Music rack/rest Owner’s manual... -
Page 11: Feature Highlights
USB to Device functionality, with MP3/WAV file recording and playback The ES7 digital piano is equipped with USB connectors that not only allow the instrument to be connected to a computer for MIDI use, but also to load and save data to USB memory devices directly. This USB to Device feature allows registration memories and songs recorded and stored in internal memory to be saved to USB for posterity, or standard MIDI files (SMF) downloaded from the internet to be conveniently played back without additional hardware. -
Page 12: Part Names And Functions
Part Names and Functions a MASTER VOLUME slider f EXIT button This slider controls the master volume level of the instrument’s This button is used to exit the current function, or return to the built-in speakers or headphones, if connected. previous screen, and can also be used as a shortcut to jump to the Line Out Volume setting. -
Page 13: Usb Button
This switch is used to turn the instrument on/off. These buttons are used to move the playing position of the * The ES7 digital piano features a power saving mode that can turn off the current recorder song or MP3/WAV/SMF backward or forward. -
Page 14: Setting Up The Piano
Attaching the music rest Insert the legs of the music rest into the holes located at the rear of the ES7 digital piano, taking care not to scratch the rear of the instrument. To prevent possible damage, avoid applying excessive force when attaching/detaching the music rest from the instrument. -
Page 15: Basic Operation
Concert Grand LED indicator on: * The ES7 digital piano features a power saving mode that can turn off the Sound category is selected. instrument automatically after a specified period of inactivity. For more information, please refer to the Auto Power Off setting on page 117. -
Page 16: Selecting Sounds
Selecting Sounds The ES7 digital piano features a wide selection of realistic instrument sounds suitable for various musical styles. Sounds are arranged into seven categories, with multiple sounds assigned to each category button. For a complete listing of the available instrument sounds, please refer to page 122 of this owner’s manual. -
Page 17: Demo Songs
Demo Songs The Demo function provides an excellent introduction to the varied capabilities of the ES7 digital piano. There are 27 different demonstration songs available, highlighting the instrument’s rich selection of high quality sounds, convenient Rhythm Section feature, and powerful speaker system. -
Page 18: Dual Mode
Dual Mode The Dual Mode function allows two sounds to be layered together, creating a more complex sound. For example, a piano sound layered with strings, or a church organ combined with a choir, etc. 1. Entering Dual mode Press and hold a SOUND button to select the main sound, then press another SOUND button to select the layered sound. - Page 19 3. Adjusting the main/layered sound volume balance While Dual mode is in use: Press the VALUE/BALANCE buttons to adjust the volume balance between the main and layered sounds. VALUE VALUE Increase layered Increase main The volume balance will briefly be shown in the LCD display. sound volume.
-
Page 20: Split Mode
Split Mode The Split Mode function divides the keyboard into two sections, allowing each section to be played with a different sound. For example, a bass sound in the lower section, and a piano sound in the upper section. 1. Entering Split mode Press the SPLIT button. -
Page 21: Changing The Split Point
3. Changing the split point Press and hold the SPLIT button, then press the desired split key Split Point on the keyboard. = F4 The name of the pressed key will briefly be shown in the LCD display, and will become the new split point. Example: To set the split point to key F4, press * Split Mode and the Rhythm Section share the same split point. -
Page 22: Four Hands Mode
Four Hands Mode The Four Hands Mode function divides the keyboard into two sections in a similar way to that of the Split Mode function. However, with Four Hands Mode enabled, the octave/pitch of each section is automatically adjusted to create two separate 44-key instruments with the same playing range. -
Page 23: Exiting Four Hands Mode
3. Changing the Four Hands mode split point Press and hold the SPLIT button, then press the desired split key Split Point on the keyboard. = C5 The name of the pressed key will briefly be shown in the LCD display, and will become the new Four Hands mode split point. -
Page 24: Enhancing The Sound
Enhancing the Sound The ES7 digital piano offers a variety of features to adjust and enhance the character of a particular sound. Some of these features (e.g. Reverb), are enabled automatically when a sound is selected, however players may also wish to change the strength or type of enhancement to suit their personal preferences or different styles of music. -
Page 25: Small Hall
3. Adjusting the Reverb settings (type/depth/time) While the reverb settings menu is shown, to change the reverb type: Press the VALUE buttons to cycle through the different reverb types. Reverb Type = Room Example: To change the reverb type from 'Room' to 'Small Hall' , press the VALUE button twice. -
Page 26: Effects
In addition to reverb, various other effects can be applied to the selected sound, altering the tonal character and feeling of the instrument. As with reverb, some sound types enable certain effects automatically in order to enhance tonal quality. The ES7 digital piano features eleven different effect types, and four combination effects. Effect types... -
Page 27: Effect Settings
Effect settings Effect type Setting 1 Setting 2 Setting 3 Setting 4 Stereo Delay / Ping Delay / Triple Delay Dry / Wet Time Feedback High Damp Chorus Dry / Wet Speed Feedback Depth Classic Chorus Mono / Stereo Speed –... -
Page 28: Amp Simulator
Enhancing the Sound Amp Simulator The ES7’s Amp Simulator (Amp Sim) attempts to reproduce the sound, response, and overdrive characteristics of a typical amp/speaker combination, giving electric piano and drawbar organ sounds an authentic vintage quality. Once enabled, the amplifier type can be selected, with adjustable drive, level, and Low/Hi EQ settings. As with the Reverb and Effects functions, selecting certain sounds will enable the Amp Sim automatically. -
Page 29: Panel Lock
3. Adjusting the Amp Sim settings (drive/level/eq low/eq high) While the amp sim settings menu is shown in the LCD display: Press the MENU buttons to cycle through the different amp sim settings pages, then press the VALUE buttons to adjust the value of the selected amp sim setting. Amp Sim Drive Example: To increase the drive of the amp sim, press the MENU... -
Page 30: Transpose
Transpose The Transpose function allows the pitch of the ES7 digital piano’s keyboard to be raised or lowered in semi-tone intervals. This is particularly useful when accompanying instruments tuned for different keys, or when a song learned in one key must be played in another key. - Page 31 Using the Song Transpose function it is also possible to transpose recorder songs stored in internal memory, and SMF song files stored on a USB memory device. This allows the pitch of the song to be adjusted without affecting the pitch of the keyboard. Selecting the Song Transpose/Key Transpose settings Press and hold the TRANSPOSE button, then press the MENU buttons to alternate between the key transpose and...
-
Page 32: Metronome
Metronome The Metronome function provides a steady beat to aid practicing the piano at a consistent tempo. The time signature, volume, and tempo of the metronome can all be freely adjusted. 1. Turning the Metronome on/off Press the METRONOME button. The LED indicator for the METRONOME button will turn on to indicate that the metronome function is in use, and a 1/4 beat will start to count. - Page 33 2. Adjusting the Metronome settings (tempo/beat/volume) To adjust the metronome volume: Press the MENU buttons to select the ‘Volume’ page, then press the VALUE buttons to adjust the value of the metronome volume. Volume ÅÅÅÅ Example: To increase the volume of the tempo, press the MENU button to select the 'Volume' page, then press and the VALUE...
-
Page 34: Registration Memories
Registration Memories The Registration function allows the current instrument setup (sound/style selection, all settings, etc.) to be stored to a registration memory, and conveniently recalled at the touch of a button. Each of the seven registration buttons contain four banks (A, B, C, and D), allowing up to 28 different registration memories to be stored. Registrations can also be loaded from/saved to USB memory devices. -
Page 35: Resetting All Registration Memories
Exiting Registration mode (retain new settings) To return to normal playing mode with the current registration memory settings selected: Press the EXIT button. The LED indicator for the REGISTRATION button will turn off, and the instrument will return to normal playing mode. Storing a Registration memory To store a registration memory to the current banks (e.g. -
Page 36: Rhythm Section Basic Operation
Rhythm Section Basic Operation The ES7’s Rhythm Section feature contains 100 built-in accompaniment styles, covering a wide range of musical genres. Each style can be used simply as a drum or percussion track, or as a full musical accompaniment with bass, guitar, organ, brass, etc. -
Page 37: Playing With The Rhythm Section
2. Playing with the Rhythm Section Press the PLAY/STOP button. The LED indicator for the PLAY/STOP button will turn on, and the count-in drum pattern will start to play. After the Count-in, the Rhythm Section will change to the Basic pattern. -
Page 38: Rhythm Section Style
Rhythm Section Basic Operation Rhythm Section Style The ES7 digital piano features 100 different accompaniment styles, ranging from Pop, Rock, Ballads, and Jazz, to Funk, Dance, Latin, and World Music styles. For a complete listing of the available Rhythm Section styles, please refer to page 125 of this owner’s manual. -
Page 39: Rhythm Section Parts
Rhythm Section Parts Each Rhythm Section style consists of several different instrument parts. It is possible to specify whether the Rhythm Section should play drums only, bass and drums, or a full backing accompaniment. Rhythm Section parts R.S. Parts LCD display Description Drums Drum... -
Page 40: Rhythm Section Settings
Rhythm Section Settings Adjusting the Rhythm Section tempo While the main Rhythm Section screen is shown in the LCD display: Press the VALUE buttons to decrease or increase the tempo of the Rhythm Section. * The Rhythm Section and Metronome share the same tempo setting. Rhythm Section settings Page no. -
Page 41: Rhythm Volume
Rhythm Volume The Rhythm Volume setting is used to adjust the volume level of the Rhythm Section accompaniment, relative to the main keyboard sound. Adjust the Rhythm Volume setting While the Rhythm Settings menu is shown in the LCD display: Press the MENU buttons to select the Rhythm Volume settings page, then press the... -
Page 42: Auto Fill-In
Rhythm Section Settings Auto Fill-in The Auto Fill-in setting is used to specify how many bars of the Rhythm Section should be played before a fill-in passage is automatically added. This function can be turned off if the Auto Fill-in feature is not required. Auto Fill-in settings Auto Fill-in setting Description... -
Page 43: One Finger Ad-Lib
One Finger Ad-lib The One Finger Ad-lib setting is used to turn the Rhythm Section’s One Finger Ad-lib function on or off. When turned on, One Finger Ad-lib allows various musical phrases to be performed at any time by pressing one of the topmost 17 keys on the keyboard. -
Page 44: Acc Mode
However, when the ‘Full Keyboard’ mode is selected, the entire keyboard can be used to play the melody, with the ES7 detecting and changing the Rhythm Section chord/key automatically. Finally, when the ‘Preset Chord’ mode is selected, the Rhythm Section will follow the preset chord sequence specified on the Preset Chord settings page. -
Page 45: Preset Chord
Changing the ACC Mode setting While the Rhythm Settings menu is shown in the LCD display: Press the MENU buttons to select the ACC Mode settings page, then press the VALUE buttons to buttons to cycle through the different chord recognition methods. 4-4 ACC Mode = Normal 4-4 ACC Mode... -
Page 46: Song Recorder (Internal Memory)
(Internal memory) The ES7 digital piano allows up to 10 different songs to be recorded, stored in internal memory, and played back at the touch of a button. Each song consists of two separate tracks - referred to as ‘parts’ - that can be recorded and played back independently. -
Page 47: Stopping The Song Recorder
4. Stopping the song recorder Press the PLAY/STOP button. The LED indicators for the PLAY/STOP and REC buttons will turn off, the recorder will stop, and the part/song will be stored in internal memory. After a few seconds, the Internal Song Player screen will be shown in the LCD display, indicating that the song is ready for playback. -
Page 48: Playing A Song
Song Recorder (Internal Memory) Playing a Song This function is used to playback recorder songs stored in internal memory. To playback a song/part immediately after recording, start this process from step 2. 1. Entering song play mode Press the PLAY/STOP button. The LED indicator for the PLAY/STOP button will turn on, and the Internal Song Player screen will be shown in the LCD display. -
Page 49: Controlling Song Playback
Controlling song playback While the song is playing: Press the REW or FWD buttons to rewind or advance the playing position of the song. Press the A-B LOOP button twice to set the start and end points PLAY/STOP REW and FWD of the loop. -
Page 50: Recording A Song With The Rhythm Section
Song Recorder (Internal Memory) Recording a Song with the Rhythm Section It is also possible to record songs while using the Rhythm Section. This feature can be used to record backing accompaniments (including chord changes) for favourite songs, allowing the player to concentrate on the melody or improvised solos using the full keyboard. -
Page 51: Erasing A Part/Song
Erasing a Part/Song This function is used to erase recorder parts that have been recorded incorrectly or songs that are no longer listened to. Once a part/song has been erased from memory it cannot be recovered. 1. Entering song erase mode Press the REC and PLAY/STOP buttons simultaneously. -
Page 52: Audio Record/Playback (Usb Memory)
(USB memory) The ES7 digital piano is also capable of recording performances as digital audio - saving the data to a USB memory device in either MP3 or WAV format. This useful function allows professional quality recordings to be produced directly on the instrument - without the need for additional sound equipment - then emailed to band members, listened to away from the instrument, or edited and remixed further using an audio workstation. - Page 53 4. Stopping the audio recorder, saving to USB Press the PLAY/STOP button. The LED indicators for the PLAY/STOP and REC buttons will turn off, and recording will stop. A confirmation message will be shown in the LCD display, prompting to save the recorded audio file. Save to USB? Press the REC button to continue, or the PLAY/STOP button to PLAY/STOP...
-
Page 54: Playing An Audio File
Playing an Audio file The ES7 digital piano is also capable of playing MP3 and WAV audio files stored on a USB memory device directly through the instrument’s speaker system. This function is particularly useful when attempting to learn the chords or melody to a new piece, or to simply play along with one’s favourite song. - Page 55 * The playback volume can be adjusted within the range of 1 - 128. * There may be a noticeable difference in volume between audio file playback and the ES7 keyboard sound. When playing back MP3/WAV audio data, please adjust the volume of the audio file as desired.
-
Page 56: Playing A Midi File
Playing a MIDI file The ES7 digital piano also supports the playback of Standard MIDI File (SMF) song files stored on a USB memory device, allowing a vast selection of widely accessible music to be heard through the instrument’s exquisite Progressive Harmonic Imaging sound engine. - Page 57 * The playback volume can be adjusted within the range of 1 - 128. * There may be a noticeable difference in volume between MIDI file playback and the ES7 keyboard sound. When playing back MID data, please adjust the volume as desired.
-
Page 58: Recording An Audio File With The Rhythm Section
Recording an Audio file with the Rhythm Section The ES7 digital piano also allows MP3 or WAV audio files to be recorded while using the Rhythm Section. This feature can be used to produce high quality digital audio recordings with full accompaniment backing, which can then be shared with friends and family. -
Page 59: Converting A Song To An Audio File
Converting a Song to an Audio file The ES7 digital piano allows recorder songs stored in internal memory to be played back and saved (converted) as an audio file to a USB device in either MP3 or WAV format. 1. Selecting a song After recording a song to internal memory: Connect a USB memory device to the USB port. -
Page 60: Deleting An Audio/Midi File
Audio Record/Playback (USB Memory) Deleting an Audio/MIDI file This function is used to delete MP3/WAV audio files or MIDI song files stored on a USB device. Once a file has been deleted from the USB device it cannot be recovered. 1. -
Page 61: Usb Functions
USB Menu The USB Menu contains functions to load/save registration memories and recorder songs from/to a USB memory device. This menu also allows files to be renamed and deleted, and for the USB memory device to be formatted. USB Menu functions Page no. -
Page 62: Load Internal Song
USB Menu Load Internal Song The Load Internal Song function is used to load recorder songs stored on a USB memory device into the instrument’s internal memory. 1. Selecting the Load Int. Song function Connect a USB memory device, then press the USB button to 1 Load Int. -
Page 63: Load Registration
Load Registration The Load Registration function is used to load registration memories stored on a USB memory device into the instrument’s internal memory. There are two types of registration file: ‘Single’ and ‘All’. Registration file types Registration type Description File extension Single A file containing a single registration memory. -
Page 64: Save Smf Song
USB Menu Save SMF Song The Save SMF Song function is used to save recorder songs stored in the instrument’s internal memory to a USB memory device as a Standard MIDI File (SMF). 1. Selecting the Save SMF Song function Connect a USB memory device, then press the USB button to 3 Save SMF Song enter the USB Menu. -
Page 65: Save Internal Song
Save Internal Song The Save Internal Song function is used to save recorder songs stored in the instrument’s internal memory to a USB memory device in the ES7’s native song format. 1. Selecting the Save Int. Song function Connect a USB memory device, then press the USB button to 4 Save Int. -
Page 66: Save Registration
USB Menu Save Registration The Save Registration function is used to save registration memories stored in the instrument to a USB memory device. There are two types of registration file: ‘Single’ and ‘All’. Registration file types Registration type Description File extension Single A file containing a single registration memory. -
Page 67: Rename File
Rename File The Rename File function is used to rename song, audio, and registration files stored on a USB memory device. 1. Selecting the Rename File function Connect a USB memory device, then press the USB button to 6 Rename File enter the USB Menu. -
Page 68: Delete File
USB Menu Delete File The Delete File function is used to delete song, audio, and registration files stored on a USB memory device. Once a file has been deleted from the USB device it cannot be recovered. 1. Selecting the Delete File function Connect a USB memory device, then press the USB button to 7 Delete File enter the USB Menu. -
Page 69: Format Usb
Format USB The Format USB function is used to format the connected USB memory device, erasing all stored data. The USB Format function will erase all data stored on the connected USB memory device. Exercise caution when using this function in order to prevent accidental data loss. 1. -
Page 70: Settings Menus
Settings Menus The Settings menus contain a variety of options to adjust the ES7’s operation and sound. Settings are grouped by category, providing convenient access to relevant controls. Once adjusted, settings can be stored to one of the instrument’s 28 registration memories, or selected as the default power-on settings with the User Memory function. -
Page 71: Basic Settings
Basic Settings The Basic settings menu contains settings to adjust the pitch, tuning, and general sound of the instrument. This menu also allows favourite panel settings to be stored, or reset back to the original factory configuration. Basic Settings Page no. Setting Description Default setting Equaliser... -
Page 72: Equaliser
Equaliser (EQ) The Equaliser function allows the overall sound character of the ES7 digital piano to be adjusted to ensure the best sound quality within the area that the instrument is located. There are five different preset EQ types available, with an additional ‘User’... - Page 73 User EQ setting User EQ bands Description Adjusts the low range frequency band (20 - 100 Hz). Mid-low Adjusts the mid-low range frequency band (355 - 1000 Hz). Mid-high Adjusts the mid-high range frequency band (1120 - 3150 Hz). High Adjusts the high range frequency band (5000 - 20000 Hz).
-
Page 74: Wall Eq
Basic Settings Wall EQ The Wall EQ setting optimises the ES7 digital piano’s speaker system depending on whether the instrument is placed beside a wall, or in an area away from a wall. * This setting does not affect the headphones or Line Out output. -
Page 75: Speaker Volume
Speaker Volume The Speaker Volume setting allows the maximum volume level of the ES7 digital piano’s speaker output to be reduced, providing finer adjustment control over the master volume. This setting can also function as a volume limiter, preventing the instrument from being played too loudly in the home or classroom etc. -
Page 76: Phones Volume
section Basic Settings Phones Volume The Phones Volume setting allows the maximum volume level of the headphones output to be increased. The default setting for Phones Volume is ‘Normal’ in order to protect an individual’s ears from excessive volume levels. The ‘High’ setting may be selected when using headphones with a high impedance, or in situations where it is desirable to increase the maximum volume level of the headphones output. -
Page 77: Line Out Volume
The Line Out Volume setting allows the level of the instrument’s Line Out output to be adjusted. This setting may be useful when connecting the ES7 digital piano to mixers and other audio equipment. * This setting does not affect the speaker or headphone volume. -
Page 78: Audio Recorder Gain
section Basic Settings Audio Recorder Gain The Audio Recorder Gain setting allows the recording level of MP3/WAV audio files to be adjusted. While the instrument’s default audio recorder level is optimised to capture the broad dynamic range of a grand piano, there may be occasions where it is desirable to increase or decrease this gain setting for certain types of music. -
Page 79: Tuning
Tuning The Tuning setting allows the overall pitch of the ES7 digital piano to be raised and lowered in 0.5 Hz steps, and may therefore prove useful when playing with other pitched instruments. 1. Selecting the Tuning setting After entering the Basic Settings menu (page 71): 1-7 Tuning = 440.0 Hz... -
Page 80: Damper Hold
section Basic Settings Damper Hold The Damper Hold setting is used to determine whether sounds such as organ or strings should be sustained continuously when the sustain (damper) pedal is pressed, or whether these sounds should decay, naturally. Damper Hold settings Damper Hold Description Organ, string, etc. -
Page 81: Four Hands
The Four Hands setting provides an alternative method to enabling the Four Hands Mode function, and may prove useful in teaching environments or situations where this function should be enabled automatically every time the ES7 digital piano is turned on. * Please refer to page 22 for information about the Four Hands Mode function. -
Page 82: User Memory
1-10 User Memory The User Memory function allows preferred panel settings to be stored in the instrument’s memory, and automatically recalled as the default settings every time the ES7 digital piano is turned on. Settings stored in User Memories General... -
Page 83: Factory Reset
1-11 Factory Reset The Factory Reset function clears any settings stored using the User Memory function above, restoring the ES7 digital piano back to its factory default settings. * This function does not clear registration memories or recorder songs stored in internal memory. -
Page 84: Virtual Technician
The Virtual Technician settings of the ES7 digital piano simulate these refinements digitally, allowing performers to shape various aspects of the instrument’s character to suit their personal preferences. -
Page 85: Touch Curve
Touch Curve As with an acoustic piano, the ES7 digital piano produces a louder sound when the keys are struck with force, and a softer sound when the keys are played gently. The volume and tonal character change in relation to the strength and speed of playing –... - Page 86 section Virtual Technician Touch Curve (cont.) 1. Selecting the Touch Curve setting After entering the Virtual Technician menu (page 84): 2-1 Touch Curve = Normal The Touch setting will be selected automatically. 2. Changing the Touch Curve type Press the VALUE buttons to cycle through the different 2-1 Touch Curve touch curve types.
-
Page 87: Voicing
Voicing The Voicing setting allows the tonal character of the ES7 digital piano to be set to one of six different types. Voicing types Voicing type Description Normal The normal tonal character of an acoustic piano throughout the entire dynamic range. -
Page 88: Damper Resonance
The ES7 digital piano recreates this phenomenon, with the Damper Resonance setting allowing the volume of this resonance sound to be adjusted. -
Page 89: Damper Noise
When the damper pedal of an acoustic piano is pressed and released, it is often possible to hear the sound of the damper head touching and releasing the strings. The ES7 digital piano reproduces this sound, with the Damper Noise setting allowing the volume of this sound to be adjusted. -
Page 90: String Resonance
String Resonance refers to a phenomenon that exists in acoustic pianos whereby the strings of held notes resonate ‘sympathetically’ with other notes of the same harmonic series. The ES7 digital piano recreates this phenomenon, with the String Resonance setting allowing the volume of this resonance to be adjusted. -
Page 91: Key-Off Effect
The ES7 digital piano reproduces this sound, with the Key-off Effect setting allowing the volume of this sound to be adjusted. -
Page 92: Fall-Back Noise
When playing an acoustic piano, it is often possible to hear the faint sound of the keyboard action returning (i.e. ‘falling back’) to the neutral position after a key is released. The ES7 digital piano reproduces this sound, with the Fall-back Noise setting allowing the volume of this sound to be adjusted. -
Page 93: Hammer Delay
When playing pianissimo passages using an acoustic piano, there may be a perceived delay between a key being pressed the hammer striking the strings. If desired, the ES7 digital piano can recreate this delay, with the Hammer Delay setting allowing the delay length to be adjusted. -
Page 94: Temperament
Virtual Technician Temperament The Temperament setting allows the tuning system used by the ES7 digital piano to be changed from the modern ‘Equal Temperament’ standard to one of the various temperaments popularised during the Renaissance and Baroque periods. It is also possible to create customised temperaments using the User Temperaments function. -
Page 95: Stretch Tuning
Stretch Tuning Stretch tuning is a piano-specific tuning method in which the tuning for the lower notes is slightly lower and the tuning for the higher notes is slightly higher than the settings made in the Equal temperament. The Stretch Tuning setting allows the degree of stretch tuning to be adjusted when Equal (piano) or Equal temperament are selected. -
Page 96: Key Settings
Key Settings The Key Settings menu contains settings to adjust the instrument’s operation when using the Dual or Split playing modes. Key Settings Page no. Setting Description Default setting Lower Octave Raise the pitch of the lower section in octave steps when using Split mode. Lower Pedal Enable/disable sustain pedal for the lower section when using Split mode. -
Page 97: Lower Octave Shift
Lower Octave Shift The Lower Octave Shift setting allows the pitch of the lower section when using Split mode to be raised in octave steps. 1. Selecting the Lower Octave Shift setting After entering the Key Settings menu (page 96): 3-1 Lower Octave The Lower Octave Shift setting will be selected automatically. -
Page 98: Lower Pedal
Key Settings Lower Pedal The Lower Pedal setting determines whether or not the sustain pedal will affect (i.e. sustain) the lower sound when using Split mode. Lower Pedal settings Lower Pedal Description In Split mode, lower section sounds will not be sustained when the sustain pedal is pressed. (default) In Split mode, lower section sounds will be sustained when the sustain pedal is pressed. -
Page 99: Split Balance
Split Balance The Split Balance setting allows the volume balance between the upper and lower sections when using Split mode to be adjusted. * The Split Balance setting can also be used adjusted directly while Split mode is in use. Please refer to page 21 for more information. 1. -
Page 100: Layer Octave Shift
section Key Settings Layer Octave Shift The Layer Octave Shift setting allows the pitch of the layered sound when using Dual mode to be raised or lowered in octave steps. 1. Selecting the Layer Octave Shift setting After entering the Key Settings menu (page 96): 3-4 Layer Octave Press the MENU buttons to select the Layer Octave Shift... -
Page 101: Layer Dynamics
section Layer Dynamics When using Dual mode, sometimes simply adjusting the volume balance between the two layered sounds is not enough to create the desired sound character, especially if both sounds are very dynamic. Layering two equally dynamic sounds can prove difficult to control and play comfortably. The Layer Dynamics Function allows the dynamic sensitivity of the layered sound to be reduced, in order to improve the blend between the two combined sounds. -
Page 102: Dual Balance
section Key Settings Dual Balance The Dual Balance setting allows the volume balance between the main and layered sounds when using Dual mode to be adjusted. * The Dual Balance setting can also be used adjusted directly while Dual mode is in use. Please refer to page 19 for more information. 1. -
Page 103: Rhythm Settings
Rhythm Settings The Rhythm Settings menu contains settings to adjust the instrument’s Rhythm Section feature. Rhythm Settings Page no. Setting Description Default setting Rhythm Vol. Adjust the volume of the Rhythm Section Auto Fill In Specify how frequently an Auto Fill-in will be played. 8 bars O.F. -
Page 104: Rhythm Volume
Rhythm Settings Rhythm Volume The Rhythm Volume setting is used to adjust the volume level of the Rhythm Section accompaniment, relative to the main keyboard sound. 1. Selecting the Rhythm Volume setting After entering the Rhythm Settings menu (page 103): 4-1 Rhythm Vol. -
Page 105: Auto Fill-In
Auto Fill-in The Auto Fill-in setting is used to specify how many bars of the Rhythm Section should be played before a fill-in passage is automatically added. This function can be turned off of the Auto Fill-in feature is not required. Auto Fill-in settings Auto Fill-in Description... -
Page 106: One Finger Ad-Lib
Rhythm Settings One Finger Ad-lib The One Finger Ad-lib setting is used to turn the Rhythm Section’s One Finger Ad-lib function on or off. When turned on, One Finger Ad-lib allows various musical phrases to be performed at any time by pressing one of the topmost 17 keys on the keyboard. -
Page 107: Acc Mode
ACC Mode The ACC Mode setting is used to select the Rhythm Section’s chord input method. * Please refer to page 44 for more information about the different Rhythm Section accompaniment modes. ACC Mode settings ACC Mode Rhythm Section play/control mode Normal Upper section plays melody, lower section controls Rhythm Section key. -
Page 108: Midi Settings
For both receiving and transmitting, channels 1-16 can be used. Recording/playing with a sequencer When connected to a sequencer (or a computer running MIDI sequencing software), the ES7 digital piano can be used to record and playback multi-track songs, with separate sounds playing simultaneously on each channel. -
Page 109: Midi Functions
* Please refer to the ‘MIDI Implementation Chart’ on page 134 for further Multi-timbral mode setting information regarding the MIDI capabilities of the ES7 digital piano. Receive multiple channel MIDI data from a MIDI-connected musical instrument or device. -
Page 110: Midi Channel
Omni mode When the ES7 digital piano is turned on, the instrument is automatically set to ‘omni mode on’, allowing MIDI information to be received on all MIDI channels (1-16). When the MIDI Channel setting is used to specify a transmit/receive channel, the instrument will be set to ‘omni mode off’. -
Page 111: Send Program Change Number
Send Program Change Number The Send Program Change Number function is used to send a Program Change Number (1-128) to the connected MIDI device. 1. Selecting the Send Program Change Number function After entering the MIDI Settings menu (page 108): 5-2 Send PGM# Press the MENU buttons to select the Send Program... -
Page 112: Local Control
Local Control The Local Control setting determines whether the instrument will play an internal sound when the keys are pressed. This setting is useful when using the ES7 digital piano to control an external MIDI device. Local Control settings Local Control Description The instrument will transmit information to an external MIDI device only. -
Page 113: Transmit Program Change Numbers
Transmit Program Change Numbers The Transmit Program Change Numbers setting determines whether the ES7 digital piano will transmit program change information via MIDI when the instrument’s panel buttons are pressed. Transmit Program Change Numbers settings Transmit PGM# Multi-timbral setting Effect of pressing panel buttons Off, On1 SOUND buttons will send PGM# shown in the left column*. -
Page 114: Multi-Timbral Mode
MIDI Settings Multi-timbral Mode The Multi-timbral Mode setting determines whether or not the ES7 digital piano is able to receive MIDI information on more than one MIDI channel simultaneously. This allows the instrument to play back multi-track, multi-timbral performance data sent from an external MIDI device. -
Page 115: Channel Mute
Channel Mute The Channel Mute setting determines which MIDI channels (1-16) are activated to receive MIDI information when Multi-timbral mode is enabled. * This setting is only available when the Multi-timbral Mode setting is set to ‘On1’ or ‘On2’. Channel Mute settings Channel Mute Description Play... -
Page 116: Usb Midi (Usb To Host Port)
(USB to Host connector) The ES7 digital piano features a ‘USB to Host’ type connector, allowing the instrument to be connected to a computer using an inexpensive USB cable and utilised as a MIDI device. Depending on the type of computer and operating system installed, additional driver software may be required for USB MIDI communication to function correctly. -
Page 117: Power Settings
Power Settings Auto Power Off The ES7 digital piano features a power saving function that can be used to automatically turn off the instrument after a specified period of inactivity. * This setting will be stored automatically, and recalled every time the instrument is turned on. -
Page 118: Connecting To Other Devices
If this occurs, turn the power off and then on again to reset the amplifier protection circuit. Do not connect the LINE IN STEREO and LINE OUT jacks of the ES7 digital piano together with the same cable. An... -
Page 119: Rear Connectors
It may be necessary to format the USB memory device before conforms to USB2.0 Hi-Speed standards. Older USB devices it can be used with the ES7 digital piano. If so, please refer to can still be used, however data transfer speed will be limited the USB Format function instructions on page 81. -
Page 120: Troubleshooting
Troubleshooting The table below summarises issues that may be experienced with the ES7 digital piano, explaining the typical cause(s), and recommended solution(s). Issue Possible Cause and Solution Page no. Check that the AC power adaptor is firmly attached to the instrument, and p. -
Page 121: Demo Song List
New Age Pad Original Kawai BASS Wood Bass Original Kawai Fretless Bass Original Kawai W. Bass & Ride Original Kawai RHYTHM SECTION Rhythm Section Demo Original Kawai * Kawai regrets that sheet music for Kawai original demo songs is not available. -
Page 122: Program Change Number List
section Program Change Number List Multi-timbral mode = off/on1 Multi-timbral mode = on2 Sound Name Program Number Program Number Bank MSB Bank LSB PIANO 1 Concert Grand Studio Grand Mellow Grand Modern Piano PIANO 2 Concert Grand 2 Studio Grand 2 Mellow Grand 2 Rock Piano E. - Page 123 Multi-timbral mode = off/on1 Multi-timbral mode = on2 Sound Name Program Number Program Number Bank MSB Bank LSB MIDI Concert Grand RS Studio Grand RS Studio Grand 2 RS Classic E.Piano RS Vibraphone RS String Ensemble RS Wood Bass RS Electric Bass RS Fretless Bass RS Drawbar Organ 2 RS...
-
Page 124: Drum Sound Mapping List
Drum Sound Mapping List Analog Set RS Ambience Set RS Platinum Set RS Ballad Set RS Snare Roll Snare Roll Snare Roll Snare Roll Finger Snap Finger Snap Finger Snap Finger Snap High Q High Q High Q High Q Slap Slap Slap... -
Page 125: Rhythm Section Style List
Rhythm Section Style List Genre Style Name Genre Style Name 16th Swing Funk Shuffle 1 8th Straight 8 Beat 1 Funk Shuffle 2 8 Beat 2 Hip Hop 1 Smooth Beat Hip Hop 2 Pop 1 Hip Hop 3 Pop 2 Hip Hop 4 Ride Beat 16 Shuffle 1... -
Page 126: Rhythm Section Chord Types
Rhythm Section Chord Types The tables below list chord types recognised by the ES7 digital piano’s Rhythm Section. Each chord can be played by pressing the notes marked with a symbol in the diagrams below. In addition, the common Major, Minor, M7, and 7, chord types can also be played by pressing just the notes marked with a symbol. - Page 127 Chord Name Notes Chord Name Notes Chord Name Notes E Maj E Maj F Maj (D ) E sus4 E sus4 F sus4 (D ) E aug E aug F aug (D ) E min E min F min (D ) E M7 E M7 F M7...
- Page 128 Rhythm Section Chord Types Chord Name Notes Chord Name Notes Chord Name Notes G Maj A Maj G Maj (F ) (G ) G sus4 A sus4 G sus4 (F ) (G ) G aug A aug G aug (F ) (G ) G min A min...
- Page 129 Chord Name Notes Chord Name Notes Chord Name Notes B Maj A Maj B Maj (A ) B sus4 A sus4 B sus4 (A ) B aug A aug B aug (A ) B min A min B min (A ) B M7 B M7 A M7...
-
Page 130: Rhythm Section Preset Chord Sequences
Rhythm Section Preset Chord Sequences The table below lists Preset Chord sequences utilised by the ES7 digital piano’s Rhythm Section when the ‘ACC Mode’ setting is set to ‘Preset Chord’. The Preset Chord sequences can last for 8, 12, or 16 bars, with the bar number and chord name written in the spaces below. - Page 131 Chord pattern Preset Chord No. of bars 1 (9) 2 (10) 3 (11) 4 (12) 5 (13) 6 (14) 7 (15) 8 (16) Chord49 G7sus4 Chord50 A M7 B m7 A M7 D M7 Dm7( 5) Chord51 Gm/B F m7( 5) Chord52 F dim E7/G...
-
Page 132: Settings List
Settings List The tables below list all of the settings/functions that can be adjusted from the ES7 digital piano’s panel interface, in addition to available ranges/types, default settings, and Registration/User Memory storing capabilities. Setting Name Range / Type Default Setting... - Page 133 Setting Name Range / Type Default Setting Registration User Memory Transpose Key Transpose On/Off Off, On (button) Key Transpose Value –12 (C) - +12 (C) Song Transpose Value –12 (C) - +12 (C) Split Split On/Off Off, On (button) Split Point A–1 - C7 Rhythm Section Rhythm Section On/Off...
-
Page 134: Specifications
Specifications Keyboard 88 weighted keys with Ivory Touch key surfaces Responsive Hammer 2 (RH2) action with Let-Off Sound Source Progressive Harmonic Imaging™ (PHI), 88-key piano sampling Internal Sounds 32 voices PIANO1: Concert Grand, Studio Grand, Mellow Grand, Modern Piano PIANO2: Concert Grand2, Studio Grand2, Mellow Grand2, Rock Piano E.PIANO: Classic E.P., 60’s E.Piano, Modern E. -
Page 135: Midi Exclusive Data Format
10th byte Byte Description 1 F0 Start code 2 40 Kawai ID number 3 00 - 0F MIDI channel 4 10, 30 Function code (30 when setting Multi-timbre On/Off ) 5 04 Indicates that the instrument is an electric piano... -
Page 136: Midi Implementation Chart
MIDI Implementation Chart Kawai ES7 digital piano Date: March 2012 Version: 1.0 Function Transmit Receive Remarks At power-up Basic channel Settable 1 - 16 1 - 16 At power-up Mode 3 Mode 1 * The default for the OMNI mode is On. -
Page 137: Owner's Manual Conventions
Owner’s Manual Conventions This owner’s manual utilises a number of illustrative conventions in order to explain the ES7’s various functions. The examples below provide an overview of the button LED indicator states and press types, and the appearance of difference kinds of text. -
Page 138: User Notes
User Notes... - Page 139 Hello to Jason Isaacs!
- Page 140 ES7 Owner’s Manual KPSZ-0512 : 817439 OW1059E-J1203 Version 1 Printed in Indonesia Copyright © 2012 Kawai Musical Instruments Mfg. Co.,Ltd. All Rights Reserved.
Need help?
Do you have a question about the ES7 and is the answer not in the manual?
Questions and answers