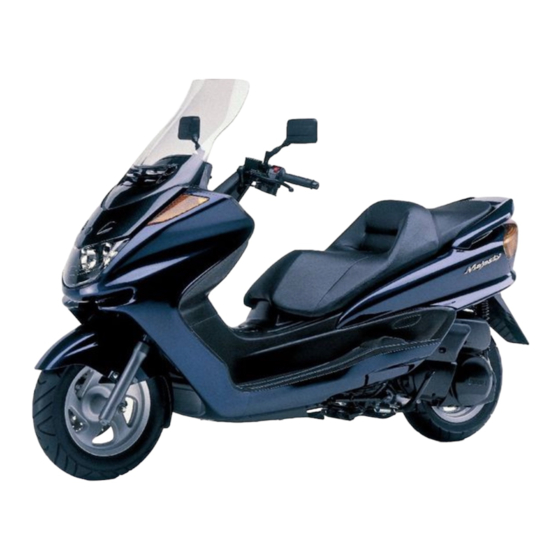
Yamaha MAJESTY YP250 Owner's Manual
Hide thumbs
Also See for MAJESTY YP250:
- Service manual (267 pages) ,
- Owner's manual (114 pages) ,
- Owner's manual (106 pages)
Table of Contents
Advertisement
Quick Links
Advertisement
Chapters
Table of Contents
Troubleshooting

Related Manuals for Yamaha MAJESTY YP250


Summary of Contents for Yamaha MAJESTY YP250
- Page 1 OWNER’S MANUAL YP250 5GM-28199-E0...
- Page 3 Welcome to the Yamaha world of motorcycling! As the owner of a YP250, you are benefiting from Yamaha’s vast experience in and newest technolo- gy for the design and the manufacture of high-quality products, which have earned Yamaha a reputa- tion for dependability.
- Page 4 8 This manual should be considered a permanent part of this scooter and should remain with it even if the scooter is subsequently sold. 8 Yamaha continually seeks advancements in product design and quality. Therefore, while this manual contains the most current product information available at the time of printing, there may be minor discrepancies between your scooter and this manual.
- Page 5 IMPORTANT MANUAL INFORMATION EW000002 PLEASE READ THIS MANUAL CAREFULLY AND COMPLETELY BEFORE OPERATING THIS SCOOTER.
- Page 6 EAU00008 YP250 OWNER’S MANUAL ©1999 by Yamaha Motor Co., Ltd. 1st Edition, October 1999 All rights reserved. Any reprinting or unauthorized use without the written permission of Yamaha Motor Co., Ltd. is expressly prohibited. Printed in Japan...
-
Page 7: Table Of Contents
EAU00009 TABLE OF CONTENTS 1 GIVE SAFETY THE RIGHT OF WAY 2 DESCRIPTION 3 INSTRUMENT AND CONTROL FUNCTIONS 4 PRE-OPERATION CHECKS 5 OPERATION AND IMPORTANT RIDING POINTS 6 PERIODIC MAINTENANCE AND MINOR REPAIR 7 SCOOTER CARE AND STORAGE 8 SPECIFICATIONS 9 CONSUMER INFORMATION INDEX... -
Page 9: Give Safety The Right Of Way
GIVE SAFETY THE RIGHT OF WAY GIVE SAFETY THE RIGHT OF WAY ..........1-1 FURTHER SAFE RIDING POINTS FOR THIS MODEL ....1-2... - Page 10 EAU00021 Q GIVE SAFETY THE RIGHT OF WAY Scooters are fascinating vehicles, which can give you an unsurpassed feeling of power and freedom. However, they also impose certain limits, which you must accept; even the best scooter does not ignore the laws of physics. Regular care and maintenance are essential for preserving your scooter’s value and operating condi- tion.
- Page 11 Q GIVE SAFETY THE RIGHT OF WAY EAU03099* FURTHER SAFE RIDING POINTS FOR THIS MODEL 8 Be sure to signal clearly when making turns. 8 Braking can be extremely difficult on a wet road. Avoid hard braking, because the scooter could slide.
-
Page 13: Description
DESCRIPTION Left view .....................2-1 Right view ...................2-2 Controls/Instruments ................2-3... - Page 14 EAU00026 DESCRIPTION Left view 1. Rear storage compartment (page 3-14) 5. V-belt case air filter (page 6-17) 2. Grab bar (Page 5-2) 6. Centerstand (page 6-24) 3. Rear shock absorber spring preload 7. Sidestand (page 3-16) adjusting ring (page 3-15) 8.
- Page 15 DESCRIPTION Right view 13, 14 9. Rider seat (page 3-12) 14. Fuse box (page 6-27) 10. Air flow louver (page 6-18) 15. Coolant reservoir tank (page 6-15) 11. Headlight (page 6-28) 16. Coolant level check window (page 6-15) 12. Radiator 17.
-
Page 16: Description
EAU00026 DESCRIPTION Controls/Instruments 19 20 21 22 23 24 18. Rear brake lever (page 3-10) 24. Fuel gauge (page 3-5) 19. Left handlebar switches (page 3-6, 3-7) 25. Right handlebar switches (page 3-7, 3-9) 20. Front storage compartment A (page 3-14) 26. -
Page 17: Instrument And Control Functions
INSTRUMENT AND CONTROL FUNCTIONS Main switch/steering lock..............3-1 Indicator lights ..................3-2 Oil change indicator light circuit check ..........3-3 Speedometer ..................3-4 Diagnosis device ................3-4 Antitheft alarm (optional) ..............3-5 Fuel gauge..................3-5 Coolant temperature gauge..............3-5 Digital clock ..................3-6 Handlebar switches ................3-6 Headlight beam variation..............3-8 Front brake lever ................3-9 Rear brake lever ................3-10 Fuel tank cap ..................3-10... -
Page 18: Main Switch/Steering Lock
EAU00027 INSTRUMENT AND CONTROL FUNCTIONS EAU00040 EAU01433 LOCK (Parking) The steering is locked in this position The steering is locked in this position, and all electrical circuits are switched and the taillight, license light and aux- OPEN off. The key can be removed in this iliary light come on, but all other cir- PUSH position. -
Page 19: Indicator Lights
INSTRUMENT AND CONTROL FUNCTIONS EAU00063 High beam indicator light “&” This indicator comes on when the headlight high beam is used. 1 . 00 EAU03125* Turn indicator lights “4”/“6” The corresponding indicator flashes when the turn signal switch is moved to the left or right. -
Page 20: Oil Change Indicator Light Circuit Check
Turn the engine stop switch to “#”. Indicator light does Indicator light comes not come on. on for a few seconds and then goes off. Ask a Yamaha dealer Electrical circuit is OK. to inspect electrical cir- Go ahead with riding. cuit. -
Page 21: Speedometer
In set the display to the “TRIP” mode. this case, take your scooter to a Then, push the “TRIP” reset button Yamaha dealer for repair. 1. Speedometer for at least one second. 2. Digital odometer/trip odometer 3. -
Page 22: Antitheft Alarm (Optional)
INSTRUMENT AND CONTROL FUNCTIONS EAU00109 Antitheft alarm (optional) An antitheft alarm can be equipped to this scooter. Consult your Yamaha dealer to obtain and install the alarm. 1. Fuel gauge 1. Coolant temperature gauge 2. Red mark EAU00110 EAU03124* Fuel gauge... -
Page 23: Digital Clock
INSTRUMENT AND CONTROL FUNCTIONS NOTE: When setting the clock after its power source is cut by a removed battery, 1 . 00 etc., or when pushing the “h” and “m” button simultaneously, first set the time for 1:00 AM, then, go on to set it for the correct time. - Page 24 INSTRUMENT AND CONTROL FUNCTIONS 1. Pass switch “&” 1. Engine stop switch 2. Dimmer switch 2. Light switch 3. Turn signal switch 3. Start switch “,” 4. Horn switch “*” EAU00135 Light switch EAU00127 Turn signal switch Turning the light switch to “ ”...
-
Page 25: Headlight Beam Variation
INSTRUMENT AND CONTROL FUNCTIONS EAU00136 Headlight beam variation 3 : High beam light on 2 : Low beam light on 1 : Light off : Auxiliary light on Bulb to be used Destination Left Right Germany, Belgium, Switzerland, Spain Halogen France, Greece, Italy, Netherlands, 60/55W bulb... -
Page 26: Front Brake Lever
INSTRUMENT AND CONTROL FUNCTIONS EAU00143 Start switch “,” The starter motor cranks the engine when pushing the start switch. EC000005 See starting instructions prior to starting the engine. 1. Engine stop switch 1. Front brake lever 2. Light switch EAU00158 3. -
Page 27: Rear Brake Lever
INSTRUMENT AND CONTROL FUNCTIONS 1. Rear brake lever 1. Lid 1. Fuel tank cap 2. Lever EAU00163 To open the fuel tank cap, insert the Rear brake lever EAU03090* Fuel tank cap key into the lock and turn it clock- The rear brake lever is located on the wise. -
Page 28: Fuel
INSTRUMENT AND CONTROL FUNCTIONS EAU00185 Always wipe off spilled fuel imme- diately with a dry and clean soft cloth. Fuel may deteriorate painted surfaces or plastic parts. EAU00191* Recommended fuel: 1. Match marks 1. Filler tube Regular unleaded gasoline 2. Fuel level To close the cap, align the match EAU01183 with a research octane... -
Page 29: Catalyzer
INSTRUMENT AND CONTROL FUNCTIONS EAU03098* EC000114 Catalyzer This scooter is equipped with a cat- The following must be observed to alytic converter in the muffler. prevent a fire hazard or other dam- OPEN ages. PUSH EW000128 8 Use only unleaded gasoline. LOCK PUSH Use of leaded gasoline will... -
Page 30: Rider Seat Adjustment
INSTRUMENT AND CONTROL FUNCTIONS 1. Rider seat 1. Bolt ( 2. Collar ( 4) EAU03096* NOTE: To adjust, open the rider seat and Rider seat adjustment 8 Place the scooter on the center- remove the bolts and collars. Slide The rider seat can be adjusted to stand before opening the rider the seat forward or backward to the change the riding position. -
Page 31: Storage Compartments
INSTRUMENT AND CONTROL FUNCTIONS Compartment A Compartment B 1. Button 1. Lever 2. Lid 2. Lid Rear storage compartment EAU03110* Front storage compartment B Storage compartments Two helmets can be stored in the To open the storage compartment, Front storage compartment A compartment under the seats. -
Page 32: Rear Shock Absorber Adjustment
INSTRUMENT AND CONTROL FUNCTIONS ECA00051* Stan- Soft Hard dard Adjusting Do not leave the rider seat open Position for an extended period of time as EW000040 the light may cause the battery to discharge. Always adjust each shock absorber to the same setting. EWA00030* Uneven adjustment... -
Page 33: Carrier (Optional)
An optional carrier can be obtained This scooter must not be operated tion circuit cut-off system. The scoot- and installed at a Yamaha dealer for with the sidestand in the down er must not be ridden when the side- adding cargo or accessories to this position. -
Page 34: Sidestand Switch Operation Check
The sidestand switch is OK. EW000045 8 8 Be sure to use the centerstand during this inspection. If improper operation is noted, 8 8 If improper operation is noted, consult a Yamaha dealer immedi- consult a Yamaha dealer. ately. 3-17... -
Page 35: Pre-Operation Checks
PRE-OPERATION CHECKS Pre-operation check list ..............4-1... -
Page 36: Pre-Operation Check List
EAU01114 PRE-OPERATION CHECKS Owners are personally responsible for their vehicle’s condition. Your scooter’s vital functions can start to deteriorate quickly and unexpectedly, even if it remains unused (for instance, if it is exposed to the elements). Any damage, fluid leak or loss of tire pressure could have serious consequences. Therefore, it is very important that, in addition to a thor- ough visual inspection, you check the following points before each ride. -
Page 37: Operation And Important Riding Points
OPERATION AND IMPORTANT RIDING POINTS Starting a cold engine.................5-1 Starting off ..................5-2 Acceleration..................5-2 Braking ....................5-2 Tips for reducing fuel consumption.............5-3 Engine break-in ..................5-3 Parking ....................5-4... -
Page 38: Starting A Cold Engine
Consult possible to preserve the battery. Yamaha dealer regarding any Do not crank the engine more control or function that you do than 10 seconds on any one not thoroughly understand. attempt. -
Page 39: Starting Off
OPERATION AND IMPORTANT RIDING POINTS 1. Grab bar EAU00433 EAU00434 EAU00435 Starting off Acceleration Braking After warming up the engine: The speed can be adjusted by open- 1. Close the throttle grip. 1. Apply the rear brake lever with ing and closing the throttle grip. 2. -
Page 40: Tips For Reducing Fuel Consumption
OPERATION AND IMPORTANT RIDING POINTS EW000057 EAU03093* EAU01128 Tips for reducing fuel Engine break-in consumption There is never a more important peri- 8 8 Avoid hard or sudden braking. Your scooter’s fuel consumption od in the life of your scooter than the It may cause the scooter to depends to a large extent on your rid- period... -
Page 41: Parking
The muffler and exhaust pipe are 1/2 throttle. during the break-in period, consult hot. Park the scooter in a place a Yamaha dealer immediately. where pedestrians or children are ECA00054* not likely to touch the scooter. Do After 1,000 km of operation, be... -
Page 43: Periodic Maintenance And Minor Repair
PERIODIC MAINTENANCE AND MINOR REPAIR Tool kit ..............6-1 Battery cover removal ...........6-26 Periodic maintenance and lubrication .....6-3 Battery..............6-26 Panel removal and installation ........6-6 Fuse replacement ..........6-27 Panel A ..............6-6 Headlight bulb replacement ........6-28 Panel B ..............6-8 Tail/brake light bulb replacement ......6-30 Panel C ..............6-8 Front turn signal light bulb replacement....6-30 Spark plug.............6-10... -
Page 44: Periodic Maintenance And Minor Repair
ALL TEND TO DEMAND THAT Otherwise, rapid engine wear may dures.) The tools provided in the EACH OWNER ALTER THIS TIME result. Consult a Yamaha dealer owner’s tool kit are to assist you in SCHEDULE TO SHORTER INTER- for proper maintenance intervals. - Page 45 PERIODIC MAINTENANCE AND MINOR REPAIR NOTE: If you do not have necessary tools required during a service operation, take your scooter to a Yamaha dealer for service. EW000062 Modifications to this scooter not approved by Yamaha may cause loss of performance, excessive emissions, and render it unsafe for use.
-
Page 46: Periodic Maintenance And Lubrication
PERIODIC MAINTENANCE AND MINOR REPAIR EAU00473 PERIODIC MAINTENANCE AND LUBRICATION Initial EVERY ANNUAL ITEM CHECKS AND MAINTENANCE JOB (1,000 km) 10,000 km 20,000 km CHECK 9 Check fuel hoses and vacuum hose for cracks or damage. 1 * Fuel line 9 Replace if necessary. - Page 47 PERIODIC MAINTENANCE AND MINOR REPAIR Initial EVERY ANNUAL ITEM CHECKS AND MAINTENANCE JOB (1,000 km) 10,000 km 20,000 km CHECK 9 Check bearing play and steering for roughness. 9 Correct accordingly. 13 * Steering bearings 9 Lubricate with lithium soap base grease. 9 Make sure that all nuts, bolts and screws are properly tightened.
- Page 48 9 Correct if necessary. 27 * Electrical components 9 Adjust headlight beam if necessary. * Since these items require special tools, data and technical skills, they should be serviced by a Yamaha dealer. EAU03206 NOTE: 8 The annual checks must be performed every year, except if a 10,000 km or 20,000 km maintenance is performed instead.
-
Page 49: Panel Removal And Installation
PERIODIC MAINTENANCE AND MINOR REPAIR 1. Panel A 1. Panel C 1. Panel B EAU01122 Panel removal and installation The panels illustrated need to be removed to perform some of the maintenance described in this chap- ter. Refer to this section each time a panel has to be removed or rein- stalled. - Page 50 PERIODIC MAINTENANCE AND MINOR REPAIR 1. Tab ( 2) 1. Screw ( 2) 2. Slot ( 2) EAU03114* 2. Pull the panel back as shown. To install Panel A 1. Insert the tabs on the panel into To remove the slots as shown, and then 1.
-
Page 51: Panel B
PERIODIC MAINTENANCE AND MINOR REPAIR 1. Bolt ( 2) 2. Panel B EAU03122* To install EAU03121* Panel C Panel B Place the panel in the original posi- To remove tion, and then install the bolts. To remove 1. Pull up the left floorboard mat as Remove the bolts, and then pull the shown. - Page 52 PERIODIC MAINTENANCE AND MINOR REPAIR 1. Screw ( 4) 2. Panel C 3. Pull the panel out as shown. To install 2. Remove the panel screws. 1. Insert the tabs on the panel into the slots as shown. 2. Install the panel screws.
-
Page 53: Spark Plug
Do not attempt to diagnose such Spark plug tool kit to remove the spark plug problems yourself. Instead, take the Removal as shown. scooter to a Yamaha dealer. You 1. Remove the spark plug cap. should periodically remove inspect the spark plug because heat and deposits will cause any spark plug to slowly break down and erode. -
Page 54: Engine Oil
PERIODIC MAINTENANCE AND MINOR REPAIR Tightening torque: Spark plug: 17.5 Nm (1.75 m0kg) NOTE: If a torque wrench is not available when you are installing a spark plug, a good estimate of the correct torque is 1/4 to 1/2 turn past finger tight. 1. - Page 55 PERIODIC MAINTENANCE AND MINOR REPAIR 1. Maximum level mark 1. Drain bolt 1. Drain bolt 2. Minimum level mark 2. Washer Engine oil replacement 2. Stop the engine and remove the 4. Check the washer and replace it 1. Warm up the engine for a few if damaged.
- Page 56 PERIODIC MAINTENANCE AND MINOR REPAIR 6. Fill the engine with oil and install NOTE: the oil filler cap. If the oil is changed before the oil change indicator light comes on (i.e. Recommended oil: before the 3,000-km oil change inter- See page 8-1.
-
Page 57: Final Gear Oil Replacement
PERIODIC MAINTENANCE AND MINOR REPAIR 6. Install the oil filler cap. 7. After replacing the final gear oil, be sure to check for oil leakage. 1. Final gear oil filler cap 1. Drain bolt EAU03120* 5. Fill the gear case with the recom- Final gear oil replacement mended oil. -
Page 58: Coolant
(soft water) to bring the level up to the maximum mark. Have a Yamaha dealer change the 6-15... - Page 59 PERIODIC MAINTENANCE AND MINOR REPAIR 1. Air filter case cover 1. Air filter element 2. Screw ( 5) 4. Remove the air filter element and 5. Squeeze out the excess solvent EAU03113* wash it gently, but thoroughly in and allow it to dry. Air filter and V-belt case air filter cleaning solvent.
- Page 60 PERIODIC MAINTENANCE AND MINOR REPAIR EC000092 8 8 Make sure both filters are properly seated in their cases. 8 8 The engine should never be without filters installed. 11. Install panel C. 1. V-belt case air filter cover 1. V-belt case air filter 2.
-
Page 61: Tires
PERIODIC MAINTENANCE AND MINOR REPAIR EW000082 Tire inflation pressure should be checked and adjusted when the temperature of the tire equals the ambient air temperature. Tire infla- tion pressure must be adjusted according to total weight of cargo, rider, passenger, and accessories 1. - Page 62 YOUR SCOOTER. Make sure the regulations of your own country. if the side wall is cracked, contact a total weight of the cargo, rider, Yamaha dealer immediately passenger, and accessories (fair- have the tire replaced.
-
Page 63: Wheels
Brakes, tires, and If any abnormal condition exists related wheel parts replacement in a wheel, consult a Yamaha 1. Locknut should be left to a Yamaha Service dealer. Do not attempt even 2. Adjusting bolt Technician. 3. Free play small repairs to the wheel. -
Page 64: Checking The Front And Rear Brake Pads
The rear brake lever free play should brake pads almost worn away, ask a Yamaha be adjusted to 2 ~ 5 mm at the brake Each brake pad is provided with a dealer to replace the brake pads as a lever end. -
Page 65: Inspecting The Brake Fluid Level
Always clean up spilled fluid immediately. 1. Minimum level mark 1. Minimum level mark 8 Have a Yamaha dealer check EAU00731 8 Use only the designated quality the cause if the brake fluid level Inspecting the brake fluid brake fluid. -
Page 66: Brake Fluid Replacement
Brake lever lubrication Lubricate the pivoting parts of both Lubricate the cables and cable ends. brake levers. If a cable does not operate smoothly, ask a Yamaha dealer to replace it. Recommended lubricant: Engine oil Recommended lubricant: Engine oil 6-23... -
Page 67: Center And Sidestand Lubrication
Recommended lubricant: EC000098 Engine oil EW000114 If any damage or unsmooth move- ment is found with the front fork, If the center and/or sidestand does consult a Yamaha dealer. not move smoothly, consult a Yamaha dealer. 6-24... -
Page 68: Steering Inspection
Hold the lower end of the front forks and try to move them forward and backward. If any free play can be felt, ask a Yamaha dealer to inspect and adjust the steering. Inspection is eas- ier if the front wheel is removed. -
Page 69: Battery Cover Removal
NOTE: 8 If the battery seems to have dis- The battery cover needs to be charged, consult a Yamaha deal- removed to access the fuse box and the coolant reservoir tank cap. 8 If the scooter is equipped with... -
Page 70: Fuse Replacement
1. Remove the battery cover by rettes etc., away. Ventilate when Yamaha dealer. removing the screws. charging or using in an enclosed 8 8 Always make sure the connec- space. Always shield your eyes tions are correct when rein- when working near batteries. -
Page 71: Headlight Bulb Replacement
If 1. Place the scooter on the center- fuse immediately blows stand. again, consult a Yamaha dealer. 2. Remove panel B. (See page 6-8 EC000103 for panel removal and installation 1. Coupler ( 2) 2. Bulb holder cover ( 2) procedures.) - Page 72 6. Install the bulb holder cover and connect the headlight coupler. 7. Install the panel. If necessary, ask a Yamaha dealer to adjust the headlight beam. 6-29...
-
Page 73: Tail/Brake Light Bulb Replacement
PERIODIC MAINTENANCE AND MINOR REPAIR EAU03115* EAU03111* Tail/brake light bulb Front turn signal light bulb replacement replacement 1. Place the scooter on the center- 1. Place the scooter on the center- stand. stand. 2. Remove panel A. (See page 6-6 2. -
Page 74: Rear Turn Signal Light Bulb Replacement
PERIODIC MAINTENANCE AND MINOR REPAIR EAU03116* Rear turn signal light bulb replacement 1. Place the scooter on the center- stand. 2. Remove panel A. (See page 6-6 for panel removal and installation procedures.) 1. Bulb socket 1. Bulb socket 3. Remove the front turn signal light 3. -
Page 75: License Light Bulb Replacement
PERIODIC MAINTENANCE AND MINOR REPAIR EAU03117* License light bulb replacement 1. Place the scooter on the center- stand. 2. Remove panel A. (See page 6-6 for panel removal and installation procedures.) 1. Screw ( 2) 1. Bulb 3. Remove the screws holding the 4. -
Page 76: Troubleshooting
If your scooter requires any repair, bring it to a Yamaha dealer. The skilled technicians at a Yamaha deal- ership have the tools, experience, and know-how to properly service your scooter. Use only genuine Yamaha parts on your scooter. -
Page 77: Troubleshooting Chart
2. Compression There is compression. Go to ignition check. Use electric starter. No compression. Ask a Yamaha dealer to inspect. 3. Ignition Wipe clean with dry cloth and correct Open throttle half-way and start Wet. Remove spark spark gap or replace spark plug. -
Page 78: Engine Overheating
Restart the engine. If the engine overheats again, ask a Level is OK. Yamaha dealer to inspect and repair the cooling system. NOTE: If it is difficult to get the recommended coolant, tap water can be temporarily used, provided that it is changed to the rec- ommended coolant as soon as possible. -
Page 79: Scooter Care And Storage
SCOOTER CARE AND STORAGE Care....................7-1 Storage ....................7-4... - Page 80 EAU01522 SCOOTER CARE AND STORAGE Before cleaning Cleaning Care 1. Cover up the muffler outlet with a After normal use exposure technology plastic bag. Remove dirt with warm water, a neu- makes a scooter charming but also 2. Make sure that all caps and cov- tral detergent and a soft clean vulnerable.
- Page 81 SCOOTER CARE AND STORAGE 8 8 Improper cleaning can damage 8 8 Do high-pressure After riding in the rain, near the sea windshields, cowlings, panels washers or steam-jet cleaners or on salt-sprayed roads and other plastic parts. Use since they cause water seep- Since sea salt or salt sprayed on the only a soft, clean cloth or age and deterioration in the...
- Page 82 NOTE: soap. Then, carefully test the tection spray (even Consult a Yamaha dealer for advice scooter for its braking perfor- chrome- and nickel-plated) metal on what products to use. mance and cornering behavior. surfaces.
- Page 83 SCOOTER CARE AND STORAGE Long-term a. Remove the spark plug cap Storage Before storing your scooter for sever- and spark plug. Short-term al months: b. Pour a teaspoonful of engine Always store your scooter in a cool, 1. Follow all the instructions in the oil into the spark plug bore.
- Page 84 SCOOTER CARE AND STORAGE 6. Lubricate all control cables and 9. Remove the battery and fully the pivoting points of all levers charge it. Store it in a cool, dry and pedals as well as of the place and recharge it once a sidestand/centerstand.
-
Page 85: Specifications
SPECIFICATIONS Specifications ..................8-1 How to use the conversion table ............8-5... -
Page 86: Specifications
EAU01038 SPECIFICATIONS Specifications Engine oil Model YP250 Type –20° –10° 0° 10° 20° 30° 40° 50°C Dimensions Overall length 2,140 mm SAE 10W/30 Overall width 780 mm SAE 10W/40 Overall height 1,350 mm SAE 15W/40 Seat height 730 mm SAE 20W/40 Wheelbase 1,535 mm SAE 20W/50... - Page 87 SPECIFICATIONS Final gear oil Chassis Type SAE 10W30 type SE motor oil Frame type Steel tube underbone Final gear case capacity 0.25 L Caster angle 28° Air filter Wet element Trail 103 mm Fuel Tire Type Regular unleaded gasoline Front Fuel tank capacity 12 L Type...
- Page 88 SPECIFICATIONS 90 kg load ~ maximum Suspension load* Front Telescopic fork Front 200 kPa (2.00 kg/cm , 2.00 bar) Rear Unit swing Rear 225 kPa (2.25 kg/cm , 2.25 bar) Shock absorbers * Load is total weight of cargo, rider, passenger and accessories. Front Coil spring/oil damper Wheels...
- Page 89 SPECIFICATIONS Front turn signal light 12 V, 21 W Rear turn signal light 12 V, 16 W Auxiliary light 12 V, 5 W License plate light 12 V, 5 W Meter lighting 12 V, 1.7 W High beam indicator light 12 V, 1.7 W Oil change indicator light 12 V, 1.7 W...
-
Page 90: How To Use The Conversion Table
SPECIFICATIONS EAU01064 HOW TO USE THE CONVERSION TABLE CONVERSION TABLE All specification data in this manual are listed in SI and METRIC TO IMPERIAL METRIC UNITS. Metric unit Multiplier Imperial unit Use this table to convert METRIC unit data to m •... -
Page 91: Consumer Information
CONSUMER INFORMATION Identification number records .............9-1 Key identification number ..............9-1 Vehicle identification number..............9-1 Model label ..................9-2... -
Page 92: Consumer Information
Record the key identification number, vehicle identification number and model label information in the spaces provided for assistance when order- ing spare parts from a Yamaha deal- er or for reference in case the vehicle is stolen. 1. Key identification number 1. -
Page 93: Model Label
(See page 3-12 for rider seat removal and instal- lation procedures.) Record the information on this label in the space provided. This informa- tion will be needed to order spare parts from your Yamaha dealer. - Page 94 INDEX Indicator lights .........3-2 Acceleration..........5-2 Engine break-in ........5-3 Turn indicator lights ......3-2 Air filter and V-belt case filter Engine oil..........6-11 High beam indicator light ......3-2 cleaning ..........6-16 Engine stop switch ........3-9 Oil change indicator light ......3-2 Air flow louver........6-18 Inspecting the brake fluid level ....6-22 Antitheft alarm (optional) ......3-5 Final gear oil replacement .....6-14 Front brake lever ........3-9...
- Page 95 INDEX Rear brake lever........3-10 Wheel bearings ........6-25 Rear shock absorber adjustment ..3-15 Wheels ..........6-20 Rear turn signal light bulb replacement ........6-31 Rider seat ..........3-12 Rider seat adjustment ......3-13 Sidestand ..........3-16 Sidestand switch operation check ..3-17 Spark plug ..........6-10 Specifications ..........8-1 Speedometer...........3-4 Start switch..........3-9 Starting a cold engine......5-1...
- Page 98 YAMAHA MOTOR CO., LTD. PRINTED ON RECYCLED PAPER PRINTED IN JAPAN 99·10–1.6 1(E)
Need help?
Do you have a question about the MAJESTY YP250 and is the answer not in the manual?
Questions and answers
Как правильно выстовить метки Грм на ямаху маджести 250 99г
Где находиться датчик уровня топлива