ZyXEL Communications GS1500-24P User Manual
Web managed gbe switch
Hide thumbs
Also See for GS1500-24P:
- Specification sheet (6 pages) ,
- Specifications (4 pages) ,
- Support notes (7 pages)

Related Manuals for ZyXEL Communications GS1500-24P


Summary of Contents for ZyXEL Communications GS1500-24P
- Page 1 GS1500-24P Web Managed GbE Switch Default Login Details IP Address http://192.168.1.1 User Name admin Password 1234 Firmware Version 1.00 Edition 2, 1/2011 www.zyxel.com Copyright © 2009 ZyXEL Communications Corporation...
-
Page 3: About This User's Guide
Refer to the included CD for support documents. Documentation Feedback Send your comments, questions or suggestions to: techwriters@zyxel.com.tw Thank you! The Technical Writing Team, ZyXEL Communications Corp., 6 Innovation Road II, Science-Based Industrial Park, Hsinchu, 30099, Taiwan. Need More Help? More help is available at www.zyxel.com. - Page 4 • Product model and serial number. • Warranty Information. • Date that you received your device. • Brief description of the problem and the steps you took to solve it. GS1500-24P User’s Guide...
-
Page 5: Document Conventions
Syntax Conventions • The GS1500-24P may be referred to as the “Switch”, the “device”, the “system” or the “product” in this User’s Guide. • Product labels, screen names, field labels and field choices are all in bold font. - Page 6 Document Conventions Icons Used in Figures Figures in this User’s Guide may use the following generic icons. The Switch icon is not an exact representation of your device. Switch Computer Notebook computer Server DSLAM Firewall Telephone Switch Router GS1500-24P User’s Guide...
-
Page 7: Safety Warnings
Your product is marked with this symbol, which is known as the WEEE mark. WEEE stands for Waste Electronics and Electrical Equipment. It means that used electrical and electronic products should not be mixed with general waste. Used electrical and electronic equipment should be treated separately. GS1500-24P User’s Guide... - Page 8 Safety Warnings GS1500-24P User’s Guide...
-
Page 9: Table Of Contents
Storm Control ........................... 137 Defence Engine ........................139 Monitoring and Tools ......................141 Monitoring ..........................143 Tools ............................149 Troubleshooting & Product Specifications ............... 155 Troubleshooting ........................157 Product Specifications ......................161 Appendices and Index ......................167 GS1500-24P User’s Guide... - Page 10 Contents Overview GS1500-24P User’s Guide...
-
Page 11: Table Of Contents
2.3.3 Mounting the Switch on a Rack .................. 29 Chapter 3 Hardware Panels ........................31 3.1 Overview ..........................31 3.2 Front Panel ......................... 31 3.2.1 Gigabit Ethernet Ports ....................32 3.2.2 Mini-GBIC Slots ......................33 3.2.3 The RESET Button ..................... 35 GS1500-24P User’s Guide... - Page 12 6.5 IP Setting Screen ....................... 53 6.6 User Account ........................54 6.7 Port Setting ......................... 55 Part III: Configuration ................57 Chapter 7 Link Aggregation ........................59 7.1 Overview ..........................59 7.2 What You Can Do ........................ 59 GS1500-24P User’s Guide...
- Page 13 10.3.1 DiffServ ........................80 10.3.2 DSCP and Per-Hop Behavior .................. 80 10.3.3 DiffServ Network Example ..................81 10.4 Port-based Priority ......................81 10.5 DSCP-to-IEEE 802.1p Priority Settings ................82 10.5.1 DSCP-based Priority ....................83 10.6 Policy-based Priority ......................83 GS1500-24P User’s Guide...
- Page 14 14.1 Bandwidth Control and Jumbo Frame Overview .............111 14.2 What You Can Do ......................111 14.3 Bandwidth Control ......................112 14.4 Jumbo Frame Setting .......................113 Chapter 15 Power Over Ethernet ......................115 15.1 Power Over Ethernet Overview ..................115 15.2 What You Can Do ......................115 GS1500-24P User’s Guide...
- Page 15 18.3.4 MAC-IP Binding ...................... 133 18.4 Dynamic ARP Setting ...................... 133 18.5 Dynamic ARP VLAN Setting .................... 134 18.6 MAC-IP Binding Config ....................135 Chapter 19 Storm Control........................137 19.1 Overview ......................... 137 19.2 What You Can Do ......................137 GS1500-24P User’s Guide...
- Page 16 Troubleshooting........................157 23.1 Power, Hardware Connections, and LEDs ..............157 23.2 Switch Access and Login ....................158 Chapter 24 Product Specifications ......................161 Part VII: Appendices and Index ............167 Appendix A Changing a Fuse ....................169 GS1500-24P User’s Guide...
- Page 17 Table of Contents Appendix B Common Services..................... 171 Appendix C Legal Information ....................175 Appendix D Open Software Announcements ............... 179 Index............................209 GS1500-24P User’s Guide...
- Page 18 Table of Contents GS1500-24P User’s Guide...
-
Page 19: Introduction And Hardware
Introduction and Hardware Getting to Know Your Switch (21) Hardware Installation and Connection (27) Hardware Panels (31) -
Page 21: Getting To Know Your Switch
The Switch is an ideal solution for small networks where rapid growth can be expected in the near future. The Switch can be used standalone for a group of heavy traffic users. You can connect computers and servers directly to the Switch’s port or connect other switches to the Switch. GS1500-24P User’s Guide... -
Page 22: Bridging Example
Switch. You can provide a super-fast uplink connection by using a Gigabit Ethernet/mini-GBIC port on the Switch. Moreover, the Switch eases supervision and maintenance by allowing network managers to centralize multiple servers at a single location. Figure 2 Bridging Application GS1500-24P User’s Guide... -
Page 23: High Performance Switching Example
Ports in the same VLAN group share the same frame broadcast domain thus increase network performance through reduced broadcast traffic. VLAN groups can be modified at any time by adding, moving or changing ports without any re- cabling. GS1500-24P User’s Guide... -
Page 24: Ways To Manage The Switch
• Change the password. Use a password that’s not easy to guess and that consists of different types of characters, such as numbers and letters. • Write down the password and put it in a safe place. GS1500-24P User’s Guide... - Page 25 If you forget your password, you will have to reset the Switch to its factory default settings. If you backed up an earlier configuration file, you would not have to totally re-configure the Switch. You could simply restore your last configuration. GS1500-24P User’s Guide...
- Page 26 Chapter 1 Getting to Know Your Switch GS1500-24P User’s Guide...
-
Page 27: Hardware Installation And Connection
The Switch can be mounted on an EIA standard size, 19-inch rack or in a wiring closet with other equipment. Follow the steps below to mount your Switch on a standard EIA rack using a rack-mounting kit. GS1500-24P User’s Guide... -
Page 28: Rack-Mounted Installation Requirements
Using a #2 Philips screwdriver, install the M3 flat head screws through the mounting bracket holes into the Switch. Repeat steps to install the second mounting bracket on the other side of the Switch. You may now mount the Switch on a rack. Proceed to the next section. GS1500-24P User’s Guide... -
Page 29: Mounting The Switch On A Rack
Figure 6 Mounting the Switch on a Rack Using a #2 Philips screwdriver, install the M5 flat head screws through the mounting bracket holes into the rack. Repeat steps to attach the second mounting bracket on the other side of the rack. GS1500-24P User’s Guide... - Page 30 Chapter 2 Hardware Installation and Connection GS1500-24P User’s Guide...
-
Page 31: Hardware Panels
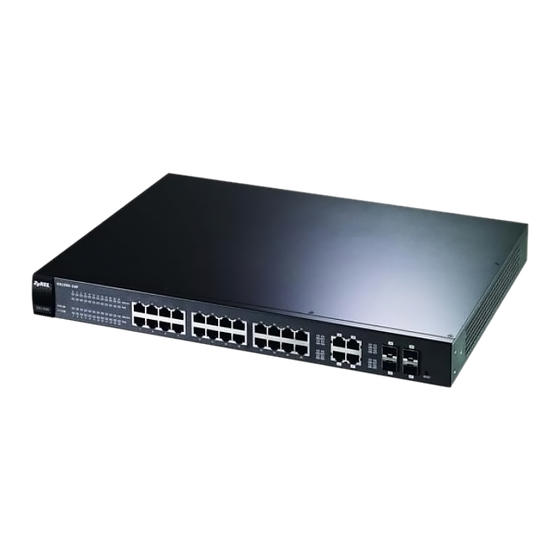
The following table describes the port labels on the front panel. Table 1 Front Panel Connections LABEL DESCRIPTION 24 10/100/ Connect these ports to a computer, a hub, an Ethernet switch or router. 1000 RJ-45 Ethernet Ports GS1500-24P User’s Guide... -
Page 32: Gigabit Ethernet Ports
Ethernet port are the same in order to connect. 3.2.1.1 Default Ethernet Negotiation Settings The factory default negotiation settings for the Gigabit ports on the Switch are: • Speed: Auto • Duplex: Auto GS1500-24P User’s Guide... -
Page 33: Mini-Gbic Slots
Insert the transceiver into the slot with the exposed section of PCB board facing down. Press the transceiver firmly until it clicks into place. The Switch automatically detects the installed transceiver. Check the LEDs to verify that it is functioning properly. Close the transceiver’s latch (latch styles vary). GS1500-24P User’s Guide... - Page 34 Remove the fiber optic cables from the transceiver. Open the transceiver’s latch (latch styles vary). Pull the transceiver out of the slot. Figure 10 Removing the Fiber Optic Cables Figure 11 Opening the Transceiver’s Latch Example Figure 12 Transceiver Removal Example GS1500-24P User’s Guide...
-
Page 35: The Reset Button
After you connect the power to the Switch, view the LEDs to ensure proper functioning of the Switch and as an aid in troubleshooting. Table 2 LED Descriptions STATU COLOR DESCRIPTION Green The system is turned on. The system is off or has failed. GS1500-24P User’s Guide... - Page 36 The port is in full-duplex mode. The port is in half-duplex mode. Mini-GBIC Slots Green The link to this port is up. The link to this port is not connected. Green Blinking This port is receiving or transmitting data. GS1500-24P User’s Guide...
-
Page 37: Basic Configuration
Basic Configuration The Web Configurator (39) Initial Setup Example (47) System (51) -
Page 39: The Web Configurator
• Java permissions (enabled by default). 4.2 System Login Start your web browser. Type “http://” and the IP address of the Switch (for example, the default management IP address is 192.168.1.1) in the Location or Address field. Press [ENTER]. GS1500-24P User’s Guide... -
Page 40: The Status Screen
A - Click the menu items to open submenu links, and then click on a submenu link to open the screen in the main window. There is also a logout link. B - The device graphic displays information regarding current port usage. GS1500-24P User’s Guide... - Page 41 User Account This link takes you to a screen where you can change the web configurator login account. Port Setting This link takes you to a screen where you can configure settings for individual Switch ports. GS1500-24P User’s Guide...
- Page 42 Port-based This link takes you to a screen where you can configure port-based Mirroring mirroring. classify an ingress Policy- This link takes you to a screen where you can based traffic flow for mirroring. Mirroring GS1500-24P User’s Guide...
- Page 43 Switch receives per second on the ports. Defence This link takes you to a screen where you can enable the Defence Engine Engine to prevent the CPU from being flooded with unknown unicast/multicast packets. GS1500-24P User’s Guide...
-
Page 44: Change Your Password
When you are done modifying the settings in a screen, click the Apply button to save your changes to the Switch. 4.5 Switch Lockout You could block yourself (and all others) from managing the Switch if you do one of the following: GS1500-24P User’s Guide... -
Page 45: Resetting The Switch
Click Logout in the navigation panel to exit the web configurator. You have to log in with your password again after you log out. This is recommended after you finish a management session for security reasons. Figure 17 Web Configurator: Logout GS1500-24P User’s Guide... - Page 46 Chapter 4 The Web Configurator GS1500-24P User’s Guide...
-
Page 47: Initial Setup Example
You can do this with port-based VLAN or tagged static VLAN with fixed port members. In this example, you want to configure port 1 as a member of VLAN 2. Figure 18 Initial Setup Network Example: VLAN GS1500-24P User’s Guide... -
Page 48: Setting Port Vid
Switch’s power is turned off. 5.1.2 Setting Port VID Use PVID to add a tag to incoming untagged frames received on that port so that the frames are forwarded to the VLAN group that the tag defines. GS1500-24P User’s Guide... -
Page 49: Configuring Switch Management Ip Address
The default management IP address of the Switch is 192.168.1.1. You can change it by following the example below. Connect your computer to any Ethernet port on the Switch. Make sure your computer is in the same subnet as the Switch. GS1500-24P User’s Guide... - Page 50 See Section 4.2 on page 39 for more information. Click System> IP Setting in the navigation panel. Configure the IP fields and click Apply to save your changes to the switch. GS1500-24P User’s Guide...
-
Page 51: System
• Use the User Account screen (Section 6.6 on page 54) to configure a login account for the web configurator. • Use the Port Setting screen (Section 6.7 on page 55) to configure Switch port settings. GS1500-24P User’s Guide... -
Page 52: Information
This field displays the IP address of the gateway. Firmware This field displays the version number of the Switch 's current firmware. Version Firmware This field displays the date the Switch 's current firmware was created. Date GS1500-24P User’s Guide... -
Page 53: Time Setting
The Switch needs an IP address for it to be managed over the network. The factory default IP address is 192.168.1.1. The subnet mask specifies the network number portion of an IP address. The factory default subnet mask is 255.255.255.0. GS1500-24P User’s Guide... -
Page 54: User Account
Use the User Account screen to configure the web configurator login details. Click System > User Account in the navigation panel to display the screen as shown. Note: It is highly recommended that you change the default password (1234). Figure 23 System > User Account GS1500-24P User’s Guide... -
Page 55: Port Setting
State Select Enable from the drop-down box to enable a port. The factory default for all ports is enabled. A port must be enabled for data transmission to occur. Select Disable to not use a port. GS1500-24P User’s Guide... - Page 56 The Actual column displays the port’s current Speed/Duplex status. Flow Control Config The Config column displays if Flow Control has been configured to be turned On or Off for the port. Actual The Actual column displays the port’s current Flow Control status. GS1500-24P User’s Guide...
-
Page 57: Configuration
Configuration Link Aggregation (59) VLAN (67) Spanning Tree Protocol (73) QoS (79) Mirroring (91) SNMP (95) Rate Limit (107) Bandwidth Control and Jumbo Frame (111) Power Over Ethernet (115) -
Page 59: Link Aggregation
Note: In a properly planned network, it is recommended to implement static link aggregation only. This ensures increased network stability and control over the trunk groups on your Switch. Section 7.7.1 on page 64 for a static port trunking example. GS1500-24P User’s Guide... -
Page 60: Dynamic Link Aggregation
7.4 Trunk Group Setting Click Configuration > Link Aggregation > Trunk Group Setting in the navigation panel to view the screen as shown. Figure 25 Configuration > Link Aggregation > Trunk Group Setting GS1500-24P User’s Guide... - Page 61 Select the check box for a trunk group setting and click Delete to remove all settings from the selected trunk group. Delete Click Delete to remove any selected trunk groups. Select All Click Select All to select all trunk group settings. GS1500-24P User’s Guide...
-
Page 62: Trunk Distribution Algorithm
MAC address. Select Source IP to distribute traffic based on the packet’s source IP address. Select Destination IP to distribute traffic based on the packet’s destination IP address. Apply Click Apply to save your changes to the Switch. GS1500-24P User’s Guide... -
Page 63: Lacp Setting
Note: Do not configure this screen unless you want to enable Aggregation dynamic link aggregation. Control Protocol LACP Status Select Enable from the drop down box to enable Link Aggregation Control Protocol (LACP). Select Disable to not use LACP. GS1500-24P User’s Guide... -
Page 64: Technical Reference
Make your physical connections - make sure that the ports that you want to belong to the trunk group are connected to the same destination. The following figure shows ports 2-5 on switch A connected to switch B. Figure 28 Trunking Example - Physical Connections GS1500-24P User’s Guide... - Page 65 Group ID Trunk1 and then select the traffic distribution algorithm used by this group. Click Apply when you are done Figure 30 Trunking Example - Configuration Screen 2 Your trunk group 1 (T1) configuration is now complete. GS1500-24P User’s Guide...
- Page 66 Chapter 7 Link Aggregation GS1500-24P User’s Guide...
-
Page 67: Vlan
The remaining twelve bits define the VLAN ID, giving a possible maximum number of 4,096 VLANs. Note that user priority and VLAN ID are independent of each other. A GS1500-24P User’s Guide... -
Page 68: Forwarding Tagged And Untagged Frames
Normal Ports dynamically join a VLAN using GVRP. Registration VLAN Tag Control Tagged Ports belonging to the specified VLAN tag all outgoing frames transmitted. Untagged Ports belonging to the specified VLAN don't tag all outgoing frames transmitted. GS1500-24P User’s Guide... -
Page 69: Static Vlan
Configuration > VLAN > Static VLAN. The port through which you access the Switch must be in VLAN 1. If you want to access the Switch through a port that is not in VLAN 1, you must reset the Switch. GS1500-24P User’s Guide... -
Page 70: Static Vlan
This field displays the descriptive name for this VLAN group. Member Ports This field displays the ports that are a member of the VLAN group. Tagged Ports This field displays all the ports that will transmit outgoing frames with a VLAN group ID tag. GS1500-24P User’s Guide... -
Page 71: Port-Based Vlan
Table 15 Configuration > VLAN > Port-based VLAN LABEL DESCRIPTION Port Select the ports to change the PVID for. PVID Enter a number between 1 and 4094 as the port VLAN ID (PVID). Port This field displays the port number. GS1500-24P User’s Guide... - Page 72 Table 15 Configuration > VLAN > Port-based VLAN (continued) LABEL DESCRIPTION Apply Click Apply to save your changes to the Switch. Port This field displays the port number. PVID This field displays the port’s port VLAN ID (PVID). GS1500-24P User’s Guide...
-
Page 73: Spanning Tree Protocol
Both RSTP and STP flush unwanted learned addresses from the filtering database. In RSTP, the port states are Discarding, Learning, and Forwarding. Note: In this user’s guide, “STP” refers to both STP and RSTP. GS1500-24P User’s Guide... -
Page 74: Stp Terminology
Table 16 STP Port States PORT DESCRIPTION STATE Disabled STP is disabled (default). Blocking Only configuration and management BPDUs are received and processed. GS1500-24P User’s Guide... -
Page 75: Stp Global Setting
Tree Protocol (RSTP). Select Disable to not use STP or RSTP. Force Version Select to use either Spanning Tree Protocol (STP) or Rapid Spanning Tree Protocol (RSTP). See Section 9.1 on page 73 for background information on STP. GS1500-24P User’s Guide... - Page 76 The root bridge determines Hello Time, Max Age and Forwarding Delay. Root Forward This is the time (in seconds) the root switch will wait before changing Delay states. Topology This is the number of times the spanning tree has been reconfigured. Changes GS1500-24P User’s Guide...
-
Page 77: Stp Port Setting
Priority decides which port should be disabled when more than one port forms a loop in a switch. Ports with a higher priority numeric value are disabled first. The allowed range is between 0 and 240 and the default value is 128. GS1500-24P User’s Guide... - Page 78 Config displays the P2P setting you have configured for the port. Actual displays the P2P setting currently in use. Edge Config displays the Edge setting you have configured for the port. Actual displays the Edge setting currently in use. GS1500-24P User’s Guide...
-
Page 79: Qos
Use the DSCP-based Priority screen (Section 10.5 on page 82) to assign priority to packets based on their Differentiated Services Code Points (DSCPs). Use the Policy-based Priority screens (Section 10.6 on page 83) to classify and prioritize certain traffic flows. GS1500-24P User’s Guide... -
Page 80: What You Need To Know
DiffServ network. Based on the marking rule different kinds of traffic can be marked for different priorities of forwarding. Resources can then be allocated according to the DSCP values and the configured policies. GS1500-24P User’s Guide... -
Page 81: Diffserv Network Example
Platinum traffic flow as they move across the DiffServ network. Figure 36 DiffServ Network 10.4 Port-based Priority You can configure the Switch to assign a IEEE 802.1p priority to packets based on the ingress (incoming) port of the packet. GS1500-24P User’s Guide... -
Page 82: Dscp-To-Ieee 802.1P Priority Settings
The following table shows the default DSCP-to-IEEE802.1p mapping. Table 20 Default DSCP-IEEE 802.1p Mapping DSCP VALUE 0 – 7 8 – 15 16 – 23 24 – 31 32 – 39 40 – 47 48 – 55 56 – 63 IEEE 802.1p GS1500-24P User’s Guide... -
Page 83: Dscp-Based Priority
A classifier groups traffic into data flows according to specific criteria such as the source address, destination address, source port number, destination port number or incoming port number. For example, you can configure a classifier to select traffic from the same protocol port (such as Telnet) to form a flow. GS1500-24P User’s Guide... - Page 84 Select the checkbox for the policy you want to delete. Click Add to configure a new policy-based priority rule. Select Click Select All to select all the entries in the table. Delete Click Delete to remove any selected entries from the table. GS1500-24P User’s Guide...
-
Page 85: Policy-Based Priority - Add/Modify
Type the source port number to which the rule should be applied. Type 0 to Source Port ignore this field. See Appendix B on page 171 for a list of common services. Ether Type Specify an Ethernet type in hexadecimal value. GS1500-24P User’s Guide... -
Page 86: Priority To Queue Mapping
Table 24 Configuration > QoS > Priority to Queue Mapping LABEL DESCRIPTION Priority Priority Level (The following descriptions are based on the traffic types defined in the IEEE 802.1d standard (which incorporates the 802.1p). Typically used for best-effort traffic. GS1500-24P User’s Guide... -
Page 87: Packet Scheduling
Weighted Fair Queuing is used to guarantee each queue's minimum bandwidth based on its bandwidth weight (portion) (the number you configure in the Weight field) when there is traffic congestion. WFQ is activated only when a port has more GS1500-24P User’s Guide... -
Page 88: Weighted Round Robin Scheduling (Wrr)
Click Configuration > QoS > Packet Scheduling to display the screen as shown next. Figure 42 Configuration > QoS > Packet Scheduling GS1500-24P User’s Guide... - Page 89 Click Apply to save your changes to the Switch. Queue ID This field displays the Queue ID. Scheduling This field displays the scheduling algorithm for the queue. Algorithm Weight This field displays the weight of the queue. GS1500-24P User’s Guide...
- Page 90 Chapter 10 QoS GS1500-24P User’s Guide...
-
Page 91: Mirroring
(Section 11.3 on page 92) to select a monitor port and specify the traffic flow to be copied to the monitor port. Use the Policy-based Mirroring screens (Section 11.4 on page 93) to classify an ingress traffic flow for mirroring. GS1500-24P User’s Guide... -
Page 92: Port-Based Mirroring
Mirrored This field displays the ports or trunks that are being monitored by the Port List mirroring port. GS1500-24P User’s Guide... -
Page 93: Policy-Based Mirroring
11.4.1 Policy-based Mirroring - Add/Modify Click Configuration > Mirroring > Policy-based Mirroring > Add or Modify in the navigation panel to display the following screen. Use this screen to classify a traffic flow and configure that flow for monitoring. GS1500-24P User’s Guide... - Page 94 1 is selected on this screen. You cannot use this field if you have not assigned a mirroring port to a mirror set index on the port-based mirroring screen. Click Add to save the policy to the Switch. GS1500-24P User’s Guide...
-
Page 95: Snmp
TCP/IP-based devices. SNMP is used to exchange management information between the network management system (NMS) and a network element (NE). A manager station can manage and monitor the Switch through the network via SNMP version one (SNMPv1), SNMP version 2c or SNMP GS1500-24P User’s Guide... - Page 96 Get operation, followed by a series of GetNext operations. Allows the manager to set values for object variables within an agent. Trap Used by the agent to inform the manager of some events. GS1500-24P User’s Guide...
-
Page 97: Snmp Setting
SNMP messages are encrypted, only the intended recipients can read them. 12.4 SNMP Setting Use this screen to configure your SNMP settings. Click Configuration > SNMP > SNMP Setting in the navigation panel to display the main screen as shown. GS1500-24P User’s Guide... - Page 98 Select Enabled to activate SNMP on the Switch. Select Disabled to not use SNMP on the Switch. System Name Type a System Name for the Switch. System Type a System Location for the Switch. Location System Contact Type a System Contact for the Switch. GS1500-24P User’s Guide...
-
Page 99: Snmpv3 Setting
MIBs. For example, one group of managers may only have access to agents with MIB II - System Group MIBs while another may have access to agents with the Ether-like MIB. Use this screen to configure your SNMPv3 settings. GS1500-24P User’s Guide... - Page 100 Chapter 12 SNMP Note: SNMP v3 is enabled when you create SNMP groups and users. Once SNMP v3 is enabled, you must configure unique SNMP communities for SNMP v1 and/or SNMP v2c access. GS1500-24P User’s Guide...
- Page 101 Chapter 12 SNMP Click Configuration > SNMP > SNMPv3 Setting in the navigation panel to display the main screen as shown. Figure 48 Configuration > SNMP > SNMPv3 Setting GS1500-24P User’s Guide...
- Page 102 Switch. Read View Type the name of the read view that you configured for this group. Name Write View Type the name of the write view that you configured for this group. Name GS1500-24P User’s Guide...
-
Page 103: Technical Reference
This field displays the encryption method used, if any. Select Select the checkbox for the user you want to delete. Delete Click Delete to remove any selected users. 12.6 Technical Reference This section provides technical background information on the topics discussed in this chapter. GS1500-24P User’s Guide... - Page 104 Switch restarts. Table 33 SNMP InterfaceTraps OPTION OBJECT LABEL OBJECT ID DESCRIPTION linkup linkUp 1.3.6.1.6.3.1.1.5.4 This trap is sent when the Ethernet link is up. LinkDownEventClear This trap is sent when the 1.3.6.1.4.1.890.1.5.8.55.25 Ethernet link is up. .2.2 GS1500-24P User’s Guide...
- Page 105 Table 33 SNMP InterfaceTraps (continued) OPTION OBJECT LABEL OBJECT ID DESCRIPTION linkdown linkDown 1.3.6.1.6.3.1.1.5.3 This trap is sent when the Ethernet link is down. LinkDownEventOn This trap is sent when the 1.3.6.1.4.1.890.1.5.8.55.25 Ethernet link is down. .2.1 GS1500-24P User’s Guide...
- Page 106 Chapter 12 SNMP GS1500-24P User’s Guide...
-
Page 107: Rate Limit
(Section 13.3.1 on page 108) to add or modify a rate limit policy. 13.3 Rate Limit Summary Click Configuration > Rate Limit in the navigation panel to display the screen as shown. Figure 49 Configuration > Rate Limit GS1500-24P User’s Guide... -
Page 108: Rate Limit Add/Modify
To specify a destination, type a MAC address in valid MAC address format (six hexadecimal character pairs). Address Mask Enter the mask of the Destination MAC Address. Source MAC To specify a source, type a MAC address in valid MAC address format (six Address hexadecimal character pairs). GS1500-24P User’s Guide... - Page 109 Specify the bandwidth in kilobit per second (Kbps). Enter a number between 0 and 1048560. The number must be a multiple of 16. Click Add to save the rate limit policy to the Switch. GS1500-24P User’s Guide...
- Page 110 Chapter 13 Rate Limit GS1500-24P User’s Guide...
-
Page 111: Bandwidth Control And Jumbo Frame
Use the Bandwidth Control screen (Section 14.3 on page 112) to limit the bandwidth for traffic going through the Switch. Use the Jumbo Frame screen (Section 14.4 on page 113) to configure the maximum size of Jumbo Frames. GS1500-24P User’s Guide... -
Page 112: Bandwidth Control
(Kbps). The default setting is Unlimited. sec) Egress Rate This field displays the maximum bandwidth allowed for outgoing traffic on (Kbit/sec) the port in kilobits per second (Kbps). The default setting is Unlimited. GS1500-24P User’s Guide... -
Page 113: Jumbo Frame Setting
The following table describes the related labels in this screen. Table 37 Configuration > Jumbo Frame LABEL DESCRIPTION Jumbo Specify the maximum Jumbo Frame size in bytes from 1522, 1536, 1552 Frame or 9216. (Bytes) Apply Click Apply to save any changes to the Switch. GS1500-24P User’s Guide... - Page 114 Chapter 14 Bandwidth Control and Jumbo Frame GS1500-24P User’s Guide...
-
Page 115: Power Over Ethernet
You can also set priorities so that the Switch is able to reserve and allocate power to certain PDs. 15.2 What You Can Do Use the Power Over Ethernet screen (Section 15.3 on page 116) to view and configure the amount of power that PDs are receiving from the Switch. GS1500-24P User’s Guide... -
Page 116: Power Over Ethernet
Chapter 15 Power Over Ethernet 15.3 Power Over Ethernet To view and configure the amount of power that PDs are receiving from the Switch, click Configuration > PowerOverEthernet. Figure 54 Configuration > PowerOverEthernet GS1500-24P User’s Guide... - Page 117 This is the port index number. This field shows which ports can receive power from the Switch. • Off - The PD connected to this port cannot get power supply. • On - The PD connected to this port can receive power. GS1500-24P User’s Guide...
- Page 118 Class 3 - Optional, 6.49 to 12.95 • Class 4 - Reserved (PSEs classify as Class 0) Consumptio This field displays the current amount of power consumed by the PD from n Power the Switch on this port. GS1500-24P User’s Guide...
-
Page 119: Security
Security MAC Address (121) 802.1x (127) Dynamic ARP (131) Storm Control (137) Defence Engine (139) -
Page 121: Mac Address
Use the Static MAC screen (Section 16.4 on page 123) to assign static MAC addresses for a port. Use the MAC Filtering screen (Section 16.5 on page 124) to create rules for traffic going through the Switch. GS1500-24P User’s Guide... -
Page 122: Mac Forwarding Table
A static MAC address is an address that has been manually entered in the MAC address table. When you set up static MAC address rules, you are setting static MAC addresses for a port. This may reduce the need for broadcasting. GS1500-24P User’s Guide... -
Page 123: Mac Forwarding Table
Click this button to remove any dynamically learned MAC address Dynamic forwarding entries. Entries 16.4 Static MAC Click Security > MAC Address > Static MAC in the navigation panel to display the screen as shown. Figure 57 Security > MAC Address > Static MAC GS1500-24P User’s Guide... -
Page 124: Mac Filtering
Table 41 Security > MAC Address > MAC Filtering LABEL DESCRIPTION MAC Address Type a MAC address in valid MAC address format, that is, six hexadecimal character pairs. VLAN ID Type the VLAN identification number the MAC address belongs to. GS1500-24P User’s Guide... - Page 125 This field displays the descriptive name for this rule. This is for identification purpose only. Select Click on the checkbox for the MAC filtering rule you want to delete. Delete Click this to delete any selected MAC filtering rules. GS1500-24P User’s Guide...
- Page 126 Chapter 16 MAC Address GS1500-24P User’s Guide...
-
Page 127: 127
• Use the 802.1x Setting screen (Section 17.5 on page 129) to activate IEEE 802.1x security and configure the RADIUS server settings. • Use the 802.1x Port Setting screen (Section 17.6 on page 130) to configure IEEE 802.1x port authentication settings. GS1500-24P User’s Guide... -
Page 128: What You Need To Know
Login Info Request Login Credentials Authentication Request Authentication Reply Session Granted/Denied 17.4 Port Authentication Configuration To enable port authentication, first activate the port authentication method (both on the Switch and the port(s)) then configure the RADIUS server settings. GS1500-24P User’s Guide... -
Page 129: Setting
Reauth Period Specify how often a client has to re-enter his or her username and (30-65535 password to stay connected to the port. sec) Apply Click Apply to save your changes to the Switch. GS1500-24P User’s Guide... -
Page 130: Port Setting
Click Apply to save your changes to the Switch. Port This field displays the port number. Mode This field displays the port’s current 802.1x setting. State This field displays the current stage of the 802.1x port authentication procedure. GS1500-24P User’s Guide... -
Page 131: Dynamic Arp
(Section 18.6 on page 135) to manage static MAC-IP bindings for DHCP snooping and ARP inspection. 18.3 What You Need to Know Read on for concepts on Dynamic ARP that can help you configure the screens in this chapter. GS1500-24P User’s Guide... -
Page 132: Arp Table Entries
• It pretends to be computer B and sends a message to computer A. As a result, all the communication between computer A and computer B passes through computer X. Computer X can read and alter the information passed between them. GS1500-24P User’s Guide... -
Page 133: Mac-Ip Binding
Select Enable to activate Dynamic ARP on the Switch. Select Disable to deactivate Dynamic ARP on the Switch. Note: You must activate dynamic ARP first if you want to add static ARP table entries. Apply Click Apply to save your changes to the Switch. GS1500-24P User’s Guide... -
Page 134: Dynamic Arp Vlan Setting
18.5 Dynamic ARP VLAN Setting Click Security > Dynamic ARP > Dynamic ARP VLAN Setting in the navigation panel. The screen will display as shown below. Figure 65 Security > Dynamic ARP > Dynamic ARP VLAN Setting GS1500-24P User’s Guide... -
Page 135: Mac-Ip Binding Config
Switch. An example entry of a MAC address is “0a-b1-c2-d3-e4-f5”. IP Address Enter the corresponding IP address (in dotted decimal notation, ex 192.168.1.5) of the network device you want to be allowed to communicate via the Switch. GS1500-24P User’s Guide... - Page 136 This field displays the type of the MAC-IP binding entry. This will be Static or Dynamic. Select Select the checkbox for the MAC-IP binding entry you want to delete. Delete Click the Delete button to remove any selected MAC-IP binding entries. GS1500-24P User’s Guide...
-
Page 137: Storm Control
19.2 What You Can Do Use the Storm Control screen (Section 19.3 on page 138) to limit the number of broadcast, multicast and unknown unicast and multicast packets the Switch receives per second on the ports. GS1500-24P User’s Guide... -
Page 138: Storm Control Setting
Multicast (pps) This field displays how many multicast packets the port can receive per second. Unknown This field displays how many unknown unicast packets the port can Unicast (pps) receive per second. Unknown This field displays how many unknown multicast packets the port can Multicast (pps) receive per second. GS1500-24P User’s Guide... -
Page 139: Defence Engine
Use the Defence Engine screen (Section 20.3 on page 139) to activate the Defence Engine. 20.3 Activating Defence Engine Click Security > Defence Engine in the navigation panel to display the screen as shown. Figure 68 Security > Defence Engine GS1500-24P User’s Guide... - Page 140 The following table describes the labels in this screen. Table 48 Security > Defence Engine LABEL DESCRIPTION Defence Select Enabled to turn the Defence Engine on. Engine Select Disabled to turn the Defence Engine off. Apply Click Apply to save your changes to the Switch. GS1500-24P User’s Guide...
-
Page 141: Monitoring And Tools
Monitoring and Tools Monitoring (143) Tools (149) -
Page 143: Monitoring
(Section 21.4 on page 145) to view the system logs. • Use the Port Statistics screen (Section 21.5 on page 147) to view port statistic information. 21.3 Logging Setting Use this screen to configure the device’s logging settings. GS1500-24P User’s Guide... - Page 144 Enter the IP address in dotted decimal notation of the syslog server you want to add. Port Specify the UDP port for sending log messages to this server. Typically port 514 is used with syslog. Click Add to save the syslog server entry to the Switch. GS1500-24P User’s Guide...
-
Page 145: Logging Viewing
Chapter 21 Monitoring 21.4 Logging Viewing Use this screen to display the Switch logs. Click Monitoring > Logging > Logging Viewing to view the screen as shown next. Figure 70 Monitoring > Logging > Logging Viewing GS1500-24P User’s Guide... - Page 146 This field displays what category the log entry fits into. Time This field specifies the time when the Switch recorded the log event. The Switch resets its internal clock when it is restarted. Message This field displays an explanation for the log entry. GS1500-24P User’s Guide...
-
Page 147: Port Statistics
This field shows the number of frames transmitted successfully on this port. TxBadPkt This field shows the number of frames unsuccessfully transmitted on this port. RxGoodPkt This field shows the number of frames received successfully on this port. GS1500-24P User’s Guide... - Page 148 Chapter 21 Monitoring Table 51 Monitoring > Port Statistics (continued) LABEL DESCRIPTION RxBadPkt This field shows the number of frames received unsuccessfully on this port. Clear Click the Clear button to reset the port statistics. GS1500-24P User’s Guide...
-
Page 149: Tools
22.3 TFTP Use this screen to backup/restore the Switch configuration using the built-in Trivial File Transfer Protocol. You can also upgrade the Switch’s firmware. Click Tools > TFTP in the navigation panel to open the following screen. GS1500-24P User’s Guide... - Page 150 Type the file name of the firmware file to install. This cannot be a path. The Name file must be in the root directory of the TFTP server. Download Click Download to download the file specified above and install the new Image firmware. GS1500-24P User’s Guide...
-
Page 151: Reset
Reboot allows you to restart the Switch without physically turning the power off. Follow the steps below to reboot the Switch. In the Tools > Reboot screen, click the Reboot button. The following screen displays. Figure 75 Tools > Reboot GS1500-24P User’s Guide... - Page 152 Chapter 22 Tools Click OK again and then wait for the Switch to restart. This takes up to two minutes. This does not affect the Switch’s configuration. Figure 76 Reboot System: Confirmation GS1500-24P User’s Guide...
- Page 153 Chapter 22 Tools GS1500-24P User’s Guide...
- Page 154 Chapter 22 Tools GS1500-24P User’s Guide...
-
Page 155: Troubleshooting & Product Specifications
Troubleshooting & Product Specifications Troubleshooting (157) Product Specifications (161) -
Page 157: Troubleshooting
Section 3.4 on page Check the hardware connections. See Section 23.1 on page 157. Inspect your cables for damage. Contact the vendor to replace any damaged cables. Disconnect and re-connect the power adaptor or cord to the Switch. GS1500-24P User’s Guide... -
Page 158: Switch Access And Login
Make sure your Internet browser does not block pop-up windows and has JavaScripts and Java enabled. Make sure your computer is in the same subnet as the Switch. (If you know that there are routers between your computer and the Switch, skip this step.) GS1500-24P User’s Guide... - Page 159 In order to use the web configurator you need to allow: • Web browser pop-up windows from your device. • JavaScripts (enabled by default). • Java permissions (enabled by default). I cannot see some of submenus at the bottom of the navigation panel. GS1500-24P User’s Guide...
- Page 160 Chapter 23 Troubleshooting The recommended screen resolution is 1024 by 768 pixels. Adjust the value in your computer and then you should see the rest of the submenus at the bottom of the navigation panel. GS1500-24P User’s Guide...
-
Page 161: Product Specifications
ACT, FDX Operating Temperature: 0º C ~ 50º C (32º F ~ 122º F) Environment Humidity: 10 ~ 95% (non-condensing) Storage Environment Temperature: -40º C ~ 70º C (-40º F ~ 158º F) Humidity: 10 ~ 95% (non-condensing) GS1500-24P User’s Guide... - Page 162 Port Mirroring Port mirroring allows you to copy traffic going from one port to another port in order that you can examine the traffic from the mirror port (the port you copy the traffic to) without interference. GS1500-24P User’s Guide...
- Page 163 Note: Only upload firmware for your specific model! Configuration Backup & Make a copy of the Switch’s configuration and put it back on Restoration the Switch later if you decide you want to revert back to an earlier configuration. GS1500-24P User’s Guide...
- Page 164 Port-based mirroring mirroring Support port mirroring per IP/TCP/UDP Bandwidth Supports rate limiting at 16 Kb increments control Broadcast Broadcast, Multicast, Unknown Unicast Storm Control 1 pps stepping Storm Control Rate Limiting Support rate limiting per IP/TCP/UDP port GS1500-24P User’s Guide...
- Page 165 Traffic Types - Packet Priority IEEE 802.1w Rapid Spanning Tree Protocol (RSTP) IEEE 802.3 Packet Format IEEE 802.3ad Link Aggregation IEEE 802.3af Power over Ethernet IEEE 802.3x Flow Control Safety EN 60950-1 FCC Part 15 (Class A) CE EMC (Class A) GS1500-24P User’s Guide...
- Page 166 Chapter 24 Product Specifications GS1500-24P User’s Guide...
-
Page 167: Appendices And Index
Appendices and Index Changing a Fuse (169) Common Services (171) Legal Information (175) Index (209) -
Page 169: Appendix A Changing A Fuse
Put another spare fuse in its place in order to always have one on hand. Push the replacement fuse into the fuse housing until you hear a click. Push the fuse housing back into the Switch until you hear a click. Plug the power cord back into the unit. GS1500-24P User’s Guide... - Page 170 Appendix A Changing a Fuse GS1500-24P User’s Guide...
-
Page 171: Appendix B Common Services
Border Gateway Protocol. BOOTP_CLIENT DHCP Client. BOOTP_SERVER DHCP Server. CU-SEEME 7648 A popular videoconferencing solution from White Pines Software. 24032 TCP/UDP Domain Name Server, a service that matches web names (for example www.zyxel.com) to IP numbers. GS1500-24P User’s Guide... - Page 172 Network News Transport Protocol is the delivery mechanism for the USENET newsgroup service. PING User-Defined Packet INternet Groper is a protocol that sends out ICMP echo requests to test whether or not a remote host is reachable. GS1500-24P User’s Guide...
- Page 173 TCP/UDP Secure Shell Remote Login Program. STRM WORKS 1558 Stream Works Protocol. SYSLOG Syslog allows you to send system logs to a UNIX server. TACACS Login Host Protocol used for (Terminal Access Controller Access Control System). GS1500-24P User’s Guide...
- Page 174 TFTP Trivial File Transfer Protocol is an Internet file transfer protocol similar to FTP, but uses the UDP (User Datagram Protocol) rather than TCP (Transmission Control Protocol). VDOLIVE 7000 Another videoconferencing solution. GS1500-24P User’s Guide...
-
Page 175: Appendix C Legal Information
ZyXEL Communications Corporation. Published by ZyXEL Communications Corporation. All rights reserved. Disclaimer ZyXEL does not assume any liability arising out of the application or use of any products, or software described herein. - Page 176 APPAREIL A LASER DE CLASS 1 PRODUCT COMPLIES WITH 21 CFR 1040.10 AND 1040.11. PRODUIT CONFORME SELON 21 CFR 1040.10 ET 1040.11. Viewing Certifications Go to http://www.zyxel.com. Select your product on the ZyXEL home page to go to that product's page. GS1500-24P User’s Guide...
- Page 177 Registration Register your product online to receive e-mail notices of firmware upgrades and information at www.zyxel.com for global products, or at www.us.zyxel.com for North American products. GS1500-24P User’s Guide...
- Page 178 Appendix C Legal Information GS1500-24P User’s Guide...
-
Page 179: Appendix D Open Software Announcements
Open Software Announcements End-User License Agreement for “GS1500-24P” WARNING: ZyXEL Communications Corp. IS WILLING TO LICENSE THE SOFTWARE TO YOU ONLY UPON THE CONDITION THAT YOU ACCEPT ALL OF THE TERMS CONTAINED IN THIS LICENSE AGREEMENT. PLEASE READ THE TERMS CAREFULLY BEFORE COMPLETING THE INSTALLATION PROCESS AS INSTALLING THE SOFTWARE WILL INDICATE YOUR ASSENT TO THEM. - Page 180 (express, implied or statutory) whatsoever with respect thereto. Please contact the appropriate software vendor or manufacturer directly for technical support and customer service related to its software and products. GS1500-24P User’s Guide...
- Page 181 DOCUMENTATION OR OTHERWISE SHALL BE EQUAL TO THE PURCHASE PRICE, BUT SHALL IN NO EVENT EXCEED THE PRODUCT’S PRICE. BECAUSE SOME STATES/COUNTRIES DO NOT ALLOW THE EXCLUSION OR LIMITATION OF LIABILITY FOR CONSEQUENTIAL OR INCIDENTAL DAMAGES, THE ABOVE LIMITATION MAY NOT APPLY TO YOU. GS1500-24P User’s Guide...
- Page 182 ZyXEL. Any waiver or modification of this License Agreement shall only be effective if it is in writing and signed by both parties hereto. If any part of this License Agreement is found invalid or unenforceable by a court of competent GS1500-24P User’s Guide...
- Page 183 GNU Library General Public License instead.) You can apply it to your programs, too. When we speak of free software, we are referring to freedom, not price. Our General Public Licenses are designed to make sure that you have the freedom to GS1500-24P User’s Guide...
- Page 184 Program (independent of having been made by running the Program). Whether that is true depends on what the Program does. 1. You may copy and distribute verbatim copies of the Program's source code as you receive it, in any medium, provided that you conspicuously and appropriately GS1500-24P User’s Guide...
- Page 185 3. You may copy and distribute the Program (or a work based on it, under Section 2) in object code or executable form under the terms of Sections 1 and 2 above provided that you also do one of the following: GS1500-24P User’s Guide...
- Page 186 Program subject to these terms and conditions. You may not impose any further restrictions on the recipients' exercise of the rights granted GS1500-24P User’s Guide...
- Page 187 10. If you wish to incorporate parts of the Program into other free programs whose distribution conditions are different, write to the author to ask for permission. For software which is copyrighted by the Free Software Foundation, write to the Free Software Foundation; we sometimes make exceptions for this. GS1500-24P User’s Guide...
- Page 188 Version 1, February 1989 Copyright (C) 1989 Free Software Foundation, Inc. 675 Mass Ave, Cambridge, MA 02139, USA Everyone is permitted to copy and distribute verbatim copies of this license document, but changing it is not allowed. Preamble GS1500-24P User’s Guide...
- Page 189 Program or a portion of it, either verbatim or with modifications. Each licensee is addressed as "you". 1. You may copy and distribute verbatim copies of the Program's source code as you receive it, in any GS1500-24P User’s Guide...
- Page 190 3. You may copy and distribute the Program (or a portion or derivative of it, under Paragraph 2) in object code or executable form under the terms of Paragraphs 1 and 2 above provided that you also do one of the following: GS1500-24P User’s Guide...
- Page 191 General Public License from time to time. Such new versions will be similar in spirit to the present version, but may differ in detail to address new problems or concerns. Each version is given a distinguishing version number. If the Program GS1500-24P User’s Guide...
- Page 192 A FAILURE OF THE PROGRAM TO OPERATE WITH ANY OTHER PROGRAMS), EVEN IF SUCH HOLDER OR OTHER PARTY HAS BEEN ADVISED OF THE POSSIBILITY OF SUCH DAMAGES. END OF TERMS AND CONDITIONS Appendix: How to Apply These Terms to Your New Programs GS1500-24P User’s Guide...
- Page 193 If the program is interactive, make it output a short notice like this when it starts in an interactive mode: Gnomovision version 69, Copyright (C) 19xx name of author Gnomovision comes with ABSOLUTELY NO WARRANTY; for details type `show GS1500-24P User’s Guide...
- Page 194 Except for the DES library, MD5 code, and linux/net/ipsec/radij.c this software is under the GNU Public License, see the file COPYING. See the file CREDITS for details on origins of more of the code. The linux/net/ipsec/radij.c code is derived from BSD 4.4lite code from sys/net/radix.c. GS1500-24P User’s Guide...
- Page 195 ---- Part 1: CMU/UCD copyright notice: (BSD like) ----- Copyright 1989, 1991, 1992 by Carnegie Mellon University Derivative Work - 1996, 1998-2000 Copyright 1996, 1998-2000 The Regents of the University of California All Rights Reserved GS1500-24P User’s Guide...
- Page 196 * Neither the name of the Networks Associates Technology, Inc nor the names of its contributors may be used to endorse or promote products derived from this software without specific prior written permission. GS1500-24P User’s Guide...
- Page 197 EXPRESS OR IMPLIED WARRANTIES, INCLUDING, BUT NOT LIMITED TO, THE IMPLIED WARRANTIES OF MERCHANTABILITY AND FITNESS FOR A PARTICULAR PURPOSE ARE DISCLAIMED. IN NO EVENT SHALL THE COPYRIGHT HOLDER BE LIABLE FOR ANY DIRECT, INDIRECT, INCIDENTAL, SPECIAL, EXEMPLARY, OR GS1500-24P User’s Guide...
- Page 198 THIS SOFTWARE IS PROVIDED BY THE COPYRIGHT HOLDERS AND CONTRIBUTORS ``AS IS'' AND ANY EXPRESS OR IMPLIED WARRANTIES, INCLUDING, BUT NOT LIMITED TO, THE IMPLIED WARRANTIES OF MERCHANTABILITY AND FITNESS FOR A PARTICULAR PURPOSE ARE DISCLAIMED. GS1500-24P User’s Guide...
- Page 199 INCLUDING, BUT NOT LIMITED TO, THE IMPLIED WARRANTIES OF MERCHANTABILITY AND FITNESS FOR A PARTICULAR PURPOSE ARE DISCLAIMED. IN NO EVENT SHALL THE COPYRIGHT HOLDERS OR CONTRIBUTORS BE LIABLE FOR ANY DIRECT, INDIRECT, INCIDENTAL, SPECIAL, EXEMPLARY, OR GS1500-24P User’s Guide...
- Page 200 CONSEQUENTIAL DAMAGES (INCLUDING, BUT NOT LIMITED TO, PROCUREMENT OF SUBSTITUTE GOODS OR SERVICES; LOSS OF USE, DATA, OR PROFITS; OR BUSINESS INTERRUPTION) HOWEVER CAUSED AND ON ANY THEORY OF LIABILITY, WHETHER IN CONTRACT, STRICT LIABILITY, OR TORT (INCLUDING GS1500-24P User’s Guide...
- Page 201 NEGLIGENCE OR OTHERWISE) ARISING IN ANY WAY OUT OF THE USE OF THIS SOFTWARE, EVEN IF ADVISED OF THE POSSIBILITY OF SUCH DAMAGE. ---- Part 8: Apple Inc. copyright notice (BSD) ----- Copyright (c) 2007 Apple Inc. All rights reserved. GS1500-24P User’s Guide...
- Page 202 Copyright (c) 2009, ScienceLogic, LLC All rights reserved. Redistribution and use in source and binary forms, with or without modification, are permitted provided that the following conditions are met: * Redistributions of source code must retain the above copyright notice, GS1500-24P User’s Guide...
- Page 203 0. Additional Definitions. As used herein, “this License” refers to version 3 of the GNU Lesser General Public License, and the “GNU GPL” refers to version 3 of the GNU General Public License. GS1500-24P User’s Guide...
- Page 204 Library. You may convey such object code under terms of your choice, provided that, if the incorporated material is not limited to numerical parameters, data structure layouts and accessors, or small macros, inline GS1500-24P User’s Guide...
- Page 205 Combined Work produced by recombining or relinking the Application with a modified version of the Linked Version. (If you use option 4d0, the Installation Information must accompany the Minimal Corresponding Source and Corresponding Application Code. If you use option 4d1, you must provide the GS1500-24P User’s Guide...
- Page 206 Library. This Product includes telnetd software under BSD like license Java TelnetD library (embeddable telnet daemon) Copyright (c) 2000-2005 Dieter Wimberger. All rights reserved. GS1500-24P User’s Guide...
- Page 207 LIABILITY, OR TORT (INCLUDING NEGLIGENCE OR OTHERWISE) ARISING IN ANY WAY OUT OF THE USE OF THIS SOFTWARE, EVEN IF ADVISED OF THE POSSIBILITY OF SUCH DAMAGE. This Product includes psntp software under MIT license The MIT License Copyright (c) <year> <copyright holders> GS1500-24P User’s Guide...
- Page 208 HOLDERS BE LIABLE FOR ANY CLAIM, DAMAGES OR OTHER LIABILITY, WHETHER IN AN ACTION OF CONTRACT, TORT OR OTHERWISE, ARISING FROM, OUT OF OR IN CONNECTION WITH THE SOFTWARE OR THE USE OR OTHER DEALINGS IN THE SOFTWARE. GS1500-24P User’s Guide...
-
Page 209: Index
CFI (Canonical Format Indicator) changing the password general features Class of Service (CoS) general setup Click Gigabit ports configuration, saving GMT (Greenwich Mean Time) copyright hardware installation default Ethernet settings GS1500-24P User’s Guide... - Page 210 Policy-based Priority trunk group Port Link Aggregation Control Protocol (LACP) port authentication Link Aggregation Control Protocol, see LACP IEEE802.1x 129, 130 lockout port mirroring 91, 164 login direction password egress ingress port redundancy GS1500-24P User’s Guide...
- Page 211 Max Age product path cost related documentation port state removing fuses root port resetting 45, 151 terminology to factory default settings switch lockout restoring configuration switch reset Round Robin Scheduling switch setup RSTP switching GS1500-24P User’s Guide...
- Page 212 MultiSource Agreement (MSA) transceivers installation removal Trunk Distribution Algorithm trunk group trunking 59, 164 example Type of Service (ToS) ventilation number of possible VIDs priority frame VID (VLAN Identifier) VLAN introduction port settings static VLAN tagged warranty note GS1500-24P User’s Guide...
- Page 213 Index GS1500-24P User’s Guide...
- Page 214 Index GS1500-24P User’s Guide...
- Page 215 Index GS1500-24P User’s Guide...
- Page 216 Index GS1500-24P User’s Guide...
- Page 217 Index GS1500-24P User’s Guide...
- Page 218 Index GS1500-24P User’s Guide...
Need help?
Do you have a question about the GS1500-24P and is the answer not in the manual?
Questions and answers