Advertisement
Important:
1. You must charge the battery for at least 2½ hours prior to the first use.
2. Maximum battery capacity is first reached after completing three complete charge and discharge cycles.
3. Always use Genuine Printek Media to ensure optimal performance.
•
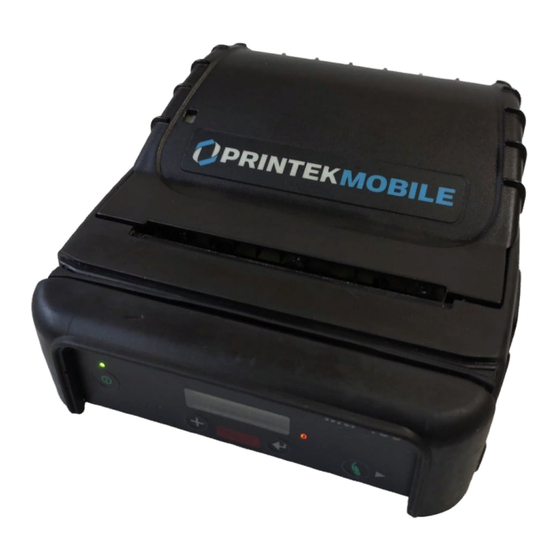
To load media, move the Paper Door Release in the direction indicated in Figure A and open the Paper Door.
•
Roll Feed – Move the media support as shown in Figure B and place the roll between the supports. Make sure the media
rotates freely. Lay the leading edge of the media through the print head as shown in Figure C, and close the door.
•
Cut Sheet – Open the paper cassette using the instructions printed on the bottom side of the cassette. Insert the
cassette into the printer with the smooth side down (flap side up) as shown in Figure D.
•
To install the battery: Slide the battery into the battery compartment until the release lever on the battery snaps into place.
You may remove the battery by pressing the release lever toward the bottom of the printer and pulling the battery out of the
battery compartment.
•
To charge the battery, connect a power adapter (sold separately) to the appropriate power source and plug the output
cable into the printer's Power Connector as shown in Figure A. The
is being charged.
•
To perform a self test, press and hold the
Note: For more information, refer to the MtP400 Series Operator's Manual. You may download this manual at www.printek.com.
Serial I/O Connector
Power Connector
Tear Bar
Magnetic Card Reader
Power
Figure A
Paper Feed
/Advance
MtP400 Quick Setup Instructions
Battery Indicator will turn on indicating that the battery
Paper Feed Button while turning on the printer with the
Paper Supply Gauge
Paper Door Release
Power Button.
Paper Door
Release Lever
Battery
Media Support
Figure B
Paper Leading Edge
Figure C
Paper Cassette
Figure D
Advertisement
Table of Contents

Related Manuals for Printek MtP400


Summary of Contents for Printek MtP400
- Page 1 To perform a self test, press and hold the Paper Feed Button while turning on the printer with the Power Button. Note: For more information, refer to the MtP400 Series Operator’s Manual. You may download this manual at www.printek.com. Paper Leading Edge Paper Supply Gauge...
-
Page 2: Printer Setup
Printer Setup Many of the printer’s features may be set using menus available on the front panel of the printer. For complete details, please refer to the MtP400 Series Operator’s Manual. To enter the Setup Mode, press and hold the Enter Button while turning on the printer with the Power Button.
Need help?
Do you have a question about the MtP400 and is the answer not in the manual?
Questions and answers