Table of Contents
Advertisement
Quick Links
Download this manual
See also:
Service Manual
Advertisement
Table of Contents

Related Manuals for Acer V360


Summary of Contents for Acer V360
- Page 2 © 2013 All Rights Reserved Acer Liquid E1 V360 User’s Manual Model: V360 First issue: 2/2013 Acer Liquid E1 V360 Smartphone Model number: __________________________________ Serial number: ___________________________________ Date of purchase: ________________________________ Place of purchase: ________________________________...
-
Page 3: Table Of Contents
Table of contents Table of contents ......... . 3 Setting up . - Page 4 AcerCloud setup ......... 36 AcerCloud setup for Windows 7 .
-
Page 5: Setting Up
Your new smartphone comes packed in a protective box. Carefully unpack the box and remove the contents. If any of the following items is missing or damaged, contact your dealer immediately: • Acer Liquid E1 V360 Smartphone • Battery • Quick Guide •... -
Page 6: Installing Or Removing The Battery
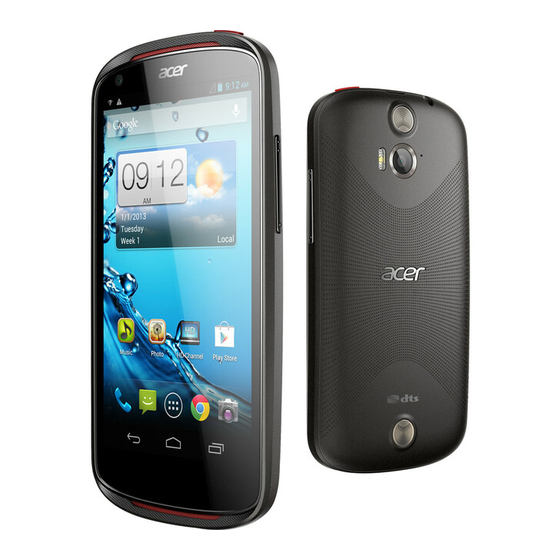
Item Description Front-facing camera A 0.3-megapixel camera for video chats and self portrait images. LED indicator Indicates the phone’s battery, call, and message status (see table below). Light sensor Detects ambient light and automatically adjusts screen brightness. Touchscreen 4.5-inch, 960 x 540 pixel capacitive touchscreen to display data, phone content and enter information. -
Page 7: Installing The Battery
Installing the battery Insert your fingernail into the cutout between the battery cover and the phone. Unclip the cover and lift off the battery cover. Place the battery into the battery compartment, lining up the battery connectors with those at the top of the compartment. -
Page 8: Installing A Sim Or Microsd Card
Connect the AC adapter cord to the micro USB connector on your smartphone. Removing the battery Open the battery compartment as shown in "Installing the battery" on page 7. Lift the battery out of the compartment by lifting at the top of the battery on either side of the camera. -
Page 9: Sim Card Lock
SIM card lock Your smartphone may come with a SIM card lock, i.e., you will only be able to use the SIM card provided by your network operator. To cancel the SIM lock, contact your network provider. -
Page 10: Using Your Smartphone
Using your smartphone Turning on for the first time To turn on your smartphone for the first time, press and hold the power button until the screen turns on. You will then be asked to configure some settings before you can use your smartphone. -
Page 11: Using The Touchscreen
Waking your smartphone If the screen is off and the smartphone does not react to any taps on the screen or front panel button, then it has been locked and is in sleep mode. Press the power button to wake your smartphone. Unlock your smartphone by sliding your finger from one side of the screen to the other (it works both ways). - Page 12 You can choose another input language by tapping and holding the comma key. Alternatively, you can open the Application menu and then tap Settings > Language & input. Then tap the Settings button next to "Android keyboard" > Input languages. The keyboard layout changes according to the selected language.
-
Page 13: The Home Screen
When there are multiple suggestions for the word you want to enter, Swype displays a Word Choice List. To accept the default word in the Word Choice List, just keep Swyping. Otherwise, scroll through the list by dragging your finger, and tap the word you want. -
Page 14: Voice Search
display information such as the time and weather, or provide additional controls and direct access to applications and other frequently used features of your smartphone. Time and Status Search Application menu Navigation At the bottom of the screen is the application dock which displays default applications. -
Page 15: Personalizing The Home Screen
The extended Home screen The Home screen extends to either side of the screen, giving you more room to add icons, widgets or features. To view the extended screen, slide your finger to the left or right. Personalizing the Home screen You may personalize your Home screen by adding or removing application shortcuts or widgets, and by changing the wallpaper. -
Page 16: Changing The Wallpaper
Resizing widgets Some widgets can be resized. As soon as you place a widget on the Home screen, you can resize it by dragging the corners. To resize a widget that is already on the Home screen, tap and hold the widget. Once the Remove icon appears, release the widget. - Page 17 Managing the lock screen Tap and hold any open area on the Home screen. Tap the Lock screen manager tab to turn on and off lock screen icons or change which lock screen icons appear. Changing home screen settings Tap and hold any open area on the Home screen. Tap the Home screen settings tab to modify sliding effects.
-
Page 18: Connection Icons
This area contains a variety of icons to inform you of your phone’s status. The left side of the Notification area displays event icons that indicate a new event (such as a new message). The icons on the right side indicate signal strength, connection, battery status and the time. -
Page 19: Notification Icons
Notification icons Icon Description Icon Description Alarm is set SIM card is invalid or not installed Speakerphone is on Vibrate mode New Gmail message Ringer is silenced New/unread SMS/MMS Phone microphone is off Problem with sending SMS/MMS Application update available New Google Talk message System update available New voicemail... - Page 20 Multitasking You can have multiple applications open at the same time. To open a new application, tap to return to the Home screen, then start the new application. To view your active applications, tap . Then tap an icon to go to the application. Tip: To prolong battery life, it is better to close an application when you’ve finished using it.
-
Page 21: Managing Contacts
Managing contacts Managing your contacts Your smartphone features an address book that allows you to save contacts to either the internal memory or onto your SIM card. Open the People application from the Application menu or from the Dialer to view your contacts. If you don’t have any contacts stored on your phone, you can import your Google account contacts, add a new contact or import contacts from your SIM or SD card. -
Page 22: Making Calls
Making calls This chapter shows you how to make phone calls, and the various options available to you during your call. Before making a call Check that the phone function is on before you make a call. You can confirm the phone status from Notification area. -
Page 23: The Voice Call Screen
1. The Notification area with the missed call icon. Open the Notification area and tap the missed call notification to display the missed call details. 2. By the Phone icon (the number in the box is the number of missed calls). Tap Phone from either the Home screen or the Application menu to directly display the missed call details. -
Page 24: Answering Or Declining A Call
default voice call screen. To do so, open the Notification area and tap the Float caller button. Answering or declining a call When you have an incoming call, the number will be shown on the screen. To accept or decline the call, tap the appropriate icon and slide your finger across the screen. To decline the call with a text message, tap the icon and select a message. -
Page 25: Voice Call Options
Voice call options Icon Description Place the call on hold. Mute a call. Speakerphone. Access the keypad while a call is in progress. Two options: • Add a second call • Record the conversation. Minimizes the call window to a "floating" screen. -
Page 26: Internet Calling
Internet calling You can place and receive Internet calls over wireless network. Adding an Internet calling account In the Application menu tap Settings > Call settings > Internet Call. Then tap Use Internet calling > Accounts > ADD ACCOUNT. Input the Username, Password, and Server accounts. - Page 27 Important: Calling a phone number using Internet calling requires that your service provider supports it, and may incur additional charges. Please contact your service provider if you have any questions.
-
Page 28: Messaging
Messaging This chapter shows you how to set up and use the Phone messages, Social messages and Social events functions of your smartphone. All SMS and MMS messages are accessed via Messaging. Messaging automatically arranges received and sent messages into threads. To access Messaging tap Messaging on the Home screen. -
Page 29: Replying To A Message
Replying to a message When a new text message arrives a message icon appears in the Notification area and the message icon at the bottom of the phone displays the number of unread text messages. Tap Messaging on the Home screen to view the message list or open the Notification area to see a summary of the message. - Page 30 Note: Downloads can take a long time, depending on your connection quality. If you reply or open another application, the download will be stopped. Important: You may be charged to download message content, especially if you are roaming. Please contact your provider if you have any questions. 3.
-
Page 31: Going Online
Going online Browsing the Internet In order to browse the Internet with your smartphone, you must be connected to a data or wireless network. Using the browser To start browsing, tap the Chrome icon on the Home screen, or open the Application menu and select Chrome. -
Page 32: Setting Up Your Google Email
and even send a note to yourself using your voice. Open Voice Search from the Application menu, or tap from the Home screen. Setting up your Google email 1. Make sure your smartphone is connected to a data or Wi-Fi connection. 2. - Page 33 Note: You must activate a Google account before using Google Play. The first time you access Google Play, you will need to read and accept the Terms of Service. Tap Play Store from the Application menu to open the Google Play. Here you can obtain a variety of add-on programs and applications to enhance the functionality of your smartphone.
-
Page 34: Maps, Navigation, Places And Latitude
You may keep track of the download progress from both the app’s page and the smartphone’s . Important: Some applications may require payment before you can download them. You will need to have a Google Checkout account in order to pay for these applications, or a credit card number associated with your Google account. -
Page 35: Using The Map
Using the map Tap the Maps icon in the applications menu. Drag the map with your finger to move the map around. To zoom in or out: 1. Double tap a location on the map to zoom in on the location, and tap once to zoom out, or 2. -
Page 36: Acercloud Setup
AcerCloud setup for Windows 7 To install AcerCloud on a PC without AcerCloud, you can download the AcerCloud setup program from the AcerCloud website (https://www.cloud.acer.com/ops/ downloads) and select AcerCloud Installer in the Windows part. After download, double-click on the installer and follow the instructions to install AcerCloud. - Page 37 Sign in using your Acer ID Start the AcerCloud program from the desktop or Start Menu. If you already have an Acer ID, use your email address and password to sign in to your AcerCloud account. Create an AcerCloud ID If you do not have an AcerCloud ID, you first need to sign up for an AcerCloud account, which you can do from your smartphone.
- Page 38 AcerCloud options When you install AcerCloud, you have several options. Select the options that are useful on your PC and click Next to complete the setup: PicStream - Take holiday snapshots on your smartphone and share them with other smart devices. Photos will be backed up permanently on your Cloud PC (see below), and temporarily accessible for 30 days in your personal cloud and on other devices.
-
Page 39: Using The Camera
Using the Camera Your smartphone features a 5-megapixel digital camera mounted on the rear, with a 0.3-megapixel front-facing camera function. This section will take you through all the steps in taking photos and videos with your smartphone. To activate the camera, tap Camera on the Home screen, or open the Applications menu and tap Camera. -
Page 40: Taking A Photo
Icon Description Resolution: Set the photo quality. Image adjustment: Set Brightness, Contrast, Saturation, Sharpness, and Hue. Scene mode: Set Auto, Night, Sunset, Party, Portrait, Landscape, Night portrait, Theatre, Beach, Snow, Steady photo, Fireworks, Sports, Candle light Set the white balance: Auto, Daylight, Cloudy, Fluorescent, Incandescent. - Page 41 2. Align the camera to take a photo of one end of the panoramic scene (the furthest left, right, top or bottom). 3. Press the camera button to take the first image; then smoothly turn the camera to the left or right to take the next image of the scene. •...
-
Page 42: Shooting A Video
Shooting a video 1. Frame your subject and steady your smartphone and zoom in or out as needed. 2. Tap to start recording. Tap or press again to stop recording. Supported formats Type Formats Image JPEG, GIF, PNG, BMP Video MPEG-4, H.263, H.264 Viewing photos and videos After you have taken your photo or video, it is automatically saved. -
Page 43: Advanced Settings
Advanced settings Putting your smartphone in Airplane mode You can enter Airplane mode (also known as flight mode) to turn off telephone and Bluetooth functions and use your smartphone as a handheld device during a flight. Check with your airline to make sure this is permitted onboard. -
Page 44: Adjusting Bluetooth Settings
Item Description More... Access additional connection settings: Airplane mode: Disable all wireless connections so you can safely use this device onboard an aircraft. VPN: Set up and manage Virtual Private Networks. Tethering & portable hotspot: Share your phone’s mobile data connection via USB or as a portable Wi-Fi hotspot. NFC: Near Field Communication enables your phone to transmit and receive information wirelessly when close to another NFC-enabled device. -
Page 45: Internet Sharing
tags, ensure the Android Beam is turned on by tapping Android Beam (below NFC) and tap ON in the top-right corner. Note: To send or recieve tags your phone must be powered on and not in sleep mode. Sending tags 1. -
Page 46: Selecting A Network
Selecting a network Your phone will automatically detect your carrier/network settings when you insert a new SIM card. However, you may prefer to manually select a network. This may be a good idea when roaming. Tip: When you are traveling, manually selecting a network may help to reduce your roaming charges. -
Page 47: Connecting To A Pc
Sound To adjust your phone’s sound settings, in the Application menu tap Settings > Sound. Item Description Vibrate Vibrates the device for incoming calls. Volumes Adjust the Ringtone, Notifications, Alarm volumes. Phone ringtone Sets your default voice calls ringtone. Default notification Set your phone’s default notification sound. -
Page 48: Fm Radio
Note: After turning on USB storage, you will not be able to access the files in the microSD card or applications such as Gallery or Music. Synchronization You can sync your calendar, email and contacts on your phone and never worry about losing them again. Sync in real time or adjust it as you please. -
Page 49: Restoring To Factory Settings
Setting the date and time To set the date and time, open the Application menu and tap Settings > Date & time. Tip: If you travel frequently or live in an area that uses daylight saving time, activate Automatic date & time from this menu. This will enable your smartphone to set the date and time based on information it receives from the network. - Page 50 Note: Before performing a clean boot, ensure that your smartphone is not locked. Press any key or tap the screen to see if the phone responds. Warning! You should only perform a clean boot when all other options have failed to restore your smartphone to an operational state. Warning! This will erase all your personal information, any contacts stored on your phone and any programs you installed.
-
Page 51: Accessories And Tips
Accessories and tips This chapter shows you how to use accessories with your smartphone, as well as provide useful tips for when you are using your smartphone. Using the headset Your smartphone comes packaged with a headset with built-in microphone for handsfree use when making calls. -
Page 52: Appendix
Appendix FAQ and troubleshooting This section lists frequently asked questions that may arise during the use of your smartphone, and gives easy answers and solutions to these questions. Aspect Question Answer Audio Why is there no If the headset is plugged into the device, sound coming from the speaker is automatically shut off. -
Page 53: Other Sources Of Help
Other sources of help For information on: Refer to: Up-to-date information regarding your www.acer.com smartphone mobile.acer.com Service enquiries www.acer.com/support Warnings and precautions • Do not use this product near water. -
Page 54: Battery Information
The battery can be charged and discharged hundreds of times, but it will eventually wear out. When the talk and standby times are noticeably shorter than normal, buy a new battery. Use only Acer approved batteries, and recharge your battery only with Acer approved chargers designated for this device. -
Page 55: Additional Safety Information
Warning! Batteries may explode if not handled properly. Do not disassemble or dispose of them in fire. Keep them away from children. Follow local regulations when disposing of used batteries. Additional safety information Your device and its enhancements may contain small parts. Keep them out of the reach of small children. -
Page 56: Emergency Calls
systems, electronic speed control systems, and air bag systems. For more information, check with the manufacturer, or its representative, of your vehicle or any equipment that has been added. Only qualified personnel should service the device, or install the device in a vehicle. Faulty installation or service may be dangerous and may invalidate any warranty that may apply to the device. - Page 57 5. DO NOT use or store your smartphone in any location that is dusty, damp or wet. 6. DO use a soft, damp cloth to clean your smartphone. If the surface of the screen becomes soiled, clean it with a soft cloth moistened with diluted window-cleaning solution. 7.
-
Page 58: Specifications
Specifications Performance ® • 1 GHz dual-core ARM Cortex -A9 CPU ™ • System memory: • 1 GB of RAM • 4 GB of ROM • Android operating system Display • 4.5" qHD TFT, capacitive touch panel • 960 x 540 resolution Multimedia Formats supported: Type... - Page 59 Expansion • microSD memory card slot (up to 32 GB) Battery • Rechargeable high density 1760 mAh Lithium-ion battery (replaceable) Note: Length of battery operation will depend on power consumption which is based on system resource use. For example, constantly using the backlight or using power-demanding applications will shorten battery life between charges.
-
Page 60: Safety
Safety Battery information This product uses a Lithium battery. Do not use it in a humid, wet and/or corrosive environment. Do not put, store or leave your product in or near a heat source, in a high temperature location, in strong direct sunlight, in a microwave oven or in a pressurized container, and do not expose it to temperatures over 60 °C (140 °F). -
Page 61: Disposal And Recycling Information
Do not throw this electronic device into the trash when discarding. To minimize pollution and ensure utmost protection of the global environment, please recycle. For more information on the Waste from Electrical and Electronics Equipment (WEEE) regulations, visit www.acer- group.com/public/Sustainability EEE yönetmeliğne uygundur It is compliant with EEE regulations. - Page 62 Wireless operation channels for different domains N. America 2.412-2.462 GHz Ch01 through Ch11 Japan 2.412-2.484 GHz Ch01 through Ch14 Europe ETSI 2.412-2.472 GHz Ch01 through Ch13 List of National Codes This equipment may be operated in the following countries: Country ISO 3166 Country ISO 3166...
- Page 63 accessory and are not holding the phone at the ear, position the handset a minimum of 1.5 cm from your body when the phone is switched on. During use, the actual SAR level is usually much lower than the maximum value, because the mobile telephone works in different output levels.
- Page 64 Certification logos To view the certification logos on your device: tap Settings > About phone > Legal information > Certification logo.
- Page 65 Lithium battery warning ATTENZIONE! Rischio di esplosione della batteria se sostituita in modo errato. Sostituire la batteria con un una di tipo uguale o equivalente consigliata dalla fabbrica. Non disperdere le batterie nell’ambiente. VORSICHT! Explosionsgefahr bei unsa- chgemäßen Austausch der Batterie. Ersatz nur durch denselben oder einem vom Hersteller empfohlenem ähnlichen Typ.
- Page 66 Acer Incorporated Date: December 20, 2012 Declaration of Conformity We, Acer Incorporated, of 8F., No. 88, Sec. 1, Xintai 5th Rd., Xizhi Dist, New Taipei City, 22181, Taiwan Declare under sole responsibility that the product: Model: V360 Description: Smart Handheld...
- Page 67 For the addresses/telephone numbers of Acer service centers, please refer to the warranty card.
-
Page 68: End User License Agreement
Sublicense or otherwise make the Software available to third parties, except that you may, after prior written notification to Acer, transfer the Software as a whole to a third party so long as you do not retain any copies of the Software and such third party accepts the terms of this Agreement. -
Page 69: Privacy Policy
Third Party Software in any manner that could interfere with any other party's use and enjoyment of the Third Party Services, or the services and products of Acer's licensors' or suppliers' third party licensors. Your use of the Third Party Software and Third Party Services is also subject to additional terms and conditions and policies which can be accessed through our global website.
Need help?
Do you have a question about the V360 and is the answer not in the manual?
Questions and answers