Table of Contents
Advertisement
Quick Links
Advertisement
Table of Contents

Related Manuals for Lynx L24BF


Summary of Contents for Lynx L24BF
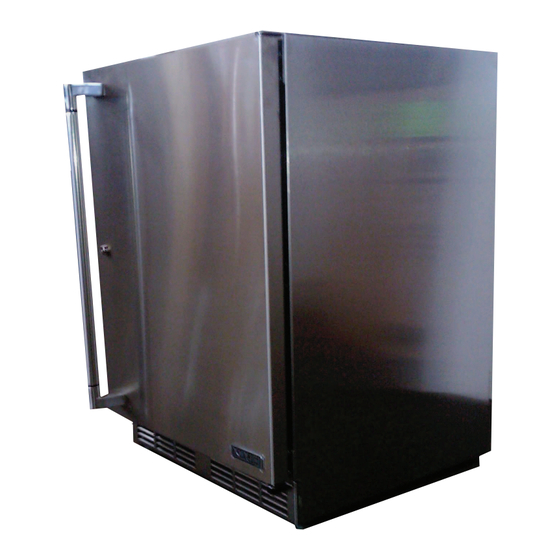
- Page 1 User Manual/ Installation Instructions Model: L24BF Lynx Professional Grills 5895 Rickenbacker Rd., Commerce CA 90040 Service: (888)289-5969 Tel: (323) 838-1770 Fax: (323) 838-1778 5895 Rickenbacker Road Commerce, CA 90040 888-289-5969 Fax 323-838-1778 www.lynxgrills.com WWW.Lynxgrills.com...
-
Page 2: Introduction
If you do not return your Warranty Registration l, DANGER!, CAUTION! and WARNING! symbols Lynx will use the date of sale as the first date of when they appear. This information is important warranty for your new Refrigerated Cabinet. You... -
Page 3: Table Of Contents
TABLE OF CONTENTS INTRODUCTION…………………………………………………………………………………….…….. PLEASE RECORD YOUR MODEL’S INFORMATION…………………………………….…….…… WARRANTY REGISTRATION CARD…………………………………………………………………... TABLE OF CONTENTS……………………………………………………………………………….….. GENERAL PRECAUTIONS…………………………………………………………………...…….…… INSTALLATION INSTRUCTIONS………………………………………………………………………. FIGURE 1 SPECIFICATION DRAWING………………………………………………..……………… PREPARING THE SPACE………………………………………………………………..……………... PREPARING ELECTRICAL CONNECTIONS…………………………………………..…………….. UNPACKING AND MOVING……………………………………………………………..……………… ANTI-TIP-OVER INSTALLATION……………………………………………………………………….. INSTALLING………………………………………………………………………………..….………….. TOE PLATE INSTALLATION……………………………………………………………….…..……….. FIGURE 3 TOE PLATE INSTALLATION……………………………………………..……………….. SHELVING…………………………………………………………………….……..…..……………….. -
Page 4: General Precautions
GENERAL PRECAUTIONS CAUTION Use only genuine Lynx replacement parts. DANGER Imitation parts can damage the unit, and may Risk of child entrapment, before you throw void the warranty. away your old refrigerator or freezer, take off the doors and leave shelves in place so that children may not easily climb inside. - Page 5 Lynx’s sole liability and your exclusive remedy under this warranty are set forth in the initial paragraph above. Lynx shall have no liability whatsoever for any incidental, consequential or special...
-
Page 6: Preparing The Space
Use only genuine Lynx replacement parts and accessories. Genuine Lynx parts and accessories are 3. Before moving unit, secure door to unit designed to work correctly with Lynx products and offer superior service life. The use of non-Lynx All Lynx units come equipped with a NEMA 5- with tape to the door closed. -
Page 7: Anti-Tip-Over Installation
installation, the unit must be secured in place TROUBLESHOOTING with the anti-tip brackets provided with the unit. A set of metal anti-tip brackets are supplied with BEFORE CALLING FOR SERVICE the unit. The anti-tip brackets, when properly ANTI-TIP BRACKETS If the unit appears to be malfunctioning, read through NORMAL OPERATION first. If the problem installed should secure the rear legs and prevent persists, check the TROUBLESHOOTING GUIDE. -
Page 8: Installing
24 hours and unfinished wood wine rack faces. before connecting power. Your Lynx units are pre-set in order to achieve CAUTION the recommended temperature range when 1. Plug the unit into the 15 amp grounded Do not use abrasive cleaners or cloths on any of installed in a 70qF ambient room temperature. -
Page 9: Toe Plate Installation
TOE PLATE INSTALLATION CAUTION The louvered toe plate must be removable for When the unit is secured in place, install the servicing. The floor cannot interfere with louvered toe plate. Secure louvered toe plate by removal. The louvered sections of the toe plate snapping the latch into the latch catch on the must not be covered or obstructed so as to unit. -
Page 10: Shelving
SHELVING IMPORTANT NOTE: Interior louver openings and fan guard openings should never be obstructed to achieve maximum performance. The single door unit comes standard with black vinyl coated adjustable full extention pullout shelves. Adjusting Full Extention Shelving 1. Pull the shelf out to its furthest position. Locate the tabs in the middle of both extenders (Figure 4), Lift on tab up while pushing the opposite tab down and pull... -
Page 11: Door Lock
TEMPERATURE CONTROLLER DOOR LOCK See Figure 6 for door lock and latch bracket details. DOOR HINGE REVERSAL Procedure for switching direction of door swing using Left Hand Hinge Kit Part No. 90197. 1. Support the door and remove the hinge pin. -
Page 12: Operation
6q swing. OPERATION Step 10: The Lynx L24BF comes equipped with a state of the art refrigeration system. The compressor is of a variable speed variety, which automatically 7. Remove the Lynx name plate from changes speeds based on system conditions the Door using a Plastic Putty Knife.
Need help?
Do you have a question about the L24BF and is the answer not in the manual?
Questions and answers