Table of Contents
Advertisement
Available languages
Available languages
Advertisement
Table of Contents

Related Manuals for Pioneer MVH-1400UB


Summary of Contents for Pioneer MVH-1400UB
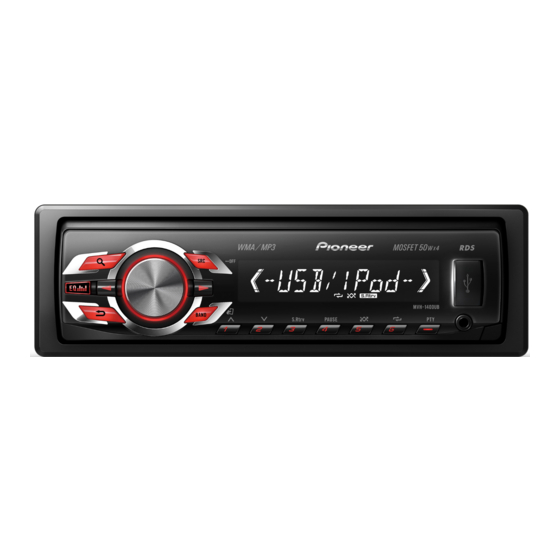
- Page 1 RDS MEDIA CENTER RECEIVER AUTORADIO MULTIMEDIA RDS RICEVITORE MULTIMEDIALE CON RDS RECEPTOR Y CENTRO DE COMUNICACIONES RDS RDS-MULTIMEDIA-EMPFÄNGER RDS MEDIA CENTER ONTVANGER Owner’s Manual MVH-1400UB Mode d’emploi Manuale d’istruzioni Manual de instrucciones Bedienungsanleitung Handleiding...
-
Page 2: Demo Mode
If you want to dispose this product, do not Should this unit fail to operate properly, please ! The Pioneer CarStereo-Pass is for use only in mix it with general household waste. There is contact your dealer or nearest authorized Germany. -
Page 3: Display Indication
A TP station is tuned in. previous folder or album. CAUTION 2 Press M.C. to select minute. ! Use an optional Pioneer USB cable (CD- (re- Press to display an audio 3 Turn M.C. to adjust minute. Track or folder repeat is on. -
Page 4: Basic Operations
Section Operating this unit Operating this unit Tuner Removing the front panel to protect your unit from Selecting a source 1 Turn M.C. to set the demo display to on or off. 1 Press SRC/OFF to cycle between: theft 2 Press M.C. to confirm the selection. Basic operations 1 Press the detach button to release the front TUNER (tuner)—USB (USB)/iPod (iPod)—... - Page 5 Section Operating this unit Operating this unit Storing and recalling stations Searching for an RDS station by PTY information OTHERS Local seek tuning lets you tune in to only those for each band You can search for general types of broadcasting radio stations with sufficiently strong signals for EDUCATE (Education), DRAMA (Drama), CUL- programs, such as those listed in the following...
-
Page 6: Usb Storage Device
Section Operating this unit Operating this unit Advanced operations using SEEK (left/right key setting) Returning to root folder RANDOM (random play) special buttons 1 Press and hold BAND/ . You can assign a function to the left and right keys 1 Press M.C. -
Page 7: Function Settings
Section Operating this unit Operating this unit ! Disconnect headphones from the iPod be- ! iPod touch 1st generation (software version Notes Press and hold M.C. to switch to link play ! You can play playlists created with the PC ap- fore connecting it to this unit. -
Page 8: Initial Settings
Section Operating this unit Operating this unit REPEAT (repeat play) S.RTRV (sound retriever) SLA (source level adjustment) ! Adjusted equalizer curve settings are stored in CUSTOM. Automatically enhances compressed audio and SLA (Source level adjustment) lets you adjust the 1 Press M.C. to select a repeat play range. 1 Press M.C. -
Page 9: Using An Aux Source
! Voice guidance is output from a connected 1 Press M.C. to turn AUX on or off. ! Some characters may not be displayed prop- Pioneer navigation unit. USB PNP (plug and play) erly. The sound is turned off, MUTE is displayed and 1 Press M.C. -
Page 10: Inputs/Outputs
Section Installation Installation — Never wire the negative speaker cable directly 9 Blue/white Connections Power cord to ground. The pin position of the ISO connector will dif- Important — Never band together negative cables of multi- fer depending on the type of vehicle. Connect ! When installing this unit in a vehicle without 9 and b when Pin 5 is an antenna control ple speakers. -
Page 11: Din Front/Rear-Mount
Section Installation Installation ! Optimum performance is obtained when the Power amp (sold separately) Secure the mounting sleeve by using a DIN Rear-mount unit is installed at an angle of less than 60°. screwdriver to bend the metal tabs (90°) into Perform these connections when using the op- Determine the appropriate position place. -
Page 12: Troubleshooting
When you contact your dealer or your nearest play. onds. Press the detach button and push the front Pioneer Service Center, be sure to note the error panel upward and pull it toward you. The repeat Depending on Select the repeat message. -
Page 13: Handling Guidelines
Appendix Additional information Additional information Message Cause Action Message Cause Action Message Cause Action Message Cause Action SKIPPED The connected Play an audio file CHECK USB The USB con- Check that the ERROR-19 Communication Perform one of NOT FOUND No related Transfer songs to USB storage de- not embedded... -
Page 14: Compressed Audio Compatibility (Usb)
When using an iPod, an iPod Dock Connector to (ID3 tag Version 2.x is given priority over Version Playable folders: up to 500 USB Cable is required. 1.x.) Playable files: up to 15 000 A Pioneer CD-IU51 interface cable is also avail- able. For details, consult your dealer. -
Page 15: Specifications
D: C D: C distributed without a license from Microsoft ........10.0 A Pioneer accepts no responsibility for data lost Licensing, Inc. Dimensions (W × H × D): on the iPod, even if that data is lost while this unit is used. - Page 16 Appendix Additional information USB standard specification ........USB 2.0 full speed Maximum current supply ........1 A USB Class ....... MSC (Mass Storage Class) File system ....... FAT12, FAT16, FAT32 MP3 decoding format ..MPEG-1 & 2 Audio Layer 3 WMA decoding format ..
- Page 18 à la poubelle avec vos l’appareil. de démonstration, vous devez afficher les régla- ordures ménagères. Il existe un système de ! Le Pioneer CarStereo-Pass est utilisable seu- ges initiaux. Sélectionnez DEMO (réglage de l’af- collecte séparé pour les appareils électroni- lement en Allemagne.
-
Page 19: Appareil Central
Appuyez sur cette touche pour rappeler des sta- Menu de configuration PRÉCAUTION Indica- tions. ! Utilisez un câble USB Pioneer optionnel (CD- État Lorsque vous mettez le contact d’allumage sur teur Appuyez sur cette touche U50E) pour connecter le lecteur audio USB/ ON après l’installation, le menu de configura-... -
Page 20: Utilisation De L'appareil
Section Utilisation de l’appareil Utilisation de l’appareil ! Pour éviter d’endommager le périphérique Tournez M.C. pour passer à YES. Appuyez TITLE (multilingue) Mise hors service de l’appareil sur M.C. pour sélectionner. ou l’intérieur du véhicule, retirez tous les câ- 1 Maintenez la pression sur SRC/OFF jusqu’à ce # Si vous n’effectuez aucune opération dans les Cet appareil peut afficher les informations textuel- bles et périphériques connectés à... - Page 21 Section Utilisation de l’appareil Utilisation de l’appareil Syntoniseur Remarque Recherche d’une station RDS en utilisant le code POP MUS (Musique populaire), ROCK MUS La fonction AF (recherche des autres fréquences (Rock), EASY MUS (Musique légère), OTH MUS Opérations de base possibles) de cet appareil peut être mise en ser- Vous pouvez rechercher une station qui diffuse un (Autre musique), JAZZ (Jazz), COUNTRY (Coun-...
-
Page 22: Périphérique De Stockage Usb
Section Utilisation de l’appareil Utilisation de l’appareil REGION (stations régionales) Vous pouvez rechercher une station à l’aide de SEEK (réglage de la touche droite/gauche) Retour au dossier racine 1 Appuyez sur BAND/ son code PTY (type de programme). de façon prolongée. Quand la fonction AF est utilisée, la fonction de re- Vous pouvez assigner une fonction aux touches 1 Appuyez sur M.C. - Page 23 Section Utilisation de l’appareil Utilisation de l’appareil Utilisez M.C. pour sélectionner le nom de Affichage des informations Pause de la lecture S.RTRV (sound retriever) fichier (ou nom de dossier) désiré. textuelles 1 Appuyez sur 4/PAUSE pour mettre en pause Améliore automatiquement l’audio compressé et ou reprendre la lecture.
-
Page 24: Utilisation Avancée À L'aide De Touches Spéciales
Section Utilisation de l’appareil Utilisation de l’appareil ! Cette fonction n’est pas compatible avec les Utilisation avancée à l’aide de Lecture de plages musicales Lecture d’une plage musicale dans la catégorie iPod nano 1ère génération. touches spéciales liées à la plage musicale en sélectionnée Le mode APP est compatible avec les modèles 1 Quand une catégorie est sélectionnée, ap-... -
Page 25: Réglages Sonores
Section Utilisation de l’appareil Utilisation de l’appareil — Les réglages des fonctions ne sont pas dispo- Réglages sonores 1 Appuyez sur M.C. pour mettre en service la ! Les réglages de la courbe d’égalisation ajustée nibles. — La fonction de recherche ne peut pas être uti- Appuyez sur M.C. -
Page 26: Réglages Initiaux
Section Utilisation de l’appareil Utilisation de l’appareil Réglages initiaux La fréquence de coupure et le niveau de sortie FM STEP (incrément d’accord FM) Ce réglage vous permet de commuter votre source peuvent être réglés lorsque la sortie haut-parleur sur USB/iPod automatiquement. Important Normalement, l’incrément d’accord FM employé... -
Page 27: Mise En Service Ou Hors Service De L'atténuateur De Luminosité
! Un guidage vocal est émis par un appareil ! Même si vous changez ce réglage, la sortie PW SAVE (économie d’énergie) de navigation Pioneer connecté. ne fonctionnera pas si OFF est sélectionné Le son est coupé, MUTE est affiché et aucun ré- dans SUB.W. -
Page 28: Installation
Section Installation Installation — Ne raccourcissez pas les câbles. 3 Jaune Connexions Cet appareil — Ne coupez jamais l’isolation du câble d’ali- Alimentation de secours (ou accessoire) Important 4 Jaune mentation de cet appareil pour partager l’ali- ! Lors de l’installation de cet appareil dans un mentation avec d’autres appareils. -
Page 29: Amplificateur De Puissance (Vendu Séparément)
Section Installation Installation ! Lors de l’installation, pour assurer une dis- 2 Amplificateur de puissance (vendu séparé- 1 Tableau de bord Vert/noir : Arrière gauche * ou haut-parleur 2 Manchon de montage d’extrêmes graves * ment) persion correcte de la chaleur quand cet ap- 3 Connectez avec des câbles RCA (vendus sé- Violet : Arrière droite + ou haut-parleur d’ex- pareil est utilisé, assurez-vous de laisser un... -
Page 30: Informations Complémentaires
Resélectionnez Quand vous contactez votre distributeur ou le répétition de l’étendue de ré- l’étendue de répé- Service d’entretien agréé par Pioneer le plus lecture pétition de lec- tition de lecture. proche, n’oubliez pas de noter le message d’er- change de ture, l’étendue... - Page 31 Annexe Informations complémentaires Informations complémentaires Message Causes possi- Action correc- Message Causes possi- Action correc- Message Causes possi- Action correc- Message Causes possi- Action correc- bles tive bles tive bles tive bles tive ! Connectez un NO AUDIO Absence de pla- Transférez les fi- N/A USB L’appareil USB...
-
Page 32: Conseils Sur La Manipulation
PRÉCAUTION Les textes russes à afficher sur cet appareil doi- reconnu. ! Pioneer ne garantit pas la compatibilité de ! Les fichiers peuvent ne pas être lus correcte- vent être codés avec un des jeux de caractères sui- tous les périphériques de stockage de masse vants : ment. - Page 33 2 Placez ces fichiers dans un dossier. Compatibilité iPod câble et/ou tout autre média), diffusion/stream- Un câble d’interface CD-IU51 Pioneer est égale- 3 Enregistrez le dossier contenant les fichiers ing via internet, des intranets et/ou d’autres sys- ment disponible. Pour plus de détails, consultez sur le périphérique de stockage USB.
-
Page 34: Caractéristiques Techniques
Annexe Informations complémentaires Caractéristiques techniques Haut-parleur d’extrêmes graves (mono) : Fréquence ....50 Hz/63 Hz/80 Hz/100 Hz/ 125 Hz Généralités Pente ......–18 dB/octave Tension d’alimentation ..14,4 V CC (10,8 V à 15,1 V ac- Gain ......+6 dB à –24 dB ceptable) Phase ....... - Page 36 Se si vuole eliminare questo prodotto, non re la modalità dimostrazione è necessario visua- gettarlo insieme ai rifiuti domestici. Esiste un ! Il CarStereo-Pass Pioneer può essere usato lizzare le impostazioni iniziali. Selezionare sistema di raccolta differenziata in conformità solo in Germania.
-
Page 37: Telecomando Opzionale
Premere per selezionare ATTENZIONE quenza la cartella o l’album pre- ! Utilizzare un cavo USB Pioneer opzionale ! RDS: nome di servizio del Dopo aver installato l’unità, portare l’in- cedente o successivo. programma, informazioni (CD-U50E) per collegare un lettore audio Sezione terruttore della chiave di avviamento su ON. -
Page 38: Funzionamento Dell'unità
Sezione Funzionamento dell’unità Funzionamento dell’unità ! Per evitare danni ai dispositivi o agli interni Attenersi alle procedure descritte di se- TITLE (multilingue) Spegnimento dell’unità guito per configurare il menu. del veicolo, accertarsi di scollegare gli even- 1 Premere e tenere premuto SRC/OFF fino a Per passare all’opzione di menu successiva, oc- Questa unità... - Page 39 Sezione Funzionamento dell’unità Funzionamento dell’unità Sintonizzatore Memorizzazione e richiamo delle Ricerca di una stazione RDS tramite le informazio- CLASSICS stazioni per ciascuna banda ni PTY Funzionamento di base L. CLASS (Musica classica leggera), CLASSIC (Mu- È possibile ricercare programmi di trasmissioni di Uso dei tasti di preselezione sintonia sica classica) tipo generale, come quelli elencati nella sezione...
- Page 40 Sezione Funzionamento dell’unità Funzionamento dell’unità Utilizzare M.C. per selezionare il nome La ricerca di sintonia in modo locale consente di Avanzamento rapido/modalità inversa rapida 1 Premere M.C. per attivare e disattivare la fun- del file (o il nome della cartella) desiderato. 1 Premere e tenere premuto c o d.
- Page 41 Sezione Funzionamento dell’unità Funzionamento dell’unità ! L’iPod si spegne circa due minuti dopo che Messa in pausa della riproduzione S.RTRV (Sound Retriever) Riproduzione di un brano nella categoria selezio- l’interruttore della chiave di avviamento è 1 Premere 4/PAUSE per attivare o disattivare la nata Questa funzione migliora automaticamente l’au- stato portato in posizione OFF.
- Page 42 Sezione Funzionamento dell’unità Funzionamento dell’unità ! iPod touch di quarta generazione (versione Operazioni avanzate tramite i Premere e tenere premuto M.C. per pas- Ruotare M.C. per modificare l’opzione di sare alla modalità di riproduzione collega- del software 4.1 o successiva) menu;...
-
Page 43: Regolazione Dell'audio
Sezione Funzionamento dell’unità Funzionamento dell’unità FAD/BAL (dissolvenza/regolazione del bilancia- La sonorità compensa le deficienze nelle gamme SLA (regolazione del livello della sorgente) 1 Premere M.C. per attivare o disattivare la mento) delle frequenze basse e alte a basso volume. pausa. SLA (funzione di regolazione del livello della sor- 1 Premere M.C. -
Page 44: Uso Della Sorgente Aux
Sezione Funzionamento dell’unità Funzionamento dell’unità Ruotare M.C. per selezionare l’imposta- AUX (ingresso ausiliario) PREOUT (impostazione pre-out) Questa unità è in grado di visualizzare le informa- zione iniziale. zioni di testo dei file audio compressi se sono Dopo averla selezionata, eseguire la procedura Attivare questa impostazione se a questa unità... -
Page 45: Installazione
! Quando questa unità è accesa, i segnali di ! La guida vocale viene emessa da un’unità di controllo vengono trasmessi dal cavo blu/ navigazione Pioneer collegata a questa Con posizione ACC Senza posizione ACC bianco. Collegarlo al telecomando del siste- unità. - Page 46 Sezione Installazione Installazione 3 Giallo e Connettore ISO Questa unità Installazione Riserva (o accessorio) In alcuni veicoli, il connettore ISO potrebbe Importante 4 Giallo essere diviso in due. In questo caso, accertar- ! Controllare tutti i collegamenti e i sistemi Collegare al terminale di alimentazione co- si di collegare entrambi i connettori.
- Page 47 Sezione Installazione Installazione ! Durante l’installazione, per assicurare la cor- Assicurare la fascetta di montaggio utiliz- Montaggio DIN posteriore Inserire le chiavi di estrazione fornite su retta dissipazione del calore quando si utiliz- zando un cacciavite per piegare le linguette entrambi i lati dell’unità...
-
Page 48: Informazioni Supplementari
Se si contatta il rivenditore o il Centro assistenza tella o un brano collegato con- to da tecnologia Pioneer più vicino, accertarsi di annotare il mes- diverso, o quan- tiene file protetti Windows Media saggio di errore. -
Page 49: Linee Guida Per L'uso Corretto
Appendice Informazioni supplementari Informazioni supplementari Durante la guida fissare saldamente il dispositivo Messaggio Causa Azione Messaggio Causa Azione Messaggio Causa Azione di memoria USB. Non lasciar cadere il dispositivo CHECK USB Il connettore Verificare che il ERROR-19 Errore di comu- Eseguire una ERROR-16 La versione del... -
Page 50: Compatibilità Ipod
Compatibilità iPod ATTENZIONE compresso (USB) ! Pioneer non garantisce la compatibilità con Per i nomi dei file (incluse le estensioni) o i nomi L’unità è compatibile esclusivamente con i se- tutti i dispositivi di memoria USB e non si as- delle cartelle, è... -
Page 51: Riproduzione In Sequenza Dei File Audio
Per tali usi è neces- È inoltre disponibile in commercio il cavo di inter- Messa a terra ....Negativa faccia CD-IU51 di Pioneer. Consultare il rivenditore sitivo di memoria USB. saria una licenza specifica. Per dettagli, visitare Consumo massimo .. - Page 52 Appendice Informazioni supplementari Specifiche standard USB ........USB 2.0 massima velocità Alimentazione massima ... 1 A Classe USB ...... MSC (Mass Storage Class) File system ....... FAT12, FAT16, FAT32 Formato di decodifica MP3 ........MPEG-1 & 2 Audio Layer 3 Formato di decodifica WMA ........
-
Page 54: Antes De Comenzar
última vez que la utilizó y si la humo y recalentamiento. llave de encendido del automóvil está en ACC o ! El CarStereo-Pass de Pioneer sólo debe usar- en ON mientras la unidad está apagada. Para Si desea deshacerse de este producto, no lo se en Alemania. -
Page 55: Unidad Principal
PRECAUCIÓN ! RDS: nombre del servicio Una vez instalada la unidad, gire la llave Púlselo también para se- ! Utilice un cable USB Pioneer opcional (CD- del programa, información Sección de encendido hasta la posición ON. leccionar la carpeta o el... -
Page 56: Utilización De Esta Unidad
Sección Utilización de esta unidad Utilización de esta unidad ! Para evitar que el dispositivo o el interior del Siga los siguientes pasos para ajustar el TITLE (idiomas múltiples) Apagado de la unidad menú: vehículo sufran daños, retire todos los cables 1 Mantenga pulsado SRC/OFF hasta que se apa- Para avanzar a la siguiente opción del menú... - Page 57 Sección Utilización de esta unidad Utilización de esta unidad Sintonizador Almacenamiento y recuperación Búsqueda de una emisora RDS por información CLASSICS de emisoras para cada banda Funcionamiento básico L. CLASS (música clásica ligera), CLASSIC (clási- Se pueden buscar programas de tipo general, Uso de los botones de ajuste de como los que se indican en el apartado siguiente.
-
Page 58: Dispositivo De Almacenamiento Usb
Sección Utilización de esta unidad Utilización de esta unidad La sintonización por búsqueda local le permite Regreso a la carpeta raíz Visualización de una lista de los archivos (o las 1 Pulse M.C. para activar o desactivar la función 1 Mantenga pulsado BAND/ . sintonizar sólo las emisoras de radio con señales carpetas) de la carpeta seleccionada NEWS. - Page 59 Sección Utilización de esta unidad Utilización de esta unidad Gire M.C. para cambiar la opción de iPod Para buscar una canción Operaciones avanzadas mediante menú y pulse para seleccionar FUNCTION. el uso de botones especiales Para ir al menú superior de la búsqueda Funcionamiento básico de listas, pulse Gire M.C.
-
Page 60: Reproducción De Canciones Relacionadas Con La Canción Que Se Está Reproduciendo
Sección Utilización de esta unidad Utilización de esta unidad — Pausa Reproducción de canciones Uso de la función iPod de esta 1 Pulse M.C. para activar la función de repro- — Avance rápido/retroceso relacionadas con la canción que unidad desde el iPod —... -
Page 61: Ajustes De Audio
Sección Utilización de esta unidad Utilización de esta unidad Ajustes de audio Ajustes iniciales Se puede ajustar la frecuencia de corte y el nivel ! Los ajustes de la curva de ecualización confi- de salida cuando la salida de subgraves está acti- Importante Pulse M.C. -
Page 62: Cambio Del Ajuste Del Atenuador De Luz
PREOUT (configuración del preamplificador) ! Funciona el sistema de orientación por voz no coinciden, puede que la información de de la unidad de navegación Pioneer conec- Active este ajuste si utiliza un dispositivo auxiliar Las salidas de RCA pueden usarse para conectar texto no se muestre correctamente. -
Page 63: Instalación
Sección Instalación Instalación — Nunca corte el aislamiento del cable de ali- 1 Entrada del cable de alimentación 6 Rojo Conexiones 2 Salida trasera o salida de subgraves mentación de esta unidad para compartir la Conectar al terminal controlado por la llave Importante 3 Salida delantera corriente con otros equipos. -
Page 64: Amplificador De Potencia (Se Vende Por Separado)
Sección Instalación Instalación ! No utilice piezas no autorizadas, ya que pue- 5 Tornillo (M4 × 8) Notas En la instalación, emplee piezas disponibles en # Asegúrese de que la unidad esté firmemente ins- ! Cambie la configuración inicial de esta uni- den causar fallos de funcionamiento. -
Page 65: Información Adicional
Anote el mensaje de error antes de contactar a la visualiza- madamente 30 con su concesionario o con el servicio técnico ción normal. segundos. oficial de Pioneer más cercano. La gama de Dependiendo Seleccione de Retirada y colocación del panel delantero repetición de... -
Page 66: Pautas Para El Manejo
Apéndice Información adicional Información adicional Mensaje Causa Resolución Mensaje Causa Resolución Mensaje Causa Resolución Mensaje Causa Resolución NO AUDIO No hay cancio- Transfiera los ar- CHECK USB El conector Compruebe que ERROR-19 Error de comu- Realice una de ERROR-16 La versión de Actualice la ver- nes. -
Page 67: Compatibilidad Con Audio Comprimido (Usb)
PRECAUCIÓN comprimido (USB) miento USB firmemente. No deje caer el dispositi- ! Pioneer no garantiza la compatibilidad con Sólo se pueden visualizar los primeros 32 caracte- vo de almacenamiento USB al suelo, ya que todos los dispositivos USB de almacena-... -
Page 68: Compatibilidad Con Ipod
2 Coloque esos archivos en una carpeta. Compatibilidad con iPod de distribución de contenido electrónico, como El cable de la interfaz CD-IU51 de Pioneer también 3 Guarde la carpeta que contiene los archivos por ejemplo, aplicaciones de pago por escucha está... -
Page 69: Especificaciones
Apéndice Información adicional Especificaciones Altavoz de subgraves (mono): Frecuencia ....50 Hz/63 Hz/80 Hz/100 Hz/ 125 Hz Generales Pendiente ....–18 dB/oct Fuente de alimentación ..14,4 V CC (10,8 V a 15,1 V per- Ganancia ....+6 dB a –24 dB misible) Fase ...... -
Page 70: Bevor Sie Beginnen
Sie sich an Ihren Händ- dung dieses Produkts zur Gewährleistung seiner gen geschlossen wird. und Ozeanien bestimmt. Der Gebrauch in ande- ler oder an die nächstgelegene PIONEER- ordnungsgemäßen Verwendung durch. Lesen ren Gebieten kann zu mangelhaftem Empfang Kundendienststelle. -
Page 71: Bedienung Des Geräts
Wiedergabe (Shuffle) Drücken, um gespeicher- Audio-Players/USB-Speichergeräts ein optio- oder zufällige Wiedergabe aller te Stationen aufzurufen. nales USB-Kabel von Pioneer (CD-U50E). Titel (Shuffle all) ist aktiviert. Drücken, um den nächs- Werden Zusatzgeräte direkt angeschlossen, ten/vorherigen Ordner können diese hervorstehen und eine Gefahr Die „Sound Retriever“-Funktion... -
Page 72: Grundlegende Bedienvorgänge
Abschnitt Bedienung des Geräts Bedienung des Geräts Setup-Menü Um die Einstellungen abzuschließen, dre- Bei der Suchlaufabstimmung wird normalerweise Entfernen der Frontplatte zum Schutz vor Dieb- hen Sie M.C., um YES auszuwählen. Drücken das 50-kHz-UKW-Kanalraster verwendet. Wenn stahl Wenn Sie nach der Installation den Zündschal- Sie den Regler, um die Auswahl zu bestäti- 1 Drücken Sie die Taste zum Entriegeln der der Alternativfrequenzsuchlauf (AF) oder die Ver-... - Page 73 Abschnitt Bedienung des Geräts Bedienung des Geräts Tuner Speichern und Abrufen von Wählen einer Programmquelle Suchen nach RDS-Stationen anhand eines Pro- Radiostationen für jedes Band 1 Drücken Sie SRC/OFF, um zwischen den fol- grammtyps Grundlegende Bedienvorgänge genden Optionen umzuschalten: Sie können nach Programmen eines generellen Verwendung der Stationstasten TUNER (Tuner)—USB (USB)/iPod (iPod)—...
- Page 74 Abschnitt Bedienung des Geräts Bedienung des Geräts CLASSICS Bei Verwendung des Alternativfrequenz-Suchlaufs TA (Verkehrsdurchsagebereitschaft) Wählen eines Ordners 1 Drücken Sie 1/ beschränkt die Regionalfunktion die Auswahl auf oder 2/ . L. CLASS (Leichte klassische Musik), CLASSIC 1 Drücken Sie M.C., um die Verkehrsdurchsage- Sender, die regionale Programme ausstrahlen.
- Page 75 Abschnitt Bedienung des Geräts Bedienung des Geräts ! Wenn die Zündung des Wagens ausgeschal- Verwenden Sie M.C., um den Namen der Pausieren der Wiedergabe S.RTRV (Sound Retriever) gewünschten Datei (bzw. des gewünschten tet wird (Zündschalter in der Position OFF), 1 Drücken Sie 4/PAUSE, um die Wiedergabe an- Ordners) zu wählen.
- Page 76 Abschnitt Bedienung des Geräts Bedienung des Geräts Erweiterte Bedienvorgänge mit Wiedergabe von Musiktiteln mit Bedienen der iPod-Funktionen Wiedergabe eines Musiktitels der gewählten Kate- speziellen Tasten Bezug zum momentan dieses Geräts über den iPod gorie 1 Drücken und halten Sie M.C. nach Auswahl spielenden Titel Bei Auswahl von CTRL APP kann die Tonausga- der Kategorie gedrückt.
-
Page 77: Audio-Einstellungen
Abschnitt Bedienung des Geräts Bedienung des Geräts — Schnellvorlauf/-rücklauf SHUFFLE ALL (Zufällige Wiedergabe aller Titel) S.RTRV (Sound Retriever) 1 Drücken Sie M.C., um den Einstellmodus auf- — Wahl eines Musiktitels (Kapitels) ! Wenn der Steuermodus auf CTRL iPod ein- zurufen. Verbessert komprimierte Audiodaten und stellt ein 1 Drücken Sie M.C., um die Funktion „Shuffle 2 Drehen Sie M.C., um den Equalizer zu wählen. - Page 78 Abschnitt Bedienung des Geräts Bedienung des Geräts Grundeinstellungen Die Trennfrequenz und der Ausgangspegel kön- FM STEP (UKW-Kanalraster) Mit dieser Einstellung können Sie Ihre Quelle au- nen eingestellt werden, wenn der Subwoofer-Aus- tomatisch auf USB/iPod umschalten. Wichtig Bei der Suchlaufabstimmung wird normalerweise 1 Drücken Sie M.C., um die „Plug and play“- gang eingeschaltet ist.
-
Page 79: Umschalten Der Dimmer-Einstellung
SW—REA ! von einem an dieses Gerät angeschlossenen ! Selbst beim Ändern dieser Einstellung er- PW SAVE (Energiesparmodus) Pioneer-Navigationsgerät Sprachanweisun- folgt keine Ausgabe, wenn die Option OFF gen ausgegeben werden. unter SUB.W gewählt wurde (siehe SUB.W Wenn Sie diese Funktion einschalten, reduzieren Der Ton wird abgeschaltet, im Display erscheint (Subwoofer Ein/Aus) auf Seite 77). -
Page 80: Installation
Abschnitt Installation Installation — Führen Sie das gelbe Batteriekabel nicht ! Das schwarze Kabel gewährleistet die Er- Anschlüsse Netzkabel durch ein Loch in den Motorraum, um die dung. Dieses Kabel wie auch die Erdungska- Wichtig Verbindung mit der Fahrzeugbatterie herzu- bel anderer Produkte (insbesondere von ! Bei der Installation des Geräts in einem stellen. - Page 81 Abschnitt Installation Installation ! Um beim Gebrauch des Geräts eine ord- 9 Blau/Weiß Hinweise Installation ! Ändern Sie die Grundeinstellungen dieses Die Pin-Position des ISO-Anschlusses variiert nungsgemäße Wärmezerstreuung zu ge- Wichtig je nach Fahrzeugtyp. Wird Pin 5 zur Steue- währleisten, ist bei der Installation genügend Geräts.
- Page 82 Abschnitt Installation Installation Befestigen Sie den Montagerahmen mit- DIN-Rückmontage Führen Sie die mitgelieferten Extrak- hilfe eines Schraubendrehers: Die Metall- tionsschlüssel an beiden Geräteseiten ein, Bestimmen Sie die geeignete Position, klammern sind in eine sichere Position (90°) bis sie in der richtigen Position einrasten. damit die Löcher an der Klammer und den zu biegen.
-
Page 83: Zusätzliche Informationen
Sicher- Vor der Kontaktaufnahme mit Ihrem Händler Der Wieder- Ja nach Wieder- Wählen Sie den heitsfunktion zu oder der nächstgelegenen Pioneer-Kunden- holbereich holbereich kann Wiederholbereich deaktivieren. dienststelle sollten Sie sich die angezeigte Feh- ändert sich sich der ausge- erneut aus. - Page 84 Anhang Zusätzliche Informationen Zusätzliche Informationen Sorgen Sie für eine sichere Befestigung des USB- Meldung Ursache Abhilfemaßnah- Meldung Ursache Abhilfemaßnah- Meldung Ursache Abhilfemaßnah- Speichermediums während der Fahrt. Lassen Sie das USB-Speichermedium nicht auf den Boden CHECK USB Der USB-An- Stellen Sie sicher, ERROR-19 Kommunikation Führen Sie einen...
- Page 85 Kompatibilität mit Audio- Zusätzliche Informationen iPod-Kompatibilität VORSICHT Kompression (USB) ! Pioneer kann nicht die Kompatibilität mit Von Dateinamen (einschließlich der Dateierweite- Dieses Gerät unterstützt nur die folgenden iPod- allen USB-Speichermedien gewährleisten rung) bzw. von Ordnernamen können jeweils nur Modelle. Die unterstützten iPod-Softwareversionen und übernimmt keine Verantwortung für...
- Page 86 Einbaugröße ..178 mm × 50 mm × tem Player. http://www.mp3licensing.com. VORSICHT 165 mm Pioneer haftet in keinem Fall für den Verlust von Frontfläche ..188 mm × 58 mm × Daten auf einem iPod, selbst dann nicht, wenn Russischer Zeichensatz 16 mm Windows Media ist eine eingetragene Marke der Datenverlust während der Verwendung die-...
- Page 87 Anhang Zusätzliche Informationen USB-Standard-Spezifikation ........USB 2.0 Full Speed Maximale Stromversorgung ........1 A USB-Klasse ..... MSC (Massenspeicher-Klas- Dateisystem ..... FAT12, FAT16, FAT32 MP3-Decodiermodus ..MPEG-1 und 2 Audio Layer 3 WMA-Decodiermodus ..Vers. 7, 7.1, 8, 9, 10, 11, 12 (2- Kanal-Audio) (Windows Media Player) WAV-Signalformat ....
- Page 88 Deponeer dit product niet bij het gewone veroorzaken. demo uit. Raadpleeg Begininstellingen op blad- huishoudelijk afval wanneer u het wilt verwij- ! De Pioneer CarStereo-Pass wordt alleen in zijde 95 voor meer informatie. deren. Er bestaat een speciaal wettelijk voor- Duitsland gebruikt.
- Page 89 ! Verbind uw USB-speler/USB-geheugen door Als u het contact aanzet na de installatie, ver- roepen. middel van een Pioneer USB-kabel (CD- schijnt het instellingenmenu op het display. Druk op deze toetsen om U50E) (optioneel) met dit toestel. Sluit ze niet...
-
Page 90: Bediening Van Het Toestel
Hoofdstuk Bediening van het toestel Bediening van het toestel Als u NO selecteert, kunt u niet instellen in het in- TITLE (taalinstelling) Het voorpaneel tegen diefstal verwijderen Een signaalbron selecteren stellingenmenu. 1 Druk op de toets Losmaken om het voorpaneel 1 Druk op SRC/OFF om over te schakelen tus- Dit toestel kan tekstinformatie bij een gecompri- los te maken. - Page 91 Hoofdstuk Bediening van het toestel Bediening van het toestel Gemeenschappelijke Weergave van RDS-informatie PTY-lijst Handmatig afstemmen (stap voor stap) wijzigen bedieningsfuncties voor 1 Druk op c of d. NEWS/INFO ! Als PCH (voorkeuzezender) is geselecteerd in instellingenmenu, functie- % Druk op SEEK kunt u niet handmatig afstemmen.
- Page 92 Hoofdstuk Bediening van het toestel Bediening van het toestel BSM (geheugen voor de sterkste zenders) U kunt PTY-informatie (programmatype-informatie) SEEK (instelling linker/rechter toets) Terugkeren naar de hoofdmap 1 Houd BAND/ gebruiken om op een bepaalde zender af te stem- ingedrukt. Met de functie BSM (Best Stations Memory) kunt U kunt een functie toewijzen aan de linker en rech- men.
- Page 93 Hoofdstuk Bediening van het toestel Bediening van het toestel Draai aan M.C. om een andere menuoptie iPod Selecteer een categorie of song met M.C. Een lijst van de bestanden (mappen) in de gese- te kiezen en druk erop om FUNCTION te se- lecteerde map weergeven Basisbediening lecteren.
- Page 94 Hoofdstuk Bediening van het toestel Bediening van het toestel ! iPod touch 1e generatie (softwareversie 3.0 Geavanceerde bediening met Draai aan M.C. om een andere modus te REPEAT (herhaalde weergave) kiezen; druk erop om een modus te selecte- of hoger) speciale toetsen ren.
-
Page 95: Audio-Instellingen
Hoofdstuk Bediening van het toestel Bediening van het toestel FAD/BAL (fader/balansinstelling) SUB.W (subwoofer aan/uit) SLA (bronniveauregeling) 1 Druk op M.C. om de instellingenmodus weer te geven. Dit toestel is voorzien van een in- en uitschakel- Met de functie SLA (bronniveauregeling) kunt u 1 Druk op M.C. - Page 96 Hoofdstuk Bediening van het toestel Bediening van het toestel CLOCK SET (klok) Deze instelling maakt het mogelijk de bron auto- U kunt de RCA-uitgangen gebruiken om een luid- Dit toestel kan tekstinformatie bij een gecompri- matisch naar USB/iPod te laten overschakelen. spreker achterin of een subwoofer aan te sluiten.
-
Page 97: Uitschakeling Van Het Geluid
! Er wordt spraakbegeleiding gegeven door — Verbind de negatieve luidsprekerkabel nooit pen als de rode kabel niet wordt aangesloten een navigatiesysteem van Pioneer dat op dit op de aansluiting die de bediening van de rechtstreeks met de aarding. toestel is aangesloten. - Page 98 Hoofdstuk Installatie Installatie ! Als u een subwoofer van 70 W (2 Ω) gebruikt, — het de besturing van het voertuig kan belem- 6 Ingang bedrade afstandsbediening 9 Blauw-wit Een bedrade afstandsbedieningsadapter kan De pinpositie van de ISO-connector verschilt moet u de subwoofer aansluiten op de vio- meren.
- Page 99 Hoofdstuk Installatie Installatie DIN-voormontage DIN-achtermontage Trek het toestel uit het dashboard. Schuif de montagebehuizing in het dash- Bepaal de juiste positie waar de gaten in board. de klem en in de zijde van het toestel op een lijn liggen. Gebruik voor installatie in een ondiepe ruimte de meegeleverde montagebehuizing.
-
Page 100: Aanvullende Informatie
Windows voor herhaald het herhaalbe- wenste herhaal- schakelaar van met uw leverancier of Pioneer-servicecentrum. standen die met Media DRM 9/10 afspelen reik kan het ge- bereik opnieuw. het voertuig uit, Windows Me- zijn beveiligd. -
Page 101: Aanwijzingen Voor Het Gebruik
Aanhangsel Aanvullende informatie Aanvullende informatie iPod Melding Oorzaak Actie Melding Oorzaak Actie ERROR-19 Communicatie- Probeer de vol- ERROR-16 De versie van de Werk de versie Stel de iPod niet bloot aan hoge temperaturen. Bestandsextensie: .mp3 fout gende mogelijk- iPod-firmware is van de iPod bij. - Page 102 Kijk voor meer informatie op of andere apparaten tijdens gebruik van dit slagapparaat op. http://www.mp3licensing.com. Ook kan gebruik gemaakt worden van een Pioneer product. Merk echter op dat de afspeelvolgorde niet altijd ! Stel een USB-opslagapparaat niet bloot aan CD-IU51 interfacekabel.
-
Page 103: Technische Gegevens
Aanhangsel Aanvullende informatie Aanvullende informatie Dit product bevat technologie die het eigendom Technische gegevens is van Microsoft Corporation en die niet gebruikt Specificatie USB-standaard Algemeen ........USB 2.0 volledige snelheid of gedistribueerd mag worden zonder toestem- Maximale voeding .... 1 A Spanningsbron .... -
Page 104: Перед Началом Эксплуатации
Перед началом эксплуатации Перед началом эксплуатации В случае возникновения PIONEER неполадок Сведения об этом руководстве Pioneer. USB- USB- « USB». iPod iPhone Сведения об этом устройстве «iPod». Демонстрационный режим (ACC) RDS ( ! Pioneer CarStereo-Pass DEMO ( . 112. -
Page 105: Управление Устройством
дистанционного управления 1 2 3 CD-R320 ! RDS: , PTY- FUNCTION a bc iPod: LIST/ENTER MULTI-CONTROL BAND/ (M.C.) iPod) SRC/OFF Индикация на дисплее AUX ( +/– (VOLUME) (TP) MUTE USB- Pioneer (CD- U50E, iPod, « » « ». AUDIO DISP/SCRL... -
Page 106: Основные Операции
Управление устройством Управление устройством CLOCK SET ( M.C. YES. M.C. M.C., (sound M.C. retriever, M.C. Sound Ret- (N). M.C., riever ( FM STEP ( . 112. iPod SRC/OFF. iPod) iPod. Основные операции Установочное меню M.C., 50 (50 )—100 (100 M.C., DEMO ( M.C., SET UP. -
Page 107: Переключение Режима Rds Дисплея
Управление устройством Управление устройством Тюнер Сохранение и вызов из памяти радиостанций для каждого SRC/OFF Основные операции диапазона Кнопки предварительной настройки TUNER ( )—USB (USB)/iPod (iPod) . 107. BAND/ , —AUX (AUX) PTY. (F1, M.C. F2, F3 MW/LW). NEWS/INFO—POPULAR—CLASSICS—OT- ( 1/ M.C. -
Page 108: Настройка Функций
Управление устройством Управление устройством POP MUS ( ), ROCK MUS ( BSM ( SEEK ( ), EASY MUS ( ), OTH MUS PTY ( BSM ( ), JAZZ ( M.C. COUNTRY ( ), NAT MUS ( M.C. MAN ( ), OLDIES ( ), FOLK NEWS/INFO—POPULAR—CLASSICS—OT- PCH (... -
Page 109: Отображение Текстовой Информации
Управление устройством Управление устройством M.C., BAND/ . 4/PAUSE, M.C. S.RTRV (sound retriever, M.C. 3/S.Rtrv BAND/ . Расширенные функции с M.C. использованием специальных 1—2—OFF ( кнопок 2 – . 109. Настройка функций Отображение текстовой информации ! ALL – M.C., iPod ! ONE – ! FLD –... - Page 110 Управление устройством Управление устройством Расширенные функции с Воспроизведение композиций в ! iPod использованием специальных жанре воспроизводимой в кнопок данный момент композиции CTRL AUDIO. M.C. iPod • iPod • OFF. ! OFF – M.C., ! ONE – • Отображение текстовой ! ALL – M.C.
- Page 111 Управление устройством Управление устройством Управление функциями iPod с SHUFFLE ( M.C. устройства iPod M.C., CTRL iPod/CTRL APP M.C., iPod ! FASTER – ! SNG – CTRL APP. ! NORMAL – iPod. iPod nano 1 ! SLOWER – ! ALB – CTRL iPod/ iPod.
-
Page 112: Начальные Настройки
Управление устройством Управление устройством M.C. FAD/BAL ( SLA ( SLA ( M.C. M.C. M.C. OFF ( )—LOW ( )—HI ( CLOCK SET ( SUB.W ( M.C. M.C. M.C., M.C. — MW/LW M.C., NOR ( )—REV ( REAR-SP ( )—OFF ( . - Page 113 Управление устройством Управление устройством M.C., AUX ( PREOUT REAR-SP M.C. (SW). M.C. (FUL). M.C., M.C. EUR ( )—RUS ( AUX. SW—REA PW SAVE ( FUL—SW USB PNP (plug and play) SUB.W SUB.W OFF, USB/ OFF, SUB.W ( iPod. SUB.W ( .
-
Page 114: Приглушение Звука
Управление устройством Установка Соединения — — . 113. — Приглушение звука — — — Pioneer. — MUTE, — . 300 — — — — —... - Page 115 Установка Установка Шнур питания REAR-SP ( . 113. PREOUT ( . 113. . 300 Данное устройство Усилитель мощности (приобретается отдельно) Audio Mute (10 A) 4 5 6 3. 12 . ...
- Page 116 Установка Установка Установка Заднее крепление стандарта DIN (90°). Оставить просторное 5 см место 5 см — — Переднее/заднее крепление стандарта DIN × 8 Демонтаж устройства 60°. Переднее крепление стандарта DIN 60° (M4 × 8)
-
Page 117: Дополнительная Информация
Установка Дополнительная информация Устранение неисправностей Снятие и установка передней панели Сообщения об ошибках Pioneer . 106. USB/iPod NO DEVICE plug and play plug and play. iPod USB/ iPod. FRMT READ NO XXXX NO TITLE). - Page 118 Дополнительная информация Дополнительная информация NO AUDIO N/A USB CHECK USB ERROR-19 – Mass Sto- rage. USB. – OFF, – USB. – USB. – OFF, USB. SKIPPED Windows Media iPod. DRM 9/10. USB. iPod. iPod Windows Me- diaä DRM 9/ iPod iPod iPod PROTECT...
-
Page 119: Рекомендации По Обращению С Изделием
Дополнительная информация Дополнительная информация iPod USB. iPod , 44,1 , 48 ERROR-16 iPod ID3: 1.0, 1.1, 2.2, 2.3, 2.4 ( iPod. iPod. iPod 1.x.) iPod. M3u: iPod. MP3i ( MP3), mp3 PRO: iPod iPod iPod iPod : .wav STOP iPod, 16 (LPCM), 4 (MS ADPCM) iPod... -
Page 120: Поддержка Ipod
Дополнительная информация Дополнительная информация Поддержка iPod iPod iPod Dock Con- iPod. nector USB- - iPod Pioneer CD-IU51 USB, ! iPhone 4 ( 4.1) ! iPhone 3GS ( 3.0.1) ! iPhone 3G ( 2.0) iPod. ! iPhone ( Запоминающее устройство USB 1.1.1) -
Page 121: Технические Характеристики
Дополнительная информация Дополнительная информация Запоминающее устройство USB Авторское право и Технические характеристики «Made for iPod» «Made for iPhone» товарные знаки ... 14,4 iPod iPhone USB. iTunes 10,8 Apple iTunes 15,1 ) Apple. Apple Inc., ..Apple ........10,0 × × ): , 001xxx.mp3 iPod iPhone 099yyy.mp3). - Page 122 IEC-A) ......–18 –24 ....+6 ......« » № 16.06.97 Pioneer Europe ........USB 2.0 ........1 USB ...... MSC (Mass Storage Class) ..FAT12, FAT16, FAT32 ........MPEG-1 2 Audio Layer 3 . .): 5 ........7, 7.1, 8, 9, 10, 11, 12 (Windows Media Player) WAV ..
- Page 124 TEL: 55-9178-4270 先鋒股份有限公司 台北市內湖區瑞光路407號8樓 電話: (02) 2657-3588 先鋒電子(香港)有限公司 香港九龍長沙灣道909號5樓 電話: (0852) 2848-6488 ã 2011 PIONEER CORPORATION. All rights reserved. ã 2011 PIONEER CORPORATION. Tous droits de reproduction et de traduction réservés. Printed in Thailand Imprimé en Thaïlande <KKMZX> <11I00000> <QRD3104-B/N> EW...
Need help?
Do you have a question about the MVH-1400UB and is the answer not in the manual?
Questions and answers