
Related Manuals for Saunier Duval Xeon 18 HE


Summary of Contents for Saunier Duval Xeon 18 HE
-
Page 1: Instructions For Use
High Efficiency Condensing Boiler Instructions for use Installation and servicing Xeon 18 HE G.C. 41-920-38 Xeon 30 HE G.C. 41-920-46... -
Page 2: Guarantee Registration
Guarantee Registration Thank you for installing a new Saunier Duval appliance in your home. Saunier Duval appliances are manufactured to the very highest standard so we are pleased to offer our customers a Comprehensive Guarantee. This product is guaranteed for 24 months from the date of installation or 30 months from the date of manufacture, whichever is the shorter, for parts. -
Page 3: Table Of Contents
Contents The instructions consist of three parts, User, Installation and Servicing Instructions. The instructions are an integral part of the appliance and must, to comply with the current issue of the Gas Safety (Installation and Use) Regulations, be handed to the user on completion of the installation. Important Information ..............4 Manual Handling ..............6 Appliance Safety Devices - User Instructions ......6... -
Page 4: Important Information
It is, therefore, important that no alteration is made to the boiler unless approved, Control of Substances Hazardous to in writing, by Saunier Duval. Any alteration not Health approved by Saunier Duval, could invalidate the certification, boiler warranty and may also infringe Under Section 6 of The Health and Safety at Work the current issue of the statutory requirements. -
Page 5: Water Treatment
Insulation Pads / Ceramic Fibre General Note This boiler is designed to provide central heating These can cause irritation to skin, eyes and the from a fully pumped open-vented or sealed water respiratory tract. system with a fully indirect cylinder. If you have a history of skin complaint you may Once the controls are set the boiler operates be susceptible to irritation. -
Page 6: Manual Handling
Condensate Drain If 2 persons performing lift, ensure co-ordinated movements during lift. The condensate drain, see section 7.3, must not Avoid upper body/top heavy bending - do not lean be modified or blocked. forward/sideways. Pluming from flue terminal Recommend wear suitable cut resistant gloves Like all condensing boilers this appliance will with good grip to protect against sharp edges and ensure good grip. -
Page 7: Maintenance And Servicing - User Instructions
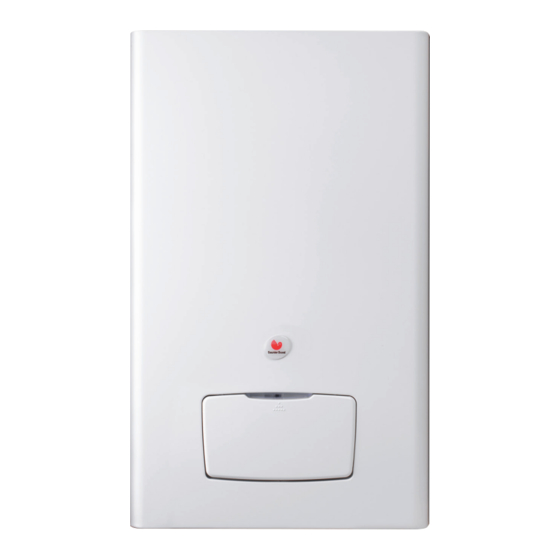
The frequency If in doubt seek advice from Saunier Duval’s own of servicing will depend upon the installation service organisation using the telephone number conditions and usage, but in general, once a year on the inside front cover of this booklet. - Page 8 1. Digital Display 2. Control Light 3. Mains Reset Switch 4. Central Heating Water Temperature Control Knob 5. Controls Fascia Diagram 1...
-
Page 9: Operating The Boiler
The pressure should read at least 0.7 bar, anything less than this figure could indicate a leak and you MUST contact your installer or Saunier Duval’s own Customer Care Line using the telephone number on page two of this booklet. Do not operate the boiler without water. -
Page 10: Technical Information
Regulations. Any alteration that is not approved by The appropriate Buildings Regulations either The Saunier Duval, could invalidate the warranty and Building Regulations, The Building Regulations could also infringe the current issue of the Statutory (Scotland), The Building Regulations (Northern Requirements. - Page 11 600 MAX. 87 MIN. 113.5 INSIDE WALL FIXING FACE CONDENSATE DRAIN CONDENSATE DRAIN Diagram 1.1 1.3 Gas Supply The gas installation shall be in accordance with the relevant standards. In GB this is BS6891. In IE this is the current edition of I.S.813 “Domestic Gas Installations”.
-
Page 12: Condensate Drain
(after 10 mins. 19.8 107 from cold) 1.5 Condensate Drain Xeon 18 HE Aplastic drain pipe must be fitted to allow discharge of condensate to a drain. Condensate should, if possible, be discharged into the internal household draining system. If... -
Page 13: Boiler Location And Ventilation
If the boiler is to be installed in a timber frame building it should be fitted in accordance with the Institute of Gas Engineers document IGE/ UP/7/1998. If in doubt seek advice from the local gas undertaking or Saunier Duval. Diagram 2.1... -
Page 14: Flue Location And Ventilation
3 FLUE LOCATION AND 3.3 Flue Options VENTILATION There are various flue systems to choose from, as follows: 3.1 Flue Position and Length Horizontal telescopic flue pack The maximum permissible horizontal flue length - Pt. No. A2045000 is 10 metres plus the flue terminal, this can be Standard flue pack achieved by use of the accessories, however - Pt. - Page 15 NOTE. If necessary, it is permitted to NOTE. If necessary, it is permitted to increase this dimension up to 600mm max. increase this dimension up to 600mm max. 208 min. to 413 max. 75 min. to 540 max. WALL THICKNESS WALL THICKNESS 87min.
-
Page 16: Terminal Position
3.4 Terminal Position The minimum acceptable siting dimensions for the terminal from obstructions, other terminals and ventilation openings are shown in diagram 3.5. Dimensions shown are measured from edge of terminal. The terminal must be exposed to the external air, allowing free passage of air across it at all times. -
Page 17: Water System
3.5 Terminal Guard 4 WATER SYSTEM A terminal guard is required if persons could come 4.1 Draining Tap into contact with the terminal or the terminal could be subject to damage. Adraining tap must be provided at the lowest point of the system, which will allow the entire system If a terminal guard is required, it must be positioned and hot water system to be drained. - Page 18 4.6 Water Treatment In the case of an existing installation, it is ESSENTIAL that prior to installing the new boiler the system is thoroughly flushed. For optimum performance after installation of a new system, the boiler and its associated central heating system should also be flushed.
- Page 19 Diagram 4.3 4.7 Open (Vented) Water System 4.9 Domestic Hot Water Cylinder The boiler must be supplied from an unrestricted SINGLE FEED INDIRECT CYLINDERS ARE water supply taken from a feed and expansion NOT SUITABLE cistern situated at a maximum height of 27 metres The domestic hot water cylinder must be of the (90ft) above the boiler.
-
Page 20: Expansion Vessel
Where a storage system will not have a vent to Guidance on vessel sizing is also given in the atmosphere the installation must comply with the current issue of BS5449 and BS7074 Part 1, for building regulations and local Water Company IE refer to the current edition of I.S.813 “Domestic bylaws, see also the current issue of BS5546 Gas Installations”. -
Page 21: Installation Preparation
4.17 Filling a Sealed Water System 5 INSTALLATION PREPARATION Provision for filling the system at low level must 5.1 Appliance Pack be made, see diagram 4.4. There must be no permanent connection to the mains water supply, IMPORTANT: With regards to the Health and even through a non-return valve. -
Page 22: Boiler Fixing
For extended side flues the flue hole centre BOILER FIXING should be determined by extending the dashed 6.1 Hanging Bracket Fixing inclined line on the template to the side wall. This dashed line is drawn at 44mm/metre (2.5°) If previously removed, reposition the wall template rise from the boiler. -
Page 23: Gas, Water And Condensate Connections
GAS SERVICE COCK UNION CONNECTOR SHOWN IN OPEN POSITION SPIGOT GAS SERVICE COCK LINER GAS SERVICE PLASTIC COCK OVERFLOW PIPE GAS SUPPLY PIPE IN CONDENSATE DRAIN CONNECTION Diagram 7.1 GAS, WATER AND CONDENSATE 7.3 Condensate Drain Connection CONNECTIONS The condensate drain connection is at the rear of the boiler, see diagram 7.1. - Page 24 22mm compression is the recommended fixing for servicing. (not supplied) FLOW RETURN Diagram 7.2...
- Page 25 Diagram 7.3...
-
Page 26: Flue Preparation Telescopic And Standard
FLUE PREPARATION 8.2 Extension pipes TELESCOPIC AND STANDARD Telescopic Top Rear flue - with the flue elbow temporarily fitted, measure the distance from the outside wall to the butt joint, see diagram 8.3. If 8.1 Flue Length the measurement ‘Y’ exceeds 525mm , then the The components supplied in the Standard and appropriate length of extension pipe is required, Telescopic kit are shown in diagram 8.1. - Page 27 Standard Top Rear flue - with the flue elbow Standard Top Side flue - with the flue elbow temporarily fitted, measure the distance from the temporarily fitted, measure the distance from the outside wall to the butt joint, see diagram 8.4. If outside wall to the butt joint, see diagram 8.6.
-
Page 28: Flue Assembly
8.2 (cont’d) Flue and Air Ducts Push the flue assembly into the wall, externally or internally, initially until the end of the assembly Telescopic: protrudes a short way from the inside face of the wall. This will enable the internal trim ring The Telescopic Flue system MUST NOT be cut. - Page 29 AIR DUCT 13mm TERMINAL CATCH FLUE DUCT L + 11mm Diagram 8.8 Diagram 8.9...
-
Page 30: Electrical Connections
Remove the test cable from the terminal strip wiring cannot be put right under the terms of the and discard. Saunier Duval guarantee. Connect both the mains supply and switched live All system components must be of an approved from the external controls (room thermostat and, type. - Page 31 9.2 Electrical connections - testing 9.3 Pump Connection Carry out preliminary electrical system checks Ensure that a separate pump supply cable is fed as below: to the boiler, see diagram 9.2. 1. Test insulation resistance to earth of mains Remove connection box, see diagram 9.1. cable.
- Page 32 Diagram 9.3...
-
Page 33: Commissioning
(see diagram 10.3) until this is Asanoptionachargeableboileronlycommissioning achieved. service can be provided by Saunier Duval Service by calling telephone No. 01773 525914. (11) Remove analyser probe from the test point and replace the cap. Refit the control panel. - Page 34 10.3 Preparation for Lighting OVERHEAT THERMOSTAT / Isolate the boiler from the mains electrical FLOW RESET SWITCH supply. FLOW THERMISTOR PIPE Test for gas soundness and purge air from the gas supply. Turn on the gas service cock, slot in line with the length of the valve, see diagram 7.1.
-
Page 35: Initial Lighting
10.4 Initial Lighting 10.5 Testing - Gas (Natural Gas only) The lighting procedure of the boiler is fully Case Off Case On automated. Burner CO2 (G20) 9.1+0.2-0.5 9.3+0.3-0.5 Check that all external controls are calling for Burner CO2 10.5+0.3-0.7 10.7+0.3-0.7 heat. -
Page 36: Commissioning - Instructions To The User
10.9 Frost Protection Drain the entire system rapidly whilst hot, using the drain tap at the lowest part of the system. Fill The boiler has a built in frost protection programme and vent the system as described previously in as long as the electricity and gas are left switched section 10.2 Lock or remove the handles from controls valve This device operates the burner and system... -
Page 37: Servicing
Do not use reconditioned or copy Inspect the tips for damage. parts that have not been clearly authorised by Clean away any debris and check the spark gap Saunier Duval. is 3.5mm to 4.5mm. 11.1 General Check the electrode gasket for signs of damage and replace if necessary. - Page 38 11.3 Burner SPARK GAP HEAT 3.5 to 4.5 EXCHANGER Refer to diagrams, 11.2,11.3,11.4 and 11.5. Isolate the gas supply at the gas service cock. SPARK ELECTRODE Disconnect the gas supply at the gas service cock. NOTE: DO NOT DISCONNECT AT THE GAS VALVE.
- Page 39 11.4. Combustion Chamber and Heat 11.6 Combustion Check Exchanger. Once the appliance has been reassembled (apart from the front and inner casing panels) connect Refer to diagram 13.3. a CO2 combustion analyser to the test point Remove loose debris from combustion chamber on the flue elbow or vertical flue adapter, see using a soft brush and vacuum cleaner.
- Page 40 This will allow the digital display to indicate the TABLE 4 ‘flashing’ fan speed on the appliance fascia. 18 HE In the fully clockwise position the display should BURNER %CO Case Off 9.1 + 0.2 - 0.5 be indicating the maximum fan speed of the appliance, 41±1 for 18 HE and 57±1 for 30 HE).
- Page 41 COMBUSTION CHAMBER BURNER SECURING NUTS (5 OFF) GAS VALVE GAS PIPE BRACKET Diagram 11.5 AND SEAL FLUE ELBOW COMBUSTION ANALYSER VERTICAL TEST POINT FLUE ADAPTER Diagram 11.6...
- Page 42 RETAINING FRONT LATCHES CASING PANEL CONTROLS FASCIA USER INTERFACE INNER CASING PANEL SEAL Diagram 11.8 MIN. 11.7 Inner Casing Panel Seal Check. SERVICE POTENTIOMETER MAX. Refer to diagram 11.8. Diagram 11.7 Check the condition of the seal, replace as POTENTIOMETERS required.
-
Page 43: Fault Finding
FAULT FINDING NOTE: RETAINING STRAP Before trying to operate the boiler make sure that : • All gas supply cocks are open and that the gas supply has been purged of air. • There is a permanent mains supply to the boiler. - Page 44 Diagram 12.2...
- Page 45 Diagram 12.3...
- Page 46 Diagram 12.4...
-
Page 47: Replacement Parts
Do not use reconditioned or copy parts that have not been 13.4 Ignition Lead clearly authorised by Saunier Duval. For access, refer to section 13.1. Replacement of parts must be carried out by a competent person. - Page 48 13.9 Rear Insulation Remove the gas supply pipe from the gas valve. For access, refer to section 13.1. When refitting the gas valve take care as it can Refer to section 11.3 for removal of the fan, gas be fitted more than one way. valve and burner assembly.
- Page 49 13.10 Viewing Window FIBRE WASHER For access, refer to section 13.1. Refer to diagram 13.4. CIRCLIP Remove circlip. Remove steel washer. Remove glass. GLASS Remove fibre washer. STEEL Replace in reverse order. WASHER Diagram 13.4 13.11 Heat Exchanger Refer to Manual Handling section on page 6. FLOW AND RETURN PIPE For access, refer to section 13.1.
- Page 50 13.13 Heating Flow Thermistor HEATING FLOW OVERHEAT For access, refer to section 13.1. THERMISTOR THERMOSTAT FLOW Refer to diagram 13.7. PIPE Remove the electrical connections from the thermistor. Remove the retaining clip from the flow pipe. Remove the thermistor from the retaining clip. NOTE: that the polarity of the wiring to thermistors is unimportant.
- Page 51 13.19 Mains Reset Switch Lift off the siphon adapter. Remove the drain connection downstream of the Refer to section 13.18 for access. condense trap. Remove switch from housing, see diagram Remove the two condense trap securing screws. 13.9. Lift up and carefully remove the condense trap Remove electrical leads.
- Page 52 13.22 Main PCB SECURING SCREWS For access, refer to section 13.1 Hinge down the control box, see diagram 13.11. Remove TORX screws and unhook the rear panel. Remove the electrical connections to the PCB. Prise back the two PCB retaining clips and withdraw the PCB.
-
Page 53: Spare Parts
SPARE PARTS When ordering spare parts, contact Saunier Duval’s own service organisation using the telephone number on the inside front cover of this booklet. Please quote the name of the appliance and serial number, to be found on the data label, see diagram 1.2. - Page 54 11 and 12 9 and 10 Diagram 14.1...
- Page 56 Saunier Duval, Nottingham Road Belper,Derbyshire DE56 1JT Tel. 00 44 (0)1773 525914 Fax. 00 44 (0)1773 828070 www.saunier-duval.co.uk...
Need help?
Do you have a question about the Xeon 18 HE and is the answer not in the manual?
Questions and answers