
Subscribe to Our Youtube Channel
Related Manuals for Virtual Reality VRVD630


Summary of Contents for Virtual Reality VRVD630
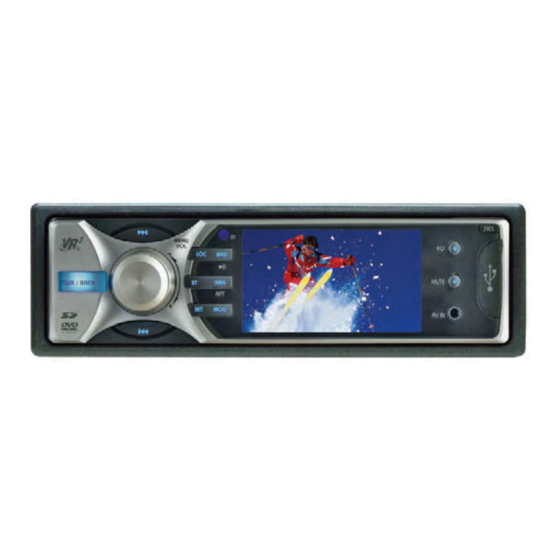
- Page 1 VRVD630 In-Dash AM/FM Stereo with Built-in 3” LCD monitor DVD/CD/VCD/DIVX/MPEG4/MP3/WMA/CD-R/CD-RW Player with USB, SD Card and Video/Audio Auxiliary Input...
-
Page 2: Table Of Contents
We have taken numerous measures in quality control to ensure that your product arrives in top condition and will perform to your satisfaction. In the rare event that your VRVD630 Multi-Media Headunit with AM/FM Stereo Receiver, DVD, VCD, CD, and MP3 Player, Auxiliary Input Jack, SD Card &... -
Page 3: Precautions
PRECAUTIONS Driving a vehicle while viewing a video on this head unit may violate motor vehicle laws, and may result in seri- ous injury, property damage, or death! Please read these important pre- • The unit is only designed for use with 4 speakers. -
Page 4: Disc & Memory Types
Disc & Memory Types The following table contains information on the different functions performed, and the different types of media used by this unit. Disc Type Icon Content Size Playtime Audio/Video 12cm About 2 - 4.5 Hours Audio/Video 12cm About 74 minutes Audio 12cm About 74 minutes... -
Page 5: Before You Install
Before You Install Automotive audio equipment installations can be challenging at times, even to the most wiring, removing and reinstalling interior panels, carpeting, dashboards or other compo- nents of your vehicle, please call our toll-free help line 1-800-445-1797 and our in-house technical service team will answer your installation questions. -
Page 6: Mark Polarity Of Speaker Wires
3. On the masking tape mark the polar- wires will make it easier to connect ity of the speaker wires (+ & - ), as the existing speakers to the VRVD630. well as left or right, and front or rear. Consult the wiring diagram of the exist- ing head unit before disconnecting any 4. -
Page 7: Installation (Vehicle's Brackets)
Installation DIN FRONT-MOUNT (Method A) IMPORTANT! BEFORE THE FINAL INSTALLATION OF THE HEAD UNIT, CONNECT THE WIRING TEMPORARILY, MAKING SURE THE UNIT AND THE SYSTEM WORK PROPERLY. of frame to remove it. Insert the keys supplied with the old unit into the grooves on both sides of the old unit. - Page 8 PARTS Check All Included Parts Open the VRVD630 box and remove all parts, then check all parts and compare them to the parts list in the user manual. For replacement parts contact VR3 Customer Service at customerservice@vr-3.com or call 1-800-445-1797.
-
Page 9: Wiring Connections
Wiring Connections VRVD630 Subwoofer Out Reverse Video In Rear Monitor Out Right Rear Left RCA Line Out Right Front Left Antenn IGNITION RED (+) REVERSE LIGHT ORANGE (+) PARKING BRAKE BROWN (-) MEMORY YELLOW (+) FUSE Connect YELLOW to battery or live + 12 Volts of power... -
Page 10: Location Of The Controls
Insert supplied adaptor into the A/V Input The Black jack on the Adapter accepts a Jack on the front panel of the VRVD630. Stereo Audio 3.5 mm plug from any Stereo The Adapter has two 3.5 mm jacks (one... -
Page 11: Remote Control
Remote Control 1. POWER 13. 0-9 NUMBER P OWE R MODE 2. MODE BUTTONS MUT E B AC K 3. DISP 14. VOLUME UP/ 4. EQ DOWN S LO W DIS P S LO W+ 5. SETUP 15. BACK 6. FAST REVERSE/ 16. - Page 12 Remote Control 1. POWER 14. VOL-/VOL+ Press to turn the unit ON or OFF. Refer to the head unit about VOLUME. 2. MODE 15. BACK Press the MODE button to change the op- Press to come back last operation. 16. MUTE erating mode of the unit.
-
Page 13: Basic Operation
Basic Operations MENUS To access these menus press the vol- ume knob on the faceplate or the MENU button on the remote control 1. Picture Menu RESET SWITCH In playback and AV mode, press the Vol- Immediately after installing or connecting ume knob to access the PICTURE menu, power to the unit, it should be initialized. -
Page 14: Radio Operation
Basic Operations use MONO to improve the sound. ST/ Press the BND button to select the desired MONO is also available on the faceplate. band, FM1, FM2, FM3, or AM, then press and hold the AMS button for 2 seconds. C. - Page 15 DVD Disc Operations Driving a vehicle while viewing a ing, press the Mode button to enter Video mode. video on this head unit may violate Usually a DVD movie has a menu screen motor vehicle laws, and may result for the viewer to choose from. When the in serious injury, property damage, DVD’s menu screen appears use the Arrow or death!
- Page 16 DVD Disc Operations will change as follows; 1/32, 1/16, 1/8, 1/4 Press the ENTER button to choose the item or 1/2 speed. you wish to change. For example; 9. ZOOM 1. Press GO TO, then use the arrow buttons During DVD playback, Press the ZOOM to highlight Chapter on the menu shown Button to increase the picture size.
-
Page 17: Id3 Tags
2. Press the ENTER button to select Time mote control. Disp., then the menu below will be shown. • These options will be used by the VRVD630 if they are available on the disc. If the disc MENU that is inserted does not have these pre-... -
Page 18: Usb/Sd Card Operations
USB/SD Card Operations ing will be displayed on the left side of the start playback. screen. When playing a disc or memory card com- MP3/MP4/WMA/DIVX Disc Operations mat automatically. For example, if the 1. Loading a Disc Press the REL button on the top right side of the faceplate to access the disc slot. -
Page 19: System Setup
System Setup System Setup b) OSD LANGUAGE SETUP Use this menu to select the language dis- To access the Setup menu, press the Setup played on the setup menus and any other button the the remote control. The menu includes; General settings, Audio setup, on-screen display. - Page 20 System Setup CH if you have selected the Dolby Digital 4. Preferences Setup connection and you would like to enjoy NOTE: The Preferences Setup page is only true Dolby Digital surround sound. In this accessible when there is a disc in the unit, setting, the CENTER, REAR speakers are and the disc is stopped.
-
Page 21: System Setup
System Setup SUBTITLE DEFAULT Sets the preferred subtitle language as the Resets the unit to its original settings. Press default when playing DVD. (ONLY if DVD ENTER to reset. supports these languages) PREFERENCE PAGE SCREEN TYPE ENGLISH FRANCH PREFERENCE PAGE AUDIO SPANISH SCREEN TYPE... - Page 22 System Setup 5. Exit Setup Menu Use the following page to exit the Setup menu. EXIT SETUP MENU...
- Page 23 System Setup Setting the Screen Size The following table shows multi-aspect ratios for different types of DVDs T V S c reen S ize Picture Format 4: 3 16: 9 on Disc Pan Scan Letter-box Wide S c reen 4: 3 16: 9 Functions Supported by DVD Discs There are many different functions available on DVD discs.
-
Page 24: Troubleshooting
Troubleshooting DVD Playback Symptom Remedy Cause Leads and connectors are Power doesn't switch ON . Confirm once more that all connections The unit doesn't operate. incorrectly connected are correct A fuse has blown Fix the problem causing the blown fuse and replace the old fuse with a new one of the same capacity Parking Brake Wire is not... - Page 25 Troubleshooting DVD Playback Symptom Remedy Cause Playback is not possible The loaded disc has a different Replace the disc with one featuring the region number from this unit same region number as this unit Dialog language (and The DVD playing does not You cannot switch among multiple feature multiple language languages if they aren't recorded on...
-
Page 26: Specifications
Specifications GENERAL Power Requirement ............12VDC (10.8~16V) Grounding System ..............12VDC Negative Fuse......................15 Amps RMS Power Output ..............4 X 8 Watts Maximum Power Output ..............4 X 40 Watts Dimensions ............178mm X 166mm X 50mm Weight ....................1.55 kg DVD PLAYER SN Ratio ................ - Page 27 Specifications FM TUNER Frequency Range ............87.5~107.9MHz Usable Sensitivity ................ 10dB SN Ratio ................55dB(mono) Distortion ................0.5%(mono) Stereo Separation ..........30dB(65dBu,1KHz) AM TUNER Frequency Range ............530~1710 KHz Usable Sensitivity ................ 30dB Signal-to-Noise Ratio ..............50dB...
-
Page 28: Warranty
Limited Warranty VIRTUAL REALITY VIDEO LABS ® products are designed and manufactured to provide a high level of trouble- free performance. VIRTUAL REALITY VIDEO LABS ® warrants, to the original purchaser, that its products are free from defects in material and workmanship for 30 days from the date of original purchase, as part of our commitment to product excellence.
Need help?
Do you have a question about the VRVD630 and is the answer not in the manual?
Questions and answers