
Related Manuals for Virtual Reality Bluetooth VR500CS-BT


Summary of Contents for Virtual Reality Bluetooth VR500CS-BT
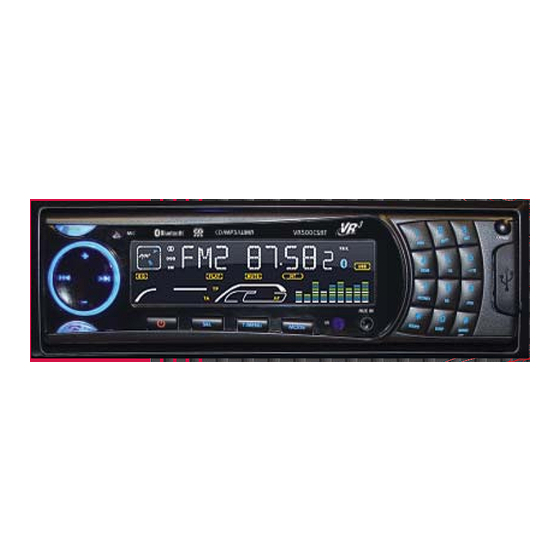
- Page 1 VR500CS-BT AM/FM Stereo In-Dash CD Player with USB Port, SD/MMC Card Slot, RDS, Remote Control, Aux In, and Recording Function...
-
Page 2: Table Of Contents
Welcome! Dear Customer, CONGRATULATIONS. The VR500CS-BT MP3/CD Player with AM/FM Receiver, USB Port and SD Card Slot, Electronic Anti-Shock (ESP) & Fold-down Detachable Face, when used as described, will give you years of dependable service in your car, truck, RV, or mini-van. We have taken numerous measures in quality control to ensure that your product arrives in top condition and will perform to your satisfaction. -
Page 3: Precautions
• This unit will only play the following discs. • This unit does not play files that have Digital Rights Management(DRM). • If you have files that have Digital Rights Management(DRM) you should consult with the vendor that you purchased files from for instructions on proper use. Type of disc CD, MP3, &... -
Page 4: Notes On Installation
Notes On Installation • Disconnect negative battery terminal before starting installation. Consult the vehi- cle’s owner’s manual for proper instruction. • The unit is designed for a 12Volt DC negative ground operation system only. Before installing the unit, confirm that your vehicle is a 12Volt DC negative ground system. •... -
Page 5: Before You Install
Automotive audio equipment installations can be challenging at times, even to the most experienced of installation technicians. If you are not confident working with electrical wiring, removing and re-installing interior panels, carpeting, dashboards or other components of your vehicle, please call your dealer in order to have the unit professionally installed. -
Page 6: Installation (Din Front Mount)
Installation DIN FRONT-MOUNT (METHOD A) NOTE: Unit should be installed horizontally or less than a 30° angle. 1. Insert Half Sleeve into dash-board hole and bend mount tabs outwards to secure it. 2. If necessary, attach the mounting strap to the rear of the unit, then attach it with the supplied nut as in fig. -
Page 7: Installation (Vehicle's Brackets)
DIN REAR-MOUNT (METHOD B) Installation using the screw holes on both sides of the unit. PARTS 2 Metal Keys 1 Hex Nut 1 Mounting Sleeve (not shown) 1 Lock Washer 4 Screws 1 Sheet Metal Screw Installation 1. Screw holes on the side of the unit. 2. -
Page 8: Built-In Microphone
Installation BUILT-IN MICROPHONE The built-in microphone is located on the front left side of the unit. There is no setup re- quired for this microphone and it is tuned to pick-up the voices of the front and rear seat passengers. Built-In Microphone GIVE US A CALL, WE'LL HELP YOU INSTALL. -
Page 9: Wiring Connections
Make sure you have good chassis ground. A good ground connection will eliminate most electrical noise problems. A good chassis ground requires a tight connection to the vehicle’s metal chassis. The area around the ground connection should be clean, bare metal without rust, paint, plastic, dust, or dirt for a good electrical connection. Subwoofer Out White Grey... -
Page 10: Location Of The Controls
Location Of The Controls / SEND 2. VOLUME UP 3. MICROPHONE 4. LCD SCREEN 5. No. 4 / RANDOM 6. No. 1 / PAUSE 7. No. 5 / -10 TRACK DOWN 8. No. 2 / REPEAT 9. No. 3 / INTRO 10. -
Page 11: Remote Control
OPERATING THE REMOTE CONTROL Aim at the front panel of the CD Receiver. The maximum operating distance is about 6M. Make sure that the signal path is not obstructed. Do not drop or throw the remote control. Do expose the remote control to direct sunlight or place next to a heating unit or other heat source. -
Page 12: Basic Operation
Basic Operation 1. TURNING THE UNIT ON / OFF Press any Button to turn the unit ON. On the Faceplate, press and hold the POWER button for 2 seconds to turn the unit off. On the Remote Control press the Power button to turn the unit ON &... - Page 13 Function Menu(cont.) Telvol In order to maintain the sound quality of phone calls, TELVOL is suggested to be be- low 35. Telephone default volume is 25. Enables Pre-set Equlizer settings. Press Volume +/- buttons to choose a pre- set EQ. None -->...
-
Page 14: Radio Operation
Radio Operation CHOOSE RADIO BAND On the faceplate or remote control, press the # / Band Button to change the radio band. The unit has five bands - three FM (FM1, FM2, and FM3) and two AM (AM1 and AM2) Band selects. - Page 15 TA (TRAVEL ANNOUNCEMENT) / TP (TRAVEL PROGRAM IDENTIFICA- TION) Enable or disable TA mode: (Default is OFF) 1) Press TA button once to activate the Traf- fic Announcement function, Press the TA button again to turn off the TA function. 2) When the TA function is activated it will automatically search a station with TA infor- mation.
-
Page 16: Bluetooth
Bluetooth Operation BLUETOOTH FEATURES 1. Bluetooth V2.0 EDR compliant 2. Supports HFP, A2DP, AVRCP. 3. Class 2, Up to 8 meters wireless digital connection. 4. ECHO cancellation with noise elimination 5. Last number redial 6. Display incoming number 7. Call list 8. -
Page 17: Cd Operation
DISC SLOT Press the OPEN button to open the face- plate, then insert a disc into the disc slot. As the disc is read TOC READ will appear on the LCD, then the first track will start to play. • If there is error, “CD ERROR” will be dis- played on LCD. -
Page 18: Usb/Sd Card Operation
CD Operation to resume playback. REPEAT On the Remote or Face Plate, press the No. 2/RPT Button to repeat the same track continuously. “RPT” will appear on the display. Press this button again to stop repeating tracks RANDOM On the Remote or Face Plate, press the No. -
Page 19: File Management & Recording
USB/SD/MMC Card Operation File Management FILE / FOLDER SEARCH In CD, USB, SD/MMC mode, press the AS/PS button to enter search mode. Below is toggle sequence of search modes. File Number Search > File Name Search > Folder Search > Exit search mode NOTE: Audio-CD Disc can only be searched with File Number Search FILE NUMBER SEARCH... -
Page 20: Deleting Files
File Management COPYING A MP3 FILE FROM A CD When copying files from a MP3 CD you may only copy one file at a time. 1. Insert a CD with MP3 audio files into the disc slot. 2. Use the |<< button or the >>| button to start playing the file you wish to copy. -
Page 21: Aux In, Rca, & Subwoofer Control
RCA Out, SUB Out & ID3 Tag 1. RCA OUTPUT The RCA Output Jacks are on the back of the unit. (Refer to Wiring Diagram) This out- put is for connecting an amplifier, equalizer, or other audio componement that requires a pre-amp out connection. -
Page 22: Specifications
Specifications GENERAL Power Supply ...DC 11 - 16 Volt Fuse ...15 Amps Load Impedance ... Compatible 4 to 8 Ohm Speakers Dimensions ...178mm (W)x 175mm(D)x 50mm(H) Power Output ... 4 x 40W (Max) Line Output ... 1.8 V (CD 1K 0dB VOL MAX) FM TUNER Frequency Range ...87.5 - 107.9 MHZ Usable Sensitivity ... -
Page 23: Warranty
VIRTUAL REALITY SOUND LABS trouble-free performance. VIRTUAL REALITY SOUND LABS its products are free from defects in material and workmanship for 30 days from the date of original purchase. As part of our commitment to product excellence, VIRTUAL REALITY SOUND LABS its affi... - Page 24 ©2008 Intellectual Solutions Inc., All Rights Reserved, All designs, logos and images are the exclusive property of Intellectual Solutions Inc. and/or its affiliates. U.S. and Foreign Patents Pending. 072508 Printed in China 00000...
Need help?
Do you have a question about the Bluetooth VR500CS-BT and is the answer not in the manual?
Questions and answers