Table of Contents
Advertisement
Model No. CTL82523
Model No. CTL85023
Serial No.
The serial number is found in the
location shown below. Write the
serial number in the space above.
Serial Number Decal
Q
UESTIONS?
At FreeMotion Fitness, we're
committed to providing complete
customer satisfaction. For assis-
tance, call Customer Care toll-
free at:
1-800-201-2109
Mon.–Fri., 8 a.m.–5 p.m. MST
C
AUTION
Read all precautions and instruc-
tions in this manual before using
this equipment. Keep this manual
for future reference.
U
M
SER'S
ANUAL
Advertisement
Table of Contents

Related Manuals for NordicTrack 9600 Spn Dom Treadmill


Summary of Contents for NordicTrack 9600 Spn Dom Treadmill
- Page 1 Model No. CTL82523 Model No. CTL85023 Serial No. The serial number is found in the location shown below. Write the serial number in the space above. Serial Number Decal UESTIONS? At FreeMotion Fitness, we’re committed to providing complete customer satisfaction. For assis- tance, call Customer Care toll- free at: 1-800-201-2109...
-
Page 2: Table Of Contents
How to Order Replacement Parts ...........46 NordicTrack is a registered trademark of ICON IP, Inc. -
Page 3: Important Precautions
MPORTANT RECAUTIONS WARNING: To reduce the risk of burns, fire, electric shock, or injury to persons, read the following important precautions and information before operating the treadmill. 1. It is the responsibility of the owner to ensure 13. Do not use an extension cord. Do not modify that all users of the treadmill are adequately the power cord or use an adaptor to connect informed of all warnings and precautions. - Page 4 22. When using iFIT.com CDs, you can manually 25. Make sure to perform all maintenance proce- override the speed and incline settings at any dures outlined in this manual. Failure to do so time by pressing the SPEED and INCLINE but- will void the warranty and may result in dam- tons.
-
Page 5: Warning Decal Placement
Apply the decal in the location shown. WARNING: HIGH VOLTAGE! Please do not attempt to service this unit without contacting NordicTrack Commercial Fitness Division Customer Care at (800) 201-2109 HAZARDOUS VOLTAGE Disconnect power before servicing. -
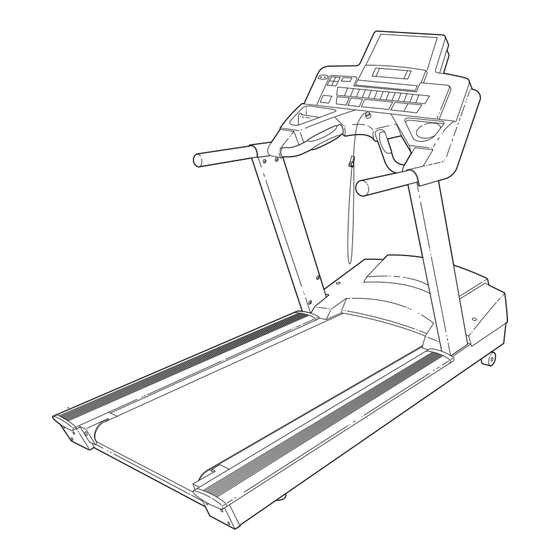
Page 6: Before You Begin
For your benefit, read this manual carefully before front cover of this manual for the location of the decal). using the NordicTrack 9600 treadmill. If you have questions after reading this manual, please call Before reading further, please familiarize yourself with Customer Care toll-free at 1-800-201-2109, Monday the parts that are labeled in the drawing below. -
Page 7: How To Set Up The Treadmill
OW TO P THE READMILL Assembly requires two persons. Set the treadmill in a cleared area and remove all packing materials. Do not dispose of the packing materials until assembly is completed. Assembly can be completed using the included allen wrenches. 1. - Page 8 4. Refer to step 1. While a second person holds the Uprights (95, 97), remove the two Upright Bolts (96). Slide the Uprights (95, 97) fully onto the brackets on the Frame (not shown). Be careful to avoid pinching your hands or the wires.
-
Page 9: How To Move The Treadmill
OW TO OVE THE READMILL Before moving the treadmill, make sure that the power cord is unplugged. Note: It may be neces- sary to disconnect the CATV cable from the tread- mill, depending on how far the treadmill will be moved. -
Page 10: How To Connect The Treadmill
OW TO ONNECT THE READMILL HOW TO CONNECT THE POWER CORD HOW TO CONNECT A CATV CABLE This product must be grounded. If it should malfunc- If your treadmill has the Workout TV console, a tion or break down, grounding provides a path of least CATV cable must be connected to the treadmill for resistance for electric current to reduce the risk of elec- cable TV stations to be viewed. -
Page 11: How To Connect Your Cd Player To The Treadmill
OW TO ONNECT YOUR LAYER TO THE READMILL With the Basic console or the Workout TV console, HOW TO CONNECT YOUR PORTABLE CD PLAYER you can connect a portable CD player to the treadmill and use iFIT.com CDs. (Refer to page 22 for instruc- Plug one end of the included male-to-male audio cable tions about using iFIT.com CDs.) into the jack on the left side of the console. -
Page 12: How To Upgrade Your Console
OW TO PGRADE YOUR ONSOLE Your treadmill has been pre-configured to operate with the Basic console and the Workout TV console (see the drawings below). For information about the features of the Basic console, refer to page 13. To learn about the state-of-the-art Workout TV console, refer to page 26. -
Page 13: How To Use The Basic Console
OW TO SE THE ASIC ONSOLE Note: If there is a thin sheet of clear Matrix plastic on the face of the console, remove it. Main Display FEATURES OF THE CONSOLE workouts, and a unique fitness test program that mea- sures your relative fitness level. - Page 14 Insert the key into the console. CAUTION: Before operating the Note: The console can be set to be used without console, read the following precautions. the key. Refer to step 10 on page 24 for instruc- • Do not stand on the walking belt when turn- tions.
- Page 15 cline will change by 0.5%. The incline range is 0% HOW TO USE THE MANUAL MODE to 15%. Note: After the buttons are pressed, it may take a moment for the treadmill to reach the se- lected incline setting. Insert the key into the console. Follow your progress with the matrix and the Refer to GETTING STARTED on page 14.
- Page 16 Distance—The center Measure your heart rate if desired. section of the main dis- play will show the dis- To measure your tance that you have heart rate, stand walked or run. on the foot rails and hold the hand- Calories—This section grip pulse sensor of the main display will with both hands.
- Page 17 Each program is divided into several time segments HOW TO USE PRESET PROGRAMS of different lengths. The main display will show both the time remaining in the program and the time remaining in the current segment of the pro- Insert the key into the console. gram.
- Page 18 To stop the program, press the STOP button. The Measure your heart rate if desired. time will begin to flash in the main display. To restart the program, press the START button or the Refer to step 6 on page 16. SPEED + button.
- Page 19 Enter your age. HOW TO USE PULSE-DRIVEN PROGRAMS Your must enter your age to use a pulse-driven program. To enter your age, press the + and – but- Pulse-driven programs automatically control the speed tons above the ENTER AGE/WT button. The but- and incline of the treadmill to keep your heart rate near tons can be held down to enter your age quickly.
- Page 20 Each pulse-driven program is divided into one- HOW TO USE THE FITNESS TEST PROGRAM minute segments. (The main display will show both the time remaining in the program and the time re- The fitness test program measures your relative fitness maining in the current segment of the program.) One target heart rate setting is programmed for level.
- Page 21 display and a two-minute cool-down period will Press the START button or the SPEED + button begin. The speed and incline will then decrease. to start the program. When the button is pressed, the main display will show the words LEVEL 1, indicating that the first four-minute level of the fitness test program has begun.
- Page 22 time by pressing the SPEED or INCLINE buttons HOW TO USE IFIT.COM CD PROGRAMS on the console. However, when the next “chirp” is heard, the speed and/or incline will change to the next settings of the CD program. To use iFIT.com CDs, your portable CD player must be connected to the treadmill.
- Page 23 + and – buttons above the ENTER AGE/WT but- HOW TO USE THE MAINTENANCE MODE ton. The delay time can be from 1 to 15 minutes. The console features a maintenance mode that allows you to access information and to view and change var- ious default settings.
- Page 24 Press the ENTER AGE/WT button again to Press the ENTER AGE/WT button again and check for system errors. select a cable TV connection or an antenna connection. If there are no system errors, the words NO SYS- TEM ERRORS will appear in the main display. If a If you are using a cable TV connection, press the + system error appears, call Customer Care toll-free or –...
- Page 25 Next, press the + or – button above the ENTER Press the ENTER AGE/WT button again and AGE/WT button until the words DELETE or ADD delete or add TV channels. appear in the main display. Then, select the next channel that you want to delete or add. Repeat After all valid TV channels have been stored in the this process until you have finished deleting or console’s memory, you can delete unwanted...
-
Page 26: How To Use The Workout Tv Console
OW TO SE THE ORKOUT ONSOLE Note: If there is a thin sheet of clear plastic on the face Flat Screen of the console, Television remove it. Matrix Main Display FEATURES OF THE CONSOLE No matter which mode or program you select, the per- sonal TV will allow you to watch the television program The state-of-the-art Workout TV console offers an im- of your choice while you exercise. - Page 27 Put on headphones (not included) if desired. HOW TO USE THE WORKOUT TV CONSOLE To listen to television The Workout TV console offers exactly the same fea- programs using head- Jack tures as the Basic console, but incorporates a built-in phones, plug your personal TV in addition.
- Page 28 NOTES...
-
Page 29: Preventive Maintenance
REVENTIVE AINTENANCE Regular maintenance is necessary for optimal performance and long treadmill life. Please read and follow all instructions below. If the treadmill is not maintained as described, components may wear excessively, the treadmill may be damaged, and the warranty will be voided. If you have questions about maintenance, call Customer Care toll-free at 1-800-201-2109, Monday through Friday, 8 a.m. - Page 30 TURNING THE WALKING PLATFORM Both sides of the walking platform are designed to be used as walking surfaces. Inspect the walking platform peri- odically for wear. If there is any wood showing through the phenolic coating, or if the surface is damaged, the walking platform should be turned over.
-
Page 31: Six-Month Preventive Maintenance Record
MONTH REVENTIVE AINTENANCE ECORD Photocopy this form and use it to record the preventive maintenance performed on the treadmill. Each copy of the form can be used for six months (26 weeks). When maintenance is performed, write the date in the appropriate spaces. - Page 32 MONTH REVENTIVE AINTENANCE ECORD Photocopy this form and use it to record the preventive maintenance performed on the treadmill. Each copy of the form can be used for six months (26 weeks). When maintenance is performed, write the date in the appropriate spaces.
-
Page 33: Troubleshooting
ROUBLESHOOTING Most treadmill problems can be solved by following the steps outlined in this section. Find any symptoms that apply, and follow the steps listed. If further assistance is needed, please call Customer Care toll-free at 1-800-201-2109, Monday through Friday, 8 a.m. until 5 p.m. Mountain Time (excluding holidays). 1. - Page 34 4. SYMPTOM: THE WALKING BELT IS OFF-CENTER a. If the walking belt has shifted to the left: Remove the key and unplug the power cord. Using the included allen wrench, turn the roller adjustment bolts in the directions shown, 1/4 of a turn each. Be careful not to overtighten the walking belt.
-
Page 35: Exercise Guidelines
NordicTrack. The actual exercise you perform is only heart rate for the recommended period of time. a part of a safe and effective training program. There... - Page 36 3. Hamstring Stretch—Sit with one leg extended. WEIGHT LOSS TIPS Bring the sole of the opposite foot toward you and rest it against the inner thigh of your extended leg. At least four, 30-minute workouts per week, Reach toward your toes as far as possible. Hold along with a reduced-calorie diet, are for 15 to 30 seconds, then relax.
- Page 37 Gradually, your stamina will increase and it will become easier to exercise for longer periods of time. Get FIT with NordicTrack Cool down after aerobic exercise. Effective aerobic exercise has three major parts: frequency, intensity, and time. The acronym "FIT"...
- Page 38 At this some tips that will help ease you into your new level you should strive to achieve your fitness goals. NordicTrack routine. Set realistic short- and long-term goals for yourself. • Begin and end each exercise session with the Frequently re-evaluate your fitness goals and reward stretches on page 36.
-
Page 39: Limited Warranty
IMITED ARRANTY Limited Warranty on Commercial Equipment FreeMotion Fitness, Inc. warrants that all new equipment will be free of manufacturing defects in workman- ship and materials, becoming effective at the date of original installation. Parts repaired or replaced under the terms of this warranty will be warranted for the remainder of the original warranty period only. Labor must be performed at a FreeMotion Fitness commercial service facility or by a FreeMotion Fitness autho- rized commercial service provider. - Page 40 Owner’s Manual It is very important that you read the Manual before operating the Product. Remember to perform the peri- odic maintenance requirements specified in the Manual to assure proper operation and your continued sat- isfaction. Receipt of Parts and Service Simply call Customer Care toll-free at 1-800-201-2109, Monday through Friday from 8 a.m.
-
Page 41: Part List
IST—M CTL82523 CTL85023 ODEL R0105A To locate the parts listed below, refer to the EXPLODED DRAWING on pages 42 and 43. No. Qty. Description No. Qty. Description No. Qty. Description Motor Hood Warning Decal 101 1 Controller Wire Hood Screw Motor Bushing 102 1 Allen Wrench (7/32”) -
Page 42: Exploded Drawing
XPLODED RAWING—M CTL82523 CTL85023 ODEL R0105A R0501A... -
Page 44: How To Order Replacement Parts
5 p.m. Mountain Time (excluding holidays). When ordering parts, please be prepared to give the following infor- mation: • The MODEL NUMBER OF THE PRODUCT (CTL82523 or CTL85023) • The NAME OF THE PRODUCT (NordicTrack ® 9600 treadmill) • The SERIAL NUMBER OF THE PRODUCT (see the front cover of this manual for the location) •...
Need help?
Do you have a question about the 9600 Spn Dom Treadmill and is the answer not in the manual?
Questions and answers