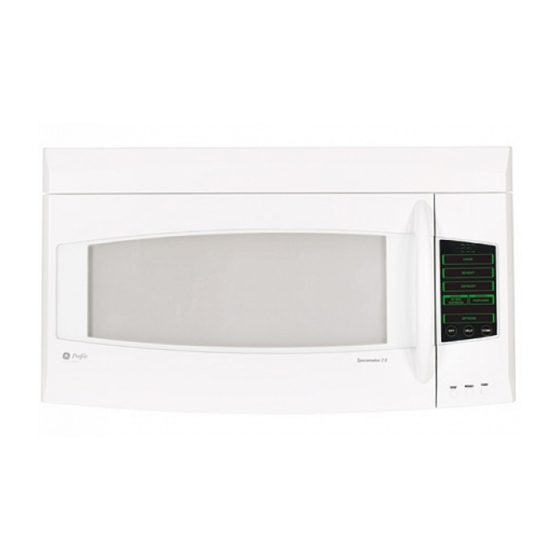
GE Spacemaker JVM2070 Owner's Manual
Ge microwave oven operating instructions jvm2070
Hide thumbs
Also See for Spacemaker JVM2070:
- Installation instructions manual (24 pages) ,
- Owner's manual (46 pages) ,
- Installation instructions manual (48 pages)
Table of Contents
Advertisement
ge.com
Safety Instructions
. . . . . . . . 2-7
Owner's Manual
Operating Instructions
JVM2070
Care and Cleaning . . . . . . . .37-40
Cooking Features . . . . . . . . .12-18
Defrosting Features . . . . . . .21-27
™
Help Features . . . . . . . . . . . . . .34
Home Screen . . . . . . . . . . . . . . .10
Microwave Oven Features . . . . . .8
Microwave Terms . . . . . . . . . . . .36
Options . . . . . . . . . . . . . . . .28-32
Other Features . . . . . . . . . . .33, 35
Power Levels . . . . . . . . . . . . . . .11
Reheating Features . . . . . . .19-20
. . . . . . .41
Consumer Support
Consumer Support . . . Back Cover
Warranty . . . . . . . . . . . . . . . . . . 42
Write the model and serial
numbers here:
Model # ________________
Serial # __________________
Find these numbers on a label
on the left front when the door
is open.
DE68-02561A
49-40478
01-06 JR
Advertisement
Table of Contents

Related Manuals for GE Spacemaker JVM2070


Summary of Contents for GE Spacemaker JVM2070
-
Page 1: Table Of Contents
Home Screen ....10 Microwave Oven Features ..8 Microwave Terms ... .36 Options . -
Page 2: Precautions To Avoid Possible Exposure To Excessive Microwave Energy
PRECAUTIONS TO AVOID POSSIBLE EXPOSURE TO EXCESSIVE MICROWAVE ENERGY (a) Do Not Attempt to operate this oven with the door open since open-door operation can result in harmful exposure to microwave energy. It is important not to defeat or tamper with the safety interlocks. -
Page 3: Safety Precautions
Use this appliance only for its intended purpose as described in this Owner’s Manual. When using electrical appliances, basic safety precautions should be followed, including the following: • This microwave oven is UL listed for installation over electric and gas ranges. -
Page 4: Vent Fan
• In the event of a grease fire on the surface units below the microwave oven, smother a flaming pan on the surface unit by covering the pan completely with a lid, cookie sheet or flat tray. - Page 5 Such use of the microwave oven could result in injury. • Do not boil eggs in a microwave oven. Pressure will build up inside egg yolk and will cause it to burst, possibly resulting in injury.
-
Page 6: Microwave-Safe Cookware
• Use foil only as directed in this manual. When using foil in the microwave oven, keep the foil at least 1 inch away from the sides of the oven. -
Page 7: Grounding Instructions
Filter Kits JX81H—Recirculating Charcoal Filter Kit Filter kits are used when the microwave oven cannot be vented to the outside. Available at extra cost from your GE supplier. See the back cover for ordering by phone or at ge.com. JX81H... -
Page 8: Microwave Oven Features
Only use the shelf when reheating on more than one level. Do not store the shelf inside the oven cavity. Microwave Oven Features ge.com 6 Touchscreen Display. Press the graphics on the interactive display to use the oven features. If the Touchscreen is dark, press HOME or the Touchscreen, or open the door to access the menu. -
Page 9: Easy Guide ™ Menu System
POWER 30 SEC START EasyGuide ™ Menu System ge.com It lets you select as many or as few options as you need for the results you want. Select TIME COOK from the touchscreen. ENTER COOK TIME Enter the cooking time... -
Page 10: Home Screen
• Set the beeper volume • Set the custom functions available on the Home Screen • Set the timer Home Screen ge.com You can reach the Home Screen at any time by pressing the HOME pad below the touchscreen. CUSTOM 2 POPCORN •... -
Page 11: Changing The Power Level
CANCEL to cancel your selection. Variable power levels add flexibility to your microwave cooking. The power levels on your microwave oven can be compared to the surface units on a range. Each power level gives you microwave energy a certain percent of the time. -
Page 12: Cooking Features
(some food types) Beverage type—Starts immediately! Food type. Food type, food weight. Amount of cooking time and power level for first and second cooking programs. Cooking or defrosting function and time of day to start. ge.com MELT DELAY Option More done/Less done... - Page 13 7 Check to make sure the time and power level are correct, and press START on the touchscreen. At the end of Time Cook 1, Time Cook 2 counts down. Cooking Features ge.com TIME COOK TIME COOK 1 & 2...
- Page 14 1 lb. sliced 5 to 7 min. 1 to 2 squash 8 to 11 min. (about 1 lb. each) Cooking Features ge.com Comments In 1 ⁄ -qt. oblong glass baking dish, place 1/4 cup water. In 1-qt. casserole. In 1 ⁄...
- Page 15 • Be sure the outside of the cooking container and the inside of the microwave oven are dry before placing food in the oven. Beads of moisture turning into steam can mislead the sensor.
- Page 16 Layer slices in paper towels on a plate, 4 slices per layer with paper towel between and one on top. 1 to 12 eggs Place eggs in measuring cup or bowl. Stir after 1/2 time. Cooking Features ge.com SELECT FOOD POPCORN POTATO CHICKEN...
- Page 17 TIME COOK for additional cooking time. severely overcooked or burnt food. Cooking Features ge.com To add time: After pressing POPCORN, press MORE DONE within the first 30 seconds after the oven starts for an extra 20 seconds of cooking time. Press MORE DONE again to add another 10 seconds (total of 30 seconds additional time).
- Page 18 Press ENTER when finished or CLEAR to erase the time you entered. 4 Select AM or PM. Press ENTER when finished or BACK to enter a new time. Cooking Features ge.com SOFTEN BUTTER BUTTER 1/2 STICK 1 STICK...
-
Page 19: Reheating Features
Starts immediately! More done/ Less done Food amount Food amount Starts immediately! More done/ Less done ge.com SOUP Comments Cover with lid or vented plastic wrap. Use wide mouth mug. Do not cover. Cover with lid or vented plastic wrap. - Page 20 Reheating Features ge.com 1 From the Home Screen, select REHEAT. 2 From the Reheat Screen, select the food type. 3 Depending on food type, enter the food description, weight or quantity. Press ENTER after each entry or CLEAR to erase the entry.
-
Page 21: Defrosting Features
BY TIME 1 LB QUICK BY FOOD DEFROST SOFTEN MELT DELAY Enter Amount of cooking time Food weight Food type, food weight Starts immediately! Food type Food type, food weight Cooking or defrosting function and time of day to start. ge.com... -
Page 22: Defrosting By Time
A dull thumping noise may be heard during defrosting. This is normal when oven is not operating at High power. Defrosting Features ge.com BY TIME Defrosting Tips • Foods frozen in paper or plastic can be defrosted in the package. Closed packages should be slit, pierced or vented AFTER food has partially defrosted. -
Page 23: Defrosting Food
3 lbs.) Chicken, whole ⁄ to 3 lbs.) Cornish hen Turkey breast (4 to 6 lbs.) Defrosting Features ge.com Time Comments 1 min. 3 to 5 min. 6 to 8 min. 5 to 7 min. Place block in casserole. Turn over and break up after half the time. - Page 24 1 From the Home Screen, select DEFROST. 2 From the Defrost Screen, select 1 LB QUICK DEFROST. The oven starts immediately. Defrosting Features ge.com BY WEIGHT Conversion Guide If the weight of food is stated in pounds and ounces, the ounces must be converted to tenths (0.1) of a pound.
- Page 25 The oven will continue to defrost if you don’t open the door and turn the food. • After defrosting, most meats need to stand 5 minutes to complete defrosting. Large roasts should stand for about 30 minutes. Defrosting Features ge.com DEFROST BY FOOD GROUND BREAD MEAT STEAKS...
- Page 26 BACK to return to the previous screen. 6 Check to make sure the time is correct, and press START on the touchscreen. 7 After removing food from the oven, stir well to complete the melting process. Defrosting Features ge.com SOFTEN BUTTER BUTTER 1/2 STICK 1 STICK...
- Page 27 6 Check to make sure the Delay time is correct, and press START on the touchscreen. The start time will be displayed and will remain until the oven automatically starts at the delayed time. Defrosting Features ge.com DELAY...
-
Page 28: Microwave Options
Reminder time, AM/PM ON time, AM/PM OFF time, AM/PM Microwave Options ge.com • Turn the turntable on or off • Change the microwave features controlled by the Custom 1 and Custom 2 features • Set a reminder to change the charcoal filter •... -
Page 29: Setting The Clock
4 Select AM or PM from the touchscreen. Press ENTER when finished or BACK to enter a new time. Microwave Options ge.com SET CLOCK TIMER To cancel the timer, press TIMER OFF. When time is up, the oven will signal. To turn off the timer signal, press TIMER OFF. -
Page 30: Turntable On/Off
3 Press TURNTABLE to turn the turntable on or off. 4 Press ENTER to save or CANCEL to cancel your selection. Microwave Options ge.com AUTO NITE LITE 6 Using the numbers on the touchscreen, enter the time of day for the light to go off. - Page 31 To turn the reminder on or off without changing the countdown time, simply press ENTER. To cancel your entry and return to the Options Screen, press CANCEL. Microwave Options ge.com EDIT EDIT CUSTOM 1 CUSTOM 2 The CUSTOM 1 and CUSTOM 2 pads on the Home Screen will show the programs you selected for one-touch recall.
- Page 32 CLOCK on the touchscreen. To change the color contrast of the display, press CONTRAST until the screen shows the contrast you want. 4 Press ENTER to save your settings or CANCEL to cancel your settings. Microwave Options ge.com DISPLAY OPTIONS...
-
Page 33: Other Features
CONTROL IS LOCKED will be displayed. Other Features ge.com If you have turned the fan on, you may find that you cannot turn it off. The fan will automatically turn off when the internal parts are cool. -
Page 34: Help Features
3 Select the problem description from the list on the touchscreen. You can find additional problems by pressing MORE at the bottom of the touchscreen, or press BACK to return to the previous screen. Help Features ge.com SELECT HELP FUNCTION PRODUCT FEATURE DETAILS HELP... - Page 35 1 Multiply reheat time by 1-1/2. 2 Switch places after 1/2 the time. Switch places after 1/2 time Switch places after 1/2 time Other Features ge.com For best results Uneven results 2-level reheating To reheat on 3 levels: 1 Turn the turntable off.
-
Page 36: Microwave Terms
Standing time is especially important in microwave cooking. Note that a microwaved cake is not placed on a cooling rack. After covering a dish with plastic wrap, you vent the plastic wrap by turning back one corner so excess steam can escape. ge.com... -
Page 37: Care And Cleaning
The turntable and support can be broken if dropped. Remember, do not operate the oven without the turntable and support in place. Shelf Clean with mild soap and water or in the dishwasher. Do not clean in a self-cleaning oven. Care and Cleaning ge.com... - Page 38 We recommend against using cleaners with ammonia or alcohol, as they can damage the Hints appearance of the microwave oven. If you choose to use a common household cleaner, first apply the cleaner directly to a clean cloth, then wipe the soiled area.
-
Page 39: Replacing The Charcoal Filter
Charcoal The charcoal filter cannot be cleaned. It must be replaced. Order Part No. WB2X10956 from Filter (on your GE supplier. some models) If the model is not vented to the outside, the air will be recirculated through a disposable charcoal filter that helps remove smoke and odors. -
Page 40: Oven Light
Replace the burned-out bulb with a 120 volt, 20-watt halogen bulb (WB36X10213), available Night Light from your GE supplier. 1 To replace the bulb(s), first disconnect the power at the main fuse or circuit breaker panel or pull the plug. -
Page 41: Problem Solver
• This is normal. Press HOME or the touchscreen to activate the control panel. • Replace fuse or reset circuit breaker. • Unplug the microwave oven, then plug it back in. • Check controls. • Make sure the 3-prong plug on the oven is fully wall outlet inserted into wall outlet. -
Page 42: Microwave Oven Warranty
This warranty is extended to the original purchaser and any succeeding owner for products purchased for home use within the USA. If the product is located in an area where service by a GE Authorized Servicer is not available, you may be responsible for a trip charge or you may be required to bring the product to an Authorized GE Service Location for service. - Page 43 Notes ge.com...
-
Page 44: Extended Warranties
Contact Us If you are not satisfied with the service you receive from GE, contact us on our Web site with all the details, including your phone number, or write to: General Manager, Customer Relations Register Your Appliance Register your new appliance on-line—at your convenience! Timely product registration will allow for...
Need help?
Do you have a question about the Spacemaker JVM2070 and is the answer not in the manual?
Questions and answers