HP R1500 - UPS XR User Manual
Ups r12000 xr models user guide
Hide thumbs
Also See for R1500 - UPS XR:
- User manual (115 pages) ,
- Product end-of-life disassembly instructions (12 pages) ,
- Installation instructions manual (9 pages)
Table of Contents
Advertisement
Quick Links
Download this manual
See also:
User Manual
Advertisement
Table of Contents

Related Manuals for HP R1500 - UPS XR


Summary of Contents for HP R1500 - UPS XR
-
Page 1: User Guide
HP Uninterruptible Power System R12000 XR Models User Guide December 2002 (Second Edition) Part Number 146316-002... - Page 2 © 2002 Hewlett-Packard Development Company, L.P. Hewlett-Packard Company shall not be liable for technical or editorial errors or omissions contained herein. The information in this document is provided “as is” without warranty of any kind and is subject to change without notice.
-
Page 3: Table Of Contents
Contents About This Guide Intended Audience............................vii Important Safety Information ........................vii Symbols on Equipment ..........................vii Rack Stability ............................viii Symbols in Text............................viii Text Conventions ............................viii Related Documents............................ix Getting Help ..............................ix HP Technical Support ..........................ix HP Website ............................ix HP Authorized Reseller ..........................x Reader’s Comments ............................x Chapter 1... - Page 4 Contents Placing the UPS in Operate Mode ......................2-6 Initiating a Self-Test ..........................2-6 Audible Alarms............................2-7 Silencing an Audible Alarm ........................2-7 Placing the UPS in Bypass Mode ......................2-8 Shutting Down the System.........................2-8 Chapter 3 LCD Configuration and Status Changing Configuration Parameters......................3-1 Matching the Utility Voltage ........................3-2 Module Locations..........................3-3 Configuring the UPS Using the LCD Menu ....................3-4 Initial Power-Up Display........................3-4...
- Page 5 Contents Appendix A Regulatory Compliance Notices Regulatory Compliance Serial Numbers ....................A-1 Federal Communications Commission Notice ..................A-1 Class A Equipment ..........................A-1 Class B Equipment..........................A-2 Declaration of Conformity for Products Marked with the FCC Logo, United States Only....A-2 Modifications .............................
-
Page 6: About This Guide
About This Guide This guide provides information about operation, configuration, battery maintenance, and troubleshooting for the UPS. Intended Audience This guide is intended for individuals requiring information about the use of UPSs. No installation or service procedure should be carried out by someone other than a technician with specific experience with high-voltage equipment. -
Page 7: Rack Stability
About This Guide Rack Stability WARNING: To prevent personal injury or damage to the equipment, verify that: • The leveling feet are extended to the floor. • The full weight of the rack rests on the leveling feet. • The stabilizing feet are attached to the rack if it is a single-rack installation. •... -
Page 8: Related Documents
About This Guide Related Documents For additional information on the topics covered in this guide, refer to the following documents: • HP Uninterruptible Power System R12000 XR Models Installation Instructions • HP UPS R12000 XR Models Extended Runtime Module Installation Instructions •... -
Page 9: Hp Authorized Reseller
About This Guide HP Authorized Reseller For the name of your nearest HP authorized reseller: • In the United States, call 1-800-345-1518. • In Canada, call 1-800-263-5868. • Elsewhere, see the HP website for locations and telephone numbers. Reader’s Comments To comment on this guide, send an email to ServerDocumentation@hp.com. -
Page 10: Overview
Overview This chapter contains a general overview of the UPS, including an introduction to the model configuration, power management software, available hardware options, and warranties. Read this chapter to become familiar with the features of the UPS before installing the unit. UPS Features The following features make this UPS versatile and easy to use: •... -
Page 11: Communication Ports
Overview Communication Ports The UPS includes two integrated communication ports that allow for in-band communication. CAUTION: To avoid damage to the equipment, use only communications cables with the part number 201092-002 (12-foot serial interface cable). One is supplied with your kit. This UPS/Computer Interface Cable carries power and is specifically designed for UPS communications. -
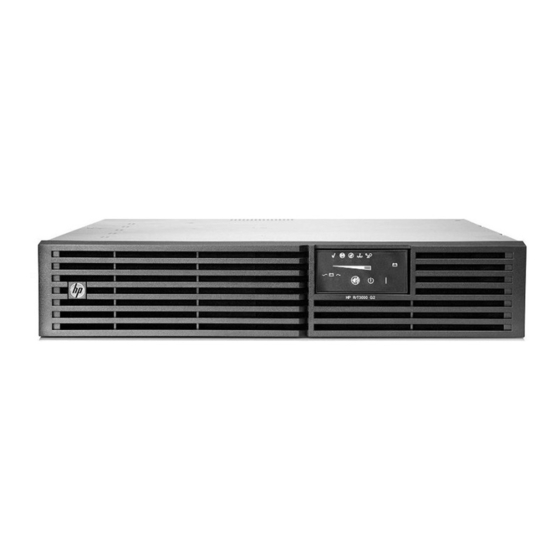
Page 12: Front View
Overview Front View The front view of the UPS is shown in Figure 1-1 and Figure 1-2. Figure 1-1: UPS bezels Supervisory bezel Control bezel Blank bezels Figure 1-2: UPS indicators and control buttons UPS control buttons LED indicators of UPS status LCD status and configuration screen LCD configuration control buttons Refer to the section, “Front Panel LEDs,”... -
Page 13: Rear View
Overview Rear View The rear view of the UPS is shown in Figure 1-3 and Figure 1-4. Figure 1-3: UPS rear view Terminal block wiring punch-out points Bypass switch C a rd l P o rt / S e ri a S N M P Figure 1-4: Close-up of the UPS rear view Option slot for future expansion... -
Page 14: Power Management Software
Overview Power Management Software Power management software ensures maximum power reliability of computer systems through comprehensive control of UPSs. Specifically, power management software: IMPORTANT: Not all UPSs are equipped to support the entire feature set listed below. • Manages graceful shutdown of attached equipment during utility power failures. •... -
Page 15: Extended Runtime Modules
Overview Extended Runtime Modules The UPS supports up to two ERMs (extended runtime modules). Each ERM consists of two battery packs in a 4U chassis. When operating at the recommended 80 percent load, one ERM will extend the available UPS runtime by up to 15 minutes. For more information, refer to the HP website at www.hp.com. -
Page 16: Warranties
Overview Warranties To back up the wide range of features offered with the UPS, a three-year limited warranty is provided. $25,000 Computer Load Protection Guarantee In addition to the limited warranty, a $25,000 Computer Load Protection Guarantee (provided by the original equipment manufacturer) is offered. IMPORTANT: The $25,000 Computer Load Protection Guarantee is offered only in North America. -
Page 17: Operation
Operation This chapter contains information on operating the UPS. Topics include using the front panel controls, LCD display, LED indicators, and modes of operation. Knowledge of these features is helpful when configuring the system and performing more advanced functions on the unit. NOTE: See the instructions included with the UPS kit for installation considerations and procedures. -
Page 18: Front Panel Indicators
Operation Front Panel Indicators The UPS displays information through the following indicators: • Front panel LCD • Front panel LEDs Front Panel LCD The front panel has a two-line LCD display that guides you through operation, configuration, and monitoring of the UPS. Refer to the section, “Changing Configuration Parameters,” in Chapter 3 for configuration instructions. -
Page 19: Front Panel Leds
Operation Front Panel LEDs The front panel has five LEDs that indicate the status of the UPS. Figure 2-3: Front panel LED display Item Description Symbol Meaning Utility Solid greenNormal operation Rapidly flashing green—Ramp Up mode Slowly flashing greenStandby mode (batteries charging) Battery Solid amberOn Battery Flashing amberBattery test in progress... -
Page 20: Modes Of Operation
Operation Modes of Operation The UPS has five modes of operation, indicated by the LEDs (see Figure 2-3): • Standby Mode — When utility is present and output is off, the Utility LED (1) flashes slowly. — Power is not available at the UPS output. —... -
Page 21: Turning On The Main Circuit Breaker
Operation Turning on the Main Circuit Breaker After a qualified electrician has properly wired the UPS to utility power and has installed all electronics modules, turn on the AC mains at the service panel. All LEDs come on for three seconds as part of the system initialization. -
Page 22: Placing The Ups In Operate Mode
Operation Placing the UPS in Operate Mode Press the On button (1) to transfer the system to Operate mode. Figure 2-4: UPS On button Initiating a Self-Test NOTE: On initial utility startup, you may receive an Inverter Uncalibrated alarm. Press the On button to start the autocalibration process, which lasts approximately 2 to 4 minutes. -
Page 23: Audible Alarms
Operation Because a portion of the self-test requires battery power, the self-test will not be initiated if the batteries are less than 90 percent charged. If the UPS detects a problem, the Alarm LED (4) will be solid red (see Figure 2-3), and the UPS sounds an audible alarm. NOTE: Refer to Chapter 5, “Troubleshooting,”... -
Page 24: Placing The Ups In Bypass Mode
Operation IMPORTANT: Although the Test/Alarm Reset button silences the audible alarm, the condition that caused the alarm still exists. Refer to Chapter 5, “Troubleshooting,” for information on what to do if the UPS detects an alarm condition. The silencing of the alarm is based on the current set of alarms that is present when the button is pressed. -
Page 25: Lcd Configuration And Status
LCD Configuration and Status This chapter contains information on configuring the UPS. Topics include a description of the LCD display menu structure, procedures for configuring the UPS, and the details of the various UPS status options. Proper configuration of the UPS and familiarity with the menu display is important in performing other functions on the unit, such as maintaining the battery and troubleshooting alarms. -
Page 26: Matching The Utility Voltage
LCD Configuration and Status Matching the Utility Voltage Use configuration parameters to select the UPS voltage range (see Table 3-1). • If the utility voltage is within this range, the UPS supplies utility power to the output receptacles. • If the utility voltage is outside this range, the UPS supplies battery power to the output receptacles. -
Page 27: Module Locations
LCD Configuration and Status Module Locations Use the LCD menus to configure either the main module or one of the electronics modules. Figure 3-2: UPS electronics modules, numbered Main Module MM (includes all four electronics modules) Module M1 Module M2 Module M3 Module M4 HP Uninterruptible Power System R12000 XR Models User Guide... -
Page 28: Configuring The Ups Using The Lcd Menu
LCD Configuration and Status Configuring the UPS Using the LCD Menu Use the LCD display to access the menu. The menu contains information about the status, meters, battery data, and firmware version of the main module or other electronics modules. Use the menu options to set the time or date, conduct an LCD display test, and change the system setup. -
Page 29: Menu Map
LCD Configuration and Status Menu Map Status Main Module Module (M) 1 through 4 Status/Alarms Status Alarms Load Power Off System Normal Load Power On On Battery On Bypass Manual Bypass OverLoad Autocalibrating Starting Up Module Failure Unknown Stats xx UPS Supporting Load Meters Main Module... - Page 30 LCD Configuration and Status Alarms If an alarm exists, one or more of the following alarms will display on the LCD panel. For a descriptive list of alarm causes, refer to the section, “LCD Alarm Troubleshooting,” in Chapter 5. Table 3-2: Alarms Ambient Over Temperature Inverter Startup Failure Automatic Shutdown Pending...
-
Page 31: Displaying The Status Or Active Alarms
LCD Configuration and Status Displaying the Status or Active Alarms The first option on the Main Menu is Status. Select this option and press the Enter button to display the status or active alarms for either the main module or electronics modules M1-M4. Main Menu Status Main Module (MM) Status and Alarms... - Page 32 LCD Configuration and Status Table 3-3: Main Module Status Options continued LCD Display Explanation Starting Up The full UPS or a single electronics module (hot-swap) is ramping x Alarms Module Failure At least one electronics module or the Supervisory Board has experienced a critical failure and is off-line.
-
Page 33: Displaying The Frequency, Power, And Current Data
LCD Configuration and Status Displaying the Frequency, Power, and Current Data Select Meters on the Main Menu to view the frequency, power and current of either the main module or any of the other electronics modules. Main Menu Meters This submenu provides information on virtual meters monitoring the UPS voltages. Scroll up and down through the menu using the Center button. -
Page 34: Displaying The Battery Charge Data
LCD Configuration and Status Displaying the Battery Charge Data Select Battery Data on the Main Menu to display the amount of charge on the battery in 10 percent increments. Main Menu Battery Data When the UPS goes into Battery mode, the following LCD displays. Battery Discharge The remaining battery energy is shown, where the tag “1h= ”... -
Page 35: Displaying The Firmware Version
LCD Configuration and Status Displaying the Firmware Version Select Firmware Vers on the Main Menu to display firmware versions for UPS components. Press the Enter button to view selections. Table 3-7 lists the firmware version options. The version number is represented by xxx. Main Menu Firmware Vers Table 3-7: Firmware Version Options... -
Page 36: Changing The System Setup Options
LCD Configuration and Status Changing the System Setup Options Select System Setup from the Main Menu to enter the menu for changing system setup options. Main Menu System Setup To change the system setup, you must enter the correct password. Use the Center and Enter buttons to select the six digits for the password [0-9 and A-Z]. - Page 37 LCD Configuration and Status Choose the baud rate for the selected serial port or option slot. Table 3-9: Baud Rate Setup LCD Display Explanation Baud Rate Choose the baud rate for the serial port or option slot selected above. Here, x is the baud rate and can be equal to 1200, 2400, 4800, 9600 (default) or 19200.
- Page 38 LCD Configuration and Status The Parallel Mode menu options allow you to configure the UPS mode of operation, as described in Table 3-11. Table 3-11: Parallel Mode Choices LCD Display Explanation Parallel Mode Select this option to configure the UPS for capacity operation. For Capacity Parallel Mode Select this option to configure the UPS for redundant operation.
-
Page 39: Battery Maintenance
Battery Maintenance This chapter contains information for properly maintaining batteries for the UPS, including battery charging, replacement, disposal procedures, and warranties. Precautions WARNING: There is a risk of personal injury from the hazardous energy levels associated with UPS batteries. The maintenance and replacement of batteries must be carried out by an HP authorized service representative. -
Page 40: Charging Batteries
Battery Maintenance Charging Batteries When connected to utility power, the UPS automatically charges the batteries. No user intervention is required while the UPS is in use. Refer to the section, “Care and Storage of Batteries,” in this chapter for information on keeping the batteries charged while the UPS is in extended storage. -
Page 41: Obtaining New Batteries
Battery Maintenance Obtaining New Batteries New batteries may be required within 30 to 60 days when the Alarm LED is solid red and the LCD displays either a Battery Needs Service or Battery Test Failed alarm. Obtain spare batteries for the UPS when this occurs. HP supplies spare battery modules for UPS R12000 XR models. -
Page 42: Removing And Replacing The Battery Module
Battery Maintenance Removing and Replacing the Battery Module WARNING: To prevent personal injury, prepare the area and observe all materials-handling procedures for removing the battery module, which weighs 27 kg (60 lb). 27 kg 60 lb To remove the battery module: 1. -
Page 43: Testing The New Battery Module
Battery Maintenance Testing the New Battery Module After installing the new battery module, press the Test/Alarm Reset button. Refer to the section, “Initiating a Self-Test,” in Chapter 2 for more information on initiating a self-test. IMPORTANT: The UPS schedules the battery test, but will not execute the test until the batteries are at least 90 percent charged. -
Page 44: Care And Storage Of Batteries
Battery Maintenance Care and Storage of Batteries To maximize the life of batteries: • Minimize the amount of time the UPS uses battery power by matching the UPS configuration with utility voltage. Refer to the section, “Matching the Utility Voltage,” in Chapter 3 for more information. -
Page 45: Troubleshooting
Troubleshooting This chapter serves as a troubleshooting guide when problems occur with the UPS. Solutions for main and electronics module alarms are provided, as well as general solutions for UPS problems that occur both during and after startup. LCD Alarm Troubleshooting Table 5-1 lists the possible alarms of the main module or electronics modules. - Page 46 Troubleshooting Table 5-1: Main Module and Electronics Modules M1-M4 Active Alarms LCD Display Possible Cause Suggested Action x Alarms The UPS triggers an alarm if the Ensure that unit grills are not blocked ambient temperature inside the and fans are operational. Correct any Ambient Over detecting electronics module exceeds environmental conditions that may be...
- Page 47 Troubleshooting Table 5-1: Main Module and Electronics Modules M1-M4 Active Alarms continued LCD Display Possible Cause Suggested Action x Alarms At least one battery string fails to reach At least one battery module needs float voltage after charging for 24 replacing.
- Page 48 Troubleshooting Table 5-1: Main Module and Electronics Modules M1-M4 Active Alarms continued LCD Display Possible Cause Suggested Action x Alarms The UPS detects that one or more of Contact Technical Support for the internal module fuses has failed. assistance. Fuse Failure x Alarms An electronics module detects a Check the ventilation grills for...
- Page 49 Troubleshooting Table 5-1: Main Module and Electronics Modules M1-M4 Active Alarms continued LCD Display Possible Cause Suggested Action x Alarms The UPS encounters an internal Switch to Maintenance Bypass mode, communication problem that is and contact Technical Support for Internal hindering its ability to successfully assistance.
- Page 50 Troubleshooting Table 5-1: Main Module and Electronics Modules M1-M4 Active Alarms continued LCD Display Possible Cause Suggested Action x Alarms This alarm is triggered by one of the The electronics module may not be following events: fully seated. Remove the bezels and Inverter Startup ensure that each of the electronics •...
- Page 51 Troubleshooting Table 5-1: Main Module and Electronics Modules M1-M4 Active Alarms continued LCD Display Possible Cause Suggested Action x Alarms The UPS detects that the current load Reduce the load level to clear the has exceeded 120% of the maximum alarm.
- Page 52 Troubleshooting Table 5-1: Main Module and Electronics Modules M1-M4 Active Alarms continued LCD Display Possible Cause Suggested Action x Alarms The UPS has been manually switched This is a normal operation. into Maintenance Bypass mode. The On Manual Bypass UPS can no longer protect the load or condition the utility to the load.
- Page 53 Troubleshooting Table 5-1: Main Module and Electronics Modules M1-M4 Active Alarms continued LCD Display Possible Cause Suggested Action x Alarms At least one electronics module Contact Technical Support for generates this alarm when it detects an assistance. Rectifier Input abnormally high input current. The Over Current detecting module shuts down to protect itself from damage.
-
Page 54: Problems During Startup
Troubleshooting Problems During Startup If problems occur when starting the UPS, refer to Table 5-2 for possible causes and suggested actions. Table 5-2: Troubleshooting problems during UPS startup Symptom Possible Cause Suggested Action UPS will not start. There is no utility power. Unit is hardwired. - Page 55 Troubleshooting Table 5-3: Troubleshooting problems after UPS startup continued Symptom Possible Cause Suggested Action All LEDs flash on and off Autocalibration is in process. Wait for continuous Utility together. LED. Redundant LED and audible Redundancy mode is not Reduce output load to allow alarm frequently turn on and available.
-
Page 56: Carepaq Considerations
Troubleshooting Table 5-3: Troubleshooting problems after UPS startup continued Symptom Possible Cause Suggested Action UPS frequently switches The utility voltage is frequently Update the configuration. between utility and battery outside the UPS operating power. range. Utility LED and Redundant UPS is on utility. The UPS is operating LED are lit. -
Page 57: Regulatory Compliance Notices
Regulatory Compliance Notices Regulatory Compliance Serial Numbers For the purpose of regulatory compliance certifications and identification, your product has been assigned a unique series number. The series number can be found on the product nameplate label, along with all required approval markings and information. When requesting compliance information for this product, always refer to this series number. -
Page 58: Class B Equipment
Modifications The FCC requires the user to be notified that any changes or modifications made to this device that are not expressly approved by Hewlett-Packard Company may void the user’s authority to operate the equipment. HP Uninterruptible Power System R12000 XR Models User Guide... -
Page 59: Cables
Regulatory Compliance Notices Cables Connections to this device must be made with shielded cables with metallic RFI/EMI connector hoods in order to maintain compliance with FCC Rules and Regulations. Canadian Notice (Avis Canadien) Class A Equipment This Class A digital apparatus meets all requirements of the Canadian Interference-Causing Equipment Regulations Cet appareil numérique de la classe A respecte toutes les exigences du Règlement sur le matériel brouilleur du Canada. -
Page 60: Japanese Notice
Regulatory Compliance Notices Japanese Notice BSMI Notice HP Uninterruptible Power System R12000 XR Models User Guide... -
Page 61: Battery Replacement Notice
Regulatory Compliance Notices Battery Replacement Notice Your computer is equipped with an internal lithium battery or battery pack. There is a danger of explosion and risk of personal injury if the battery is incorrectly replaced or mistreated. Unless specific replacement instructions are provided as part of this guide, replacement is to be done by an authorized service provider using the HP spare designated for this product. -
Page 62: Appendix B Electrostatic Discharge
Electrostatic Discharge Preventing Electrostatic Damage A discharge of static electricity from a finger or other conductor may damage system boards or other static-sensitive devices. This type of damage may reduce the life expectancy of the device. • To prevent electrostatic damage when setting up the system or handling parts, avoid hand contact by transporting and storing products in static-safe containers. -
Page 63: Appendix C Specifications
Specifications This appendix provides the physical, input, and output specifications for the UPS. Topics include battery descriptions, battery runtime estimates, and environmental requirements when operating the UPS. Physical Specifications Table C-1: Physical Specifications Feature Metric U.S. Dimensions Width 44.45 cm 17.50 in Height 44.45 cm... -
Page 64: Output Specifications
Specifications Output Specifications Table C-3: Output Specifications Nominal Power Rating UPS Model Effective VA R12000 XR WW 12000 12000 (worldwide) Configuration Available Nominal Characteristics Setting (VAC) Output Voltage (VAC) Voltage The input voltage 200, 208, 220, 230 or 240 range is 200-240 VAC ±20%. -
Page 65: Battery Specifications
Specifications Battery Specifications Table C-4: Battery Specifications Feature Specification Type Each module contains maintenance-free, sealed, valve regulated lead-acid (VRLA) batteries with an eight-year minimum float service life at 25°C (77°F). Voltage The battery module has a battery string voltage of 48 Vdc. - Page 66 Index alarms cables audible 2-7 FCC compliance statement A-3 LCD display 3-6 part number 1-2 list of 3-6 care and storage of batteries 4-6 silencing 2-7 CarePaq services 5-12 cautions, defined viii charging the UPS batteries 2-5, 4-2 commissioning test, for batteries 4-5 batteries communications setup choices, defined 3-12 caring for 4-6...
- Page 67 Index displaying electronics module firmware version 3-11 hardware configuration electronics modules alarms 3-8 options 3-13 electronics modules status 3-8 setting 3-13 main module alarms 3-7 hardware options 1-5 main module status 3-7 Extended Runtime Module (ERM) 1-5 UPS battery charge data 3-10 MPDU 40 A WW 1-5 disposing of used batteries 4-5 PDU 40 A WW 1-5...
- Page 68 Index UPS modules 3-3 LED display 2-3 rear view, UPS 1-4 LED indicators, modes of operation 2-4 Redundancy mode 2-4 LEDs 2-3 regulatory compliance notices BSMI A-4 cables A-3 Canadian A-3 main module Class A equipment A-1 alarms 3-7 Class B equipment A-2 status 3-7 device modifications A-2 main module status options...
- Page 69 Index weight vii placing in Operate mode 2-6 symbols on equipment vii placing in Standby mode 2-8 system setup rear view 1-4 baud rate setup 3-13 removing battery module 4-4 communications setup 3-12 repairing 5-12 entering a password 3-12 replacing the batteries 4-3 hardware configuration 3-13 self-test 2-6 language 3-14...
Need help?
Do you have a question about the R1500 - UPS XR and is the answer not in the manual?
Questions and answers