Table of Contents
Advertisement
Quick Links
Advertisement
Table of Contents

Subscribe to Our Youtube Channel
Related Manuals for ViewSonic VMP74


Summary of Contents for ViewSonic VMP74
- Page 5 & pending. DTS and the Symbol are registered trademarks, & DTS 2.0+ Digital Out and the DTS logos are trademarks of DTS, Inc. ViewSonic Network Media Player ViewSonic Network Media Player are warranted for 1 year for labor from the date of the first customer purchase.
-
Page 6: Safety Information
5℃~35℃. To reduce the risk of fire, electric shock, or interference, do not expose this appliance to rain, liquid, moisture, excessive hear, or naked flame. For technical support, please go to http://www.viewsonic.com/ CAUTION: About Laser and LED Use of controls or adjustments, or performance of procedures other than those specified herein my result in hazardous radiation exposure. -
Page 7: About This Guide
This Guide gives you the fastest way for hand-on procedure to enjoy multimedia with Media Player. There will be user manual which describes usage information in detail. Please go to http://www.viewsonic.com/ to download it. For a quick help, press “ ” on the remote control unit. -
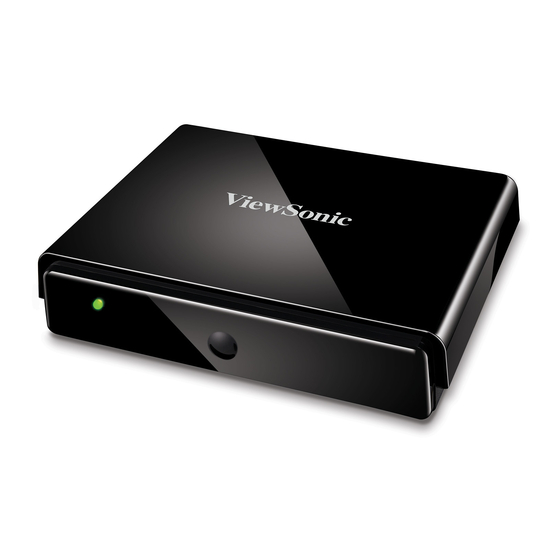
Page 8: Hardware Overview
Hardware Overview Power light FRONT VIEW On/Off S/PDIF HDMI USB Host Ethernet Power Button eSATA /USB Host Composite REAR VIEW Power Off: Press the Power On/Off button on the back of the set for more than 5 seconds in operation status will force the system to power off. Front Panel LED indicator: Red●- Power Off Green●- Operating... -
Page 9: Peripheral Connections
Peripheral Connections Video & Audio HDMI is for high-definition video and audio quality. Optical S/PDIF is for high-quality audio connected to an external decoder or amplifier. hotkey on the remote control unit and go to ‘System Setup’ → ‘Audio Please press Setup’... -
Page 10: Network Connection
Network Connection The ETHERNET port is to connect to your home router for local area network or Internet connection. You can also connect your Media Player to the network wirelessly by ViewSonic authorized wireless USB dangle. Using Remote Control Use the remote control to navigate menus, and to select and watch videos, listen to music, or... - Page 12 The table below describes the function of the remote control unit. REMOTE CONTROL KEY FUNCTION TABLE KEYPAD FUNCTION DESCRIPTION POWER Turn On/Off “Media Player”. HOME Return to Main Menu. Switch the video output among HDMI 1080p (AUTO), HDMI OUTPUT 480p and CVBS. HELP Hot key on-screen instruction SETUP...
-
Page 13: Networking Diagram
Networking Diagram A connection example with network and peripheral devices is shown below. NETWORK DIAGRAM Setup for TV Mode Please set the video sources selector of your TV to match the connection from your Media Player. For example, if you use HDMI, set the TV to use the corresponding HDMI input port. 1. -
Page 14: Wired Network Setup
Wireless Network Setup Media Player supports wireless Ethernet with an USB Wi-Fi dongle (option) authorized by ViewSonic. To enable wireless function, please make sure you plug the Wi-Fi dongle into the USB port before Powering on Media Player. - Page 15 wireless connection. 1) Press “SETUP” key on the remote control or select “SETUP” from the OSD Main Menu. 2) Select “Network Wizard” from setup main menu to start setup wizard and choose “Wireless” 3) Media Player scans and displays all available networks, choose yours from the list.
- Page 16 The key length of each Key Format is described in the table below. For WPA and WPA2 format, Media Player will detect and switch automatically. Key Format Key Length WEP64(ASCII) 5 digits WEP64(HEX) 10 digits WEP128(ASCII) 13 digits WEP128(HEX) 26 digits WPA-PSK/WPA2-PSK 8 digits or more 6) Input password and choose “Enter”...
-
Page 17: Network Neighborhood (Samba Client)
Network Neighborhood (Samba Client) As long as the network is linked and no firewall is blocking the shares from remote sites, there is no additional set-up needed to enable this feature. Following steps show how to access media through the Samba Client Protocol. 1. -
Page 18: Local Storage Device
2. Press “down” button to choose the one target machine and navigate to the destination files you require to play. Local Storage Device The Media Player supports USB flash disk, USB Hard Disk Drive and SATA HDD. In the main menu, just choose “Removable Device”... -
Page 19: Copy/Delete Local Files From Pc
3. Select the origin and destination. Press “OK” if you wish to proceed or “Cancel” to go back. Copy/Delete local files from PC Media Player supports the Samba server function which shares your local storage space with client PC over the network. For PC with Windows OS, it’s generally known as My Network Places. At first, check the IP address number of your Media Player in the “Network Setup”... - Page 20 1. Click “My Network Place” icon on your PC. My Network Place 2. Click “Entire Network” → “Workgroup” 3. The default Media Player Local HDD location is “Workgroup”, double click it and you will see the Media Player (ShareHDD) icon. 4.
-
Page 21: Playing Music, Photo And Video Files
5. Manage your media files between your PC to Media Player local HDD by using PC mouse. Playing Music, Photo and Video files For the supported file format and container in detail, please refer to the relevant section in the user manual. -
Page 22: Web Browser & Rss
3. Photo Slide Show: Press ‘OK’ for the selected photo in thumbnail for full-screen display and press again to start the slide show. Location Directory Navigation: Press “MENU” button to go to the ‘directory’ bar on the top of the screen. By pressing the numerical buttons on the remote control unit during navigation will sort the file names by the first letter of the key pressed. - Page 23 The homepage of the web browser will be displayed, then you can surf the web using the remote control or keyboard and mouse. An USB keyboard and mouse can be plugged to facilitate the web surfing. Make sure you plug it before you enter the Web Browser. A virtual keyboard is also available there by pressing to facilitate input.
- Page 24 can be viewed with RSS format used to publish frequently updated works—such as blog entries, news headlines, audio, and video. An RSS document (which is called a "feed", "web feed" or "channel") includes full or summarized text, plus metadata such as publishing dates and authorship. Web feeds benefit publishers by letting them syndicate content automatically.
-
Page 25: Play Internet Radio- Live 365
BBC iPlayer BBC iPlayer is an internet television, P2P, and cable television service, developed by the BBC to extend its former RealPlayer-based "Radio Player" and other streamed video clip content. The audio/video is streamed directly over the Internet. You can select whatever radio station, TV episodes by remote control. -
Page 26: Viewing Youtube Content
5. Select a radio station from list, and press “OK”, “Play”, or “Left” button to play it. Note: indicates stands for a radio station. Note: Press “BGM” hotkey on the remote control to add the station into background music list. Viewing Youtube Content You can use the Media Player to view Youtube content without the need for a PC. - Page 27 2. Navigate to choose one to play. Because the content is directly streaming from the Internet, please be patient while the content is loading. The waiting time depends on your local network bandwidth, the wide area network situation...
-
Page 28: Firmware Upgrade
and the situation of correspondent YouTube server. 3. Video Search Please select the search icon on the right side, a virtual keyboard will be there for a keyword is available to key-in search criteria. ShoutCast You can use the Media Player to listen to ShoutCast station without the need for a PC. Follow these steps: 1. - Page 29 4. When the process is successfully finished, Media Player will reboot automatically. 5. An alternative way is to choose “USB Upgrade”. The latest firmware binary file is compressed and located on http://www.ViewSonic.com , ensure that the correct file/model is located before downloading.
- Page 30 file must be stored in the root directory for Media Player to detect it. 7. Insert the USB disk/stick to the USB port of Media Player. Go to “Setup” → “Version” → “Firmware upgrade” → “USB Upgrade”. 8. Select “Yes” to proceed or “No” to cancel. Please note that the power must not be turned off or interrupted during the process, otherwise the firmware can be corrupted and Media Player will not able to boot again.
-
Page 31: Miscellaneous Settings
Miscellaneous Settings System Language and other settings apply on system are configured in the “System Setup” of the Setup Main Menu”. Please select the item that you want to configure and press “OK” button or “Right” button on remote control to enter sub menu. After configuration, please press “Back” button or “Left”... - Page 32 Below table is a brief description for the System Setup selection. Item Name Value Language Language Selecct TV System/ Video Output/ TV Mode Setup Configure Video Scale Digital Audio Output/Analog Audio Setup Configure Audio Output Brightness/ Contrast/ HUE/ Video Setup Adjust Saturation Music, Photo &...
-
Page 33: Tv Mode Setup
TV Mode Setup You can go to the “System Setup” menu to change the TV mode setting, including the Video output, TV system and aspect ratio. TV Mode Setup Table Item Name Value Video Output P-SCAN Composite/ HDMI Select TV System NTSC/480p/720p60/1080i60/1080p24/1080p60 Select Aspect Ratio... -
Page 34: Video Setup
Audio Setup Table Item Name Value Digital Audio Output On/Off Switch MONO R/ MONO L/ MIX Analog Audio Output Select MONO/ STEREO SPDIF/RAW PCM Select SPDIF/RAW PCM Select SPDIF/RAW PCM Select WMA PRO SPDIF/RAW PCM Select Video Setup Video Setup Table Item Name Value Brightness... -
Page 35: Other Settings
Other Settings You can set the screen saver time as well as time shown on the main page. Network Setup This section contains the following items: Media Setup This section contains the following items, description in detail is below the table. -
Page 36: Auto Sync
TABEL OF MEDIA SETTINGS Category Item Name Value Photo Display Opton Slide Show Time 1 sec ~ 3 min Select Orientation Correction Enable/Disable Switch Transition Effect Enable/Disable Switch Off/ Repeat One/ Repeat Music Playing Option Music Auto Play Switch All/ Random Video Playing Option Video Playing Videos Switch... -
Page 37: Hard Disk Share Setup
Hard Disk Share Setup If you have installed a Hard Disk Drive into your media player, you can see the “Hard Disk Share Setup” here to configure your HDD Settings. You can rename the default Share Name, Group Name, User Name and Password by onscreen keyboard. -
Page 38: Troubleshooting
Trouble Shooting No Television display or Poor quality image. 1. Make sure your TV is turned on and switched to the correct input. 2. Make sure Media Player is turned on and switched to the correct TV mode. If the TV Mode that you are using is not correct one for your television, you may not be able to see any image displayed. - Page 39 Media Player does not receive a valid IP Address 1. Verify that a working DHCP server is on your network. PCs on the network should get IP addresses in the correct range. 2. You can use a Static IP Address of there is a problem connecting to the server. If you are using a wireless network, verify that Media Player is associated with the correct SSID, and that the WEP settings on Media Player match the setting on your access point.
- Page 40 Q: Why I can not see anything on TV screen? Answer: Please select the correct signal input on your TV set. If you connect the player to TV via HDMI, please select the right HDMI port no. on your TV set; If you connect the player to TV via A/V port, please select the right A/V port no.
Need help?
Do you have a question about the VMP74 and is the answer not in the manual?
Questions and answers