RCA 25423 User Manual
4-line intercom speakerphone
Hide thumbs
Also See for 25423:
- User manual (84 pages) ,
- Quick start manual (6 pages) ,
- User manual (44 pages)

Related Manuals for RCA 25423


Summary of Contents for RCA 25423
- Page 1 4-Line Intercom Speakerphone User’s Guide Quick Guide on Pgs. 7-14 Please read this manual before operating product for the first time. Model 25423/24...
-
Page 2: Equipment Approval Information
Important Information Equipment Approval Information Your telephone equipment is approved for connection to the Public Switched Telephone Network and is in compliance with parts 15 and 68, FCC Rules and Regulations and the Technical Requirements for Telephone Terminal Equipment published by ACTA. 1 Notification to the Local Telephone Company On the bottom of this equipment is a label indicating, among other information, the US number and Ringer Equivalence Number (REN) for the equipment. -
Page 3: Icensing
2 Rights of the Telephone Company Should your equipment cause trouble on your line which may harm the telephone network, the telephone company shall, where practicable, notify you that temporary discontinuance of service may be required. Where prior notice is not practicable and the circumstances warrant such action, the telephone company may temporarily discontinue service immediately. -
Page 4: Nterference
Important Information Interference Information This device complies with Part 15 of the FCC Rules. Operation is subject to the following two conditions: (1) This device may not cause harmful interference; and (2) This device must accept any interference received, including interference that may cause undesired operation. -
Page 5: Table Of Contents
quipmEnt pprovAl nformAtion ... 3 icEnsing ... 3 EAring ompAtibility ... 4 ntErfErEncE nformAtion fcc rf r AdiAtion xposurE ... 7 ntroduction ... 8 Arts HEcklist ElEpHonE EquirEmEnts ... 9 Ayout mportAnt nstAllAtion nformAtion mportAnt nstAllAtion uidElinEs ... 11 nstAlling tHE HonE ...13 ...13... - Page 6 Table of Contents eViewing hone ..32 emoRy eViewing nteRcom )...32 memoRy Location diting umBeR iRectoRy emoRy diting umBeR nteRcom emoRy )..33 emoRy ocation toRing umBeR toRing auSe emoRy iaLing toRed umBeR ...34 emoRy eLete LeaR ...34 LeaR emoRieS .
-
Page 7: Introduction
Number Caller ID Service to know who is calling when the phone rings and Call Waiting Caller ID Service to know who is calling while you are on the phone. NOTE: Features and options pertaining to Caller ID do not apply to Model 25423. Important Information... -
Page 8: Connections And Setup
VERY IMPORTANT: In order to achieve full system operation (i.e. intercom, page, etc.), Line 1 must be connected and must be common to all phones connected to the system. Only other 25423, 25424, 25425, 25413, 25414, 25415, 25403 and 25404 models are compatible for full system operation. -
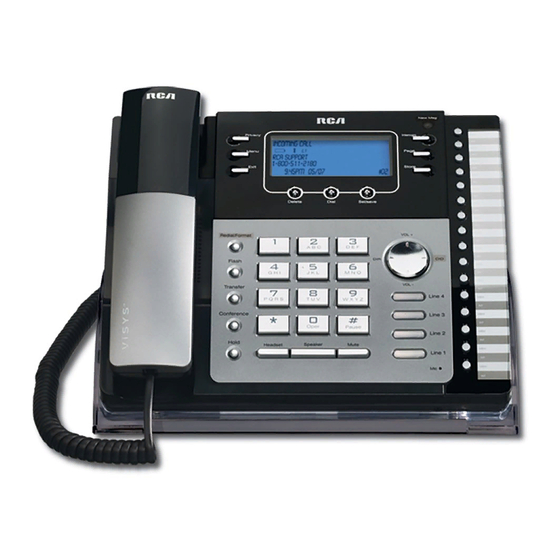
Page 9: Base Layout
Base Layout Privacy (button) Menu (button) Exit (button) Redial/Format (button) Flash (button) Transfer (button) Conference (button) Hold (button) (button) Headset (button) New Message (indicator) only applicable for Model 25424 Dial (button) Delete (button) Sel/Save (button) Speaker #Pause (button) (button) Mute (button) Connections &... -
Page 10: Important Installation Information
Connections & Setup Important Installation Information • Never install telephone wiring during a lightning storm. • Never install telephone jacks in wet locations unless the jack is specifically designed for wet locations. • Never touch non-insulated telephone wires or terminals, unless the telephone line is disconnected from the network. -
Page 11: Installing The Phone
Installing the Phone The phone may be connected to two 2-line (RJ14C) wall jacks or four single line (RJ11C) wall jacks to accomodate all four lines. IMPORTANT: Install batteries and connect the AC power supply to the base unit as outlined in steps 1 through 3 below prior to connecting the telephone line cords to insure for proper base station ID assignment. -
Page 12: Unit Initialization
Connections & Setup 4. Connect the telephone line cords: If you have two dual line wall jacks installed in your home or office, plug one end of the straight telephone line cord tagged as “LINE 1+2” into the jack marked LINE 1 + 2 and one end of the other straight line cord into the other jack on the back of the base. -
Page 13: Ata P Ort
Features like intercom, page and call transfer may be used among the units, but Line 1 must be common for all 25423, 25424, or 25425 units for these features to work properly. You may choose to share or privatize lines 2, 3 and 4. -
Page 14: Other System Phones
Programming the Telephone Other System Phones 1. Press Line 1. 2. Look at all the other stations. If they all indicate line 1 is being used, the connection is correct. 1. Press the Intercom button. The display shows INTERCOM and ENTER CALLING PHONE ID. 2. -
Page 15: S Peakerphone ,.H Andset ,. And .H
CID records for the corresponding telephone line. OFF disables the function for the corresponding telephone.) Press the Sel/Save button. NOTE: On Model 25423 you cannot select CID ON/OFF. 7. Press the Sel/Save button to save. The cursor automatically moves to Line 2. -
Page 16: Delay Ring
Programming the Telephone Delay Ring Use this setting to delay the Central Office ring. 1. Press the Menu button while in standby mode. 2. Use the Vol (+ or -) buttons to scroll up or down to SET PHONE OPTIONS. 3. -
Page 17: Phone Name
Phone Name 1. Press the Menu button while in standby mode. 2. Use the Vol (+ or -) buttons to scroll up or down to SET PHONE OPTIONS. 3. Press the Sel/Save button. 4. Use the Vol (+ or -) buttons to scroll up or down to SET PHONE NAME. 5. -
Page 18: O .U Nknown /B Locked
Programming the Telephone Flash Time 1. Press the Menu button while in standby mode. 2. Use the Vol (+ or -) buttons to scroll up or down to SET PHONE OPTIONS. 3. Press the Sel/Save button. 4. Use the Vol (+ or -) buttons to scroll up or down to SET FLASH TIME. 5. -
Page 19: Display Contrast
7. Press the Sel/Save button to save. NOTE: Not applicable to Model 25423. Display Contrast Adjust the display contrast to one of four contrast levels. 1. Press the Menu button while in standby mode. 2. Use the Vol (+ or -) buttons to scroll up or down to SET LCD CONTRAST. -
Page 20: Manually Setting The Time And Date
7. Press the Sel/Save button to save. NOTE: If you make a mistake, press the Delete button to erase all digits. NOTE: Not applicable to Model 25423. Manually Setting the Time and Date The time and date is automatically set when you receive the first CID call. To manually reset the time and date, follow the steps below. -
Page 21: Hour Format
Hour Format You may set this phone to a 12 or 24-hour format. The default is 12-hour format. 1. Press the Menu button while in standby mode. 2. Use the Vol (+ or -) buttons to scroll up or down to SET TIME & DATE. 3. -
Page 22: Making Calls With The Speakerphone
Basic Operation Making Calls with the Speakerphone 1. Press the Speaker button and the phone automatically selects the priority line. If the priority line is occupied, it selects an open line. Press a Line button to select a line. 2. Wait for a dial tone then dial a phone number. 3. -
Page 23: Nswering .C Alls
Answering Calls If you receive a call on the priority line, 1. Pick up the handset (handset mode), OR 2. Press the Speaker button (speakerphone mode), OR 3. Press the Headset button (headset mode). 4. When finished, hang up the handset, or press the Speaker button or press the Headset button. -
Page 24: Do Not Disturb
Basic Operation Do Not Disturb This feature is set at individual telephones to disable (silence) an incoming ring signal, intercom ring, or page. When there is an incoming call or an intercom call, the status indicators function as normal but the phone will not ring. 1. -
Page 25: Redial
Redial 1. Pick up the handset (handset mode), or press the Speaker button (speakerphone mode), or press the Headset button (headset mode) and the priority line is automatically selected, Press a line button to select other line. 2. Press the Redial/Format button NOTE: The redial function will not operate if the number to be redialed contains more than 32 digits. -
Page 26: Message Waiting
While in use, a line can be secured so that no one else can listen to the conversation. This feature only applies to 25423, 25424, 25425, 25413, 25414, 25415, 25403 and 25404 phones. However, other phone which are not compatible with these models can still access the line. -
Page 27: Ne -T Ouch .I Ntercom
3. Press another line button and dial the telephone number of the party you want to conference with. 4. Press the Conference button. 5. Speak to both parties. NOTE: If you have more than one line on hold, and you want to have a conference call, you must first select the line on which you want to conference. -
Page 28: C Onference .C Alls
Intercom Calls Answering an Intercom Call When you receive an Intercom call, the Intercom indicator flashes red, and the display shows the caller’s name and phone ID. NOTE: If you want to answer with the speakerphone, press the Intercom or Speaker button. If you want to answer by headset, press the Headset button (the headset must be connected). -
Page 29: Summary Screen
NOTE: Paging can be done with optional headset. plug in headset, press Headset button, the press Page button. Caller ID Note: The Caller ID section of this user’s guide is not applicable to Model 25423. Summary Screen The summary screen shows the current time, current date, number of CID records to be reviewed and total number of records saved to CID memory. -
Page 30: D Eleting . A .Cid.r Ecord
Caller ID Reviewing CID Records Saving a CID Record to the Intercom/Memory Log or to Phone Book Memory 3. To store data in the Phone Book Directory, press the DIR button, To store data in the Intercom/Memory Log, press a memory log button (1-16). Deleting a CID Record To delete the record shown in the display, press the Delete button once. -
Page 31: Memory
7-digits: 7-digit telephone number (i.e.555-5555) 10-digits: 3-digit area code +7-digit telephone number (i.e.425-555-5555) 11-digits: long distance code 1 +3-digit area code +7-digit telephone number (i.e. 1-425-555-5555) 4. To dial the displayed number, select a line or press Dial again. If You Did Not Program Your Local Area Code 1. -
Page 32: Memory
Memory 4. Use the touch-tone pad to enter a name (up to 21 characters). More than one letter is stored in each of the number keys. For example, to enter Bill Smith, press the 2 key twice for the letter B. Press the 4 key 3 times for the letter I. Press the 5 key 3 times for the letter L. -
Page 33: Memory
Editing a Name or Number Stored in Phone Book (Directory) Memory 1. Press the DIR button. 2. Use the Vol (+ or -) buttons to scroll up or down to the desired memory record. 3. Press the Sel/Save button and edit the content according to the steps in the Storing a Name and Number in Memory section. -
Page 34: Memory Delete/Clear
Memory 2. Use the Vol (+ or -) buttons to scroll up or down through the phone book memories, or use the touch tone pad to enter the corresponding letters for the memory you want to review. For example, press the 5 key to display phone book memories that start with the letter J. -
Page 35: Chain Dialing
Chain Dialing This process allows you to dial a succession of stored numbers from separate memory locations. This is useful when you must dial several sequences of numbers, such as with frequent calls via a telephone company long distance provider. For example Local access number of long distance company Authorization code (ID) -
Page 36: Operation Without Power
It is possible to enhance your phone to a cordless feature with the additional purchase of the H5401 accessory handset and module. The H5401 is packaged with an RF module, when the module is properly inserted into the back of the 25423/24 base, the antenna icon on the display will illuminate. -
Page 37: General Product Care
Memory dialing doesn’t work • Did you program the memory location keys correctly? • Did you follow proper dialing sequence? Battery icon is blank or shows only one bar • The 4 “AAA” batteries need replacing or are improperly installed or not installed at all. Intercom does not function correctly •... - Page 38 Service Service If trouble is experienced with this equipment, for repair or warranty information, please contact customer service at 1-800-511-3180. If the equipment is causing harm to the telephone network, the telephone company may request that you disconnect the equipment until the problem is resolved. This product may be serviced only by the manufacturer or its authorized service agents.
-
Page 39: Accessory Information
Accessory Information Accessory Information AC power adaptor 5-2777 To place order, have your Visa, MasterCard, or Discover Card ready and call toll-free 1-800-338-0376. A shipping and handling fee will be charged upon ordering. We are required by law to collect appropriate sales tax for each individual state, country, and locality to which the merchandise is being sent. -
Page 40: Limited Warranty
Warranty Limited Warranty What your warranty covers: • Defects in materials or workmanship. For how long after your purchase: • Two years, from date of purchase. (The warranty period for rental units begins with the first rental or 45 days from date of shipment to the rental firm, whichever comes first.) What we will do: •... - Page 41 Product Registration: • Please complete and mail the Product Registration Card packed with your unit. It will make it easier to contact you should it ever be necessary. The return of the card is not required for warranty coverage. Limitation of Warranty: •...
- Page 42 Index Accessory Information Answering an Intercom Call Answering Calls Base Layout Basic Operation Call Alert Tone Call Waiting Caller ID Caller ID Chain Dialing Clear All Memories Conference Calls Cordless Phone Option Data Port Delay Ring Deleting a CID Record Deleting All Call Records Dialing a Stored Number Dialing Back...
- Page 43 Making Calls with the Handset Making Calls with the Optional Headset 22 Making Calls with the Speakerphone Manually Setting the Time and Date Memory Delete/Clear Memory Log and Phone Book (Directory) Memory Message Waiting Mute No Unknown/Blocked One-Touch Intercom Operation By Battery Operation without Power Other System Phones Paging All Stations...
- Page 44 This will only add delays in service for your product. Thomson Inc. 101 West 103rd Street Indianapolis, IN 46290-1102 © 2007 Thomson Inc. Trademark(s) ® Registered Marca(s) Registrada(s) Model 25423/24 00020876 (Rev. 0 E/S) 07-28 Printd in China...
- Page 45 Teléfono con Altavoz e Interfono de 4 líneas Guía del Usuario Guía de Instalación Rápida en la Página 7-14 Por favor lea este manual antes de operar este producto por primera vez. Modelo 25423/24...
-
Page 46: Información Sobre La Aprobación De Equipo
Información Importante Información sobre la Aprobación de Equipo El equipo de su teléfono esta aprobado para la conexión con la red Telefónica Pública (Public Switched Telephone Network) y cumple con los requisitos establecidos en las secciones 15 y 68 de las Reglas y Regulaciones de la FCC y con los Requerimientos Técnicos para Equipos de Terminales Telefónicas (Technical Requirements for Telephone Terminal Equipment), publicado por ACTA. -
Page 47: Información De Interferencias
2 Derechos de la Compañía Telefónica Si su equipo causase algún problema en su línea que pudiera dañar la red telefónica, la compañía telefónica siempre que sea posible le avisará de la posible interrupción temporal de su servicio. En caso que la compañía no pudiera avisarle de antemano y hubiera necesidad de tomar tal acción, la compañía telefónica podrá... -
Page 48: Compatibilidad Con Audífonos (Cca)
Información Importante Si estas medidas no eliminan la interferencia, favor de consultar a su distribuidor o a un técnico de radio/televisión experto por otras sugerencias. También, la Comisión Federal de Comunicaciones (FCC) ha preparado un folleto muy útil, “How To Identify and Resolve Radio/TV Interference Problems”... - Page 49 nformacIón sobre la probacIón de nformacIón de nterferencIas eclaracIón de la sobre rf ... 5 a la adIacIón ... 5 IcensIng ompatIbIlIdad con udífonos ... 7 ntroduccIón ... 8 Ista de artes equerImIentos de nchufe ... 9 ormato de la nformacIon mportante para la ndIcacIones...
- Page 50 Tabla de Contenido sted rogramó su laVe de sted rogramó su dentIfIcador de lamada en spera emorIa del egIstro de emorIa y de ) ... 32 Ibro elefónIco IrectorIo lmacenar un úmero y ... 32 emorIa eVIsar emorIa del ) ... 33 IrectorIo eVIsar el egIstro de...
- Page 51 Servicio de Llamada en Espera con Identificador de Llamada para saber quién está llamando mientras usted está en el teléfono. NOTA: Las opciones y características relativas al Identificador de Llamada no aplican al Modelo 25423. Información Importante...
-
Page 52: Lista De Partes
25413 , o 25414, o 25415 o GE 29487 o 29488 son compatibles para la operación total del sistema. Si conecta teléfonos que no sean RCA 25413 , o 25414, o 25415 o GE 29487 o 29488 a la Línea 1, puede inhibir las operaciones del interfono y localizador. -
Page 53: Formato De La Base
Formato de la Base Privacy (botón privacia) Menu (botón de menu) Exit (botón salir) Redial/Format (botón para volver a marcar/formato) Flash (botón para servicios especiales) Transfer (botón de transferencia) Conference (botón para conferencia) Hold (botón para espera) * (botón) Headset (botón audífono) New Message Indicator (Indicador de mensajes nuevo) -
Page 54: Informacion Importante Para La Instalacion
Conexión y Programación Informacion Importante para la Instalacion • Nunca instale cableado telefónico durante una tormenta de relámpagos. • Nunca instale enchufes telefónicos en localizaciones mojadas a menos que el enchufe haya sido diseñado específicamente para localizaciones mojadas. • Nunca toque cables o terminales no aislados, a menos que la línea telefónica haya sido desconectada en la interfaz de la red. -
Page 55: Instalacion Del Telefono
Instalacion del Telefono El teléfono puede estar conectado a dos enchufes telefónicos de 2 líneas (RJ14C) o 4 enchufes de línea sencillo (RJ11C) para acomodar las 4 líneas. IMPORTANTE: Antes de conectar los cables de la línea telefónica instale las baterías y conecte el suministro de corriente CA a la unidad base como se indica en los pasos 1 a 3 a continuación, para asegurar la adecuada asignación de identificación de estación base. - Page 56 Conexión y Programación 4. Conecte las líneas telefónicas: Si usted tiene dos enchufes telefónicos dobles instalados en su casa o oficina, conecte un extremo del cable liso marcado como “Line 1 + 2” dentro del enchufe marcado “Line 1 + 2” y un extremo del otro cable liso dentro del otro enchufe en la parte posterior de la base.
-
Page 57: Terminal De Datos
Las funciones como interfono, localizador, y transferencia de llamada pueden usarse entre los aparatos, pero la Línea 1 debe ser común en todos los teléfonos 25423, 25424, o 25425 para que todas las funciones operen adecuadamente. Usted puede elegir compartir o privatizar las líneas 2, 3 y 4. - Page 58 MUY IMPORTANTE: Para poder lograr el funcionamiento óptimo del sistema (por ejemplo, interfono, localizador, etc.), la línea 1 debe estar conectada y ser común a todos los teléfonos del sistema. Únicamente los modelos 25423, 25424, 25425, 25413, 25414, 25415, 25403 y 25404 son totalmente compatibles.
- Page 59 Identificador para la línea telefónica correspondiente. La opción de desactivado (OFF) desactiva esa función en el teléfono correspondiente). Oprima el botón Sel/Save. NOTA: En el Modelo 25423 usted no puede seleccionar CID ON/OFF. 7. Oprima el botón Sel/Save para salvar. El cursor se mueve a la Linea 2 automáticamente.
- Page 60 Programación del Teléfono 8. Repita los pasos 6 y 7 para cada línea telefónica. Después de que usted seleccione el tono del timbre para la Linea 4, oprima el botón Exit. Línea Prioritaria Una línea de prioridad (1 de las cuatro líneas) debe ser establecida para tener precedencia sobre las otras tres líneas.
-
Page 61: Identificador Del Teléfono
Identificador del Teléfono 1. Oprima el botón Menu mientras está en la modalidad de alerta. 2. Use los botones Vol (+ ó ‑) para desplazarse arriba o abajo PROG OPCIONES TELEF. 3. Oprima el botón Sel/Save. 4. Use los botones Vol (+ ó ‑) para desplazarse arriba o abajo PROG IDENT TELEFONO. 5. - Page 62 Programación del Teléfono Contestar Automáticamente el Interfono Para operación “manos libres”, el teléfono puede ser programado para responder una llamada de intercomunicación activando automáticamente el altavoz. NOTA: Usted puede también utilizar esta función para vigilar una habitación. 1. Oprima el botón Menu mientras está en la modalidad de alerta. 2.
- Page 63 6. Use los botones de Vol (+ ó ‑) para desplazarse arriba o abajo para elegir SI o NO. La programación de fábrica es SI. 7. Oprima el botón Sel/Save para salvar. NOTA: (No aplica al Modelo 25423). Contraste de la Pantalla Ajuste el contraste de la pantalla a uno de los cuatro niveles de contraste.
- Page 64 Programación del Teléfono NOTA: Si usted comete un error, oprima el botón Delete para borrar todos los digitos. NOTA: (No aplica al Modelo 25423). Claves de Área Regionales Dependiendo de su localización, usted puede necesitar programar hasta seis claves de área regionales.
- Page 65 Programar Manualmente la Hora y la Fecha La hora y la fecha se programan automáticamente cuando usted recibe su primera llamada del Identificador de Llamadas. Para programar manualmente la hora y la fecha, siga los pasos a continuación. NOTA: La programación automática de la hora n es aplicable al modelo 25413. 1.
- Page 66 Operación Básica 5. Oprima el botón Sel/Save. 6. Use los botones Vol (+ ó ‑) para desplazarse arriba o abajo seleccionar 12 HORAS o 24 HORAS. 7. Oprima el botón Sel/Save para salvar. Restablecer las Programaciones de Fábrica Esta función le permite volver a programar el menú de acuerdo a las programaciones de fábrica originales.
-
Page 67: Marcado Previo
NOTA: Únicamente es posible tener una conversación de una persona en la modalidad de altavoz. Cuando usted habla, está transmitiendo. Cuando escucha, está recibiendo. Usted no puede hacer las dos cosas al mismo tiempo. El teléfono automáticamente cambiará entre transmitir y recibir dependiendo del nivel de volumen de la voz y del ruido que haya en la habitación y que recoja el micrófono del altavoz. - Page 68 Operación Básica Si usted recibe una llamada en una línea que no es la línea prioritaria, 1. Levante el auricular y oprima el botón de la línea correspondiente (en modalidad el auricular), Oprima el botón Speaker y oprima el botón de la línea (en modalidad de altavoz), Oprima el botón de línea correspondiente, y después oprima el botón Headset (en modalidad de audífonos).
- Page 69 Favor de No Molestar Esta función se programa en los teléfonos individuales para desactivar (silenciar) una señal de timbre para las llamadas entrantes, o del localizador. Cuando hay una llamada entrante, los indicadores de estado quieren el funtion como normal pero el teléfono no sonará. 1.
- Page 70 Operación Básica Para Volver a Marcar 1. Levante el auricular (en modalidad el auricular), o oprima el botón Speaker (modalidad de altavoz) o oprima el botón Headset (en modalidad de audífonos) y la línea prioritaria es seleccionada automáticamente. Oprima un botón de línea para seleccionar otra línea. 2.
-
Page 71: Llamadas En Conferencia
Mientras está en uso, una línea puede ser asegurada para que nadie más pueda escuchar la conversación. Esta función únicamente se aplica a los teléfonos 25423, 25424, 25425, 25413, 25414, 25415, 25403 y 25404. Sin embargo, otros teléfonos que no son compatibles con estos modelos pueden aún tener acceso a la línea. -
Page 72: Llamadas Por Interfono
Llamadas por Interfono NOTA: Si usted tiene más de una línea en espera, y usted quiere tener una llamada en conferencia, primero tiene que seleccionar una línea en la que usted quiera poner la conferencia. Para Desconectar a una Persona: Oprima el botón de línea de la persona con la que usted quiera seguir conversando, y la otra persona será... - Page 73 Para Contestar una Llamada de Interfono Cuando usted recibe una llamada por el INTERFONO, el indicador Intercom parpadea en rojo, y la pantalla muestra el nombre el nombre de la persona que llama y el número de identificador del teléfono. NOTA: Si usted quiere contestar utilizando el altavoz, oprima el botón Intercom o Speakerphone.
-
Page 74: Identificador De Llamadas (Cid)
Headset, luego oprima el botón Page. Identificador de Llamadas (CID) NOTA: La sección Identificador de Llamada de esta guía del usuario no es aplicable al Modelo 25423. Pantalla Sumario La pantalla sumario muestra la hora y fecha actuales, el número de llamadas que deben ser revisadas y el número total de llamadas salvadas. -
Page 75: I U Sted P Rogramó Su C Lave De Á Rea
Para Revisar Archivos del Identificador de Llamadas Para Salvar Información del Identificador de Llamadas en la Memoria o en la Memoria del Libro Telefónico 3. Para almacenar información en el Libro de Directorio Telefónico, oprima el botón, Para almacenar la información en la Memoria del Libro Telefónico, oprima uno de los botones delregistro de memoria (1‑16). -
Page 76: I U Sted N O P Rogramó Su C Lave De Á Rea
Memoria 3. Para ajustar el formato de un número, use el botón Redial/Format. Por ejemplo, un número local de 7 dígitos a veces no puede ser marcado porque requiere un formato de 10 o de 11 dígitos. Use el botón Redial/Format para recorrer los formatos de 7, 10 u 11 dígitos. - Page 77 NOTA: Si usted comete un error, use los botones DIR ó CID (izquierda/derecha) para mover el cursor al dígito incorrecto, y oprima el botón Delete para borrar. 3. Oprima el botón Sel/Save y la indicación de que inscriba nombre aparece en la pantalla INSCRIBA NOMBRE.
-
Page 78: Para Almacenar Una Pausa En La Memoria
Memoria Para Revisar el Registro de Memoria (Intercom/Memory Log) (Localización de Memoria) 1. Oprima el botón DIR. 2. Oprima el botón Intercom/Memory Log (1‑16). 3. Oprima el botón Exit cuando usted haya terminado de revisar memorias. Para Editar un Nombre o Número Almacenado en la Memoria del Libro Telefónico (Directorio) 1. -
Page 79: Para Marcar Un Número Almacenado
Para Marcar un Número Almacenado 1. Levante el auricular, u oprima el botón Speaker para seleccionar una línea automáticamente. U oprima el botón de la línea que usted quiera usar. 2. Espere al tono de marcar. 3. Oprima el botón Intercom/Memory Log (1‑16) para la persona que usted quiera llamar. El número se marca automáticamente. -
Page 80: Arcado En Adena
Memoria 6. Use los botones Vol (+ ó ‑) para desplazarse arriba o abajo seleccionar SI o NO. La programación de fábrica es NO. 7. Oprima el botón Sel/Save para confirmar. NOTA: Si usted selecciona SI, todas las memorias del directorio y las de acceso directo son eliminada. -
Page 81: Operación De Las Baterías
H5401 y módulo. El H5401 es empacado con un módulo RF, cuando el módulo esté apropiadamente insertado en la parte posterior de la base 25423/24, el icono de antena en la pantalla se iluminará. Solución de Problemas No hay tono de marcar •... -
Page 82: Cuidado General Del Producto
Solución de Problemas • Usted puede tener demasiadas extensiones en su línea. Intente desconectar algunos teléfonos. • Vea las soluciones para “No hay tono de marcar”. La voz entrante es demasiado baja o no se escucha para nada • Verifique la programación de volumen. No funciona el marcado por memoria •... -
Page 83: Cómo Obtener Servicios De Mantenimiento
Cómo Obtener Servicios de Mantenimiento Si usted experimenta problemas con este equipo, para reparaciones o para información de garantía, comuníquese con el departamento de servicio al cliente al 1‑800‑511‑3180. Si el equipo está causando daños a la red telefónica, la compañía telefónica puede pedirle que desconecte su equipo hasta que el problema haya sido resuelto. -
Page 84: Arantía Imitada
Garantía Limitada Garantía Limitada Lo que cubre su garantía: • Defectos de materiales o de trabajo. Por cuánto tiempo después de la compra: • Dos años, a partir de la fecha de compra. (El periodo de garantía para unidades arrendadas se inicia con la primera renta o 45 días de la fecha del embarque a la firma de arrendamiento, lo que ocurra primero). - Page 85 Registro del Producto: • Por favor llene y envíe por correo la Tarjeta de Registro del Producto que se embarcó con su producto. Hará más fácil que hagamos contacto con usted si fuera necesario. No se requiere la devolución de la tarjeta para tener la cobertura de la garantía. Limitaciones sobre la Garantía: •...
- Page 86 Indice Clave de Área Local 19 Claves de Área Regionales Cómo Obtener Servicios de Mantenimiento Compatibilidad con Audífonos (CCA) Contestar Automáticamente el Interfono 18 Contraste de la Pantalla Cuidado General del Producto Declaración de la FCC sobre Exposición a la Radiación RF En Espera Enmudecedor Favor de No Molestar...
- Page 87 Pantalla Sumario Para Almacenar el Último Número Marcado Para Almacenar un Número y Nombre en la Memoria Para Almacenar una Pausa en la Memoria Para Borrar Todas la Memorias Para Borrar Todos los Archivos Para Borrar un Archivo del Identificador de Llamadas Para Borrar/ Limpiar Memorias Para Cambiar Entre Altavoz, Auricular y...
- Page 88 Esto únicamente resultará en un retraso para dar servicio a su producto. Thomson Inc. 101 West 103rd Street Indianapolis, IN 46290‑1102 © 2007 Thomson Inc. Trademark(s) ® Registered Marca(s) Registrada(s) Model 25423/24 00020876 (Rev. 0 E/S) 07-28 Impreso en China...
Need help?
Do you have a question about the 25423 and is the answer not in the manual?
Questions and answers