Chapters
Table of Contents

Related Manuals for Pioneer DEH-P6350


Summary of Contents for Pioneer DEH-P6350
-
Page 1: Operation Manual
Multi-CD control High power CD player with FM/AM tuner Reproductor de CD de alta potencia con control de múltiples CD con sintonizador FM/AM Operation Manual DEH-P6350 Manual de Operación... -
Page 2: Table Of Contents
Contents Key Finder ............ 3 Tuner Operation ........18 Head Unit Local Seek Tuning (LOCAL) Remote Controller Best Stations Memory (BSM) Before Using This Product ...... 4 Using the Built-in CD Player ....19 About This Manual ..........4 Repeat Play (RPT) About the Demo Mode ........ - Page 3 Audio Adjustment ........29 Other Functions ........45 Setting the Sound Focus Equalizer Displaying the Time ........45 (SFEQ) ............ 29 Switching the Entertainment Display ....45 About the Sound Focus Equalizer (SFEQ) Using the AUX Source ........46 Selecting the Equalizer Curve ......30 Selecting the AUX Source About the Custom Curves AUX Title Input (TITLE)
-
Page 4: Key Finder
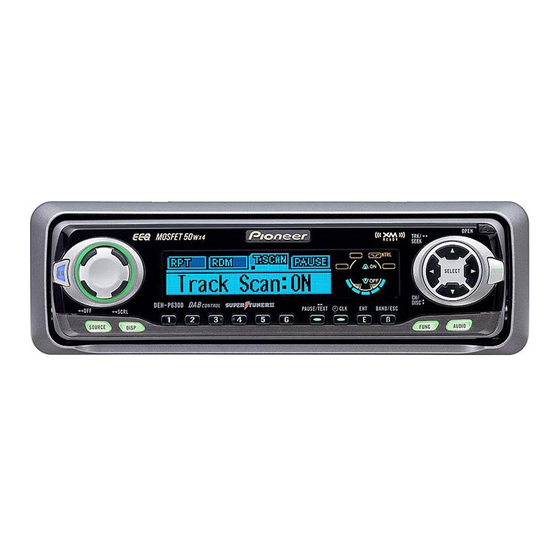
Key Finder Head Unit VOLUME OPEN button 5/∞/2/3 buttons EQ button SFEQ button SFEQ SELECT AUDIO button SOURCE AUDIO DISP FUNC FUNCTION button Buttons 1–6 BAND button DISPLAY button ENTERTAINMENT button CLOCK button SOURCE button PAUSE button Remote Controller A remote controller that enables remote operation of the head unit is supplied. Operation is the same as when using buttons on the head unit. -
Page 5: Before Using This Product
Before Using This Product About This Manual This product features a number of sophisticated functions ensuring superior reception and operation. All are designed for the easiest possible use, but many are not self-explanatory. This operation manual is intended to help you benefit fully from their potential and to maximize your listening enjoyment. -
Page 6: Precaution
• If the battery is disconnected, the preset memory will be erased and must be repro- grammed. • Should this product fail to operate properly, contact your dealer or nearest authorized Pioneer Service Station. When using the 50-Disc Type Multi-CD Player The available functions of the 50-Disc Type Multi-CD Player are described in this Operation Manual. -
Page 7: Remote Controller And Care
Remote Controller and Care Using the Remote Controller This product is equipped with a remote controller for convenient operation. • Point the remote controller in the direction of the front panel to operate. Precaution: • Do not store the remote controller in high temperatures or direct sunlight. •... -
Page 8: Detaching And Replacing The Front Panel
Detaching and Replacing the Front Panel Theft Protection The front panel of the head unit is detachable to discourage theft. • Keep the front panel closed while driving. Detaching the Front Panel 1. Open the front panel. SELECT SFEQ 2. Grip the left side of the front panel and pull it gen- tly outward. -
Page 9: Basic Operation
= External Unit 2 = AUX Note: • External Unit refers to a Pioneer product (such as one available in the future) that, although incom- patible as a source, enables control of basic functions by this product. Two External Units can be controlled by this product, although “External”... - Page 10 Basic Operation 3. Raise or lower the volume. Rolling the VOLUME changes the volume level. Note: • Roll clockwise to raise the volume level. • Roll counterclockwise to lower the volume level. 4. Turn the source OFF. SOURCE DISP Hold for 1 second...
-
Page 11: Basic Operation Of Tuner
Basic Operation of Tuner Reset the AM tuning step from 9 kHz (the factory preset step) to 10 kHz when using the tuner in North, Central or South America. (Refer to page 41.) Manual and Seek Tuning • You can select the tuning method by changing the length of time you press the 2/3 button. -
Page 12: Basic Operation Of Built-In Cd Player
Basic Operation Basic Operation of Built-in CD Player Note: • Be sure to close the front panel after loading or ejecting a disc. Switching the Display Each press of the DISPLAY button changes Open the display in the following order: Playback mode (Play time) = Disc Title Note: Note:... -
Page 13: Disc Loading Slot
Disc Loading Slot Note: • The Built-in CD player plays one standard 12 cm or 8 cm (single) CD at a time. Do not use an adapter when playing 8 cm CD. • Do not insert anything other than a CD into the CD Loading Slot. -
Page 14: Basic Operation Of Multi-Cd Player
Basic Operation Basic Operation of Multi-CD Player This product can control a Multi-CD player (sold separately). Track Search and Fast Forward/Reverse • You can select between Track Search or Fast Forward/Reverse by pressing the 2/3 button for a different length of time. Track Search 0.5 seconds or less Fast Forward/Reverse... -
Page 15: Corresponding Display Indications And Buttons
Corresponding Display Indications and Buttons This product’s display features Key Guidance Indicators. These light to indicate which of the 5/∞/2/3 buttons you can use. When you’re in the Function Menu (refer to next sec- tion), Detailed Setting Menu (refer to page 16), Initial Setting Menu (refer to page 39) or Audio Menu (refer to page 31), they also make it easy to see which 5/∞/2/3 buttons you can use to switch functions ON/OFF, switch repeat selections and perform other opera- tions. - Page 16 Basic Operation 2. Operate a mode (e.g. Repeat Play). SELECT SFEQ The button used and the operation it performs are indicated by the key guidance indicator. Press the 5 button to switch the key guidance indicator ON, and the ∞ button to switch it OFF. 3.
-
Page 17: Entering The Detailed Setting Menu
7 Multi-CD Player Function name (Display) Button: Operation Page 2 or 3: Select (Play range) Repeat Play (PMODE) 1 2 or 3: Select (Disc Title) Selecting Discs by Disc Title List 2 5: Play (T.LIST) 5: ON Random Play (RDM) ∞: OFF 5: ON Scan Play (SCAN) -
Page 18: Detailed Setting Menu Functions
Basic Operation 3. Operate a mode. 4. Cancel the Detailed Setting Menu. SFEQ SELECT AUDIO FUNC Note: • You can cancel the Detailed Setting Menu by pressing the FUNCTION button again for 2 seconds. Detailed Setting Menu Functions The following chart shows functions for each source in the Detailed Setting Menu. The chart also shows indications for each function, operations and buttons used to perform operations. -
Page 19: Tuner Operation
Tuner Operation Local Seek Tuning (LOCAL) When Local is ON, you can only select broadcast stations providing strong reception. 1. Press the FUNCTION button and select the Local mode (LOCAL) in the Function Menu. 2. Switch the Local ON/OFF with the 5/∞ buttons. 3. -
Page 20: Using The Built-In Cd Player
Using the Built-in CD Player Repeat Play (RPT) Repeat Play plays the same track repeatedly. 1. Press the FUNCTION button and select the Repeat mode (RPT) in the Function Menu. 2. Switch the Repeat Play ON/OFF with the 5/∞ but- tons. -
Page 21: Scan Play (T.scan)
Scan Play (T.SCAN) Scan Play plays the first 10 seconds or so of each track on a CD in succession. 1. Press the FUNCTION button and select the Scan mode (T.SCAN) in the Function Menu. 2. Switch the Scan Play ON with the 5 button. -
Page 22: Using Multi-Cd Players
Using Multi-CD Players Repeat Play (PMODE) There are three repeat play ranges: One-track Repeat, Disc Repeat and Multi-CD player Repeat. Default repeat play range is Multi-CD player Repeat. 1. Press the FUNCTION button and select the Repeat mode (PMODE) in the Function Menu. -
Page 23: Scan Play (Scan)
Scan Play (SCAN) In the Disc Repeat, the beginning of each track on the selected disc is scanned for about 10 seconds. In the Multi-CD player Repeat, the beginning of the first track on each disc is scanned for about 10 seconds. 1. -
Page 24: Its (Instant Track Selection)
Using Multi-CD Players ITS (Instant Track Selection) The ITS function allows you to search for the track you wish to play when a Multi-CD player is installed. You can use ITS to program automatic playback of up to 24 tracks per disc from up to 100 discs. -
Page 25: Erase A Track Program
Erase a Track Program 1. Select the track you wish to erase, during ITS Play. 2. Select the ITS Programming mode (ITS) in the Detailed Setting Menu. (Refer to page 16.) 3. Erase the track program with the ∞ button. ITS is canceled and playback of the next ITS-programmed track begins. -
Page 26: Disc Title
Using Multi-CD Players Disc Title Disc Title Input (TITLE) You can input Titles up to 10 letters long for up to 100 discs. Using this function lets you easily search for and select a desired disc for play. (You can store ITS program and Disc Title data for up to 100 discs in memory.) 1. -
Page 27: Selecting Discs By Disc Title List
6. When you have completed title input, make the 10th letter flash, then memorize by press- ing the 3 button. Note: • Titles remain in memory, even after the disc has been removed from the magazine, and are recalled when the disc is reinserted. •... -
Page 28: Displaying Disc Title
Using Multi-CD Players Displaying Disc Title You can display the currently playing Disc Title. Note: • You can also display the currently playing Disc Title when playing a CD TEXT disc on a CD TEXT compatible Multi-CD player. (Refer to page 28.) •... -
Page 29: Cd Text Function
CD TEXT Function (for CD TEXT compatible type) You can use these functions when playing a CD TEXT disc on a CD TEXT compatible Multi-CD player. Title Display Switching • Select the desired title display with the DISPLAY button. Each press of the DISPLAY button changes the display in the following order: Playback mode (Play Time) -
Page 30: Audio Adjustment
Audio Adjustment Setting the Sound Focus Equalizer (SFEQ) Clarifying the sound image of vocals and instruments allows the simple staging of a natur- al, pleasant sound environment. Even greater listening enjoyment will be obtained if seating positions are chosen carefully. About the Sound Focus Equalizer (SFEQ) “FRT1”... -
Page 31: Selecting The Equalizer Curve
Selecting the Equalizer Curve You can switch between Equalizer curves. • Select the desired Equalizer curve. POWERFUL (powerful) = NATURAL (natural) = VOCAL (vocal) = CUSTOM 1 (custom 1) = CUSTOM 2 (custom 2) = FLAT (flat) = SUPER BASS (super bass) About the Custom Curves “CUSTOM 1”... -
Page 32: Entering The Audio Menu
Audio Adjustment Entering the Audio Menu With this menu, you can adjust the sound quality. Note: • After entering the Audio Menu, if you do not perform an operation within about 30 seconds, the Audio Menu is automatically canceled. • Audio Menu functions change depending on the Rear Output and Subwoofer Controller setting in the Initial Setting Menu. -
Page 33: Equalizer Curve Adjustment (Eq Low/Eq Mid/Eq High)
3. Adjust left/right speaker bal- ance with the 2/3 buttons. “Bal :L 9” – “Bal :R 9” is displayed as it moves from left to right. Note: • When the Rear Output setting is “Rear SP :S.W”, you cannot adjust front/rear speaker balance. (Refer to page 42.) •... -
Page 34: Equalizer Curve Fine Adjustment
Audio Adjustment Equalizer Curve Fine Adjustment You can adjust the center frequency and the Q factor (curve characteristics) of each cur- rently selected curve band (EQ Low/EQ Mid/EQ High). Level (dB) Q=2N Q=2W Frequency (Hz) Center frequency 1. Press the AUDIO button for 2 seconds to select Equalizer Curve Fine Adjustment. -
Page 35: Bass Adjustment (Bass)
Bass Adjustment (Bass) You can adjust the cut-off frequency and the Bass level. In “FRT1” mode, bass adjustment affects only the rear output: front output cannot be adjusted. 1. Press the AUDIO button and select the Bass mode (Bass) in the Audio Menu. 2. -
Page 36: Loudness Adjustment (Loud)
Audio Adjustment Loudness Adjustment (Loud) The Loudness function compensates for deficiencies in the low and high sound ranges at low volume. You can select a desired Loudness level. 1. Press the AUDIO button and select the Loudness mode (Loud) in the Audio Menu. -
Page 37: Subwoofer Setting Adjustment (Sub-W2)
Subwoofer Setting Adjustment (Sub-W2) When the Subwoofer output is ON, you can adjust the cut-off frequency and the output level of Subwoofer. 1. Press the AUDIO button and select the Subwoofer setting mode (Sub-W2) in the Audio Menu. 2. Select the frequency to 50 Hz, 80 Hz or 125 Hz with the 2/3 buttons. -
Page 38: Non Fading Output Level Adjustment (Nonfad)
Audio Adjustment Non Fading Output Level Adjustment (NonFad) When the Non Fading output is ON, you can adjust the level of Non Fading output. 1. Press the AUDIO button and select the Non Fading Output setting mode (NonFad) in the Audio Menu. 2. -
Page 39: Source Level Adjustment (Sla)
Source Level Adjustment (SLA) The SLA (Source Level Adjustment) function prevents radical leaps in volume level when switching between sources. Settings are based on the FM volume level, which remains unchanged. 1. Compare the FM volume with the volume of the other source. (e.g. -
Page 40: Initial Setting
Initial Setting Entering the Initial Setting Menu With this menu, you can perform initial settings for this product. 1. Turn the source OFF. 2. Enter the Initial Setting Menu. SELECT SFEQ AUDIO FUNC Hold for 2 seconds 3. Select a desired mode. SELECT SFEQ AUDIO... -
Page 41: Initial Setting Menu Functions
Initial Setting Menu Functions The Initial Setting Menu features the following functions. Setting the Time (CLOCK) This is the mode for setting the time on the unit’s clock display. (Refer to page 45 for details concerning the clock display.) 1. Press the FUNCTION button and select the Time setting mode (CLOCK) in the Initial Setting Menu. -
Page 42: Setting The Am Tuning Step (Am)
Initial Setting Setting the AM Tuning Step (AM) The tuning step employed in the tuner’s AM band can be switched between 9 kHz and 10 kHz per step. Reset the tuning step from 9 kHz (the factory preset step) to 10 kHz when using the tuner in North, Central or South America. -
Page 43: Setting The Dimmer (Dim)
Setting the Dimmer (DIM) To enable this product’s display from being too bright at night, when the vehicle’s head lights are turned ON the display is dimmed. You can switch this function ON/OFF. 1. Press the FUNCTION button and select the Dimmer mode (DIM) in the Initial Setting Menu. -
Page 44: Switching The Telephone
Initial Setting 1. Press the FUNCTION button and select the Rear Output and Subwoofer Controller setting mode (SW) in the Initial Setting Menu. 2. Change the Rear Output set- ting with the 5/∞ buttons. Note: • When no Subwoofer is connected to the rear output, select “Rear SP:FULL”. •... -
Page 45: Switching The Motion Screen (Disp)
Switching the Motion Screen (DISP) You can switch ON/OFF the moving source icon during a source play. When OFF is selected, the moving source icon disappears after the opening screen is dis- played. 1. Press the FUNCTION button and select the Motion Screen mode (DISP) in the Initial Setting Menu. -
Page 46: Other Functions
Other Functions Displaying the Time • To turn the time display ON. SELECT SFEQ AUDIO FUNC The time display disappears temporarily when you perform another operation, but the time indication returns to the display after 6 seconds. Note: • Even when the sources and the Feature Demo are OFF, the Time appears on the display. Pressing the CLOCK button switches the Time display ON/OFF. -
Page 47: Using The Aux Source
Using the AUX Source An IP-BUS-RCA Interconnector such as CD-RB20 or CD-RB10 (sold separately) enables you to connect this product to auxiliary equipment featuring an RCA output. For more details, refer to the IP-BUS-RCA Interconnector’s Owner’s Manual. Selecting the AUX Source •... -
Page 48: Cd Player And Care
CD Player and Care Precaution • Play only CDs bearing the Compact Disc Digital Audio mark. (If a CD features the top right mark on its disc title side, that disc is a CD TEXT disc. There are also some CD TEXT discs that do not feature the top right mark.) •... -
Page 49: Built-In Cd Player's Error Message
When problems occur with CD playback, an error message appears on the display. Refer to the table below to identify the problem, then take the suggested corrective action. If the error persists, contact your dealer or your nearest PIONEER Service Center. Message... -
Page 50: Specifications
Specifications General CD player Power source ..14.4 V DC (10.8 – 15.1 V allowable) System ........Compact disc audio system Grounding system ........Negative type Usable discs ..........Compact disc Max. current consumption ........10.0 A Signal format ....Sampling frequency: 44.1 kHz Dimensions Number of quantization bits: 16;... - Page 52 Contenido Guía de botones ........3 Operación del sintonizador ....18 Unidad principal Sintonización de búsqueda local Controlador remoto (LOCAL) Memoria de las mejores emisoras (BSM) Antes de usar este producto ....4 Uso del reproductor de CD Sobre este manual ..........4 incorporado ........
- Page 53 Ajuste de audio ........29 Otras funciones ........45 Ajuste del ecualizador de enfoque de sonido Visualización de la hora ........45 (SFEQ) ............ 29 Cambio a la presentación visual de Acerca del ecualizador de enfoque de entretenimiento ........45 sonido (SFEQ) Uso de la fuente AUX ........
-
Page 54: Guía De Botones
Guía de botones Unidad principal Botón OPEN VOLUME Botón EQ Botones 5/∞/2/3 Botón SFEQ SFEQ SELECT Botón AUDIO SOURCE AUDIO DISP FUNC Botón FUNCTION Botones 1–6 Botón BAND Botón ENTERTAINMENT Botón DISPLAY Botón CLOCK Botón SOURCE Botón PAUSE Controlador remoto Se provee un controlador remoto que permite la operación remota de la unidad principal. -
Page 55: Antes De Usar Este Producto
Antes de usar este producto Sobre este manual Este producto viene con diversas funciones sofisticadas que aseguran una recepción y operación superior. El producto ha sido proyectado para uso lo más fácil posible, pero muchas funciones requieren explicación. El propósito de este manual de operación es ayu- darle a beneficiarse completamente del potencial del producto y maximizar su disfrute de audición. -
Page 56: Precaución
• Cuando este producto no funciona correctamente, comuníquese con su concesionario o centro de servicio Pioneer autorizado. Cuando utiliza el reproductor de Multi-CD del tipo de 50 discos En este manual de operación se describen las funciones utilizables del reproductor de Multi-CD del tipo de 50 discos. -
Page 57: Controlador Remoto Y Cuidado
Controlador remoto y cuidado Uso del controlador remoto Este producto se equipa con un controlador remoto para conveniencia en su operación. • Apunte el controlador remoto en la dirección del panel delantero para operarlo. Precaución: • No almacene el controlador remoto en altas temperaturas o a la luz directa del sol. •... -
Page 58: Extracción Y Colocación Del Panel Delantero
Extracción y colocación del panel delantero Protección contra robo El panel delantero de la unidad principal es extraíble como una medida antirrobo. • Mantenga el panel cerrado mientras conduce el automóvil. Extracción del panel delantero 1. Abra el panel delantero. SELECT SFEQ 2. -
Page 59: Operación Básica
Multi-CD = Unidad externa 1 = Unidad externa 2 = AUX Nota: • Unidad externa refiérese a un producto Pioneer (como un disponible en el futuro) que, mientras sea incompatible como una fuente, permite el control de funciones básicas por este producto. Con este producto se pueden controlar dos unidades externas, aunque siempre se visualizará... - Page 60 Operación básica 3. Suba o baje el volumen. Desplazar el botón VOLUME cambia el nivel del volumen. Nota: • Desplace el botón hacia la derecha para subir el volumen. • Desplace el botón hacia la izquierda para bajar el volumen. 4.
-
Page 61: Operación Básica Del Sintonizador
Operación básica del sintonizador Reajuste el paso de sintonización AM de 9 kHz (el paso fijado en la fábrica) a 10 kHz cuando utilice el sintonizador en América del Norte, Central o del Sur. (Vea la página 41.) Sintonización de búsqueda y manual •... -
Page 62: Operación Básica Del Reproductor De Cd Incorporado
Operación básica Operación básica del reproductor de CD incorporado Nota: • Asegúrese de cerrar el panel delantero después de colocar o expulsar un disco. Cambio de la presentación visual A cada presión del botón DISPLAY cambia Abierto la presentación visual en el orden siguiente: Modo de reproducción (Tiempo de ejecución Nota: transcurrido) = Título de disco... -
Page 63: Ranura De Carga De Disco
Ranura de carga de disco Nota: • El reproductor de CD incorporado reproduce un CD estándar de 12 cm u 8 cm (simple) a la vez. No utilice un adaptador cuando reproduzca discos de 8 cm. • No inserte nada que no sea un CD en la ranura de carga de CD. Precaución: •... -
Page 64: Operación Básica Del Reproductor De Multi-Cd
Operación básica Operación básica del reproductor de Multi-CD Este producto puede controlar un reproductor de Multi-CD (en venta por separado). Búsqueda de pista y avance rápido/retroceso • Se puede seleccionar entre la búsqueda de pista o el avance rápido/retroceso presionando el botón 2/3 durante un lapso diferente de tiempo. -
Page 65: Visualizaciones Y Botones Correspondientes
Visualizaciones y botones correspondientes El visualizador de este producto presenta los indicadores de guía de botones. Estos indicadores se iluminan para indicar qué botones 5/∞/2/3 se pueden utilizar. Cuando se está en el menú de funciones (vea la siguente sección), el menú de ajustes detallados (vea la página 16), menú... -
Page 66: Funciones Del Menú De Funciones
Operación básica 2. Opere un modo (por ejemplo, la reproducción de repetición). SELECT SFEQ El botón usado y la operación que ello realiza se indican por el indicador de guía de botones. Presione el botón 5 para activar el indicador de guía de botones, y el botón ∞... -
Page 67: Selección Del Menú De Ajustes Detallados
7 Reproductor de Multi-CD Nombre de la función (Visualización) Botón: Operación Página 2 o 3: Selección (Gama de reproducción) 21 Reproducción de repetición (PMODE) 1 2 o 3: Selección (Título de disco) Selección de discos mediante la lista de 2 5: Reproducción títulos de disco (T.LIST) 5: Active Reproducción aleatoria (RDM) -
Page 68: Funciones Del Menú De Ajustes Detallados
Operación básica 3. Opere un modo. 4. Cancele el menú del ajustes detallados. SFEQ SELECT AUDIO FUNC Nota: • Se puede cancelar el menú de ajustes detallados presionando el botón FUNCTION de nuevo durante 2 segundos. Funciones del menú de ajustes detallados En la siguiente tabla se muestran las funciones para cada fuente en el menú... -
Page 69: Operación Del Sintonizador
Operación del sintonizador Sintonización de búsqueda local (LOCAL) Cuando el modo local está activado, se puede seleccionar solamente emisoras de señales fuertes. 1. Presione el botón FUNCTION y seleccione el modo local (LOCAL) en el menú de funciones. 2. Active o desactive el modo local con los botones 5/∞. -
Page 70: Uso Del Reproductor De Cd Incorporado
Uso del reproductor de CD incorporado Reproducción de repetición (RPT) La reproducción de repetición reproduce la misma pista repetidamente. 1. Presione el botón FUNCTION y seleccione el modo de repetición (RPT) en el menú de funciones. 2. Active o desactive la reproducción con repetición con los botones 5/∞. -
Page 71: Reproducción Con Exploración (T.scan)
Reproducción con exploración (T.SCAN) La reproducción con exploración reproduce en sucesión los primeros 10 segundos más o menos de cada pista de un CD. 1. Presione el botón FUNCTION y seleccione el modo de exploración (T.SCAN) en el menú de funciones. 2. -
Page 72: Uso De Reproductores De Multi-Cd
Uso de reproductores de Multi-CD Reproducción de repetición (PMODE) Existen tres gamas de reproducción con repetición: Repetición de una pista, repetición de disco y repetición de reproductor de Multi-CD. La gama de reproducción con repetición es la repetición de reproductor de Multi-CD. 1. -
Page 73: Reproducción Con Exploración (Scan)
Reproducción con exploración (SCAN) En la repetición de disco, se explora el comienzo de cada pista en un disco seleccionado durante aproximadamente 10 segundos. En la repetición de reproductor de Multi-CD y de repetición total, se explora el comienzo de la primera pista de cada disco durante aproxi- madamente 10 segundos. -
Page 74: Its (Selección De Canción Instantánea)
Uso de reproductores de Multi-CD ITS (Selección de canción instantánea) La función ITS le permite buscar la pista que desea reproducir cuando se encuentra instala- do un reproductor de Multi-CD. Puede usar la función ITS para programar la reproducción automática de hasta 24 pistas por disco desde 100 discos, en la memoria puede almacenar el programa ITS y datos de títulos de disco hasta para 100 discos. -
Page 75: Borrado De Una Pista Programada
Borrado de una pista programada 1. Durante la reproducción ITS, seleccione la pista que desea borrar. 2. Seleccione el modo de programación ITS (ITS) en el menú de ajustes detalla- dos. (Vea la página 16.) 3. Borre la pista con el botón ∞. El modo de programación ITS se cancela y la reproducción ITS de la próxima pista programada comien-... -
Page 76: Título De Disco
Uso de reproductores de Multi-CD Título de disco Ingreso de título de disco (TITLE) Esta función le permite ingresar hasta un máximo de 100 títulos de disco compuestos de hasta 10 caracteres. Además, esta función le permite fácilmente buscar y seleccionar un disco deseado para reproducción. -
Page 77: Selección De Discos Mediante La Lista De
6. Al completar el ingreso del título, haga la 10.ma letra centellear, y memorice presionando el botón 3. Nota: • Los títulos permanecen en la memoria, aún después que se saque el disco del cargador de CD, y se llaman cuando se inserta el disco nuevamente. •... -
Page 78: Visualización Del Título Del Disco
Uso de reproductores de Multi-CD Visualización del título del disco Puede visualizar el título del disco que está siendo reproducido actualmente. Nota: • También puede visualizar el título del disco que está siendo reproducido actualmente cuando reproduce un disco CD TEXT en un reproductor Multi-CD compatible con CD TEXT. (Vea la página 28.) •... -
Page 79: Función Cd Text
Función CD TEXT (para el tipo compatible con CD TEXT) Estas funciones se pueden usar cuando se reproduce un disco CD TEXT en un reproductor de Multi-CD compatible con CD TEXT. Cambio de visualización del título • Seleccione la visualización del título deseado con el botón DISPLAY. -
Page 80: Ajuste De Audio
Ajuste de audio Ajuste del ecualizador de enfoque de sonido (SFEQ) Aclarando la imagen de sonido de los vocales e instrumentos permitirá la realización de un entorno acústico más natural y placentero posible. Una cuidadosa selección de las posiciones de audición permitirá obtener incluso un mejor disfrute del sonido. -
Page 81: Selección De La Curva Del Ecualizador
Selección de la curva del ecualizador Se puede cambiar entre las curvas del ecualizador. • Seleccione la curva del ecualizador deseada. POWERFUL (potente) = NATURAL (natural) = VOCAL (vocal) = CUSTOM 1 (personalizable 1) = CUSTOM 2 (personalizable 2) = FLAT (plano) = SUPER BASS (ultra bajos) Acerca de las curvas personalizables “CUSTOM 1”... -
Page 82: Selección Del Menú De Audio
Ajuste de audio Selección del menú de audio Con este menú se puede ajustar la calidad sonora. Nota: • Después de seleccionar el menú de audio, si no se realiza ninguna operación dentro de aproximadamente 30 segundos, el menú de audio se cancela automáticamente. •... -
Page 83: Ajuste De La Curva Del Ecualizador
3. Ajuste el equilibrio de los altavoces izquierdo y derecho con los botones 2/3. Se visualiza “Bal :L 9” – “Bal :R 9” a medida que se mueve de la izquierda a la derecha. Nota: • Cuando el ajuste de la salida trasera es “Rear SP :S.W”, no se puede ajustar el equilibrio de los altavoces delanteros/traseros. -
Page 84: Ajuste Fino De La Curva Del Ecualizador
Ajuste de audio Ajuste fino de la curva del ecualizador Se puede ajustar la frecuencia central y el factor Q (características de curva) de cada banda de curva seleccionada actualmente (EQ Low/EQ Mid/EQ High). Nivel (dB) Q=2W Q=2N Frecuencia (Hz) Frecuencia central 1. -
Page 85: Ajuste De Los Graves (Bass)
Ajuste de los graves (Bass) Usted puede ajustar la frecuencia de corte y el nivel de los graves. En el modo “FRT1”, el ajuste de los graves afecta únicamente a la salida trasera: no es posible ajustar la salida delantera. 1. -
Page 86: Ajuste De Sonoridad (Loud)
Ajuste de audio Ajuste de sonoridad (Loud) La función de sonoridad compensa las deficiencias en las gamas de sonido altas y bajas en volúmenes bajos. Se puede seleccionar un nivel de sonoridad deseado. 1. Presione el botón AUDIO y seleccione el modo de sonoridad (Loud) en el menú de audio. -
Page 87: Salida Sin Extinción (Nonfad)
Fijación de los ajustes de altavoz de graves secundario (Sub-W2) Cuando la salida del altavoz de graves está activada (ON), puede ajustar la frecuencia de corte y el nivel de salida del altavoz de graves secundario. 1. Presione el botón AUDIO y seleccione el modo de fijación de altavoz de graves secundario (Sub-W2) en el menú... -
Page 88: Ajuste Del Nivel De Salida Sin Extinción (Nonfad)
Ajuste de audio Ajuste del nivel de salida sin extinción (NonFad) Cuando la salida sin extinción está activada (ON), puede ajustar el nivel de salida sin extinción. 1. Presione el botón AUDIO y seleccione el modo de ajuste de salida sin extinción (NonFad) en el menú... -
Page 89: Ajuste Del Nivel De La Fuente (Sla)
Ajuste del nivel de la fuente (SLA) La función SLA (Source Level Adjustment) evita saltos radicales en nivel del volumen cuando se cambia entre las fuentes. Los ajustes se basan en nivel del volumen de FM, que permanece inalterado. 1. Compare el volumen de FM con el volumen de la otra fuente. (Por ejemplo, reproductor de CD incorporado.) 2. -
Page 90: Ajustes Iniciales
Ajustes iniciales Selección del menú de ajustes iniciales Con este menú se pueden realizar los ajustes iniciales para el producto. 1. Desactive las fuentes. 2. Seleccione el menú de ajustes iniciales. SELECT SFEQ AUDIO FUNC Sostenga durante 2 segundos. 3. Seleccione el modo deseado. SELECT SFEQ AUDIO... -
Page 91: Funciones Del Menú De Ajustes Iniciales
Funciones del menú de ajustes iniciales El menú de ajustes iniciales provee las siguientes funciones. Ajuste de la hora (CLOCK) Este es el modo para ajustar la hora en la presentación visual del reloj de la unidad. (Refiérase a la página 45 para los detalles relacionados a la presentación visual del reloj.) 1. -
Page 92: Ajuste Del Paso De Sintonía Am (Am)
Ajustes iniciales Ajuste del paso de sintonía AM (AM) El paso de sintonía empleado en la banda AM del sintonizador se puede cambiar entre pasos de 9 kHz y 10 kHz. Reposicione el paso de sintonía de 9 kHz (paso fijado en la fábrica) para 10 kHz cuando utilice el sintonizador en América del Norte, Central o del Sur. -
Page 93: Ajuste Del Reductor De Luz (Dim)
Ajuste del reductor de luz (DIM) Para evitar que el visualizador de este producto quede muy brillante durante la noche, cuando se encienden los faros del vehículo la luz del visualizador se atenúa. Esta función se puede activar o desactivar. 1. -
Page 94: Conmutación Del Enmudecimiento/Atenuación
Ajustes iniciales 1. Presione el botón FUNCTION y seleccione la salida trasera y modo de ajuste del controlador de altavoz trasero (SW) en el menú de ajustes iniciales. 2. Cambie el ajuste de la salida trasera con los botones 5/∞. Nota: •... -
Page 95: Conmutación De La Pantalla De Película (Disp)
Conmutación de la pantalla de película (DISP) Es posible activar/desactivar el icono de fuente móvil mientras se está reproduciendo una fuente. Si selecciona desactivado, el icono de fuente móvil desaparecerá tras visualizarse la ani- mación inicial de la fuente. 1. Presione el botón FUNCTION y seleccione el modo de pantalla de película (DISP) en el menú... -
Page 96: Otras Funciones
Otras funciones Visualización de la hora • Para activar la visualización de la hora. SELECT SFEQ AUDIO FUNC La visualización de la hora desaparece temporalmente cuando se realiza otra operación, pero regresará después de 6 segundos. Nota: • Cuando las fuentes y la demostración de característica están desactivadas (OFF), la hora se visua- liza. -
Page 97: Uso De La Fuente Aux
Uso de la fuente AUX Un interconector IP-BUS-RCA, como el CD-RB20 o CD-RB10 (vendidos separadamente), permite la conexión de este producto a un equipo auxiliar con una salida RCA. Para los detalles, consulte el manual de instrucciones del interconector IP-BUS-RCA. Selección de la fuente AUX •... -
Page 98: Reproductor De Cd Y Cuidados
Reproductor de CD y cuidados Precaución • Reproduzca solamente discos CD que lleven la marca Compact Disc Digital Audio. (Si un CD presenta la marca en la parte derecha superior sobre el lado de título del disco, ese disco es un disco CD TEXT. Existen algunos discos CD TEXT que no tienen la marca en la parte derecha superior.) •... -
Page 99: Mensajes De Error Del Reproductor De Cd Incorporado
Cuando ocurren problemas con la reproducción de CD, aparece un mensaje de error en el visualizador. Vea la tabla siguiente para identificar el problema, y luego tome la acción recomendada. Si el error persistiera, comuníquese con su concesionario o Centro de Servicio PIONEER más cercano. Mensaje Causa posible Acción recomendada... -
Page 100: Especificaciones
Especificaciones General Salida de altavoz de graves secundario Frecuencia ..........50/80/125 Hz Fuente de alimentación ........14,4 V CC Pendiente ..........–18 dB/oct. (10,8 – 15,1 V permisible) Ganancia ............±12 dB Sistema de conexión a tierra ......Tipo negativo Fase ............ - Page 104 300 Allstate Parkway, Markham, Ontario L3R OP2, Canada Published by Pioneer Corporation. TEL: (905) 479-4411 Copyright © 2000 by Pioneer Corporation. PIONEER ELECTRONICS DE MEXICO, S.A. de C.V. All rights reserved. San Lorenzo 1009 3er. Piso Desp. 302 Publication de Pioneer Corporation.
Need help?
Do you have a question about the DEH-P6350 and is the answer not in the manual?
Questions and answers