Table of Contents
Advertisement
Advertisement
Table of Contents

Subscribe to Our Youtube Channel
Related Manuals for Plinius M16


Summary of Contents for Plinius M16
- Page 1 A u d i o P r e a m p l i f i e r...
- Page 3 We have designed and manufactured this preamplifier to reproduce faithfully and accurately, your favourite music. With a little care and a full understanding of the operating recommendations in this manual, your Plinius M16 Preamplifier will provide years of high-quality, trouble-free performance. Serial Number: ..................
- Page 4 Preamplifier Features – Front Panel .....................Page 6 Preamplifier Features – Rear Panel ....................Page 8 Preamplifier Features – Remote ....................Page 10 Installation and Operation ......................Page 12 Input/Output Connection ......................Page 13 M16 Features ..........................Page 15 Specifications ..........................Page 17 Index ............................Page 18 Contact Details ..........................Page 19...
- Page 5 Please take special note of the following precautions before operating your new preamplifier: • This preamplifier operates at hazardous voltage levels. We recommend that any work requiring removal of the lid or base be referred to a suitably qualified and experienced service technician. DO NOT attempt to connect any input of this preamplifier to its own outputs.
-
Page 6: Standby Led
Use the phase switch to change the phase response of the Plinius M16 from absolute to inverted 180°. The LED above the switch will light when the unit is set to inverted phase. If your M16 has the optional phono stage installed, the opposite applies for the phono circuitry only. In other words, when in phono the phase LED will light when in absolute phase, but with any other input selected the phase LED will light when in inverted phase. -
Page 7: Volume Control Knob
The volume control is an ALPS motorised unit that will accurately convey the selected source signal to the line stage of the Plinius M16. When using the remote control to alter the volume level, stab the button to make small adjustments, or hold the button down to continuously adjust the volume. -
Page 8: Input Terminals
Please remember that your Plinius M16 Preamplifier is a high quality electronic instrument capable of an exceptional level of performance. Be sure that you understand your system’s requirements fully before you make any connection to this preamplifier. -
Page 9: Output Terminals
This switch works in conjunction with the remote control to short the outputs and disconnect the inputs. Use this switch whenever the Plinius M16 is not in use. Note that when in standby the line stage and power supply is still live, so the internal circuitry will stay at normal operating temperature. -
Page 10: Volume Control
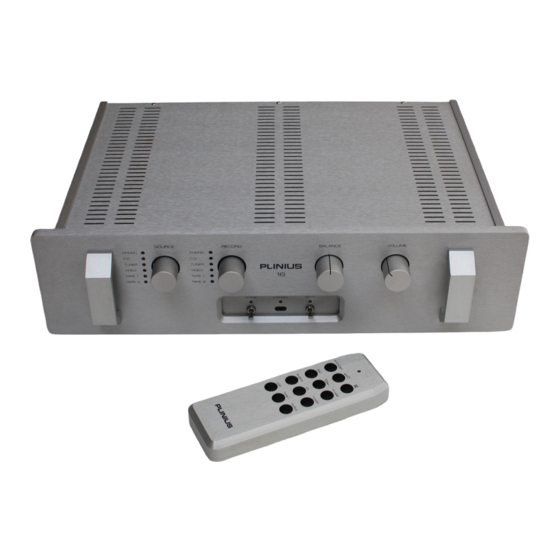
The Plinius M16 Remote provides access to most of the controls you will require on a daily basis. STANDBY PHASE RECORD PHONO C.D. TUNER TAPE 1 TAPE 2 PLINIUS EMOTE ONTROL HOWING UNCTION UTTONS VOLUME CONTROL Use these two buttons to control the volume level of the preamplifier. The middle top button increases volume, while the button directly below it decreases the volume. -
Page 11: Source Selection
STANDBY Standby shorts the outputs of the preamplifier and disconnects the inputs. It is recommended that whenever the Plinius M16 is left switched on but not in use, the standby function be implemented. RECORD The record button toggles the selected recording source for both tape loop outputs. Use this button to select the source from which you want to record. -
Page 12: Placement And Ventilation
(slots in the lid) are not covered or restricted in any way. The Plinius M16 design incorporates a very high level of mechanical de-coupling of the input and output. However, it can still be influenced by acoustical feedback in the operating environment. The use of acoustic cones or a suitably spiked preamplifier stand or table, may further enhance the performance of this preamplifier. -
Page 13: Recording Music
Connect your phono turntable, CD player, tuner, tape deck, etc, to the corresponding RCA inputs on the back of the Plinius M16. Make sure you connect the red coded cable to the red RIGHT RCA input, and the black (or white) cable to the black LEFT RCA input. Also make sure the RCA connectors are a snug fit and are inserted all the way in. -
Page 14: Connecting The Mains Supply
Plinius M16 Preamplifier. WARM-UP PERIOD You will find that the Plinius M16 will become noticeably ‘warmer’ in sound after being on for a period of time. We usually recommend waiting at least 72 hours before expecting the best quality of sound reproduction from your preamplifier. - Page 15 The M16 mini-switches are factory set to a 47kΩ load. Also, switch 1 is set in the on position. This is a 220pF capacitive setting and is usually required for RF suppression. It is not recommended that you turn switch 1 off.
-
Page 16: Led Brightness Control
LED BRIGHTNESS CONTROL Your Plinius M16 has an internal LED brightness control that will adjust the front panel LED’s. A small flat bladed screwdriver can be used to adjust the brightness. The LED brightness control is a small multi turn potentiometer and is located on the front of the main circuit board within the top cavity of the amplifier, and is labelled VR3. - Page 17 F F F F R R R R : : : : Phono RIAA and Line Inputs 20Hz to 20kHz ±0.2dB. REQUENCY REQUENCY REQUENCY REQUENCY ESPONSE ESPONSE ESPONSE ESPONSE D D D D : Typically <0.05% THD at rated input level. ISTORTION ISTORTION ISTORTION...
- Page 18 Balance Control..........................Page 7 Date of Manufacture ........................Page 3 Front Panel Layout..........................Page 6 Front Panel Switches........................Page 6 Fuse Protection ..........................Page 16 Ground Lift Switch..........................Page 9 IEC Power Connector......................Pages 12,14 Input Terminals ........................Pages 8,13 Mains/Line Fuse...........................Page 16 Mains Supply Connection......................Page 14 Mains Switch ..........................Page 9 Output Terminals........................
- Page 19 All operational, technical and descriptive material published here is subject to change at any time without notice. For further product information or queries, please contact us at the address below. PLINIUS PLINIUS products are designed and manufactured by: PLINIUS PLINIUS Audible Technologies Ltd.
Need help?
Do you have a question about the M16 and is the answer not in the manual?
Questions and answers