Sign In
Upload
Download
Table of Contents
Contents
Add to my manuals
Delete from my manuals
Share
URL of this page:
HTML Link:
Bookmark this page
Add
Manual will be automatically added to "My Manuals"
Print this page
×
Bookmark added
×
Added to my manuals
Manuals
Brands
GE Manuals
Digital Camera
X Series
User manual
GE X Series User Manual
Hide thumbs
Also See for X Series
:
User manual
(89 pages)
1
2
3
4
5
Table Of Contents
6
7
8
9
10
11
12
13
14
15
16
17
18
19
20
21
22
23
24
25
26
27
28
29
30
31
32
33
34
35
36
37
38
39
40
41
42
43
44
45
46
47
48
49
50
51
52
53
54
55
56
57
58
59
60
61
62
63
64
65
66
67
68
69
70
71
72
73
74
75
76
77
78
79
80
81
82
83
84
85
86
87
88
89
page
of
89
Go
/
89
Contents
Table of Contents
Troubleshooting
Bookmarks
Table of Contents
Warning
Safety Precautions
Before You Start
Preface
Copyright
Trademarks
Safety Information
About this Manual
Symbols Used in this Manual
Table of Contents
Contents
Getting Ready
Unpacking
Install Shoulder Strap and Lens Cap
Camera Views
SD/SDHC Card (Not Included)
Turning on and O
Setting Language and Date/Time
Set Display Language
Set Date/Time
Using the Mode Dial
About the LCD Screen
Basic Operation
Shooting in Auto Mode
Using the Zoom Function
Open Flash
Self-Timer
Macro Mode
EV (Exposure Value)
Face Detection
Smile Detection
Blink Detection
Advanced Functions Menu
WB (White Balance)
Iso
Quality
Color
Using the Modes
LCD Screen Display
Still Picture Mode Display
Video Shooting Mode Display
Playback Mode Display
Auto Scene Mode (ASCN)
Landscape
Portrait
Night Portrait
Backlit Portrait
Night Landscape
Macro
Auto
Panorama
Scene Mode (SCN)
Sport
Indoor
Snow
Fireworks
Museum
Night Landscape
Children
Leaf
Sunset
Glass
Landscape
Night Portrait
Beach
Text
Gathering
Fish Eye
Travel Shooting
Portrait Mode
Auto Program Exposure
Shutter Priority
Aperture Priority
Manual Mode
Playback
Viewing Photos and Videos
Thumbnail View
Using Zoom on Playback (for Still Pictures Only)
Using the Delete Button
Using the Menus
Still Picture Menu
AF Mode (Auto-Focus Mode)
AF-Assist Beam
Continuous AF
Expo Metering (Exposure Metering)
Continuous Shot
Date Imprint
Quick Review
Digital Zoom
Movie Menu
Continuous AF
Expo Metering (Exposure Metering)
Playback Menu
Protect
Delete
DPOF (Digital Print Order Format)
Trim
HDR-High Dynamic Range
Rotate
Red-Eye Reduction
Display Setup
Slideshow
Wallpaper Settings
Setup Menu
Beep
LCD Brightness
Power Saver
Zone
Date/Time
Language
File and Software
File Numbering
Copy to Card (Copy Internal Memory to Memory Card)
Reset Settings
FW Version (Firmware Version)
Connections
Video System
Connecting to a PC
Setting the USB Mode
Transferring Files to Your PC
Connecting to a Pictbridge Compatible Printer
Setting the USB Mode
Connecting the Camera and Printer
Using the Pictbridge Menu
Print with Date
Print Without Date
Print Index
Print DPOF
Exit
Appendices
Error Messages
Troubleshooting
Advertisement
Quick Links
Download this manual
imagination at work
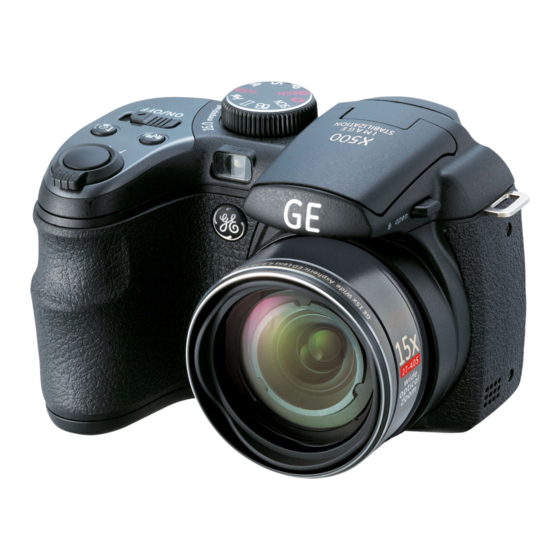
GE Digital Camera
X Series : X500
All manuals and user guides at all-guides.com
User Manual
Getting Started
Basic operation
Camera function controls
Playback
Using the Menus
Camera connectivity
Appendix
Table of
Contents
Previous
Page
Next
Page
1
2
3
4
5
Advertisement
Table of Contents
Need help?
Do you have a question about the X Series and is the answer not in the manual?
Ask a question
Questions and answers
Related Manuals for GE X Series
Digital Camera GE X500 User Manual
X series digital camera (89 pages)
Digital Camera GE E1050 Specifications
A series, g series, e series, x series digital camera (31 pages)
Digital Camera GE X2600 Power PRO Series User Manual
Power pro series (50 pages)
Digital Camera GE X2600 Quick Manual
Power pro series 16 mp 26x zoom 3” lcd hd video (2 pages)
Digital Camera GE X400 Power Pro Series User Manual
Power pro series (89 pages)
Digital Camera GE X400 Quick Manual
Power pro series 14 mp, 15x zoom, 2.7” lcd (2 pages)
Digital Camera GE X450 User Manual
Power pro series (102 pages)
Digital Camera GE X450 User Manual
(102 pages)
Digital Camera GE X450 Quick Start Manual
Power pro series (2 pages)
Digital Camera GE X550 User Manual
(89 pages)
Digital Camera GE X500 User Manual
(89 pages)
Digital Camera GE A735 - SERVICE Service Note
Battery indicator meter (2 pages)
Digital Camera GE E1250TW User Manual
User manual (portuguese) (98 pages)
Digital Camera GE J1458W Bruksanvisning
User manual (norsk (norwegian)) (84 pages)
Digital Camera GE E1250TW User Manual
User manual (french) (98 pages)
Digital Camera GE Smart Series User Manual
(84 pages)
This manual is also suitable for:
X500
Table of Contents
Print
Rename the bookmark
Delete bookmark?
Delete from my manuals?
Login
Sign In
OR
Sign in with Facebook
Sign in with Google
Upload manual
Upload from disk
Upload from URL


Need help?
Do you have a question about the X Series and is the answer not in the manual?
Questions and answers