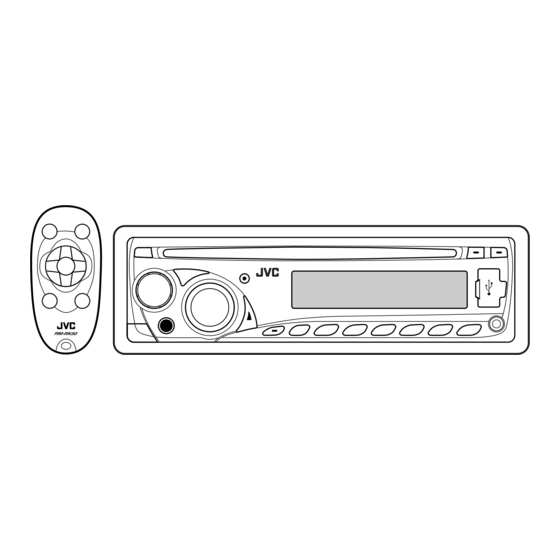
JVC KD-G646 Instructions Manual
Cd receiver
Hide thumbs
Also See for KD-G646:
- Installation & connection manual (4 pages) ,
- Instructions manual (42 pages)
Summary of Contents for JVC KD-G646
- Page 1 CD RECEIVER KD-G646/KD-G645 KD-G646/KD-G645 For canceling the display demonstration, see page 6. For installation and connections, refer to the separate manual. INSTRUCTIONS GET0502-005A [UT]...
- Page 2 • Your preset adjustments will also be erased. • Be careful not to drop the disc when it ejects. • If this does not work, reset your unit.
- Page 3 CONTENTS 5 ∞...
-
Page 4: Control Panel
Control panel — KD-G646/KD-G645 Parts identification Display window ∞ DO NOT expose the remote sensor to strong light (direct sunlight or artificial lighting). ¢... -
Page 5: Remote Controller
Remote controller — Main elements and features RM-RK50 Installing the lithium coin battery (CR2025) Aim the remote controller directly at the remote sensor on the unit. Make sure there is no obstacle in between. ∞ Warning: ∞... -
Page 6: Turn On The Power
Getting started Basic settings Basic operations Turn on the power. Ÿ 1 Canceling the display demonstrations * You cannot select these sources if they are not 2 Setting the clock ready or not connected. For FM/AM tuner Finish the procedure. ⁄... -
Page 7: Storing Stations In Memory
When an FM stereo broadcast is hard to Radio operations receive Lights up when monaural mode is activated. Ÿ Lights up when receiving an FM stereo broadcast with sufficient signal strength. Reception improves, but the stereo effect will be lost. To restore the stereo effect, repeat the same procedure. - Page 8 Disc / USB device operations * If no title is assigned to a station, “NO NAME” appears. To assign a title to a station, see page 14.
- Page 9 Ÿ To fast-forward or reverse the track To go to the next or previous track If a USB device has been attached... To go to the next or previous folder (for MP3/WMA) To detach the USB device, To locate a particular track (for CD) or folder (for MP3/WMA) directly Cautions:...
- Page 10 • For MP3/WMA, you can skip tracks within the same folder ] = = (back to the beginning) Ex.: To select track 32 while playing tracks whose number is a single digit (1 to 9) • Each time you press the button, you can skip 10 ] = = (back to the tracks.
-
Page 11: Selecting The Playback Modes
Sound adjustments Selecting the playback modes Select your desired playback mode. Preset values BAS MID TRE LOUD 7 Repeat play Indication (For) USER Mode Plays repeatedly ROCK TRACK RPT FOLDER RPT CLASSIC RPT OFF 7 Random play POPS HIP HOP Mode Plays at random FOLDER RND... -
Page 12: General Settings - Psm
Indication, [Range] General settings — PSM BASS MIDDLE TREBLE Select a PSM item. FADER BALANCE Adjust the PSM item selected. LOUD SUB.W Repeat steps 2 and 3 to adjust other PSM items if necessary. VOL ADJ Finish the procedure. VOLUME... - Page 13 If the power supply is not interrupted by turning off the ignition key of your car, it is recommended to select “CLOCK OFF” that you save the car’s battery. Some characters or symbols will not be shown correctly (or will be blanked) on the display. Displayed only when “L/O MODE”...
-
Page 14: Other External Component Operations
Other external component Title assignment operations Select FM/AM. Show the title entry screen. Assign a title. Select a character. Move to the next (or previous) character position. Ÿ Turn on the connected component and start playing the source. Adjust the volume. Repeat steps until you finish entering the title. -
Page 15: Maintenance
Maintenance... -
Page 16: More About This Unit
More about this unit Basic operations Turning on the power Playing a CD-R or CD-RW Turning off the power Tuner operations Storing stations in memory Disc operations Caution for DualDisc playback General... - Page 17 Playing an MP3/WMA disc Playing MP3/WMA tracks from a USB device Continued on the next page...
- Page 18 General settings—PSM Title assignment Changing the source Ejecting a disc or removing a USB device...
-
Page 19: Troubleshooting
Troubleshooting Symptoms Remedies/Causes Continued on the next page... - Page 20 Symptoms Remedies/Causes * Folder that is physically empty or folder that contains data but does not contain valid MP3/WMA track.
-
Page 21: Specifications
Specifications AUDIO AMPLIFIER SECTION CD PLAYER SECTION USB SECTION TUNER SECTION GENERAL FM Tuner AM Tuner Design and specifications are subject to change without notice. - Page 22 Having TROUBLE with operation? Please reset your unit Refer to page of How to reset your unit EN, CT © 2007 Victor Company of Japan, Limited 1007DTSMDTJEIN...
- Page 23 KD-G646/KD-G645 Installation/Connection Manual 1007DTSMDTJEIN GET0502-010A EN, CT © 2007 Victor Company of Japan, Limited ENGLISH 12 V DC, NEGATIVE ground electrical systems 12 V WARNINGS • • Be sure to ground this unit to the car’s chassis again after installation.
-
Page 24: Installation (In-Dash Mounting)
INSTALLATION (IN-DASH MOUNTING) • Removing the unit When using the optional stay / When installing the unit without using the sleeve / × × Note... - Page 25 ENGLISH ELECTRICAL CONNECTIONS Typical connections / Before connecting:...
- Page 26 • Disconnect the speakers from this unit, connect them to the amplifier. Leave the speaker • leads of this unit unused. JVC Amplifier Set “L/O MODE” to “REAR” (See page Set “L/O MODE” to “SUB.W” (See page 13 of the INSTRUCTIONS.) 13 of the INSTRUCTIONS.)


Need help?
Do you have a question about the KD-G646 and is the answer not in the manual?
Questions and answers