Table of Contents
Advertisement
Quick Links
Download this manual
See also:
Service Manual
8C-AVA-903-01
020215AMK-H-L
DVD PLAYER
PLATINA DVD
XD-PG700
Owner's record
For your convenience, record the model number and serial
number (you will find them on the rear of your set) in the
space provided below. Please refer to them when you
contact your Aiwa dealer in case of difficulty.
Model No.
Serial No. (Lot No.)
XD-PG700
For assistance and information,
call toll free 1-800-BUY-AIWA.
(United States and Puerto Rico)
U
OPERATING INSTRUCTIONS
MANUAL DE INSTRUCCIONES
En
(English)
E
(Español)
Advertisement
Table of Contents

Related Manuals for Aiwa XD-PG700


Summary of Contents for Aiwa XD-PG700
-
Page 1: Dvd Player
For your convenience, record the model number and serial number (you will find them on the rear of your set) in the space provided below. Please refer to them when you contact your Aiwa dealer in case of difficulty. Model No. Serial No. (Lot No.) -
Page 2: Precautions
ENGLISH - Do not place the unit on a bed, rug, or similar surface WARNING that may block the ventilation openings. - Do not install the unit in a bookcase, cabinet, or airtight TO REDUCE THE RISK OF FIRE OR rack where ventilation may be impeded. -
Page 3: Table Of Contents
Table of Contents More Features Search ..............26 Title search ............26 Introduction Chapter search ..........27 Time search ............. 27 Precautions ............... 2 Mark search ............. 28 Before Use ..............4 Zooming and Changing the Angle ...... 29 Disc symbols used in this manual ....4 Zooming the picture ........ -
Page 4: Before Use
Before Use Please read the following before operating the unit. Supported disc formats Disc symbols used in this manual This unit can play discs with the following marks. Although this unit can play DVDs, audio CDs and MP3 discs, some of the functions are restricted depending on the type (8-cm and 12-cm discs) of disc. -
Page 5: Disc-Related Terms
Regular inspection and maintenance are recommended after every 1,000 hours of use. (This depends on the operating environment.) For details, please contact your Aiwa dealer. CONTINUE CONTINÚE ENGLISH... -
Page 6: Cleaning Discs
Before Use (continued) Cleaning discs Remote control Fingerprints and dust on the disc can cause poor picture Installing batteries quality and sound distortion. Before playing, clean the disc Detach the battery cover on the rear of the remote control, with a clean cloth. Wipe the disc from the center out. and insert two R03 (size AAA) batteries with 0 and 9 aligned correctly. -
Page 7: General Information On Progressive Scan
General information on progressive scan This unit includes a progressive scan conversion circuit. This generates high-resolution progressive scan video, with a lower flicker rate, allowing you to see the movie at its original quality. What is a progressive scan? The conventional television system has 525 scan lines In distinction to this, a progressive scan is one where all of making up a frame, but these are scanned in alternate the lines are scanned successively in a single pass. -
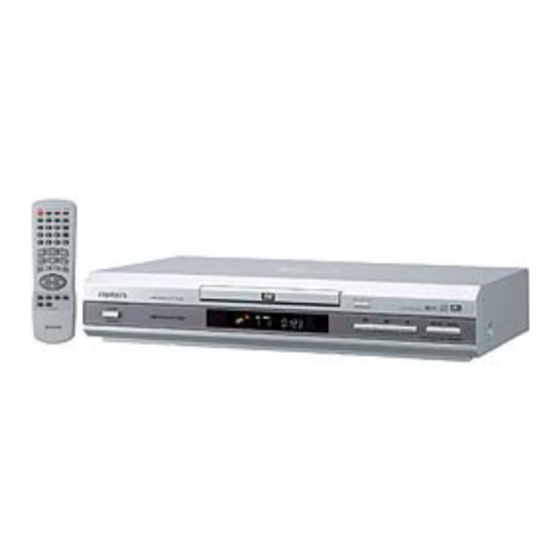
Page 8: Parts And Controls
Parts and Controls Front panel 8 9 0 6STANDBY/ON indicator g/t button • Lights in red when the unit is in power-off standby • Press to skip to the next chapter/track. mode. • Lights in green when the unit is turned on. •... - Page 9 MENU button & • Press to display menu programs. • Press to move to the previous page of the track/ program list in the OSD menu. REPEAT button Press to repeat playback. A-B button Press to specify the starting and ending points of a section to be repeated.
-
Page 10: Display Window
Parts and Controls (continued) Display window The unit shows on-screen display menus and messages on the TV screen, and LCD indications in the unit's display window. They make operations simple and easy, especially when playing DVDs. The instructions in this manual refer mainly to the on-screen display on the TV screen. TITLE CHP/TRK PROG. -
Page 11: Connections
Connections Before making connections, identify the type of your audio equipment and TV referring to the respective charts. Then, decide the connection and setup procedures accordingly. Before making connections • Connect the AC cords of the unit and any external equipment last, after finishing all other connections. •... -
Page 12: Connecting To Audio Equipment
Connections (continued) Connecting to audio equipment Audio equipment to be connected Input jack of the audio Refer to to the unit equipment A on pages 13-15 None (only a TV is connected) — B on page 16 • Amplifier Digital input jack •... -
Page 13: A-1 Connecting To A Tv
A-1 Connecting to a TV Rear of the TV Video input jack (yellow) Audio input jacks (Left/white, Right/red) yellow Audio cord (supllied) Video cord (supplied) white yellow to AUDIO OUT Rear of the unit L (white)/R (red) jacks to VIDEO OUT jack (yellow) DIGITAL AUDIO COAXIAL... -
Page 14: A-2 Connecting To A Tv Equipped With An S-Video Input Connector
Connections (continued) A-2 Connecting to a TV equipped with an S-video input connector Rear of the TV S-video input connector (S1, S2) S-video cord (not supplied) Set the VIDEO OUTPUT switch to S-VIDEO to S-VIDEO OUT connector Rear of the unit DIGITAL AUDIO COAXIAL... -
Page 15: A-3 Connecting To A Tv Or Monitor With Component Video Input Connectors
A-3 Connecting to a TV or monitor with component video input connectors TV or monitor to the video input jacks Video cables (not supplied) blue green Set the VIDEO OUTPUT switch to to COMPONENT VIDEO COMPONENT/PROGRESSIVE SCAN OUT/PROGESSIVE SCAN (C /Y) jacks Rear of the unit DIGITAL... -
Page 16: B Connecting To A Tv And An Amplifier With A Digital Input Jack
Connections (continued) B Connecting to a TV and an amplifier with a digital input jack yellow to the video input jack (yellow) Video cord (supplied) yellow to VIDEO OUT jack Rear of the unit (yellow) DIGITAL AUDIO COAXIAL DIGITAL VIDEO S-VIDEO COMPONENT OUTPUT... -
Page 17: C Connecting To A Tv And A Stereo System
C Connecting to a TV and a stereo system yellow to the video input jack (yellow) Video cord (supplied) yellow to VIDEO OUT jack Rear of the unit (yellow) DIGITAL AUDIO COAXIAL DIGITAL VIDEO S-VIDEO COMPONENT OUTPUT VIDEO OUT/ PROGRESSIVE S-VIDEO SCAN VIDEO... -
Page 18: D Connecting To A Tv And An Av Receiver Equipped With A Dolby Digital (Ac-3) Decoder
Connections (continued) D Connecting to a TV and an AV receiver equipped with a Dolby Digital (AC-3) decoder yellow to the video input jack (yellow) Video cord (supplied) yellow to VIDEO OUT jack (yellow) Rear of the unit DIGITAL AUDIO COAXIAL DIGITAL VIDEO... -
Page 19: E Connecting To A Tv And An Av Receiver Equipped With A Dts Decoder
E Connecting to a TV and an AV receiver equipped with a DTS decoder yellow to the video input jack (yellow) Video cord (supplied) yellow Rear of the unit to VIDEO OUT jack (yellow) DIGITAL AUDIO COAXIAL COMPONENT DIGITAL VIDEO S-VIDEO OUTPUT VIDEO OUT/... -
Page 20: F Connecting To A Tv And An Av Receiver Equipped With A Dolby Pro Logic Decoder
Connections (continued) F Connecting to a TV and an AV receiver equipped with a Dolby Pro Logic decoder yellow to the video input jack (yellow) Video cord (supplied) yellow to VIDEO OUT jack (yellow) Rear of the unit DIGITAL AUDIO COAXIAL DIGITAL VIDEO... -
Page 21: Playback
Press POWER (6STANDBY/ON). The unit turns on and the 6STANDBY/ON indicator turns green. The "aiwa" screen appears on the TV screen. Press zOPEN/CLOSE. The disc tray opens. Load a disc. -
Page 22: Still (Pause)
Playback (continued) Still (pause) The OSD menu for the CD is displayed on the TV screen. Press i/k to select a track on the track list, then press Press a during playback. SELECT/ENTER or c to start playback. Press TOP MENU to move to the next page or MENU to To return to normal playback move back to the previous page of the track list. -
Page 23: Fast Forward And Fast Reverse
Fast forward and fast reverse Slow playback Press and hold r (/f) or (g/) t Press G SLOW or F SLOW during for about 2 seconds during playback. playback. Each time you press and hold the button, the play speed changes as shown below. -
Page 24: Basic Operation Of The Osd (On-Screen Display) Menu
Playback (continued) Basic operation of the OSD (On-Screen Display) menu You can check the general playback status or start playback from a desired point on the disc, etc. by displaying and Press DISPLAY during playback. operating the OSD menu. Press i/k to select a desired menu item. -
Page 25: Description Of Each Osd Menu Item
Description of each OSD menu item Each menu item shows its current status/setting which can be changed on the OSD menu. For details of the functions or optional settings, refer to the page in parentheses. Menu item Current status/setting Function Title number/total number of titles Skip to the desired title (page 26). -
Page 26: Search
Search Title search Press DISPLAY during playback or in stop mode. Number CLEAR buttons If the unit is in stop mode, continue to step 3. Press i/k to select "T" (title). SELECT/ENTER DISPLAY i/k/j/l Press j/l to select a desired title number. -
Page 27: Chapter Search
Chapter search Time search Press DISPLAY during playback. Press DISPLAY during playback. Press i/k to select "C" (chapter). Press i/k to select the time icon. - : - - : - - Press j /l to select a desired Use the number buttons to enter the chapter number. -
Page 28: Mark Search
Search (continued) To start playback from a marked point Press SEARCH during playback or in MARK SEARCH stop mode. The mark search menu appears on the TV screen. Number CLEAR buttons MARKER SEARCH 1 2 3 4 5 – – – – Within 10 seconds, press j/l to SELECT/ENTER select a marked point you want to... -
Page 29: Zooming And Changing The Angle
Zooming and Changing the Angle Changing the angle When playing a DVD with multi-angle scenes ANGLE (photographed from several different angles), you can select the angle you want to view. CLEAR When a multi-angle scene comes on during playback, " "... -
Page 30: Random And Repeat Playback
Random and Repeat Playback Repeat playback Press REPEAT during playback. RANDOM Each time you press the button, repeat play mode changes as follows: CHAPT: Repeats the chapter currently being played. CHAPT REPEAT TITLE: Repeats the title currently being played. TITLE Random playback KARAOKE Press RANDOM during playback or in stop... -
Page 31: Repeating A Section Between Two Specified Points (A-B Repeat)
Repeating a section between two TRACK: specified points (A-B repeat) Repeats the track currently being played. You can specify a section and play it repeatedly. TRACK During playback, press A-B at the starting point (A) of the section you want to repeat. ALL: Repeats all tracks on the disc or on the program list. -
Page 32: Programmed Playback
Programmed Playback Press SELECT/ENTER. The selected track is entered on the program list. Program PROGRAM TRACK 1 TRACK 5 CLEAR TRACK 2 TRACK 3 TRACK 4 TRACK 5 TRACK 6 TRACK 7 Clear All TRACK 8 SELECT/ENTER 1:05:00 STER. NORM. i/k/j/l TOP MENU Repeat steps 2 and 3 to enter... - Page 33 To return to normal playback Press and hold PROGRAM for about 3 seconds. Alternatively, press the j left cursor button and i/k to select a track, then press c or SELECT/ENTER. The PROG. indicator disappears from the display window and the OSD menu. To repeat programmed playback Press REPEAT repeatedly.
-
Page 34: Creating A 3D Surround Effect
Creating a 3D Surround Effect Press j/l to select "3D SUR". 3D SUR NOTES • If no button is pressed for 10 seconds, the OSD menu disappears. DISPLAY • The 3D surround effect may not function with some DVDs. i/k/j/l Press DISPLAY during playback. -
Page 35: Changing The Audio Track/Channel
Changing the Audio Track/Channel Some discs have more than one audio track, such as soundtracks with different languages. While playing such a disc, the audio track can be changed to play the different soundtracks. AUDIO Although the following is the simpler procedure, you can also change the soundtrack by operating the OSD menu (see page 24). -
Page 36: Displaying And Changing Subtitles
Displaying and Changing Subtitles When playing DVDs which contain subtitles, you can turn on and off the subtitle display on the TV screen or change the language of the subtitles. Although the following is the simpler procedure, you can SUBTITLE also change the subtitle language and turn on/off the subtitle display by operating the OSD menu (see page 24). -
Page 37: Playing An Mp3 Disc
Playing an MP3 Disc The unit can play MP3 audio recorded on CD-ROM, CD-R Notes on creating MP3 discs or CD-RW discs. • When converting audio data to MP3 Before playing an MP3 disc, read the following notes. Create MP3 files with a sampling frequency of 44.1 kHz and a fixed bit rate of 128 kbps. -
Page 38: Basic Operations Of Mp3 Playback
Playing an MP3 Disc (continued) Press i/k to select a track. Press TOP MENU to move to the next page or MENU to move to the previous page of the track list. Press c or SELECT/ENTER to start playback. Program 01 TRACK. -
Page 39: Osd (On-Screen Display) Menu For The Mp3 Disc
OSD (On-Screen Display) menu for the MP3 disc The OSD menu for the MP3 disc is displayed when an MP3 disc is loaded. It enables you to check the general playback status, select tracks and perform programmed playback. Program 01 TRACK. mp3 02 TRACK. -
Page 40: Changing Setup Values
Changing Setup Values Press i/k to select the item to be changed, then press the l right cursor button. Disc Audio* (page 41) Sets the audio soundtrack language. Disc Subtitle* (page 42) Sets the subtitle language. Disc Menu* (page 42) SELECT/ENTER Sets the language used in the DVD menu screen. -
Page 41: Disc Audio
Press i/k to select the desired language. Original: The original language set for the disc is selected. Number English/French/German/Spanish/Italian/Chinese/ CLEAR buttons Polish/Hungarian/Russian Other: To select another language, use the number buttons to enter its 4-digit language code referring to the language code SELECT/ENTER list on page 50. -
Page 42: Disc Subtitle
Changing Setup Values (continued) Disc Subtitle Disc Menu The subtitle language on a DVD can be changed. If the The language used in the DVD menu can be changed. If selected language is not available on the disc, the original the selected language is not available on the disc, the language for the disc is selected. -
Page 43: Rating
Rating Press i/k to select the desired restriction level and press SELECT/ Some DVDs contain parental control information that ENTER. applies to the complete disc or certain scenes on the disc. By using the parental control feature of the unit, you can specify the restriction level to prevent the unit from playing 8 Blocked Disc Audio... -
Page 44: Country Code
Changing Setup Values (continued) Country Code TV Aspect After you specify the restriction level in the previous "Rating" Select the appropriate display format, depending on section, set the country code so that the restriction level is whether you are using a conventional (4:3) or wide-screen adjusted to match the cinema rating system of your country. -
Page 45: Menu Language
4:3 Letterbox: Menu Language Select this when a conventional TV is connected. Titles recorded in wide-screen (16:9) format will be played in The language used in this setup menu can be changed. letterbox mode, with black bands at the top and bottom of the screen. -
Page 46: Progressive Scan
Changing Setup Values (continued) Progressive Scan Digital Audio Output When connecting the unit to a progressive-scan compatible Set the audio output of the unit according to the type of TV, you can take advantage of the unit's progressive scan audio equipment connected to the unit. output enabling high quality video playback with less flickers. -
Page 47: Others
Output Others Playback Stream/ DOLBY disc DIGITAL/ You can turn on and off the DRC (Dynamic Range Control). When the DRC is turned on, the unit compresses the 96-kHz dynamic range of the audio output (i.e. the difference linear PCM between the loudest and the quietest sounds) so that you can listen to a movie or music at a low volume without losing the clarity of sound. -
Page 48: Country Codes
Changing Setup Values (continued) Country codes Code Country Code Country Code Country Andorra China Guinea Bissau United Arab Emirates Colombia Guyana Afghanistan Costa Rica Hong Kong Antigua and Barbuda Former Czechoslovakia Heard and McDonald Islands Anguilla Cuba Honduras Albania Cape Verde Croatia Armenia Christmas Island... - Page 49 Code Country Code Country Code Country Moldavia Reunion (French) Uzbekistan Madagascar Romania Vatican City State Marshall Islands Russian Federation Saint Vincent & Grenadines Macedonia Rwanda Venezuela Mali Saudi Arabia Virgin Islands (British) Myanmar Solomon Islands Virgin Islands (USA) Mongolia Seychelles Vietnam Macau Sudan...
-
Page 50: Language Codes
Changing Setup Values (continued) Language codes Code Language Code Language Code Language 6565 Afar 7285 Hungarian 8084 Portuguese 6566 Abkhazian 7289 Armenian 8185 Quechua 6570 Afrikaans 7365 Interlingua 8277 Rhaeto-Romance 6577 Amharic 7378 Indonesian 8279 Romanian 6582 Arabic 7383 Icelandic 8285 Russian 6583... -
Page 51: Troubleshooting
Troubleshooting If something seems to be wrong with your DVD player, first check the items in the table below. Symptom Check See page • Is the power cord plugged firmly into a live outlet? The power does not come on. •... -
Page 52: Specifications
Specifications Power supply 120 V AC, 60 Hz NOTE Power consumption 14 W This equipment has been tested and found to comply with Power consumption in standby mode the limits for a Class B digital device, pursuant to Part 15 2.4 W of the FCC Rules. - Page 53 Call Toll Free 1-800-BUY-AIWA For Assistance and Information, (United States and Puerto Rico) Printed in China...
Need help?
Do you have a question about the XD-PG700 and is the answer not in the manual?
Questions and answers