Advertisement
Table of Contents
- 1 Power Supply
- 2 Remote Control
- 3 Adjusting the Clock
- 4 Before Operation
- 5 Programmed Play
- 6 Repeat Play (Remote Control Only)
- 7 Mp3 CD Operation
- 8 Listening to the Radio
- 9 Automatic/Manual Tuning
- 10 Listening to Preset Stations
- 11 Timer Operation
- 12 Using the Sleep Timer
- 13 Maintenance
- 14 Specifications
- Download this manual
Advertisement
Table of Contents

Related Manuals for Sanyo DTA-300M


Summary of Contents for Sanyo DTA-300M
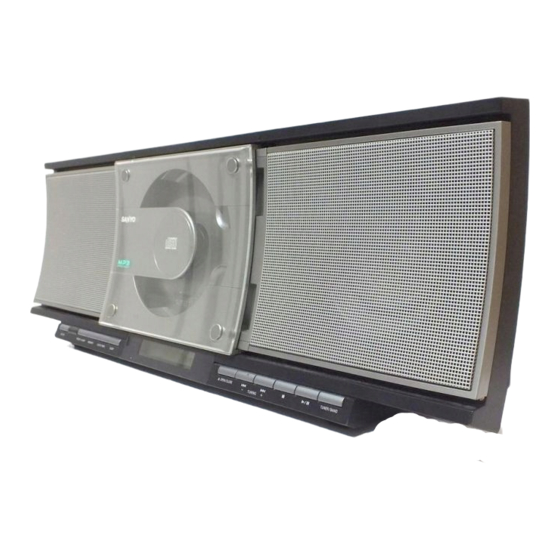
- Page 1 DTA-300M INSTRUCTIONS MANUAL Audio System REMOTE CONTROLLER RB - DTA300M...
- Page 2 PRECAUTIONS CAUTION THIS PRODUCT CONTAINS A LOW POWER LASER DEVICE, TO ENSURE CONTINUED SAFETY DO NOT REMOVE ANY COVERS OR ATTEMPT TO GAIN ACCESS TO THE INSIDE OF THE PRODUCT. REFER ALL SERVICING TO QUALIFIED PERSONNEL. CLASS 1 LASER PRODUCT LUOKAN 1 LASERLAITE KLASS 1 LASERAPPARAT The apparatus shall not be exposed to dripping or splashing.
-
Page 3: Power Supply
CONNECTIONS Amplified Subwoofer (not supplied) Note: Headphones Do not connect the AC adaptor to an AC outlet until all connections Connect stereo headphones (not supplied) to the PHONES socket for have been made. monitoring or for private listening. The speakers are automatically dis- connected when headphones are connected. -
Page 4: Remote Control
REMOTE CONTROL Replacing the battery Controls Please purchase CR2025. Lithium Battery. REMOTE CONTROLLER RB - DTA300M Notes: When the remote control does not work properly, the battery is weak Replace it. 1. Power button (z/ON) Remove the battery if the remote control is not be used for a month 2. -
Page 5: Adjusting The Clock
ADJUSTING THE CLOCK NOTE: 5. Press the f or e button to set the “minutes”. When the unit is first connected to the AC power line, the clock display blinks on the display. Example: To set “6:30” 6. Press the MEMORY button. The clock starts. 1. -
Page 6: Programmed Play
CD PLAY Use compact discs bearing the symbol “REP” appears “REP” blinks shown. In addition to conventional 12 (Repeat all track) (Repeat one tracks) cm CDs, this system can be used to play 8 cm CDs without an adaptor. Released 1. -
Page 7: Mp3 Cd Operation
MP3 CD OPERATION MP3 CD OPERATION MP3 CD Play (Using the remote control) 1. Lord the MP3 CD. “READING” then the total number of files and total number of tracks This unit can play back the CD-R/RW that has recorded music data or and MP3 appear on the display. -
Page 8: Listening To The Radio
LISTENING TO THE RADIO Automatic/Manual tuning 5. Repeat the steps above to add more preset stations. 1. Press the TUNER/BAND button to select FM or AM. When presetting a new station, the previously preset station is “TU” appears on the display, then “TU” is replaced by the tuner cleared. -
Page 9: Timer Operation
TIMER OPERATION When the timer ON time arrives, the power is turned on automati- Using the timer cally and the unit starts playing with the preset function selected. “ON TIMER OFF” remains lit while timer operation is engaged. Set the on and off times, and function to be used. Operation will start When the timer OFF time arrive, the power turn off and the with the selected function at the on time. -
Page 10: Maintenance
MAINTENANCE MAINTENANCE Cleaning the unit Clean the outside of the unit with a clean soft cloth, moistened with lukewarm water. Do not use benzene, thinner or alcohol since they will Cleaning the CD player lens mar the finish of the surfaces. The lens should never be touched. - Page 12 4. Failure due to fair wear and tear of any item, such as batteries, Sanyo dealer. He will be pleased to give you a quotation for the repair. record playing styli, and tape recording, playback and erase heads is If you are in any doubt about what to do, write to us at the address specifically excluded.
Need help?
Do you have a question about the DTA-300M and is the answer not in the manual?
Questions and answers