Table of Contents
Advertisement
Quick Links
Advertisement
Table of Contents

Related Manuals for Grundig GDP 3560


Summary of Contents for Grundig GDP 3560
- Page 1 DVD-PLAYER GDP 3560 ENGLISH...
-
Page 2: Table Of Contents
CONTENTS ____________________________________________ DVD Player GDP 3560 Special features of your DVD player Scope of delivery Disc formats Set-up and safety Overview The front of the DVD player The back of the DVD player The remote control 10-16 Connection and preparation... - Page 3 CONTENTS ____________________________________________ 29-33 Playback audio/video files Features of the Nero Digital CD Features of the DivX Video CD © Features of the MP3 CD 31-33 Playback 34-35 Picture CD playback Features of the JPEG CD Features of the KODAK picture CD 34-35 Displaying JPEG pictures Selecting pictures...
-
Page 4: Dvd Player Gdp 3560
DVD PLAYER GDP 3560 ____________________ Special features of your DVD player Your DVD player provides you with perfect digital video playback of studio quality. It also provides superb cinema-quality audio playback – in stereo or with digital multi-channel sound – depending on the type of DVD and the audio system or stereo television. -
Page 5: Set-Up And Safety
SET-UP AND SAFETY ___________________________ Please note the following information when setting up your DVD player: This DVD player is designed to play video and audio signals from compact discs (DVD and CD). Any other use is expressly prohibited. ON/OFF If the DVD player is subject to a sudden change in temperature, for example if it is brought in from the cold to a warm room, connect it to the mains sup- ply and let it stand for at least two hours before you insert a DVD. -
Page 6: Overview
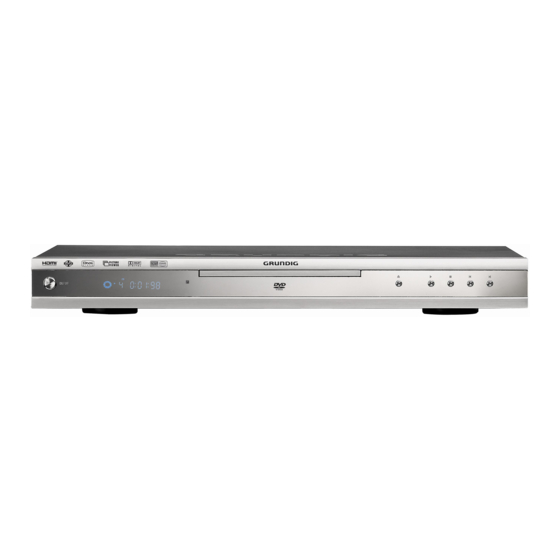
OVERVIEW ____________________________________________ The front of the DVD player ON/OFF ON/OFF Switches the DVD player to stand-by and off again. Switching off the DVD player does not mean it is discon- nected from the mains. Stand-by indicator. Display. Compartment for DVDs/CDs. Opens and closes the disc compartment. -
Page 7: The Back Of The Dvd Player
OVERVIEW ____________________________________________ The back of the DVD player Pb/Cb Pr/Cr VIDEO OUT 100-240 V~ 50/60 Hz 15 W S VIDEO OUT EURO AV HDMI OUT AUDIO OUT DIGITAL AUDIO OUT Video output socket, VIDEO OUT for connecting a television or AV receiver with a cinch socket. -
Page 8: The Remote Control
Selects various camera angles* for certain scenes or passages on the DVD during playback. Title Selects the RANDOM PLAY function in STOP mode. Mutes the sound on a GRUNDIG television. Switches up one menu level; When stopped: switches the picture signal between ”Interlace mode”, “S-Video”, “RGB” and “Progressive”. - Page 9 Tele Pilot 81 D Switches between the various sound formats. Switches the remote controller between controlling your DVD player and controlling your GRUNDIG television. The possibilities of this are described on page 44. For selecting and displaying subtitles* of the DVD during playback.
-
Page 10: Connection And Preparation
CONNECTION AND PREPARATION Note: Do not connect any other equipment while the device is switched on. Switch off the other equipment as well before connecting it. Only plug the device into the mains socket after you have connected the external devices. Connecting a television or flat screen You have four options, depending on the sockets you have on your television or flat screen:... - Page 11 CONNECTION AND PREPARATION Connecting with an HDMI cable* (digital audio/video signal) HDMI IN Pb/Cb Pr/Cr VIDEO OUT 100-240 V~ 50/60 Hz 15 W S VIDEO OUT EURO AV HDMI OUT AUDIO OUT DIGITAL AUDIO OUT Plug a standard HDMI cable into the »HDMI« socket of the DVD player and into the corresponding socket of the television or Pb/Cb Pr/Cr...
- Page 12 CONNECTION AND PREPARATION Connecting with an adapter cable HDMI to DVI L AUDIO DVI-D INPUT Pb/Cb Pr/Cr VIDEO OUT 100-240 V~ 50/60 Hz 15 W S VIDEO OUT EURO AV HDMI OUT AUDIO OUT DIGITAL AUDIO OUT Plug a standard adapter cable into the »HDMI« socket of the DVD player and into the corresponding socket of the television or Pb/Cb Pr/Cr...
- Page 13 Before you first switch on the device, please check whether your television, flat screen or projector is suitable for this use. GRUNDIG accepts no liability for damage resulting from failure to observe this. Notes: If you connect the DVD player using the »Y«, »Pb/Cb« and »Pr/Cr«...
- Page 14 CONNECTION AND PREPARATION Connection using a EURO-AV (Scart) cable Pb/Cb Pr/Cr VIDEO OUT 100-240 V~ 50/60 Hz 15 W S VIDEO OUT EURO AV HDMI OUT AUDIO OUT DIGITAL AUDIO OUT Plug the EURO-AV cable supplied into the »EURO AV TV«...
-
Page 15: Connecting A Multi-Channel Amplifier Or Digital Two-Channel Audio System
CONNECTION AND PREPARATION Connecting a multi-channel amplifier or digital two-channel audio system The digital multi-channel sound of a DVD can best be decoded and played back with a multi-channel audio/video amplifier (Dolby* digital decoder or DTS**). Pb/Cb Pr/Cr VIDEO OUT 100-240 V~ 50/60 Hz 15 W S VIDEO OUT... -
Page 16: Connecting An Audio System With Analogue Two-Channel Stereo Sound
CONNECTION AND PREPARATION Connecting an audio system with analogue two- channel stereo sound Pb/Cb Pr/Cr AUDIO VIDEO OUT INPUT 100-240 V~ 50/60 Hz 15 W S VIDEO OUT EURO AV HDMI OUT AUDIO OUT DIGITAL AUDIO OUT Plug a standard cinch cable into the »R AUDIO OUT L«... -
Page 17: Getting Started
GETTING STARTED _______________________________ Switching on the DVD player Switch on the DVD player by pressing »ON/OFF« on the device. Notes: The DVD player must be in stop mode for the following settings. All settings which are made via the main menu are then only acti- vated if they have been ended beforehand using »i«. - Page 18 GETTING STARTED _______________________________ Selecting the video output socket (EURO AV/RGB or S-Video) The video output of your DVD player has been set at the factory to »RGB«. When you connect your DVD-Player to the television, flat screen or projector using a Y/C cable (»S-VIDEO OUT«...
- Page 19 GETTING STARTED _______________________________ Adjusting the HDMI resolution The ideal setting for the connected flat screen or projector can be adjusted here. The abbreviation behind the number means: »p« = Progressive, »i« = Interlace. Call up the main menu with »i«. Installation Picture Sound...
-
Page 20: Before Playback
BEFORE PLAYBACK _____________________________ Preparation Switch on the television and select the preset channel for the DVD player. If an audio system or an AV receiver is connected to the DVD player, switch it on and select the audio input for the DVD player. -
Page 21: Dvd Playback
DVD PLAYBACK ___________________________________ DVD features You can recognise a DVD by the logo on the label. Depending on the content of the DVD, the discs contain one or more titles. Each title may contain one or more chapters. Titles and chapters can be selected easily and conveniently. -
Page 22: Dvd Playback
DVD PLAYBACK ___________________________________ DVD playback After the disc compartment closes and the DVD is scanned, Play playback starts automatically. To pause playback (freeze-frame), press » «. Pause Press » « to resume playback. End playback with » « (press twice). Stop Selecting titles or chapters ... -
Page 23: Calling Up Information
DVD PLAYBACK ___________________________________ Selecting a chapter directly Next To select the next chapter, press » « during playback. To select the previous chapter, press » « during playback. Back – The DVD player locates the chapter and starts playback. Calling up information You can call up information on the title, chapter and playing time for display on the screen. -
Page 24: Additional Playback Functions
DVD PLAYBACK ___________________________________ Additional playback functions Notes: The sound is muted during the “Frame search”, “Slow motion” and “Freeze-frame” functions. Depending on the DVD, some functions cannot be selected. Frame search Several different speeds are available. Select the desired playback speed during playback with » «... -
Page 25: Selecting And Displaying Subtitles
DVD PLAYBACK ___________________________________ Enlarging the picture and moving screen sections (Zoom) During playback or pause, press »v« repeatedly. – Display: » 1«, » 2«, » 3«, » 4« a section of the pic- ture is enlarged. The picture section can be moved with » «, »... -
Page 26: Repeat Functions
DVD PLAYBACK ___________________________________ Repeat functions Repeating a selected scene (A-B Repeat) You can mark the start and end of a scene, this is then played back repeatedly. During playback, mark the beginning of the scene by pressing and holding »b«. –... -
Page 27: Vcd/Vcd Features
S-VCD/VCD PLAYBACK ______________________ S-VCD/VCD features You can recognise S-VCD/VCDs (video CDs) by the logo on the label. Depending on the contents of the S-VCD/VCD (films, music videos etc.), the discs may carry one or more tracks. Like audio CDs, S-VCDs/VCDs have a track structure. S-VCDs/VCDs can be created using the PBC (playback control) system for track navigation. -
Page 28: Playing Back A Track
S-VCD/VCD PLAYBACK ______________________ Playing back a track After the disc compartment closes and the S-VCD/VCD is Play scanned, playback starts automatically. To pause playback (freeze-frame), press » «. Pause Press » « repeatedly to switch through individual frames. Step II Press »... -
Page 29: Playback Audio/Video Files
PLAYBACK AUDIO/VIDEO FILES _____________ Features of the Nero Digital Nero Digital™ is the ideal solution for video and audio codecs. Codecs are required for processing and playing audio and video files. The Nero Digital™ codec allows you to save all the audio and video material on a DVD on a normal data CD –... -
Page 30: Features Of The Mp3 Cd
PLAYBACK AUDIO/VIDEO FILES ___________________ Features of the MP3 CD MP3 stands for MPEG-1 Audio Layer 3 and arises from the Motion Pic- ture Expert Group (MPEG) Standard which was developed for compres- sing film data. The MP3 format enables audio files to be saved on a computer with a sound quality similar to that of a CD. -
Page 31: Playback
PLAYBACK AUDIO/VIDEO FILES ___________________ Playback After the disc compartment closes and the data CD is scanned, Play playback starts automatically. Note: If you are playing a DivX Video CD with subtitles the subtitles are displayed before playback. Select desired subtitles (Subtitle) with » «... - Page 32 PLAYBACK AUDIO/VIDEO FILES ___________________ Frame search © (Nero Digital /DivX Video CD only) You can select different speeds (2-fold, 4-fold, 8-fold and 20-fold forwards and backwards). Select the desired playback speed during playback with » « or » «. Press » «...
- Page 33 PLAYBACK AUDIO/VIDEO FILES ___________________ Switching the dubbing language or the audio © format (Nero Digital /DivX Video CD only) A Nero DIGITAL or DivX Video CD can contain various dubbing © languages or audio formats. Press » « during playback. Keep pressing »d«...
-
Page 34: Picture Cd Playback
PICTURE CD PLAYBACK ______________________ Features of the JPEG CD JPEG stands for Joint Picture Experts Group. This process was desi- gned to compress picture files. JPEG files can be burned onto a CD along with other file types. Such CDs are known as file CDs or mixed mode CDs. For example, the CD could contain MP3 files (audio) and JPEG files (for example to display album covers). -
Page 35: Selecting Pictures
PICTURE CD PLAYBACK ______________________ Selecting pictures ... using the numerical buttons During playback, select the desired picture using »1 … 0«. – Playback starts with the picture selected..step by step (SKIP) Next During playback, select the next picture with » «. -
Page 36: Audio Cd Playback
AUDIO CD PLAYBACK ________________________ Features of the Audio CD An audio CD is identified by this logo. Audio CDs contain only sound recordings. They can be played in the normal manner on an audio system. The individual tracks are stored in a sequence. There are no folders. Track 1 Track 2 Track 3... -
Page 37: Random Play
AUDIO CD PLAYBACK ________________________ Fast search Different speeds are available. To select the desired playback speed press » « or » « repeatedly during playback. To return to playback press » «. Play Ending playback Playback stops automatically at the end of the CD. You can stop Stop playback at any time by pressing »... -
Page 38: Creating A Program
CREATING A PROGRAM ____________________ This function enables you to program a playback list for all types of discs. Up to 12 titles, chapters or tracks can be stored. Note: Opening the disc compartment deletes the programme. Creating a program Insert the DVD, audio CD or picture CD in the disc tray. Stop the DVD player by pressing »... -
Page 39: Audio Settings
AUDIO SETTINGS ________________________________ Selecting the digital output Here you select whether the audio signal is emitted from the »DIGI- TAL AUDIO OUT« sockets in the original data format or in PCM for- mat. The factory setting is »Original«. Call up the main menu using »i«. Select the »Sound«... -
Page 40: Child Lock
CHILD LOCK __________________________________________ The child lock enables you to block scenes on DVDs which are not suitable for children or to select alternative scenes. This is done by selecting a certain access level. Authorising the contents of a DVD Films on DVD may be wholly or partially unsuitable for children. These DVDs contain information which marks the corresponding content or scenes. -
Page 41: Personal Settings
PERSONAL SETTINGS _________________________ Setting the language Call up the main menu using »i«. Activate the »Installation« menu item with »OK«. – The »Installation« menu is displayed. Note: For further operation, see the following sections, each one starting from Step 1. Selecting the language for the subtitles If subtitles are available on the current DVD, they are shown in the Installation... -
Page 42: Divx Video Registration
PERSONAL SETTINGS _________________________ DivX © VIDEO Registration Call up the main menu using »i«. Installation Picture Sound Child Lock Select »Child Lock« with » « or » « and press »OK« to Code - - - - confirm. Access level Factory defaults Reset Select »DIVX Registration«... -
Page 43: Switching Function Displays On And Off
This function enables you to check the current software status of the DVD player. Switch on the DVD player using »ON/OFF« on the device. Open the disc compartment by pressing » «. Display the software information by pressing »OK«. GDP 3560 16/08/05 V:1.00... -
Page 44: Television Remote Control
TELEVISION REMOTE CONTROL _______ You can also operate GRUNDIG televisions with this remote control. The fun- ctions available to you depend on the model of the GRUNDIG television. Point the remote control directly at the TV. Switches the remote control to television operation. -
Page 45: Information
INFORMATION _____________________________________ Technical data This product fulfils the European directives 89/336/EEC, 73/23/EEC and 93/68/EEC. This device conforms to the safety regulation DIN EN 60065 and therefore the international safety regulation IEC 60065. You may not open the DVD player. The manufacturer will not accept any liability for damage resulting from improper handling. -
Page 46: General Instructions For Laser Devices
INFORMATION _____________________________________ General instructions for laser devices Your system is a CLASS 1 LASER PRODUCT. This means that the laser is designed in such a way as to ensure that the maximum permissible emission value cannot be exceeded under any circumstances. CLASS 1 Caution: LASER PRODUCT... -
Page 47: Troubleshooting
GRUNDIG will refuse to refund any costs resulting in such cases. Any repair costs in such cases, even those occurring within the guarantee period, are to be paid by the customer. -
Page 48: Environmental Note
INFORMATION _____________________________________ Environmental note This product has been made from high-quality parts and materials which can be re-used and recycled. Therefore, do not throw the product away with normal household waste at the end of its life. Take it to a collection point for recycling electrical and electronic devices. - Page 49 Grundig Multimedia B.V. • De Boelelaan 7 • NL-1083 HJ Amsterdam • http://www.grundig.com 41/05...
Need help?
Do you have a question about the GDP 3560 and is the answer not in the manual?
Questions and answers