Table of Contents
Advertisement
Quick Links
C
V
SX25+
OMPACT
IEW
U
M
SER
ANUAL
© 2005 3D perception AS All rights reserved.
The copyright of this document is the property of 3D perception AS. The document is supplied on the
express terms that it is to be treated as confidential. No part of this document may be reproduced or
transmitted in any form or by any means, electronic or mechanical for any purpose, without the
express written permission of 3D perception AS. The information in this document is subject to
change without notice and is provided 'AS IS'.
Advertisement
Table of Contents

Related Manuals for 3D Perception COMPACTVIEW SX25+

Summary of Contents for 3D Perception COMPACTVIEW SX25+
- Page 1 © 2005 3D perception AS All rights reserved. The copyright of this document is the property of 3D perception AS. The document is supplied on the express terms that it is to be treated as confidential. No part of this document may be reproduced or transmitted in any form or by any means, electronic or mechanical for any purpose, without the express written permission of 3D perception AS.
- Page 2 3D perception SX25+ OMPACT Revision 3 User Manual OCUMENT TATUS Revision Month Year Paragraph(s) Prepared by Description of Change October 2004 A F Rotheram Initial release November 2004 A F Rotheram Reset September 2005 22 & 24 A F Rotheram...
-
Page 3: Table Of Contents
UP AND ..........................8 VERVIEW ...........................9 EYPAD ..........................10 TATUS ........................11 EMOTE ONTROL 10. C .......................13 ONNECTOR ANEL 11. S ...........................14 11.1 Set-up computer......................14 11.2 Set-up Video .......................15 12. GCM - G ................16 EOMETRY ORRECTION ODULE 12.1 Connecting the CompactView SX25+I ..............16... - Page 4 3D perception SX25+ OMPACT Revision 3 User Manual 12.2 Connecting the CompactView SX25+E ..............17 13. F .........................18 OCUS AND 13.1 Focus...........................18 13.2 Zoom...........................18 14. M ....................19 OUNTING THE ROJECTOR 14.1 To a Ceiling Mount.....................19 14.2 To a Tabletop......................20 15. U ......................21...
- Page 5 3D perception SX25+ OMPACT Revision 3 User Manual 22. P ..........................37 ARTS LIST 22.1 Main products ......................37 22.2 Spare parts ........................37 23. L , ‘FCC S ’ ‘T ’ .......38 IMITED ARRANTY TATEMENT RADEMARKS OPYRIGHT 24. C ..........................40 ONTACT US...
-
Page 6: Before You Start
3D perception SX25+ OMPACT Revision 3 User Manual EFORE YOU START Thank you for choosing a 3D perception C SX25+ projector OMPACT Accessories Please take a few minutes to ensure that your C SX25+ projector pack contains all OMPACT the necessary parts as listed on the Accessories Page. -
Page 7: Accessories
3D perception SX25+ OMPACT Revision 3 User Manual CCESSORIES SX25+ P OMPACT ROJECTOR EMOTE ONTROL AND BATTERIES SX25+I ODELS SX25+E ABLE COVER IRFLOW COVER User Manual Cables VGA male Blue - VGA male Blue, 2m DVI-I male White - DVI–I male White, 2m A/V Cable 3 x Phono –... -
Page 8: Introduction
3D perception SX25+ OMPACT Revision 3 User Manual NTRODUCTION The C SX25+ projector is the ultimate in high-resolution projectors when projection OMPACT on to flat, curved or double curved screens with multiple projectors is the requirement. The C SX25+ projector is compatible with most data and video sources, both... -
Page 9: Safety & Warnings
3D perception SX25+ OMPACT Revision 3 User Manual & W AFETY ARNINGS This user manual contains important information regarding safety precautions and the set-up and use of the projector. Please read the manual carefully before you operate the projector. Safety This device complies with relevant safety regulations for data processing equipment for use in an office environment. -
Page 10: Mercury Vapour
3D perception SX25+ OMPACT Revision 3 User Manual The projector is designed for indoor use only. Never operate the unit outdoors. Do not operate the projector outside its temperature and humidity specifications, as this may result in overheating and malfunctioning. -
Page 11: Remote Control Warning
3D perception SX25+ OMPACT Revision 3 User Manual Acute exposure to high concentrations of mercury vapor can cause conditions such as lung and airway irritation, tightness in the chest, a burning sensation in the lungs, coughing, nausea, vomiting and diarrhea. Children and fetuses are particularly sensitive to the harmful effects of metallic mercury to the nervous system. -
Page 12: Efore Et Up And Se
3D perception SX25+ OMPACT Revision 3 User Manual EFORE UP AND Be sure you have read the Safety and Warnings chapter in this manual before proceeding with the set-up and use of the C SX25+ projector. OMPACT Unpack the supplied parts and familiarize yourself with the various components. -
Page 13: Overview
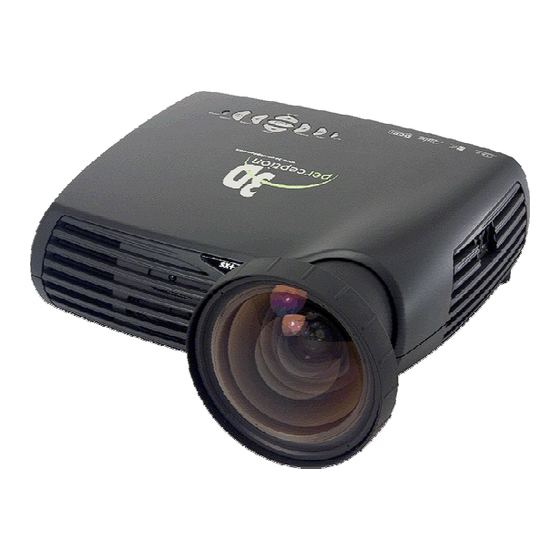
3D perception SX25+ OMPACT Revision 3 User Manual VERVIEW Focus ring Lamp house Zoom ring (optional lens) Adjustable foot IR sensor Foot release Ventilation Security lock Keypad Ceiling Mount Connector panel M. Control Chain In Power connector Control Chain Out... -
Page 14: Keypad
3D perception SX25+ OMPACT Revision 3 User Manual EYPAD POWER Switch the projector on and off. AUTO Automatically detect and synchronize to the signal source selected. MENU Activate the menu system. Use the four arrow keys to navigate and to activate. -
Page 15: Status
3D perception SX25+ OMPACT Revision 3 User Manual TATUS GREEN LIGHT A permanent GREEN light indicates the projector is turned on YELLOW LIGHT A permanent YELLOW light indicates the projector is either switched off or is in stand-by mode. YELLOW LIGHT FLASHING A flashing yellow light indicates wait. -
Page 16: Remote Control
3D perception SX25+ OMPACT Revision 3 User Manual EMOTE ONTROL The remote control allows flexible access to the projector settings, either through direct keys, or through the menu system. The remote control can be used to emulate the computer mouse through the USB interface. - Page 17 3D perception SX25+ OMPACT Revision 3 User Manual BRIGHT Adjusts image brightness from dark to bright CONTRAST Adjusts the image contrast from soft to hard COLOR Adjusts the color of the image from pale to saturated VOLUME Adjusts the sound volume...
-
Page 18: Connector Panel
3D perception SX25+ OMPACT Revision 3 User Manual ONNECTOR ANEL A. Component video In (YPbPr). Used for H. RS 232 control Out. The secondary output high quality video reproduction. connector allows for daisy-chaining, enabling both individual and global control and B. -
Page 19: Set - Up
3D perception SX25+ OMPACT Revision 3 User Manual Before any set-up, switch off all equipment. 11.1 Set-up computer The projector may be connected to up to three computer sources simultaneously, using the VGA and DVI inputs. The VGA interface is analog and may cause some noise in the projected image, depending on the signal quality from the VGA graphics card in the computer and cabling. -
Page 20: Set-Up Video
3D perception SX25+ OMPACT Revision 3 User Manual 11.2 Set-up Video Three video sources may be connected, using the YPbPr (component), S-VIDEO (super video) and VIDEO (composite video) inputs. Component video will display more detailed images. Composite video yields images with less detail. -
Page 21: Gcm - Geometry Correction Module
For full details on achieving the effects of these features please read the CompactDesigner/CompactControl User Manual. The CompactView SX25+I is delivered with a GCM card inside it. The CompactView SX25+E does not have a GCM card inside it, it has to been connected to a GCM card in a CompactUTM. -
Page 22: Connecting The Compactview Sx25+E
3D perception SX25+ OMPACT Revision 3 User Manual 12.2 Connecting the CompactView SX25+E The CompactView SX25+E must be connected to a channel in a CompactUTM. For full details please see the CompactUTM basic/CompactUTM zer0 User Manual. -
Page 23: Focus And Zoom
3D perception SX25+ OMPACT Revision 3 User Manual OCUS AND 13.1 Focus Turn the Focus ring (A) on the projection lens to get a correctly focused image. 13.2 Zoom Turn the Zoom ring (B) on the projection lens to zoom In and Out. (This is only available on the optional zoom lens.) -
Page 24: Mounting The Projector
The projector can be ceiling mounted using any approved UL tested/listed ceiling mount fixture with a minimum weight capacity of 12 kg (26 lbs). The ceiling mount obtainable through 3D perception (as illustrated below) is only approved for projectors. OMPACT For the ceiling mount use M4 screws provided. -
Page 25: To A Tabletop
3D perception SX25+ OMPACT Revision 3 User Manual 14.2 To a Tabletop The projector may be mounted or sited directly onto a tabletop. To adjust the projected image to the desired height on the screen, eject the front foot (C) by pressing the release button (D), and adjust the angle to the right position. -
Page 26: Using The Projector
3D perception SX25+ OMPACT Revision 3 User Manual SING THE ROJECTOR After set-up, switch on all equipment. To switch the projector on, firmly press the POWER button on the keypad or the remote control. The STATUS indicator will turn from yellow to green when the projector is switched on. -
Page 27: Menu System
3D perception SX25+ OMPACT Revision 3 User Manual YSTEM The menu system gives access to a multitude of image and system controls. The menu system is structured through a top menu with several sub menus. The sub menus will vary depending on the actual source selected. -
Page 28: Picture Sub-Menu
3D perception SX25+ OMPACT Revision 3 User Manual 16.1 Picture Sub-menu brightness S-VIDEO/COMPOSITE VIDEO Adjusts the image brightness. A higher setting will increase the brightness a lower setting will decrease the brightness of the image. contrast Controls the contrast of the image. A higher setting... -
Page 29: Dynamic Sub-Menu
3D perception SX25+ OMPACT Revision 3 User Manual 16.2 Dynamic Sub-menu white boost FOR ALL Increases the white level of the image for enhanced contrast gamma The source image is adapted to characteristics typical to certain applications. This enables an optimized display of images, depending on whether the source is video, computer etc. -
Page 30: Advanced Sub-Menu
3D perception SX25+ OMPACT Revision 3 User Manual 16.3 Advanced Sub-menu h position S-VIDEO/COMPOSITE VIDEO Shifts the image sideways. v position Shifts the image up and down. phase Adjust for stable image. A jittery image may appear with certain VGA sources. You may also press the AUTO button on the keypad or remote control to optimize. -
Page 31: Set Up Sub-Menu
3D perception SX25+ OMPACT Revision 3 User Manual 16.4 Set Up Sub-menu keystone V FOR ALL Adjust vertical keystone correction. Compensates for the geometrical distortion of the projected image resulting from tilting the projector to shoot higher up on the wall. -
Page 32: Utilities Sub-Menu
Note: Control mode will automatically be reset to RS232 even if the projector is a type SX25+I. A power cycle is needed for the projector to detect the presence of a GCM card and to select the... -
Page 33: Control Sub-Menu
The projector can be controlled by only one of the modes at a time. When using the CompactView SX25+I the mode must be set to RIMI (Rich Media Interface). When a GCM has been installed, the projector will detect its presence after a power cycle and select RIMI. -
Page 34: Maintenance
3D perception SX25+ OMPACT Revision 3 User Manual AINTENANCE The projector may from time to time require cleaning. Never open the projector, as this will void any warranties. Refer all service and repair work to qualified personnel. Only the exterior of the projector may be cleaned. Use a damp cloth. Make sure no liquids enter... -
Page 35: Lamp Replacement
3D perception SX25+ OMPACT Revision 3 User Manual EPLACEMENT The STATUS lamp on the keypad will turn red when the lamp life expires. In addition, a message will appear on the screen; “LAMP LIFE TIME HAS EXPIRED! Please change lamp.”... -
Page 36: Insert New Lamp
3D perception SX25+ OMPACT Revision 3 User Manual Pull the handle (D). Remove the lamp house (E). 18.2 Insert New Lamp Replace the lamp house (E) Fold the handle (D) back in to place. Tighten the 3 screws (C) - Page 37 3D perception SX25+ OMPACT Revision 3 User Manual Replace the lamp cover (B) Tighten the screw (A). In the “utilities” sub menu, reset the lamp timer.
-
Page 38: Service Information
3D perception SX25+ OMPACT Revision 3 User Manual ERVICE NFORMATION This product contains no user-serviceable parts. If the product fails to function as expected, first check that all connections are properly made, and that the power cord is properly connected. -
Page 39: Technical Data
3D perception SX25+ OMPACT Revision 3 User Manual ECHNICAL 20.1 Projector Specifications Resolution 1400 x 1050 (native) SXGA+ Display technology Single chip DLP™ technology by Texas Instruments® Display device LVDS DMD™ with DarkChip2™ technology Computer Compatibility UXGA, SXGA+, SXGA, XGA, SVGA, VGA... -
Page 40: Gcm Specifications
20-90% RH, non-condensing Humidity storage 10-95% RH, non-condensing 20.2 GCM Specifications These specifications apply to the CompactView SX25+I only Warping Non-linear image mapping from 50% to 200 % Total latency typically 250 line period Automatic and manual options Up to 100 geometrical control points (compliant with curved... -
Page 41: Covers
3D perception SX25+ OMPACT Revision 3 User Manual OVERS 21.1 Cable cover Loosen the rear adjustable feet by unscrewing them. Align the vertical hooks on the cover with the guides on the rear of the projector. Snap the cover into place with the lower guides clamping the rear feet. -
Page 42: Parts List
3D perception SX25+ OMPACT Revision 3 User Manual ARTS LIST 22.1 Main products Product name Product number CompactView SX25+E 313-SX25-E CompactView SX25+I 313-SX25-I 22.2 Spare parts Product name Product number Lamp Replacement Kit 250 W 313-400-0184-00... -
Page 43: Limited Warranty , 'Fcc Statement
The warranty period means the 12-month period from the date of purchase of a C OMPACT SX25+ projector. During the warranty period, 3D perception will, at its option and in its sole discretion, repair or replace defective parts, including replacement of the entire C SX25+ projector, at OMPACT no additional charge to the Customer. - Page 44 N-1373 Asker Norway In the case of any such claim, inspection shall be promptly arranged with 3D perception or it’s authorised personnel, and where appropriate, representatives of the carrier. Any other claim or action respecting the condition or conformity of a C...
-
Page 45: Ontact Us
+47 66 98 70 70 Fax: +47 66 98 70 71 Support desk: +47 66 98 70 90 info@3d-perception.com support@3d-perception.com www.3d-perception.com Regional offices USA 3D perception Inc 1277 N. Semoran Blvd. Suite 117 Orlando, Florida 32807 Tel: +1 321 235 7999 Fax: +1 321 235 7992 paal.s@3d-perception.com...
Need help?
Do you have a question about the COMPACTVIEW SX25+ and is the answer not in the manual?
Questions and answers